Advertisement
Table of Contents
- 1 Hardware Included
- 2 The Fan Must be Mounted to the Building Structure.
- 3 The Structure Must be Suitable to Support the Weight of the Fan.
- 4 Mount the Fan Blade Onto the Fan Shaft.
- 5 The Fan Blade Needs to be Aligned with the Orifice Opening.
- 6 Attach the Small Pulley to the Motor Shaft.
- 7 Mount Motor to the Motor Bracket. Fasten with Appropriate Bolts.
- Download this manual
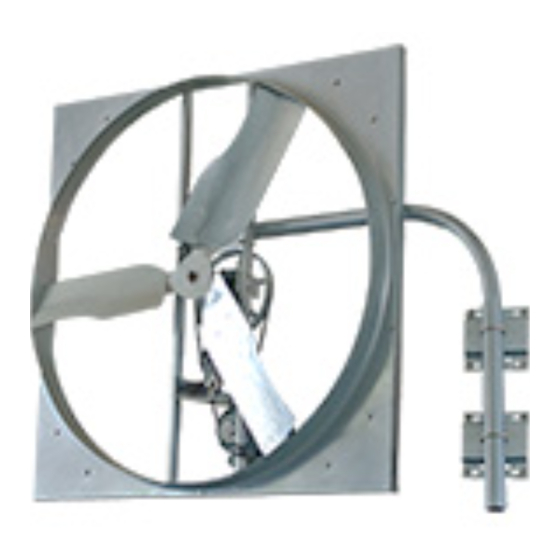
PF52 FANS
WARNING:
READ INSTRUCTIONS COMPLETELY BEFORE INSTALLATION & SAVE FOR REFERENCE
ALL WIRING SHOULD BE PERFORMED BY A QUALIFIED ELECTRICIAN FOLLOWING LOCAL CODES
AND REGULATIONS.
Congratulations on the purchase of this innovative
circulating fan.
STEP 9
STEP 2
Its new design allows it to easily mount to walls, posts or
Mount the Tensioner onto the Tensioner bracket
ceilings.
Connect the motor bracket (plate with the oval
using one M10 bolt.
CAUTION:
cut-out center) in between the two uprights centered
This fan provides 28,000 CFM of circulating air flow - good
in the top of the frame, using M8x40 (4). Please
TIE OFF THE EXCESS CORD SO THAT IT WILL NOT GET CUT IN THE FAN.
for any application.
notice the flat mounting plate should be on the
If your PF52 comes assembled, you will only require the
bottom of the frame. See Diagram 3.
mounting bracket and U-bolts.
STEP 10
package should include the items listed below and right..
STEP 3
Mount motor to the motor bracket. Fasten with
MAINTENANCE
Please check to ensure you have these parts before
appropriate bolts.
Connect the shaft bracket (plate that is approx. ½
assembly.
the width of motor mounting bracket) below the
!
WARNING:
motor mounting bracket, directly above the
mounting plate, using M8x40 (4).
MOTORS ARE EQUIPPED WITH AUTOMATIC OVERLOAD PROTECTION AND MAY RESTART WITHOUT
STEP 11
WARNING. ALWAYS DISCONNECT FROM POWER BEFORE ATTEMPTING TO SERVICE.
Attach The Small Pulley To The Motor Shaft. Be certain
STEP 4
the small pulley aligns straight with the large pulley.
Moving parts,
disconnect power
See Diagram 6.
Attach the two Pillow Block Bearings using M10x40
before servicing.
(4) to the shaft bracket. Insert the fan shaft into the
Models:
two pillow block bearings. The shaft should protrude
These fans are used in a variety of applications and therefore maintenance schedules will vary. In general no more than 1/16" of dirt
slightly longer on the front of the fan vs. the back of
STEP 12
PF52-AI
build-up should occur on blade, motor and guard for proper fan operation and to prevent premature failure. The complete fan should
the fan where the large pulley attaches.
WARNING:
PF52-A3
Place the MX V4 belt around the small pulley, sliding
be wiped down on a regular basis to maintain the high efficiency of the fan. Particular care should be taken to clean fan blades front
onto the large pulley and tensioner in one motion.
and back, and guards for better air moving performance. The motor should be kept clean to prevent overheating and premature failure.
Note: rotating the wheel and pressing the tensioner
As with all mechanical equipment scheduled inspections should include checking that all hardware is secure and blade set screws are
closer to the wheel will allow the belt to mount easier
WARNING:
STEP 5
tight. We suggest as a minimum, that this be performed at the start and twice more every season.
on the pulleys.
THE HARDWARE FOR MOUNTING TO JOIST OR BEAM IS NOT SUPPLIED. HARDWARE USED MUST BE
Mount The Fan Blade Onto The Fan Shaft. Loosen the
SUITABLE FOR THE TYPE OF JOIST OR BEAM TO WHICH THE FAN WILL BE MOUNTED. HARDWARE
two bolts on the fan blade prior to attaching. When
MUST CORRECTLY FIT THE MOUNTING HOLES PROVIDED AND SUPPORT THE WEIGHT OF THE FAN.
WARNING:
mounted, hand tighten these bolts. After final
STEP 13
alignment is established these bolts will be tightened
WARNING:
DO NOT PRESSURE WASH THE MOTOR. THE MOTOR IS TOTALLY ENCLOSED, BUT IT IS NOT
further.
FAILURE TO TIGHTEN ALL BOLTS & NUTS SECURELY COULD RESULT IN SERIOUS INJURY!
SEALED.
If using the panel mounting kit, bolt the universal wall
mounts to the wall or beam that will hold the base of
WARNING:
the mount. Next, place the U bolts in the appropriate
TO REDUCE THE RISK OF FIRE OR ELECTRIC SHOCK, DO NOT USE THIS FAN WITH ANY SOLID STATE
STEP 6
holes to hold the L mount in place.
SPEED CONTROL DEVICE.
WARNING:
WARNING!
Attach the large pulley to fan shaft on the opposite
STEP 1
TO REDUCE THE RISK OF FIRE, ELECTRIC SHOCK, OR INJURY TO PERSONS, OBSERVE THE
side of the fan blade. Be certain the center of the
MOVE OUT BLADE TO END OF SHAFT BEFORE STARTING FAN.
FOLLOWING:
large pulley is aligned straight up with the large oval
STEP 14
Begin by fastening the main panel frame to the orifice, using bolts M8x55 (14) and M8x35 (4). See DIAGRAMS 1 & 2.
of the motor bracket. Once alignment is established
MAKE SURE BLADE IS TIGHTENED UP AFTERWARDS.
A) Use this unit only in the manner intended by the manufacturer. If you have questions, contact
tighten two set screws on the large pulley.
The L mount end will slide through the U bolts on the
DIAGRAM 1
See Diagram 4.
the manufacturer.
mounting plate located on the bottom of the panel
fan frame. Tighten the U-Bolts once the desired
B) Before servicing or cleaning unit, switch power off at service panel and lock the service
position has been established.
disconnecting means to prevent power from being switched on accidentally. When the service
STEP 7
Canarm Ltd. warrants every new fan to be free of defects and workmanship, to the extent that, within one year from the date of
disconnecting means cannot be locked, securely fasten a prominent warning device, such as a
purchase, Canarm Ltd. shall either repair or replace at Canarm's option, any unit or part thereof, returned freight pre-paid, and
The fan blade needs to be aligned with the orifice
tag to the service panel.
found to be defective. Proof of purchase may be required.
opening so the blade edge does not stick past the
This warranty does not include any labor or transportation cost incidental to the removal and re-installation of the unit at the
USE & CARE
edge of the orifice. Once aligned, tighten the set
users premises.
screws.
Components repaired or replaced are warranted through the remainder of the original warranty period only.
Fan Controls:
This warranty applies to the original purchaser - user only; it is null and void in case of alteration, accident, abuse, neglect, and
operation not in accordance with instructions.
WARNING:
STEP 8
NOTICE: No warranty claims will be honored by Canarm Ltd. unless prior authorization is obtained.
Mount the Tensioner bracket on the back right side
TO REDUCE THE RISK OF FIRE OR ELECTRIC SHOCK, DO NOT USE THIS FAN WITH ANY SOLID
of the shaft mount using M8x25 (2).
STATE SPEED CONTROL DEVICE.
Installation or Product problems? Do not return to store of purchase.
See Diagram 5.
Contact Canarm Service at 1-800-265-1833 (CANADA) 1-800-267-4427 (U.S.A.)
1-800-567-2513 (EN FRANCAIS) Monday to Friday 8:00 - 5:00pm e.s.t.
PF52-M - 03/16/12
PF52-M - 03/16/12
PF52-M - 03/16/12
PF52-M - 03/16/12
PF52-M - 03/16/12
PF52 Fans
Instruction Manual
READ AND SAVE THESE INSTRUCTIONS
If unassembled, your
CONNECTING FRAME TO ORIFACE
CANARM LTD.
2157 PARKEDALE AVE., PO BOX 367
BROCKVILLE, ONTARIO K6V 5V6
TELEPHONE: (613) 342-5424
FAX: 1-800-263-4598
or visit www.canarm.com
E-MAIL: agsales@canarm.ca
PARTS LIST
WARRANTY
CANARM LTEE.
2555 RUE BERNARD LEFEBVRE
LAVAL, QUEBEC H7C 0A5
TELEPHONE: (450) 665-2535
FAX: (450) 665-0910
E-MAIL: agsales@canarm.ca
DIAGRAM 5
DIAGRAM 3
FAN BACK VIEW
DIAGRAM 6
DIAGRAM 4
DIAGRAM 2
FAN BACK VIEW
ARTHUR MANUFACTURING FACILITY
#7686 CONCESSION 16, RR4
ARTHUR, ONTARIO N0G 1A0
TELEPHONE: (519) 848-3910
FAX: (519) 848-3948
E-MAIL: agsales@canarm.ca
Page 1 of 5
Page 4 of 5
Page 3 of 5
Page 2 of 5
Page 5 of 5
Advertisement
Table of Contents

Related Manuals for Canarm AgSystems PF52


Summary of Contents for Canarm AgSystems PF52
- Page 1 STEP 7 Canarm Ltd. warrants every new fan to be free of defects and workmanship, to the extent that, within one year from the date of disconnecting means cannot be locked, securely fasten a prominent warning device, such as a purchase, Canarm Ltd.
- Page 2 STEP 7 Canarm Ltd. warrants every new fan to be free of defects and workmanship, to the extent that, within one year from the date of disconnecting means cannot be locked, securely fasten a prominent warning device, such as a purchase, Canarm Ltd.
- Page 3 STEP 7 Canarm Ltd. warrants every new fan to be free of defects and workmanship, to the extent that, within one year from the date of disconnecting means cannot be locked, securely fasten a prominent warning device, such as a purchase, Canarm Ltd.
- Page 4 STEP 7 Canarm Ltd. warrants every new fan to be free of defects and workmanship, to the extent that, within one year from the date of disconnecting means cannot be locked, securely fasten a prominent warning device, such as a purchase, Canarm Ltd.
- Page 5 STEP 7 Canarm Ltd. warrants every new fan to be free of defects and workmanship, to the extent that, within one year from the date of disconnecting means cannot be locked, securely fasten a prominent warning device, such as a purchase, Canarm Ltd.
Need help?
Do you have a question about the AgSystems PF52 and is the answer not in the manual?
Questions and answers