ZTE Cricket Blade X Quick Start Guide
- User manual (73 pages) ,
- User manual (77 pages) ,
- Quick start manual (2 pages)
Advertisement
- 1 Getting to know your ZTE Blade X
- 2 Phone setup
- 3 Touch screen
- 4 Personalize
- 5 ZTE Lock Screen
- 6 Calls and voicemail
- 7 Text and picture messaging
- 8 Email
- 9 Cricket services
- 10 Cool tools
- 11 Health and fitness tracking
- 12 Apps on Google Play
- 13 Camera and video
- 14 More information
- 15 Accessories
- 16 Documents / Resources
Getting to know your ZTE Blade™ X

Phone setup
- With your phone powered off, insert the tray eject tool into the hole on the nano-SIM/microSDXC card tray and pull the tray out.

- Place the nano-SIM and microSDXC cards in the tray with the gold-colored contacts facing down.

- Carefully slide the tray back into place.
- Charge your phone with the included charging adapter and USB Type-C cable.


Note: The battery and back cover are not removable. Removal could result in damage to the device and voided warranty.

To avoid damage to the phone, do not use any other kind of SIM card or any non-standard nano-SIM card cut from a SIM card. You can get a standard nano-SIM card from your service provider.
Touch screen
Navigating your phone
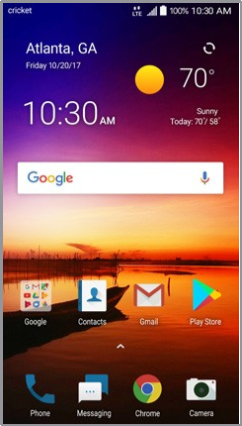
- Press the Power key to turn on the display.
- Press and hold the screen to unlock.
- Use your fingertip to lightly touch the screen.
- Use quick flicks of your finger on the touch screen to swipe up, down, left, and right.
![]()
- Spread two fingers apart or pinch them together on the screen to zoom in or out on a web page or Gallery image.
- To return to the previous screen, tap the Back key.
- Tap the Home key
![]() at any time to return to the main home screen. Press and hold the Home key
at any time to return to the main home screen. Press and hold the Home key ![]() to access the Google™ app.
to access the Google™ app. - Tap the Recent apps key to access recently viewed apps.
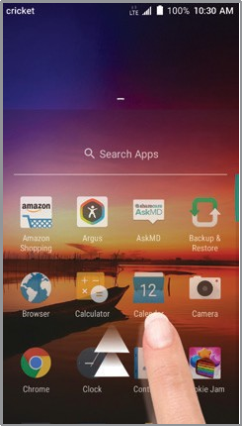
- Tap the Arrow
![]() or swipe up from the bottom of the home screen to access applications on your phone.
or swipe up from the bottom of the home screen to access applications on your phone.
 at any time to return to the main home screen. Press and hold the Home key
  or swipe up from the bottom of the home screen to access applications on your phone.
Notifications panel
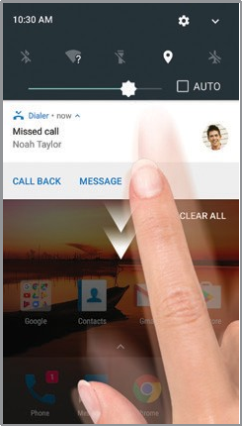
- Drag your finger down from the top of any screen to see the notifications panel. Pull down one more time to reveal additional options.
- Tap
![]() to access the full Settings menu.
to access the full Settings menu. - Tap
![]() to add, move, or delete icons in the quick settings menu.
to add, move, or delete icons in the quick settings menu. - Swipe right or left to clear individual notifications, or tap CLEAR ALL.
 to access the full Settings menu.
Personalize
Set wallpaper
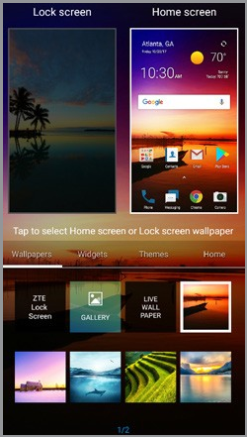
- To change your home screen wallpaper, press and hold a blank part of the home screen and tap Wallpapers.
- Tap a wallpaper to set it. You can also tap GALLERY or LIVE WALLPAPER for more options.
Add to home screen
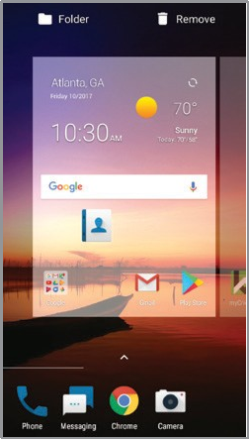
- Tap the Arrow or swipe up from the bottom of the home screen, press and hold the desired app, and drag it to the home screen.
- Press and hold a blank part of the screen and tap Widgets. Press and hold the desired widget and drag it to the home screen.
- Press and hold a blank part of the screen and tap Themes to change the theme or Home to manage the home screen panels.
- Press and hold an icon to drag it to a new location. Drag it to Remove
![]() to delete it.
to delete it.
 to delete it.
Register your fingerprint
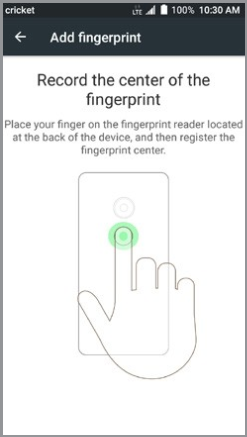
- Tap the Arrow
![]() or swipe up from the bottom of the home screen, and tap Settings
or swipe up from the bottom of the home screen, and tap Settings ![]() > Security > Fingerprint.
> Security > Fingerprint. - Follow the steps to register your Fingerprint + Pattern, PIN, or Password.
- Tap REGISTER.
- Follow the instructions to record your fingerprint.
- Tap OK.
ZTE Lock Screen
Experience something new with the dynamic ZTE Lock Screen. Vivid lock screen images change regularly, providing a fresh look for your phone.
ZTE Lock Screen quick options
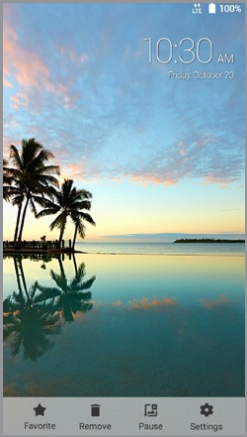
- To reveal the quick options bar, swipe up from the bottom of the lock screen.
- Tap an option:
- Favorite: Tap to save the current wallpaper to the My Favorites folder.
- Remove: Tap to prevent the current wallpaper from appearing again.
- Pause: Tap to keep the current wallpaper as the lock screen until you tap Start.
- Settings: Tap to go directly to the ZTE Lock Screen menu in Settings.
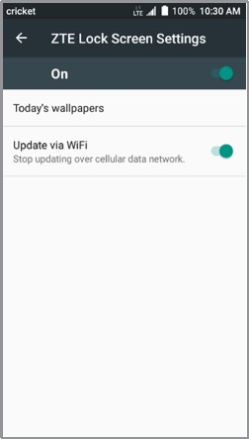
ZTE Lock Screen settings
- Tap the Arrow
![]() or swipe up from the bottom of the home screen, and tap Settings
or swipe up from the bottom of the home screen, and tap Settings ![]() > Display > Wallpaper > ZTE Lock Screen.
> Display > Wallpaper > ZTE Lock Screen. - If ZTE Lock Screen is off, tap the switch to turn it on.
- Tap an option:
- Today's wallpapers: Tap to view the current collection of wallpapers.
- Update via Wi-Fi: When this setting is on, ZTE Lock Screen will be updated only when connected to a Wi-Fi network.
Calls and voicemail
HD Voice Capable
Enjoy crystal clear conversations.*
Make a call
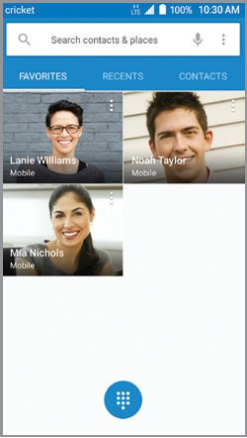
- From the home screen, tap Phone
![]() .
. - Tap the search box at the top of the screen, or tap Dialer
![]() to open the dialpad. Enter a contact name or phone number.
to open the dialpad. Enter a contact name or phone number. - Tap the matching contact or Call
![]() to place the call.
to place the call.
 to place the call.
Check voicemail
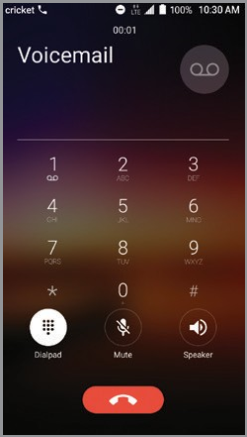
- From the home screen, tap Phone
![]() > Dialer
> Dialer ![]() .
. - Press and hold the 1 key
![]() .
. - If prompted, enter your voicemail password.
Use call waiting
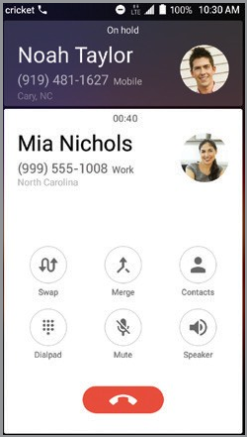
Call waiting helps you answer or hold a call while you are on an existing call.
- While on a call, you will hear a tone if another call comes in. Tap Hold current and answer.
- Tap Merge
![]() to merge calls, or tap Swap
to merge calls, or tap Swap ![]() to switch between active calls.
to switch between active calls.
 to merge calls, or tap Swap
  to switch between active calls.
Note: To access phone settings, tap Menu > Settings from the main phone screen.
*To experience Cricket HD Voice, both callers must have a compatible HD Voice–capable smartphone and make the call over Cricket's LTE network or a compatible network. Cricket's LTE coverage is not equivalent to its overall network coverage. HD Voice calls made on a compatible device and on the LTE network may not experience an HD Voice connection at times of network congestion. Other carriers' networks may interoperate with Cricket's LTE network to support an HD Voice call.
Text and picture messaging
Send a text message
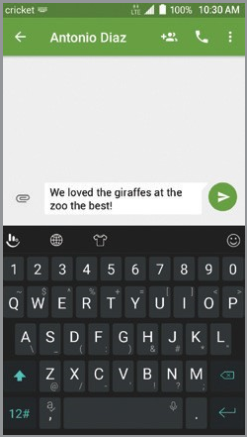
- From the home screen, tap Messaging
![]() .
. - Tap New message
![]() to start a new text message.
to start a new text message. - In the To field, enter a number or contact name, or tap ALL CONTACTS to select from your contacts.
- Tap the Send message field and enter your message.
- Tap Send
![]() to send the message.
to send the message.
Send a picture message
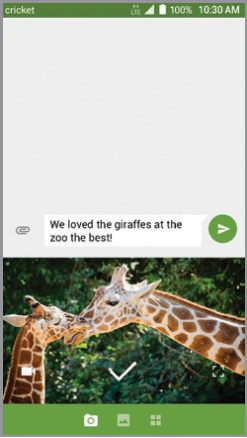
- Follow steps 1- 4 above.
- Tap Paperclip
![]() .
. - Tap Check
![]() to snap a photo, or tap Gallery
to snap a photo, or tap Gallery ![]() to select a photo from your gallery.
to select a photo from your gallery. - Tap Send
![]() to send the message.
to send the message.
 .
.Please don't text and drive.
Email setup (Gmail™, Yahoo!®, etc.)
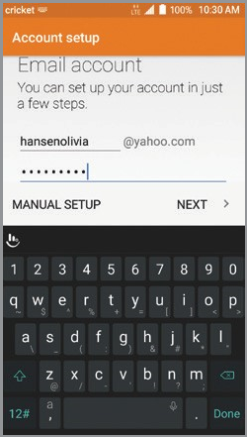
- Tap the Arrow
![]() or swipe up from the bottom of the home screen, and tap Email
or swipe up from the bottom of the home screen, and tap Email ![]() .
. - Follow the steps to set up your account.
Create and send an email message
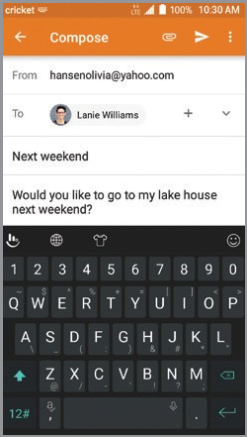
- Tap the Arrow
![]() or swipe up from the bottom of the home screen, and tap Email
or swipe up from the bottom of the home screen, and tap Email ![]() .
. - To compose a new message, tap Compose
![]() .
. - Tap the To field. Enter an email address, or tap Add contact
![]() > CONTACTS, GROUPS, or HISTORY to select from your contacts.
> CONTACTS, GROUPS, or HISTORY to select from your contacts. - Enter a subject and email message.
- To attach files, tap Paperclip
![]() and choose the type of attachment you want.
and choose the type of attachment you want. - Tap Send
![]() to send the message.
to send the message.
 and choose the type of attachment you want.
Note: To set up a corporate email account, contact your IT administrator.
Cricket services
These services make using Cricket even better and easier.

My Cricket: Access billing, make a quick payment, view usage, and access support from the palm of your hand.

Visual Voicemail: Quickly view, access, and play back your voicemail messages. Easily save important numbers to your SAVED list and respond to messages by calling back or texting.

Deezer from Cricket: Listen on-the-go with ad-free streaming music, download your favorites to your phone, and get customized playlists based on your preferences.
Cool tools

Selfie: Take selfies quickly and easily. Access the front-facing camera from either the lock screen or the Apps menu to instantly capture the moment.

AskMD: Consult with AskMD® about symptoms or health conditions, find a nearby physician, and organize your health information to prepare for more effective doctor visits.
Health and fitness tracking
Argus is a healthy lifestyle services app that makes staying fit easy, painless, and fun! Argus provides activity and diet tracking along with a social network focused on health and fitness.
Set up Argus
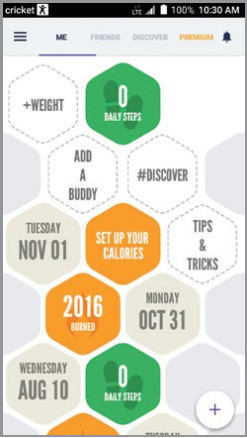
- Tap the Arrow
![]() or swipe up from the bottom of the home screen, and tap Argus
or swipe up from the bottom of the home screen, and tap Argus ![]() .
. - Tap Enter Your Email, or sign up via Facebook® or Google+™.
- To set up your profile, tap Menu
![]() > Settings and enter your height, weight, and other specifics.
> Settings and enter your height, weight, and other specifics. - Tap the blocks on the app's main screen to set up your calorie goals, add a buddy, read motivational tips and tricks, and more.
 > Settings and enter your height, weight, and other specifics.
Use Argus
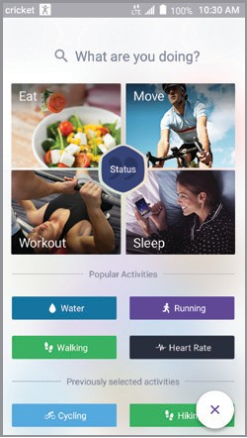
- Tap the Arrow
![]() or swipe up from the bottom of the home screen, and tap Argus
or swipe up from the bottom of the home screen, and tap Argus ![]() .
. - Tap Add
![]() and choose an activity type (Eat, Move, Workout, Sleep).
and choose an activity type (Eat, Move, Workout, Sleep). - Follow the on-screen instructions.
Notes:
- Activities you can track, such as Move or Workout, can be customized. Select an activity, and then tap START >
![]() > CUSTOMIZE.
> CUSTOMIZE. - To pause and resume recording of an activity, tap Pause
![]() /Resume
/Resume ![]() . Tap Stop
. Tap Stop ![]() > Save
> Save ![]() to save the activity.
to save the activity.
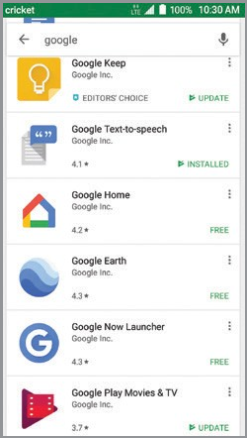
Apps on Google Play™
The Blade X is preloaded with great apps to take your experience to the next level. To find additional apps, check out Google Play.
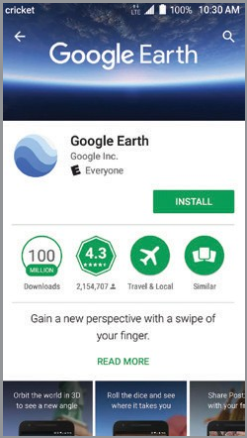
Access Google Play
- From the home screen, tap Play Store
![]() .
. - Enter your existing Google account or create one following the steps on the screen.
Navigate Google Play
From the Play Store, you have multiple ways to search for apps, games, and more.
- Tap a category to browse apps, games, movies, and music organized by popularity or category.
- Tap the Google Play search bar to search the Play Store for a specific game or app.
- To install, tap the app and follow the instructions. Once installed, you will see a notification in the Notifications panel. Open the app from this notification or by locating the new shortcut on your home screen.
Note: A payment method, such as Google Wallet™, is required to purchase apps.
Camera and video
The Blade X lets you choose from four different modes (manual, panorama, multi exposure, and time-lapse video) to satisfy every type of photographer!
Take a picture
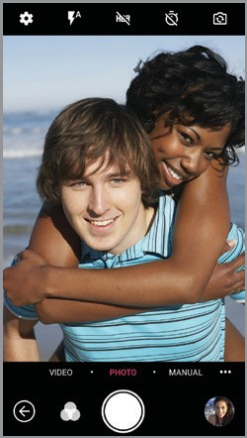
- From the home screen, tap Camera
![]() .
. - Zoom in and out by pinching/ spreading your fingers on the screen or by pressing the Volume key.
- Tap the Shutter button
![]() to take a photo.
to take a photo. - Tap Settings
![]() to adjust your camera settings.
to adjust your camera settings.
 .
. to adjust your camera settings.
Record a video

- In camera mode, tap VIDEO > Record
![]() to begin recording video.
to begin recording video. - While recording, you can tap Pause
![]() to pause recording and Resume
to pause recording and Resume ![]() to resume recording.
to resume recording. - Tap Stop
![]() to stop recording video.
to stop recording video. - Tap Settings
![]() to adjust your video recording settings.
to adjust your video recording settings.
Take a quick selfie
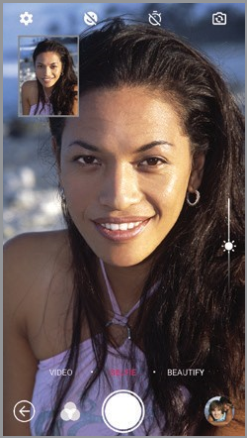
- From the lock screen, press and hold Selfie
![]() .
. - Look at the selfie indicator to capture natural expressions.
- Tap the Shutter button
![]() to take a selfie.
to take a selfie.
 .
.Note: See user manual for more.
More information
On the web
Detailed support information, including device specifications and a full user manual, is available at www.cricketwireless.com/support/devices.
On the phone
- Call Customer Care at 1-855-246-2461 or
- Dial 611 from your cell phone.
Accessories
For more information concerning accessories, please visit your local Cricket store location or go to www.cricketwireless.com/shop/accessories.

Note: Store and online inventories may vary.
Product meets FCC Radio Frequency Exposure Guidelines—FCC ID SRQ-Z965. This device complies with Part 15 of the FCC Rules. Operation is subject to the following two conditions:
- this device may not cause harmful interference, and
- this device must accept any interference received, including interference that may cause undesired operation.
© 2017 Cricket Wireless LLC. All rights reserved. Cricket and the Cricket logo are registered trademarks under license to Cricket Wireless LLC. Other marks are the property of their respective owners. microSDXC™ logo is a trademark of SD-3C, LLC. The Bluetooth® word mark and logos are registered trademarks owned by Bluetooth SIG, Inc. Manufactured under license from Dolby Laboratories. Dolby, Dolby Audio, and the double-D symbol are trademarks of Dolby Laboratories. Qualcomm and Snapdragon are trademarks of Qualcomm Incorporated, registered in the United States and other countries. Used with permission.
© 2017 ZTE CORPORATION. All rights reserved. No part of this publication may be excerpted, reproduced, translated or utilized in any form or by any means, electronic or mechanical, including photocopying and microfilm, without the prior written permission of ZTE Corporation. The manual is published by ZTE Corporation. We reserve the right to make modifications on print errors or update specifications without prior notice.

079584509446 Printed in USA

Documents / Resources
References
Download manual
Here you can download full pdf version of manual, it may contain additional safety instructions, warranty information, FCC rules, etc.
Advertisement


Need help?
Do you have a question about the Blade X and is the answer not in the manual?
Questions and answers