ZTE Telstra Lite 2 Z2315T - Prepaid Mobile with Sim Manual
- User manual (35 pages)
Advertisement
- 1 Getting started
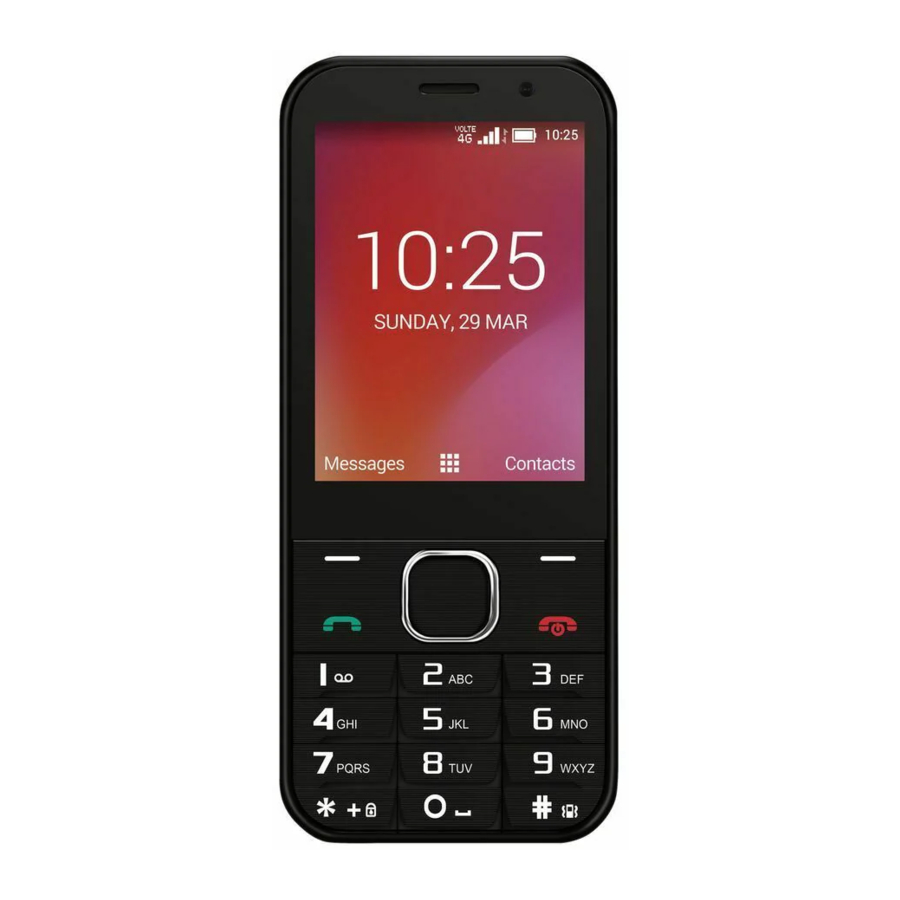
- 2 Getting to know your device
- 3 Make and answer calls
- 4 Contacts
- 5 Messaging
- 6 Main Menu
- 7 Connectivity
- 8 Media Centre
- 9 More Applications
- 10 Technical Specifications
- 11 FAQs &Troubleshooting
- 12 Documents / Resources
Getting started

Key definitions
| Left Soft Key | Messages. Long press to review Notifications |
| Right Soft Key | Contacts |
| Power key | Press and hold (long press) to switch the handset On. Press to light up the display. Press to hang up a call in progress or reject an incoming call. Press and hold (long press) to power off the phone. |
Inserting and Removing the SIM card
- Switch off your phone and disconnect any external power.
- Remove the back cover using the thumb catch on the bottom corner of the handset

- Remove the battery.
- Insert your SIM card face down into the card holder with the edge with the cut corner going in first. (There is a diagram of the SIM card next to the SIM slot)

- microSD memory is an optional extra to expand your personal storage. The phone accepts microSD cards up to 32GB with FAT32 format.
- Replace the battery, back cover and press to lock down.


Getting to know your device
Charging the Battery
Connect the charger to the phone using a USB cable, and plug the charger into a standard power socket. Only use the approved charger and USB lead provided.
Always insert the charger lead carefully.
Check the plug and socket are aligned correctly.
Do NOT use excessive force which may damage the USB port.
Be careful to avoid tripping on the lead whilst it is plugged in.
Physical damage to the USB port is not covered by warranty.
Switch your unit on
After inserting the SIM card, replace the battery and the back cover. Then press and hold the Red key for 2 seconds to switch the handset on.
The phone will be ready to use after a short time.
Wake up your unit
To save power the display will automatically dim and turn off after a pre-set period of time (see Menu > Settings > Display > Sleep).
After the phone switches to the sleep mode press the power key to switch the display back on. The keypad will be locked, Long press the Star key (*) to unlock it.
Make and answer calls
Make a call
You can make calls from the keypad, call log, or Contacts app.
Directly make a call
From the home screen enter the phone number using the key pad then press the Green Call Key to make the call.
Make a call from the Call History list
Press the Green Call Key to open the call log screen. Select a recent caller from the list using the navigation keys then press Detail > Dial or just press the Green Call Key to dial the number.
Make a call from Contacts
On the home screen select the Right Soft Key to open Contacts. Select the required Contact from the list using the navigation keys. Press Select > Dial or just press the Green Call Key to dial the number.
Dial from Messaging
On the home screen, press the Left Soft Key for Messaging
Select a message or conversation using the navigation keys and press the Ok key to view the message.
Press Options (Left soft key) > Call then press the Green Call Key to dial.
Make an international call
Press the star key (*) to open the dialer then long press the star key until the star that appears turns into a plus sign (+). When the call is made the plus sign is replaced by the calling country's International code (IDD), eg Australia's IDD is 0011. Then enter the country code, region code and phone number. If calling a mobile number leave out the first zero, eg 0499 99 999 would be 499 999 999. When dialing a landline in Australia leave out the first zero in the area code, eg 02 9999 9999 would be 2 9999 9999.
Answer a call
Your phone will ring, vibrate or both (depending on the current mode and settings) for an incoming call. Press Answer (Left soft key) or the Green Call Key to answer the call. If the earphone is inserted, press the button on the earphone to answer the call.
Reject a call
Press Hang Up (Right Soft Key) or the Red Key to reject a call.
End a call
To hang up a call press Hang Up (Right Soft Key) or press the Red Key
Adjust the volume
During a call, you can raise or lower the volume by using the Up and Down navigation keys.
Turn the speaker on or off
During a call, press the Options (Left Soft Key) > Speaker to turn the speaker On.
To turn the speaker Off press Options (Left Soft Key) > Earpiece speaker.
Add a multi-party or Conference call
During a call press Options (Left Soft Key) then Add call. Dial a number and press the Green Call Key to add one call and put the current caller on hold. Press Options (Left Soft Key) then Merge call to join the two (or more) parties together to create a conference call.
Contacts
You can go to Contacts by pressing the Left Soft Key or Menu > Contacts App.

Add new contact
Press Contacts > Options > Add contact.
Select Phone or SIM Card to specify where the contact will be stored.
The first field is First name, if you want to enter a title such as Mr, Mrs, Dr press the Up or Right navigation key to highlight the small down arrow to the right of the First name field, then press the OK key. A new Name prefix field will be inserted before the First name field.
When finished press the Options > Save to save your Contact, or just press the Red key and the contact will automatically be saved.
Delete contacts
Press Contacts to show the list of contacts.
To delete a single contact
Use the Navigation keys to highlight to contact to delete.
Press Select > Options > Delete then confirm with the OK key.
To delete multiple contacts Press Options > Multi-Select.
Select the contacts you want to delete one by one by pressing the Ok key when they are highlighted.
To select all contacts use the Up navigation key to highlight Selected(0) then press the Ok key.
When the required selections are made, Press Options > Select (Ok key). Then confirm with the Ok key.
Edit contact details
In Contacts, highlight the contact to edit using the Navigation keys.
Press Select (Ok key)
Press Options > Edit
Edit the contact information, see Add New Contact.
Press Options > Save to save your changes.
Search contacts
When you open Contacts the cursor will either be in the Search field or the last contact that was highlighted. Use the Up navigation key to move up to the Search field.
Press a letter key on the keypad. The phone will automatically list all matched contacts containing that letter.
Scroll up or down the Contacts list to select the chosen Contact or press another letter to refine the search.
Import/Export contacts
In Contacts, press Options > Import/Export.
Choose whether to import from / export to the SIM card or input from / export to a microSD card if installed.
To select all contacts use the Up navigation key to highlight Selected(0) then press the Ok key.
Messaging
On the home screen press the Right Soft Key to open Messaging
Send messages
- Press Options >Newmessage
- Input your desired name or phone number in theTo field. Press and hold the # key to change text entry mode to letters or numbers.
You can also press OK to select a contact from your Contacts list. - Press the Down arrow key to Input text. The default text entry mode is Multi-tap. Multi-tap means that if you press a key quickly it will cycle through the letters as indicated on each key. Press and hold on the # key to select a predictive text mode indicated by T12 abc, T12 Abc or T12 ABC. To return to Multi-Tap select abc, Abc or ABC. Select 123 to input numbers.
- Press Options >Add attachments to send a picture, video or audio file – the message will be sent as a multimedia message which requires carrier data access.
- Press Send to send the message.
Receive messages
- When you receive a message the handset will light up, vibrate and play a tone depending on your current settings. The message icon will show at the top of the screen.
- Press the Messaging icon then open the message.
- Enter text to reply to the message. Press Back then Send.
Main Menu
Use the navigation keys to highlight the required item then press the OK button to select it.
- Call history: review incoming and outgoing call records
- Contacts: view and add Contacts to the phone
- Gallery to view your photos
- Messaging: access SMS and MMS messages
- FM Radio
- Music
- Camera: access the camera to take pictures and videos
- Settings: Wireless & network, Accessibility, Sound & notifications, Display, Phone settings, Call settings, About phone, System update
Clock
Calendar
File Explorer
Extra – Sound recorder, Video player, Calculator, Notes, Torch
Connectivity
Your phone can connect to the Internet via your mobile phone operator.
The icons on the Status bar indicate which kind of data network you're connected to.
Turn Data Off
Go to Menu >Settings >Wireless & networks > Data usage to switch data on or off.
To check data usage, select Mobile data usage in the same menu.
Wi-Fi
Wi-Fi is on by default. Go to Menu > Settings > Wireless & networks > Wi-Fi to log on to local Wi-Fi networks. Secured networks require a password.
To check Wi-Fi data usage go to Menu > Settings > Wireless & networks > Data usage> Wi-Fi data usage.
Bluetooth
Via the Bluetooth function, you can exchange data with other Bluetooth devices that are within a short distance.
Turn on/off Bluetooth
Go to Menu > Settings >Bluetooth. Press OK to switch Bluetooth On or Off. Available devices will be shown on the screen.
Pairing
- Your phone will scan for and display all available Bluetooth devices.
- Select the desired device to start the pairing. Usually you will need to enter a PIN number which can be 0000, 1234 or generated by the other device.
Connect to a Computer to transfer files
Transfer audio, video and picture files between your handset and your computer.
PC
Connect your handset using the USB data lead supplied.
First time, select Install driver on the handset notifications window.
On your PC, use Windows Explorer to open the CD Drive (X): USB_Driver, then double click Setup to install the handset drivers. (X) will be the drive letter that Windows assigns.
Subsequently, select Media Device (MTP) from the notifications window, which will open the handset in Windows Explorer.
MAC
On your MAC, download and install 'Android File Transfer'.
Connect your handset using the USB data lead supplied.
Select Media Device (MTP) from the notifications window, which will open the handset on your MAC.
Flight mode
In areas where the use of mobile devices is restricted, you can activate Flight mode. You will not be able to make/answer calls, send/receive messages in Flight mode.
Go to Menu >Settings > More> Flight mode.
About phone
You can check the phone's status, battery use, software version, etc. Go to Settings >About phone> Status.
Camera
Your phone has a 2mp rear camera when the flip is opened. You can set a photo you've taken as the wallpaper, a contact photo or send it through MMS, Bluetooth or Gmail.
- Go to Menu >Camera.
- Press Options to change Filters, Storage location, Light sensitivity setting (ISO), Brightness, WhiteBalance (WB), Picture size, Shutter tone, and auto preview.
- PressOK to take a photo.
- Press Gallery to view your photos
Video recording
Your phone can record video clips.
- Go to Menu >Camera
- Use the let/right keys to select the
![]() option to activate the video recorder
option to activate the video recorder - Press Options to change Storage location and Video quality
- Press OK to start recording, press OK again to stop recording
- Press Gallery to view your video clips
Media Centre
Allows you to play music and videos, record sound, show your photos and listen to the radio.
Go to Menu > Media centre
Music Player
Listen to music saved in the phone or on a memory card.
Go to Menu > Media centre>Music
A list of available songs will be displayed.
Press OK to play the highlighted song, press OK again to stop play.
Press Options to set a playlist, set a song as a ringtone, etc.
Sound Recorder
You can record audio files through sound recorder.
Go to Menu > Media centre>Sound Recorder
Press Record to start recording, SelectDoneto stop recording or Pause to pause the recording. When paused press Resume to continue the recording.
When you have finished recording you change the default filename and press Save to save it or press Discard to cancel it.
Press List to view saved recordings and play them or press Options to manage the recordings.
Gallery
Menu > Gallery. View your pictures and videos.
FM radio
You need to insert the wired headset that comes with your phone to act as an antenna, so always connect the headset when using the radio. When you receive an incoming call while listening to the radio, the radio will turn off.
Go to Menu >FM Radio.
The FM radio scans and saves available stations automatically.
More Applications
File manager
Go to Menu >File Manager icon. You can view all files saved in the phone or on the memory card.
Alarms
Go to Menu >Clock > Alarm to set an alarm. Alarms will switch the handset On even when it is switched off.
World Clock
Go to Menu >Clock> World Time to add a new world time location (City)
Timer
Go to Menu > Clock>TimerSelect Play to start the timer. Press Stop to stop the alert. Press +1 to add 1 minute, press + to add a new timer event.
Stopwatch
Go to Menu >Clock > Stopwatch. Select Play to start the Stopwatch. You can Record the time, Pause the time or Share the results.
Calculator
Go to Menu >Extra >Calculator
On the Calculator screen, slide the screen to the right or left to switch between Advanced panel and Basic panel.
Calendar
Go to Menu >Calendar
Calendar Events
If you want the events recorded just in the phone and not synced to Google.
Press Options > Calendars to display and press Select on the calendar name.
A tick should appear to left of the calendar
Creating a new Event
- Press Add to create a new calendar event.
- Enter the event name and location.
- To set the duration for the event, Select From and To.
- Enter the event time zone and description.
- If you have more than one calendar, select the calendar where you want to save the event.
- Select the Repetition.
- Set the time of the reminder in Reminders.
- Select Save.
Sync an external calendar
If you join your Google calendar on line you are able to sync that into your phone calendar:
- On the calendar screen, Select Options > Calendars to display.
- Select which calendars you would like to be displayed and press Sync.
Technical Specifications
| Size and Weight | 122.5 x 52 x 13.8mm. 115g with battery | |
| Networks | 4G LTE Band 3, 28 LTE Data Rates: 150M Down / 50M Up 3G UMTS 850. HSPA+ 42Mbps data | |
| Display | 2.8" 240 x 320 main screen | |
| Camera | 2MP rear camera with flash. VGA front camera | |
| CPU & Memory | SC9820E Dual core 1.2GHz CPU 512MB internal storage. Expandable external storage microSD(HC) up to 32GB | |
| Operating system | Proprietary based on Android | |
| Battery | Capacity | 1800mAh Li-ion user replaceable |
| Charge Time | 3-4 hrs with AC Charger | |
| Standby time | Up to 280 hours (subject to network) | |
| Voice talk time | Up to 5 hours (subject to network) | |
| Connectivity | Bluetooth, 3.5mm jack NAHJ, micro USB | |
| SIM Card | Micro SIM, 3FF format. | |
FAQs &Troubleshooting
| Symptom | Solution |
| How do I check the software version? | Menu > Settings > About phone > Build number |
| How do I reset to factory defaults? | Menu> Settings > Phone settings >Reset >Factory data reset |
| How do I configure the MMS Settings? | Messages> Options > Settings> MMS |
| How do I copy Contacts to or from my SIM card? | Contacts > Options > Import/Export. Choose a method and follow the directions on screen |
| How do I select Network mode? | Menu > Settings >Wireless & networks > Mobile networks > Preferred network type |
| How do I manually select a carrier? | Menu > Settings >Wireless & networks >Mobile networks > Network operators > Search networks |
| How do I enable USB tethering? | Menu > Settings >Wireless & networks >Tethering and mobile hotspot > USB tethering. (Connect as CDROM to install drivers) |
| How do I configure APN's | Menu > Settings >Wireless & networks >Mobile Networks > Access Point Names > Select (> Addto add a new APN) |
| How do I enable Flight Mode? | Menu > Settings >Wireless & networks > Flight mode |
| How do I check Call forwarding etc | Menu > Settings >Call settings > Calls > Call forwarding / Call barring / Call waiting / Caller Id |
| How do I check for Software Updates? | Menu > Settings > System update |
| How do I get more technical support? | Visit ztemobiles.com.au or call 1300 789 475 during office house AEST. |
| How do I change the Ringtone? | Menu > Settings >Sound & notifications > Phone Ringtone |
| The battery discharges quickly | Possible network coverage issue. Check the signal level. With only 1 or 2 bars, the battery has to work harder to maintain network contact. Limit multi-media to save power. The battery may be worn out. |
| The handset turns on by itself. | An alarm or calendar event switches the handset on automatically. |
| No incoming ring or alarm tone | Press the Volume Up key to enable the Ringtone. Check the ringtone and ring volume settings. |
| The handset switches off after charging. | The handset is charging in the off state. Press and hold the Red key to switch the handset ON. |
| I cannot charge the phone | Confirm the charger is properly inserted. Remove the battery, clean the contacts and check it is inserted correctly. The battery may be worn out. Tip: Charge the phone using the supplied USB cable. |
| I cannot connect to other Bluetooth devices | Turn Bluetooth on. Set visibility to Show. Make sure the pass-code is correct. Possible compatibility issues. Not all functionality is supported between different Bluetooth devices and standards. |
| ERROR MESSAGES | |
| Message | Solution |
| No SIM Card | Check a valid SIM card is inserted. See the Getting Started section |
| Enter PIN code | You have set a SIM PIN. Please enter your SIM PIN code. |
| Enter PUK code | Contact your Service Provider to get the PUK code |
| Enter Unlock Code | Contact your Service Provider to obtain the network unlocking code. |
ZTE Australia provides dedicated support with a call centre and social media outreach.
Search 'ZTE Australia' on Facebook and Twitter to keep in touch.

Documents / Resources
References
Download manual
Here you can download full pdf version of manual, it may contain additional safety instructions, warranty information, FCC rules, etc.
Download ZTE Telstra Lite 2 Z2315T - Prepaid Mobile with Sim Manual
Advertisement


Need help?
Do you have a question about the Telstra Lite 2 and is the answer not in the manual?
Questions and answers