
Related Manuals for BIGTREETECH CB1


Summary of Contents for BIGTREETECH CB1
- Page 1 Shenzhen Big Tree Technology Co., Ltd. BIGTREETECH BIGTREETECH User Manual 1 / 22...
-
Page 2: Table Of Contents
4.3.1 For Raspberry Pi Imager ..........13 4.3.2 For balenaEtcher ..........15 5. Configure Network .............18 5.1 Ethernet ..............18 5.2 WiFi Setting ...............18 6. Configure Motherboard ............19 6.1 SSH Connect to Device with CB1 Installed ........19 6.2 Compile MCU Firmware ............20 7. Cautions ..............22 2 / 22... -
Page 3: Revision History
Shenzhen Big Tree Technology Co., Ltd. BIGTREETECH Revision History Version Revisions Date 01.00 Original 2022/09/20 3 / 22... -
Page 4: Product Profile
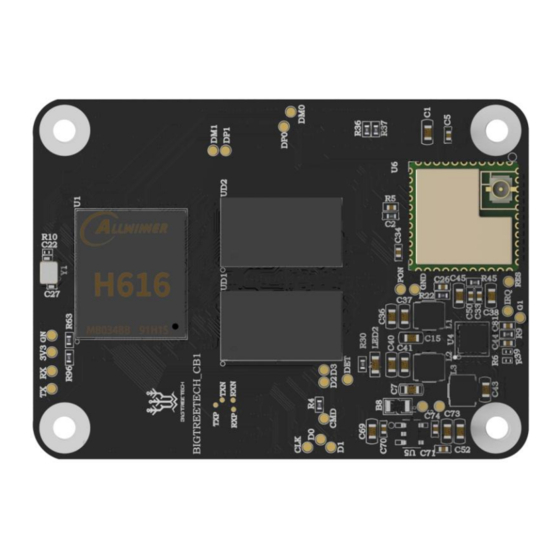
BIGTREETECH 1. Product Profile The BIGTREETECH CB1 is launched to provide a great solution to the insane shortage of Raspberry Pi CM4. It outputs signals to the motherboard via the fast and convenient two 100 pins micro BTB connection header, including 100M Ethernet, HDMI, etc. -
Page 5: Dimensions
Shenzhen Big Tree Technology Co., Ltd. BIGTREETECH 1.3 Dimensions 2 Peripheral Port 2.1 Pin Signal Connector Description A connector_01 A connector_02 A connector_03 A connector_04 EPHY-TXP Ethernet TX Positive A connector_05 EPHY-TXN A connector_06 Ethernet TX Negative A connector_07 A connector_08... - Page 6 A connector_21 SYS-LED System work light A connector_22 A connector_23 A connector_24 PC15 3.3V IO(CB1 V2.1 is 1.8v ) A connector_25 3.3V IO(CB1 V2.1 is 1.8v ) A connector_26 3.3V IO(CB1 V2.1 is 1.8v ) PH10 A connector_27 3.3V IO...
- Page 7 Shenzhen Big Tree Technology Co., Ltd. BIGTREETECH A connector_58 A connector_59 A connector_60 A connector_61 SDC0-D3 SDCARD Data3 signal A connector_62 SDC0-CMD SDCARD CMD signal A connector_63 SDC0-D0 SDCARD Data0 signal A connector_64 PG11 3.3V IO A connector_65 A connector_66...
- Page 8 Shenzhen Big Tree Technology Co., Ltd. BIGTREETECH B connector_2 USB1-DM B connector_3 HOST USB1 LINEOUTL B connector_4 B connector_5 USB1-DP HOST USB1 B connector_6 LINEOUTR B connector_7 B connector_8 B connector_9 B connector_10 B connector_11 TV_OUT CVBS OUT B connector_12...
- Page 9 Shenzhen Big Tree Technology Co., Ltd. BIGTREETECH B connector_46 B connector_47 B connector_48 B connector_49 B connector_50 B connector_51 HCEC HDMI CEC B connector_52 B connector_53 HHPD HDMI Hotplug B connector_54 B connector_55 B connector_56 B connector_57 B connector_58 B connector_59...
- Page 10 Shenzhen Big Tree Technology Co., Ltd. BIGTREETECH HTXCN B connector_90 HDMI CLK Negative. B connector_91 B connector_92 B connector_93 B connector_94 B connector_95 B connector_96 B connector_97 B connector_98 B connector_99 HSDA HDMI I2C B connector_100 HSCL HDMI I2C 10 / 22...
-
Page 11: Interface Introduction
Shenzhen Big Tree Technology Co., Ltd. BIGTREETECH 3. Interface Introduction 3.1 Install via the BTB Connection 11 / 22... -
Page 12: Pins Gpio
When Manta series motherboard work with CB1, 40 pins GPIO is a custom IO arrangement, as shown in the figure below, Pin 7 is CB1's "PC7", and Pin 11 is CB1's "PC14". The GPIO number of CB1 corresponds to (Px–PA)*32 + Pin For example: PC7 = (PC–PA)*32 + 7 = 2 * 32 + 7 = 71... -
Page 13: Write Os
Shenzhen Big Tree Technology Co., Ltd. BIGTREETECH 4. Write OS 4.1 Download the OS Image Please download and install the OS image we provided: https://github.com/bigtreetech/CB1/releases 4.2 Download and Install Writing Software The official Raspberry Pi Imager: https://www.raspberrypi.com/software/ balenaEtcher: https://www.balena.io/etcher/ Both of the above software can be used, just choose one to download and install. - Page 14 Shenzhen Big Tree Technology Co., Ltd. BIGTREETECH c. Select "Use custom", then select the image that you downloaded. d. Select the MicroSD card and click "WRITE" (WRITE the image will format the MicroSD card. Be careful not to select the wrong storage device, otherwise the data will be formatted.)
-
Page 15: For Balenaetcher
Shenzhen Big Tree Technology Co., Ltd. BIGTREETECH e. Wait for the writing to finish. 4.3.2 For balenaEtcher a. Insert a MicroSD card to your computer through a card reader. 15 / 22... - Page 16 Shenzhen Big Tree Technology Co., Ltd. BIGTREETECH b. Select the image that you downloaded. c. Select the MicroSD card and click "WRITE" (WRITE the image will format the MicroSD card. Be careful not to select the wrong storage device, otherwise the data will be formatted.)
- Page 17 Shenzhen Big Tree Technology Co., Ltd. BIGTREETECH 17 / 22...
-
Page 18: Configure Network
Shenzhen Big Tree Technology Co., Ltd. BIGTREETECH 5. Configure Network 5.1 Ethernet Plug-and-play with an Ethernet cable, no additional setup required. 5.2 WiFi Setting After successfully writing the OS image, the MicroSD card will have a FAT32 partition recognized by the computer and a configuration file named "system.cfg" under this partition. -
Page 19: Configure Motherboard
2. Insert the MicroSD card to the motherboard, and wait for the system to load after power on, approx. 1-2 minutes. 3. The device with CB1 installed will automatically be assigned an IP after being successfully connected to the network. -
Page 20: Compile Mcu Firmware
Shenzhen Big Tree Technology Co., Ltd. BIGTREETECH Login as: biqu, password: biqu. 6.2 Compile MCU Firmware After SSH is successfully connected to the device with CB1 installed, enter in the terminal: cd ~/klipper/ make menuconfig Compile the firmware with the corresponding motherboard configuration, here is... - Page 21 Shenzhen Big Tree Technology Co., Ltd. BIGTREETECH Press q to exit, and Yes when asked to save the configuration. make to compile firmware, "klipper.bin" file will be generated in home/pi/klipper/out folder when make is finished, download it onto your computer using the SSH application.
-
Page 22: Cautions
HDMI, USB, and RJ45. Pay attention to the heat dissipation of CB1. If the running application consumes too many system resources, the CB1 will get hot quite seriously. If you need other resources for this product, please visit https://github.com/bigtreetech/...
Need help?
Do you have a question about the CB1 and is the answer not in the manual?
Questions and answers
how to see the file system of cb1 using Mac
To access the file system of the BIGTREETECH CB1 using a Mac, you can use an SSH connection or a USB/SD card reader:
` (replace `` with the actual IP).
1. SSH Access (Preferred Method):
- Ensure the CB1 is powered on with the Klipper image installed and connected to the same network as your Mac.
- Wait for the green LED to start flashing (indicates CB1 is running).
- Find the IP address of CB1 using your router’s device list or a network scanning tool.
- Open Terminal on your Mac and type: `ssh pi@
- Default password is usually `raspberry` unless changed.
2. Using SD Card Reader:
- Power off the CB1 and remove the micro SD card.
- Insert the SD card into your Mac using a card reader.
- The boot partition should mount automatically, allowing limited access to the file system.
3. UART Debugging (Optional):
- Use a USB-to-serial adapter and connect to UART0.
- Use a terminal app like MobaXterm (via another PC) or screen/minicom on Mac.
- This allows low-level access for debugging if SSH is not available.
Make sure the correct fdtfile and console settings are used in the configuration if you're using UART or HDMI.
This answer is automatically generated