Advertisement
Quick Links
Do not open during installation
This product is factory-sealed.
Refer to the instructions contained
in this document for details.
Installation tools
Mounting hardware used on this product
includes fasteners with hexalobular
socket heads (ISO 10664). Installation
requires the use of matching tools.
Surge Protection
This product features built-in surge protection circuitry in compliance
with applicable standards.
For comprehensive protection of a luminaire installation against lightning
and electrical surges, it is essential to cover mains supply and data input
lines at the distribution board level, by using respective primary (Type 1)
and secondary (Type 2) surge arrestors in compliance with EN61643-11/
IEC61643-1.
Warning
Ensure that all required surge protection measures are in place and
activated prior to luminaire installation. Also, disconnect luminaires
before operating high-power devices such as, for example, electrical
arc welders.
WE-EF LIGHTING
Installation and Maintenance
Instructions
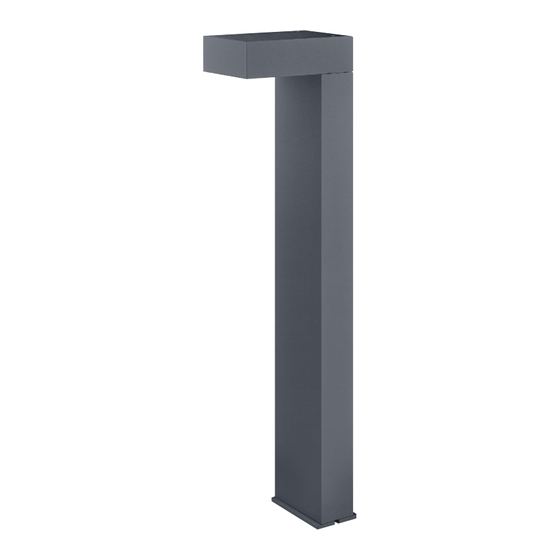
Bollard
PSY414 LED
PSY424 LED
PTY414 LED
PTY424 LED
Advertisement

Related Manuals for WE-EF PSY414


Summary of Contents for WE-EF PSY414
- Page 1 WE-EF LIGHTING Installation and Maintenance Instructions Bollard PSY414 LED PSY424 LED PTY414 LED PTY424 LED Surge Protection Do not open during installation This product is factory-sealed. This product features built-in surge protection circuitry in compliance Refer to the instructions contained with applicable standards.
- Page 2 Bollard PSY414 PTY414 PSY424 PTY424 IP66/IP67, IK10, Class I, ta = 40°C Accessories: Planted root – Galvanised steel. Weight ESV2 for PSY414/424 300-9115 for PSY414 29.3 for PSY424 35.5 for PTY414 30.9 ESV2 for PTY424 41.9...
-
Page 3: Maintenance
Light Source Maintenance Apart from cleaning the product’s exterior surfaces, no special maintenance work is required. Do not use high-pressure cleaners. In case of component failure due to abnormal circumstances or at end of life, replacement must be carried Warning: Do not open luminaire while mains supply is switched on. -
Page 4: Installation
Installation The product must be installed and maintained by a building/construction and/or electrical regulations and relevant legislation. Warning: Notice: no longer be valid and shall become the full responsibility of the modifying person/organisation. Claims based on defects attributable to improper installation and/or application, and the consequences thereof, are excluded. -
Page 5: Installation Procedure
Installation Procedure It is recommended to incorporate the optional planted root to ensure maximum stability. 2) Remove sleeve A from post B. 4) Remove terminal box cover C as shown. plate E with provided fasteners to ground. Ensure proper orientation of terminal box. An optional planted root is available. - Page 6 5) Check that rating shown on luminaire label 6) Pull cable D (and second cable for through wiring, if required) through strain relief(s) F and conforms with mains electrical supply. terminate in terminal block G. Lock cable(s) with strain relief(s). 08/18 IP66 PSY424 120-277 / 60Hz...
- Page 7 9) Align sleeve A 10) Remove countersunk screws J from head K (good and bad engagement). with Torx 25 tool (supplied by WE-EF). 11) Hold head K under arm. Grab socket L, 12) Place head K over sleeve A and check for connect and tighten with plug M.
- Page 8 13) Tighten recessed screws N gradually in alter- 14) Return countersunk screws J into head and nating sequence 6 Nm (53.1 in-lb) with Torx tighten. 30 tool (supplied by WE-EF).
- Page 9 WE-EF LIGHTING United States of America Tel +1 724 742 0030 Fax +1 724 742 0035 info.usa@we-ef.com TO9245W0422 © WE-EF 2022 Technical specifications are subject to change.
- Page 10 WE-EF LIGHTING Installation and Maintenance Instructions Planted Root ESV4 ESV2 ESV6...
- Page 11 Planted Root ESV4 300-0461 ESV4 300-0464 Suitability Suitability 1. KTX234 1. CFY259 2. KTY234 2. GRY234 3. ZFY230 3. RRY324 4. GRY224 4. RRZ324 5. Short post 5. XRY324 6. XRZ324 ESV4 300-0586 ESV4 300-0459 Suitability Suitability 1. XRY334 1. QSI254 2.
- Page 12 Planted Root ESV2 300-9115 ESV6 300-0457 Suitability Suitability 1. PSY414/424 1. LTM440 2. LTM444 3. AMW-C 4. AMF-C 5. AMF-S 6. AML-C ESV6 300-0824 Suitability 1. AML-C 2. FLA461...
-
Page 13: Installation Instruction
Installation Instruction 1) Note: It is the responsibility to installer to 2) Please note, ESV4 and ESV6 must be ensure the suitability of the ESV planted root for any local or national structural requirements In both instances conduit entry can be rotated for installation, and that planted root is suitable to match cable routing. - Page 14 5) For all other product that use ESV6 please orientate planted root as shown (base plate connections/conduit. is parallel to the pathway). For this installation, use M16 bolts supplie. 7) Place the ESV in the form work for concrete 8) Fit the nominated bolts through mounting pad, ensuring orientation, position and levels are correct.
- Page 15 9) Pour concrete to desired level depending on requirement of concrete, paver or soil. Ensure (as per luminaire instructions) onto mounting level. Concrete Paver Soil...
- Page 16 WE-EF LIGHTING United States of America Tel +1 724 742 0030 Fax +1 724 742 0035 info.usa@we-ef.com TO9257W0422 © WE-EF 2022 Technical specifications are subject to change.
Need help?
Do you have a question about the PSY414 and is the answer not in the manual?
Questions and answers