Advertisement
Quick Links
Long Range DVI-D and RS-232 Extender
USER MANUAL
LDX
DVI-D and RS-232 Extender
LDX-2P
Dual Head DVI-D, USB 1.1, Dual RS232, Audio over CAT5/5e/6 Extender
LDX-4P
Quad Head DVI-D, USB 1.1, Dual RS232, Audio over CAT5/5e/6 Extender
LDX-PLUS
DVI-D, USB and RS232 over CAT5/5e/6 Extender
LDX
Designed and Manufactured in the USA
1-800-284-2131
www.smartavi.com
series
Advertisement

Related Manuals for SMART-AVI LDX Series


Summary of Contents for SMART-AVI LDX Series
- Page 1 series Long Range DVI-D and RS-232 Extender USER MANUAL DVI-D and RS-232 Extender LDX-2P Dual Head DVI-D, USB 1.1, Dual RS232, Audio over CAT5/5e/6 Extender LDX-4P Quad Head DVI-D, USB 1.1, Dual RS232, Audio over CAT5/5e/6 Extender LDX-PLUS DVI-D, USB and RS232 over CAT5/5e/6 Extender Designed and Manufactured in the USA 1-800-284-2131 www.smartavi.com...
-
Page 2: Table Of Contents
OVERVIEW TECHNICAL SPECIFICATIONS_________________________________________________________________ WHAT’S IN THE BOX?________________________________________________________________________ FRONT AND REAR___________________________________________________________________________ INSTALLATION_______________________________________________________________________________ TROUBLESHOOTING_________________________________________________________________________ TECHNICAL SUPPORT________________________________________________________________________ LIMITED WARRANTY STATEMENT____________________________________________________________ Long Range DVI-D and RS-232 Extender... -
Page 3: Technical Specifications
Technical Specifications VIDEO Format DVI-D Single Line Maximum Pixel Clock 165 MHz LDX, LDX-PLUS (1) DVI-D 29-pin female Input Interface (TX) LDX-2P (2) DVI-D 29-pin female LDX-4P (4) DVI-D 29-pin female LDX, LDX-PLUS (1) DVI-D 29-pin female Output Interface (RX) LDX-2P (2) DVI-D 29-pin female LDX-4P... -
Page 4: What's In The Box
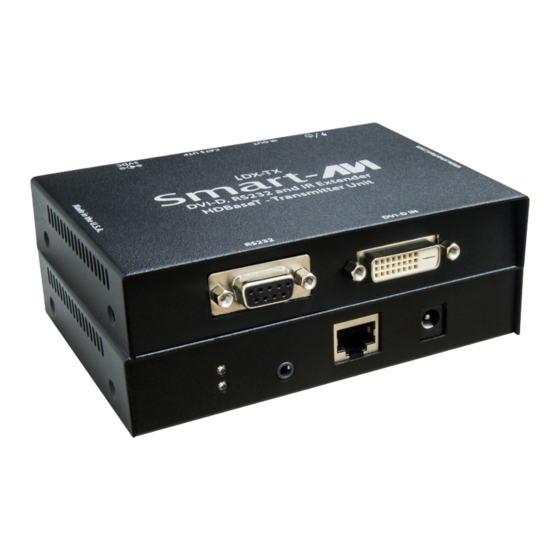
What’s in the box? PART NO. Q-TY DESCRIPTION LDX-TX Unit Single/Dual Head DVI, KVM and Audio Transmitter LDX-RX Unit Single/Dual Head DVI, KVM and Audio Receiver PS5VD4A PS5VD4A Power Supply User Manual LDX-tX Rear LDX-tX FRONT LDX-RX Rear LDX-RX FRONT Long Range DVI-D and RS-232 Extender... -
Page 5: Installation
INSTALLATION 1. Turn off connected devices 2. Connect cables between signal source device and LDX-TX unit’s input ports 3. Connect cables between the LDX-RX unit’s output ports and end-point device 4. Connect LDX-TX and LDX-RX via CAT5e/6 cable 5. Connect power supply to either LDX-TX and LDX-RX units 6. - Page 6 INSTALLATION (continue) 1. Power off all devices. 2. Connect two DVI-D sources (computer) to the two DVI-D ports on the back of the transmitter. 3. Connect a USB source (computer) to the USB port on the transmitter. 4. Optionally connect RS232 for control functions. 5.
- Page 7 INSTALLATION (continue) 1. Power off all devices. 2. Connect two DVI-D sources (computer) to the four DVI-D ports on the back of the transmitter. 3. Connect a USB source (computer) to the USB port on the transmitter. 4. Optionally connect RS232 for control functions. 5.
- Page 8 INSTALLATION (continue) 1. Turn off connected devices. 2. Connect cables between signal source device and LDX-PLUS-TX unit’s input ports. 3. Connect cables between the LDX-PLUS-RX unit’s output ports and end-point device. 4. Connect LDX-PLUS-TX and LDX-PLUS-RX via CAT5e/6 cable. 5. Connect power supply to either LDX-PLUS-TX or LDX-PLUS-RX units. 6.
-
Page 9: Troubleshooting
Troubleshooting No Power • Make sure that the power adapter is securely connected to the power connector of the unit. • Check the output voltage of the power supply and make sure that the voltage value is around 12VDC. • Replace the power supply. No Video •... -
Page 10: Limited Warranty Statement
Limited warranty statement A. Extent of limited warranty SmartAVI, Inc. warrants to the end-user customers that the SmartAVI product specified above will be free from defects in materials and workmanship for the duration of 1 year, which duration begins on the date of purchase by the customer. Customer is responsible for maintaining proof of date of purchase. - Page 11 NOTICE The information contained in this document is subject to change without notice. SmartAVI makes no warranty of any kind with regard to this material, including but not limited to, implied warranties of merchantability and fitness for particular purpose. SmartAVI will not be liable for errors contained herein or for incidental or consequential damages in connection with the furnishing, performance or use of this material.
Need help?
Do you have a question about the LDX Series and is the answer not in the manual?
Questions and answers