Table of Contents
Advertisement
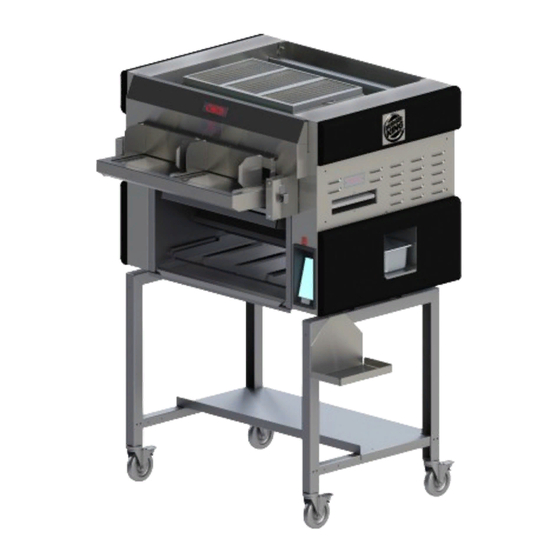
Model FH94 Electric
Owner's Manual
WARNING:
Improper installation, adjustment, alteration, maintenance can cause property damage, injury,
or death. Read the installation, operating and maintenance instructions thoroughly before
installing or servicing this equipment.
Broiler must be kept free of combustible materials, and the flow of ventilation air must not
be obstructed. Operating personnel must not perform any maintenance or repair functions.
Contact your Nieco Authorized Service Agent for service or repair.
Fill in the information bellow and have it handy when calling your authorized service agency for assistance.
The serial number is on the broiler rating plate on the back of the unit.
Purchased from: __________________________________________________________
Date of Purchase: _________________________________________________________
Model No.: _______________________________________________________________
Serial No.: _______________________________________________________________
IMPORTANT: RETAIN THIS MANUAL IN A SAFE PLACE FOR FUTURE REFERENCE
Advertisement
Table of Contents

Related Manuals for Nieco FH94 Electric


Summary of Contents for Nieco FH94 Electric
- Page 1 Broiler must be kept free of combustible materials, and the flow of ventilation air must not be obstructed. Operating personnel must not perform any maintenance or repair functions. Contact your Nieco Authorized Service Agent for service or repair. Fill in the information bellow and have it handy when calling your authorized service agency for assistance.
- Page 2 3. Operating personnel must not perform any maintenance or repair functions. Contact your Nieco Authorized Service Agent. 3. Do not use this appliance in an area where a water jet could be used.
-
Page 3: Table Of Contents
V. Parts List and Wiring Diagrams ....... 34–36 Model FH94 Electric... -
Page 4: General Information
This manual provides the safety, installation and operating procedures for the Nieco Automatic Broiler Model FH94. We recommend that all information contained in this manual be read prior to installing and operating the broiler. -
Page 5: C Service/Technical Assistance
General Information C. Service/Technical Assistance If you experience any problems with the installation or operation of your broiler, contact your local Nieco Authorized Service Agent. You may contact the factory direct at +1-707-284-7100 if you have trouble locating your local Authorized Nieco Service. - Page 6 • Use only genuine Nieco replacement parts for your broiler. Failure to do so will void the warranty and may significantly alter the performance of your broiler. The use of non-Nieco parts is capable of affecting these criteria, and may affect broiler performance, parts longevity and food safety.
-
Page 7: Machine Installation
Installation near combustible walls Installation near non-combustible walls and construction and construction Back of broiler 12" (305 mm) 0” (0 mm) Sides of broiler 12" (305 mm) 0” (0 mm) Front (Feed End) 12" (305 mm) 0” (0 mm) Model FH94 Electric... -
Page 8: Electrical Connection
An electrical wiring diagram can be found inside the control box. Note: Disconnect power before servicing. G. Pre-Operation Check Be sure that all parts are installed in the proper location: Ventilation is turned on Broiler is plugged in Model FH94 Electric... -
Page 9: Operation
Touch Screen Control Panel: • Controls all operation of the broiler • Turns on/off cook chamber The Touch Screen Control Panel takes approximately 30-45 seconds to power on after main power switch has been turned on. Model FH94 Electric... -
Page 10: Touch Screen Controls
Power Manager Settings Tap to access on/off for Access controls for cook chamber Temperature, Editing Recipes, and Calibration Cleaning Tap to access cleaning Default Password: 123 sequence visual guide. Factory Settings Not accessed for general operation purposes. Model FH94 Electric... -
Page 11: Powering The Broiler
Note: The Touch Screen Control Panel takes approximately 30-45 seconds to power on after main power switch has been turned on. 2. Use Touch Screen Control to turn on the LEFT/RIGHT cooking chambers. 3. Allow broiler to heat for 45 minutes before cooking. Model FH94 Electric... -
Page 12: Shutdown Procedures
FOR YOUR SAFETY: In the event or use gasoline or other flammable of a prolonged power failure, no vapors or liquids in the vicinity of this attempt should be made to operate or any other appliance. this appliance. Model FH94 Electric... -
Page 13: Basic Operation: On/Off
• Controls all Wait 30–45 Seconds for operation of the Touch Screen Control to broiler Power On • Turns on/off cook chamber Touch Power to Touch Toggle Switch To Turn Cooking Chambers On Turn On or Off Model FH94 Electric... -
Page 14: Selecting A Recipe
Click next recipe (semi-circle) to toggle and select the recipe for each Belt Lane. Lane 1 is the Left Belt Lane 2 is the Right Belt Touch to Toggle Recipe Selection For Left Belt Touch to Toggle Recipe Selection For Right Belt Model FH94 Electric... -
Page 15: Manager Settings Control Screen
2. Allow broiler to heat for 45 minutes. 3. Perform Cookout. 4. Adjust Recipe cook time as necessary to achieve BKC Cookout Specifications. Note: Calibration button is not currently used for the Calibration process. Recipe Settings Touch to enter the Recipe Screen Model FH94 Electric... -
Page 16: How To Adjust Recipe Cook Time
Tip: As a general guide, new recipe setting, then adjust time/speed in 5 ← touch to return to the second increments to Manager Settings Screen. achieve desired product temperature. Edit Name Touch Recipe Name to edit Model FH94 Electric... -
Page 17: How To Add A New Recipe
Save achieve desired product Select to confirm temperature. new recipe setting, then ← touch to return to the Deleting a Recipe Manager Settings Screen. Touch and hold Recipe Name, then touch Yes to Delete selected Recipe. Model FH94 Electric... -
Page 18: Assembly/Disassembly And Cleaning
THE BROILER UNTIL IT IS FULLY BROILER. COOL. FAILURE TO FOLLOW FAILURE TO DO SO COULD POSE THIS INSTRUCTION MAY RESULT A FIRE SAFETY HAZARD. FAILURE TO DO SO MAY RESULT IN SEVERE INJURY. IN OPERATIONAL PROBLEMS. Model FH94 Electric... -
Page 19: Cleaning Process Visual Guide
You can access a visual guide to the cleaning process from the touch screen control home screen. The images reflect the same process contained in this manual and in the FH94 cleaning chart poster. Every 4 Hours Daily Cleaning Touch to access cleaning sequence visual guide. Weekly Monthly Model FH94 Electric... - Page 20 When to clean the part The tools needed to clean the part Picture of the part to be removed and cleaned How to remove and clean the parts Step in Cleaning Chart Frequency Color Code Every 4 Hours Daily Weekly Monthly Model FH94 Electric...
- Page 21 This warning symbol shows a step in the procedure that must be followed exactly or broiler performance could be affected. This “puzzle” symbol shows an important step in the reassembly procedure to follow carefully. Model FH94 Electric...
-
Page 22: Clean Every 4 Hours
Clean: Every 4 hours Feeder Cover Feed End Tools 3-Compartment Sink Scrub Pad Instructions 1. Slide the feeder cover towards you until it comes off. 2. Wash with scrub pad, rinse, and sanitize in the 3-compartment sink. Model FH94 Electric... - Page 23 Clean: Every 4 hours Feeder Housing Enclosure Feed End Tools 3-Compartment Sink Scrub Pad Instructions 1. Lift and remove. 2. Wash with scrub pad, rinse, and sanitize in the 3-compartment sink. REASSEMBLY: Hang feeder housings on brackets. Model FH94 Electric...
-
Page 24: Clean Daily
Make sure lower heat reflector is cool before putting in water or it may warp the pans. 2. Take to sink area and spray with degreaser. 3. Wash with scrub pad, rinse, and sanitize in the 3-compartment sink. Model FH94 Electric... - Page 25 Lower Drip Tray Feed End Tools Scrub Pad Heat-Resistant Degreaser Gloves 3-Compartment Sink Instructions 1. Slide tray out. 2. Take to sink area and spray with degreaser. 3. Wash with scrub pad, rinse, and sanitize in the 3-compartment sink. Model FH94 Electric...
- Page 26 Clean: DAILY Sludge Tray Discharge End Tools 3-Compartment Sink Scrub Pad Degreaser Instructions 1. Slide out. 2. Take to sink area and spray with degreaser. 3. Wash with scrub pad, rinse, and sanitize in the 3-compartment sink. Model FH94 Electric...
- Page 27 Discharge End Tools 3-Compartment Sink Scrub Pad Degreaser Instructions 1. Lift up and out of broiler. 2. Take to sink area and spray with degreaser. 3. Wash with scrub pad, rinse, and sanitize in the 3-compartment sink. Model FH94 Electric...
- Page 28 Discharge End Tools 3-Compartment Sink Scrub Pad Degreaser Instructions 1. Lift stripper blade up and swing out. 2. Take to sink area and spray with degreaser. 3. Wash with scrub pad, rinse, and sanitize in the 3-compartment sink. Model FH94 Electric...
- Page 29 Discharge End Tools Airbox Wrench/ Shaft Cleaning Tool Belt Scraper Tool Instructions CAUTION: EXTREMELY HOT. Allow to cool before handling. 1. Remove carbon build-up from belts and plates by scraping with supplied cleaning tools and brushes, or equivalent. Model FH94 Electric...
- Page 30 Allow to cool before handling. 1. Lift Incendalyst up and off. ™ 2. Rinse clean with water only. The Incendalyst ™ may be soaked, then rinsed if needed. 3. Shake out excess water thoroughly. CLEAN WITH WATER ONLY! Model FH94 Electric...
-
Page 31: Clean Weekly
1. Slide upper element reflector out. Make sure upper element reflector is cool before putting in water or it may warp. 2. Take to sink area and spray with degreaser. 3. Wash with scrub pad, rinse, and sanitize in the 3-compartment sink. Model FH94 Electric... -
Page 32: Clean Monthly
1. Remove air hose with supplied wrench or equivalent. REASSEMBLY: Reinstall air hose, hand-tighten only Remove Upper Airbox Clean: MONTHLY Tools Heat-Resistant Gloves Instructions CAUTION: EXTREMELY HOT. Allow to cool before handling. 1. Lift out airbox by handle. Model FH94 Electric... - Page 33 REASSEMBLY: Reinstall air hose, hand-tighten only Clean: MONTHLY Clean Upper Burner Tools Cleaning Brush Instructions CAUTION: EXTREMELY HOT. Allow to cool before handling. 1. Clean with supplied wire brush or equivalent, making sure holes are clear. Model FH94 Electric...
-
Page 34: Parts List And Wiring Diagrams
FH94E III. OPERATION Kitchen Theater Look Cleaning Guide Clean: DAILY Cosmetic Surfaces & Glass Door Surfaces Tools Towel Degreaser Instructions Viewing Window First, open the glass door gently, allowing it to seat in the downward position. Model FH94 Electric... - Page 35 3. Wipe the glass with a dry towel to remove any soapy moisture Exterior Cosmetic Surfaces Wipe down exterior cosmetic surfaces with a damp cloth. Model FH94 Electric...
- Page 36 END COVER - TEMINAL BLOCK 25333 SHAFT CLEANING TOOL 4405-18 TERMINAL BLOCK - GROUND - MAIN POWER 25332 TOLL, COMBINATION WRENCH 18686 TERMINAL BLOCK-GRAY 23307 CLEANING BRUSH 18687 END COVER - TEMINAL BLOCK 9133 ROD BELT PLIERS Model FH94 Electric...
- Page 37 27922 COVER, CENTER, LH & RH SIDE, BOH 27940 FEEDER MOUNTING BRACKET - RH 27822 LOWER SHELF, SQUARE STAND 27941 FEEDER MOUNTING BRACKET - LH 28470 BRACKET, STACKING PHU PAN, FOR SQUARE STAND 27898 BRACKET, CLUTCH MOUNTING Model FH94 Electric...
- Page 38 FH94E III. OPERATION Wiring Diagram Model FH94 Electric...
- Page 39 FH94E III. OPERATION Wiring Diagram Model FH94 Electric...
- Page 40 01.2021 Initial Version 09.2021 Front of House Kitchen Theater Kit Cleaning Instructions added 7950 Cameron Drive Windsor, CA 95492 Phone: 707.284.7100 Fax: 707.284.7430 service@nieco.com Printed in the USA © 2022 Nieco, LLC All Rights Reserved P/N 99107 Model FH94 Electric...
Need help?
Do you have a question about the FH94 Electric and is the answer not in the manual?
Questions and answers