Table of Contents
Advertisement
Advertisement
Table of Contents

Subscribe to Our Youtube Channel
Related Manuals for Lister Petter TS1


Summary of Contents for Lister Petter TS1
- Page 1 T SERIES TS, TR, TX Engines Workshop Manual P027-08270 | edition 8 | April 2021...
- Page 2 The information, specifications, illustrations, instructions and statements contained within this publication are given with Lister Petter Power Systems' best intentions and are believed to be correct at the time of going to press. Our policy is one of continued development and we reserve the right to amend any technical information with or without prior notice.
-
Page 3: Table Of Contents
TS, TR, TX engines workshop manual Contents Introduction General Information Safety Precautions and Safe Working Practices 2.43 Flywheel Housing - TX Safety Symbols 2.43 Main Bearing Housing Engine Features 2.44 The Crankshaft Engine Identification 2.45 Crankshaft End Float Battery Details 2.46 Checking Bearing Clearance 2.47 Crankshaft Main Bearings 2.48 Gear End Drives... - Page 4 TS, TR, TX engines workshop manual Flywheel Charge Windings 11. Conversion Factors Charge Windings 11.1 Formulae Syncro Charge Windings 11.2 Conversion Factors Nicsa Charge Windings 12. Index Electrical Wiring Diagrams Wiring Diagrams 10. Technical Data 10.1 Engine Mechanical Data - TS 10.2 Engine Mechanical Data - TR 10.3...
-
Page 5: Introduction
The purpose of this manual is to give information, operating, maintenance and repair procedures for the 'T' Series of If problems occur with your engine, or any of the Lister Petter engines. Power Systems approved accessories fitted to it, your local Lister The manual is designed primarily for use by qualified technicians Petter Power Systems Distributor should be consulted. -
Page 6: General Information
The engine lifting eyes fitted to the engine are suitable for lifting the engine and accessory assemblies originally fitted Follow All Safety Instructions by Lister Petter. They must not be used to lift the complete plant. a. Carefully read all safety messages in this manual and the g. - Page 7 TS, TR, TX engines workshop manual c. Manufacturers Safety Data Sheets will provide specific details d. Never flash any connection to check the current flow or of the physical and health hazards, safety and emergency experiment with any adjustments or repairs to the system. procedures and any necessary personal protection equipment e.
-
Page 8: Safety Symbols
1.2 Safety Symbols 1.2 SAFETY SYMBOLS This section identifies the ISO 8999 symbols currently used by Lister Petter Power Systems. This section identifies the ISO 8999 symbols currently used by Lister Petter Power Systems. -
Page 9: Engine Features
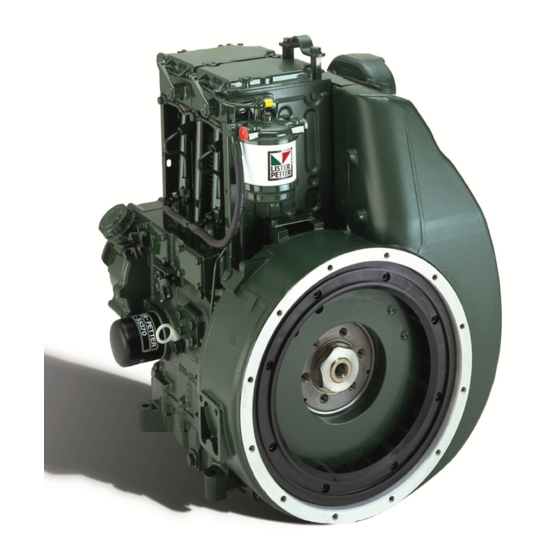
TS, TR, TX engines workshop manual T SERIES ENGINES WORKSHOP MANUAL 1.3 Engine Features 1.3 ENGINE FEATURES TS/TR2 TS/TR1 TS/TR3... -
Page 10: Engine Identification
For temperatures below -18°C (0°F), high discharge, low resistance Arctic or Alkaline batteries must be used. Lister Petter Power Systems recommend that a battery should WARNING provide a minimum cranking period of 60 seconds from a... - Page 11 TS, TR, TX engines workshop manual 1. Connect one end of the jumper lead to the positive (+) post The battery electrolyte level should be checked every 500 hours of the slave battery. and distilled water added, if necessary, to bring the level to the 2.
-
Page 12: Engine Servicing & Adjustments
T SERIES ENGINES WORKSHOP MANUAL 2. ENGINE SERVICING & ADJUSTMENTS TS, TR, TX engines workshop manual 2.1 PRELIMINARY INSTRUCTIONS the flexible element. Care must be taken to ensure all joints are kept air 2. Engine Servicing & Adjustments WARNING tight. Maintenance must be performed by qualified The standard air cleaner is fitted to the air manifold persons who are conversant with the hazards... -
Page 13: The Manifolds
20 revolutions to prime the fuel and lubrication Heavy exhaust silencers and air cleaners must systems. be remotely mounted, or mounted on the engine 20 revolutions to prime the fuel and lubrication Heavy exhaust silencers and air cleaners must 2.Withdraw the plunger (A) and fill one third of the using a special bracket, and connected by means systems. -
Page 14: The Air Cowling
T SERIES ENGINES WORKSHOP MANUAL 3.Replace the glowpiug cable. TS, TR, TX engines workshop manual T SERIES ENGINES WORKSHOP MANUAL 4.Replace the axial fan air cowling. 2.5 THE AIR COWLING 2.5 The Air Cowling 3.Replace the glowpiug cable. Three sides of the engine are encased in an air 4.Replace the axial fan air cowling. -
Page 15: Drive Belt Tension
Removal of a Cylinder Head Drawing SK2204/91 is available from Lister Petter Drawing SK2204/91 is available from Lister Petter Power Systems for this purpose. Power Systems for this purpose. 1. Remove the cylinder head cover. -
Page 16: Cylinder Head Clearance
cylinder head. their position for re-assembly. With the cylinder head in position the air baffle/s 2.12 CYLINDER HEAD CLEARANCE may be removed by removing the split pin. TS, TR, TX engines workshop manual 9.Remove the push rods and tubes and place TS and TR Engines them with their respective cylinder head if further 1.With the head removed smear a very small... -
Page 17: The Valve Rocker Stub Shafts - Ts/Tr
TS, TR, TX engines workshop manual Refitting the Stub Shaft 3. Refer to 'Figure 2.12.1' and using a very small amount of grease place the two pieces of wire on the piston crown. Before fitting check the oil holes are clear, fit a new 'O' ring The wires must be at each side of the gudgeon pin axis and to the recess on the inside face of the stub shaft and coat the 90°... -
Page 18: The Valves
3.Place These measurements also apply to cylinder heads valve stem shield. and s fitted with pre-finished valve guides that have been 9.Turn the cylinder head over and remove the 4.Fit th obtained from Lister Petter Power Systems. valve. (E) o... -
Page 19: The Valve Seats
Exhaust valves: 0.89-1.14mm (0.035-0.045in). The pe 36 00480 TS2 36 00020 TR2 (F) into the sleeve. 36 00199 TS1 36 00025 TR1 increas 36 00307 TS3 36 00043 TR3 8. Locate the mandrel through the guide. 36 00480 TS2 36 00020 TR2 9. -
Page 20: Valve Clearance
5.Re-check to ensure the clearance is correct. trave T SERIES ENGINES WORKSHOP MANUAL 6.Repeat the procedure for both valves in all 5.Tight cylinders. screw TX Eng WARNING ure the TS, TR, TX engines workshop manual 2.19 THE DECOMPRESSOR 6.Place 302°F) The valve guide will be damaged if the mandrel positi chilled... -
Page 21: The Crankshaft Pulley - Tx
over is 3.Inser the pin to take up the valve clearance. The Service Tool 317-50063 (TS/TR) or 317-50065 ure the the s 8.Turn the pin a further half a turn and tighten the (TX), is used to protect the oil seal when the end 4.Rem locknut. -
Page 22: The Fuel Tank
TS, TR, TX engines workshop manual TS/TR Engines 5. Remove the bolts securing the top of the tank to the cylinder head cover and air cowl bracket. 4. Replace the catch pin and spring pin or grub screw. Replacing the Fuel Tank - TS/TR TX Engines 1. -
Page 23: Priming The Fuel System
Water is drained from Several types of filter/agglomerator have been used but the Figure 2.24.1 Priming the Fuel System 38 02253 TS1 hours, or more frequently if for any reason the engines below and differs from the older AC Delco... -
Page 24: The Fuel Injector
No screw is any Lister Petter Power Systems distributor. 2. Remove the fuel pipe between the fuel pump and injector; the engines and they must not be mixed with any they must not be mixed with any earlier types on an engine. -
Page 25: The Fuel Pump
section. Care must be taken to ensure that any part of WARNING the hand is not likely to become trapped between the two parts of the slide hammer while it is Under no circumstances allow unprotected skin TS, TR, TX engines workshop manual being used. - Page 26 2.27 THE FUEL PUMP The 'ring' type are available in 0.127, 0.762, 1.016 Fuel P 40 00213 TS1 40 00113 TR1 and 1.276mm sizes and were first fitted on: 40 00297 TS2 40 00135 TR2 It is re...
-
Page 27: Fuel Pump Timing
B - Later TS/TR and all TX 6.Re-connect the speeder spring to the spigot. If the spigot was turned when the pumps were TS, TR, TX engines workshop manual removed it must be turned until the hole axis is Figure 02.28.1 Fuel Pump Components at 90°... - Page 28 The values given in the first table apply to early TS/TR engines Approximately 1 of flywheel movement can be with serial numbers up to those shown. obtained with a 0.127mm (0.005in) shim. 36 00489 TS1 36 03079 TR1 13.Remove the gauge and replace the pump to 36 00314 TS2...
-
Page 29: Governor Modifications
1.If 'ri or later engines. Figure 2.27.1 Fuel Pump Linkage onto Figure 2.29.1 Fuel Pump Linkage 35 01614 TS1 36 00001 TR1 A - Early TS/TR A - Early TS/TR; B - Later TS/TR an all TX pump 35 07495 TS2... -
Page 30: Setting The Governor
TS, TR, TX engines workshop manual Changing Governor Weights Notes: The speed ranges given in the table do not necessarily relate to the full load build A table of governor weight and spring combinations is given in speeds due to flywheel limitations. T SERIES ENGINES WORKSHOP MANUAL "Governing Ranges to BS5514". - Page 31 Extreme care must be taken to ensure that the governor is correctly set for the engine type CAUTION and build. T SERIES ENGINES WORKSHOP MANUAL Extreme care must be taken to ensure that the TS, TR, TX engines workshop manual T SERIES ENGINES WORKSHOP MANUAL governor is correctly set for the engine type Governor 'E' Setting...
- Page 32 T SERIES ENGINES WORKSHOP MANUAL On some engines a tamperproof setscrew is fitted. screw (A) and rotate the plate (B) until the fuel TS, TR, TX engines workshop manual pump calibration marks are aligned. T SERIES ENGINES WORKSHOP MANUAL On some engines a tamperproof setscrew is fitted.
-
Page 33: Governor 'G' Setting And Timing Tables
TS, TR, TX engines workshop manual 2.32 Governor 'G' Setting and Timing Tables Timing Speed/ Load Builds BTDC Class Rating Setting 01, 02 20° 2500 B1 90/100% 0.040" Timing Speed/ Load Builds 23° 3000 B1 90/100% 0.055" BTDC Class Rating Setting 06, 07 20°... -
Page 34: Speed Adjustment
TS engines: Fixed Speed Adjustment Fixed Speed Adjustment The Engine Control 35 01203 TS1 The two screws are adjusted and locked against the The control knob, spindle and plate assembly was The two screws are adjusted and locked against the speed 35 06483 TS2 speed control lever to give the full on-load speed. -
Page 35: The Fuel Pump Tappet
1.Remove the gear end cover. 2.35 THE FUEL PUMP TAPPET 2.Rem 2.Remove No.1 cylinder fuel pump inspection Removing a Tappet 3.Rem door. 4.Rem 1.Remove the fuel pump. 3.Move the automatic excess fuel lever (B) along TS, TR, TX engines workshop manual 5.If the 2.With the fuel pump removed use long nosed the shaft towards the outside of the crankcase... -
Page 36: The Camshaft Gearwheel
TS, TR, TX engines workshop manual T SERIES ENGINES WORKSHOP MANUAL Inspecting the Camshaft 1. Remove the setscrew (A) from the end cover. 2. Use a suitable rod through the hole to push the camshaft a. Examine the camshaft bush for scars or wear. gearwheel as far as it will-go towards the flywheel end. -
Page 37: The Camshaft Bushes
5.Assemble the bridge (8) and thrust nut (9) to the of the gear at any time. screw 6.Using the correct size of spanner tighten the Changing the Camshaft Ball Race thrust nut until the bush is removed. TS, TR, TX engines workshop manual 1.Remove the retaining pin from the gearwheel 7.Remove the tool. -
Page 38: The Cylinder Barrel
bearing is fully located in the centre web bearing Notes: housing. The camshaft bush tool, 317-50006, has been 5.Remove the complete tool. replaced by 393235; both are described and TS, TR, TX engines workshop manual either can be used. The legend numbers Flywheel End Bush Removal referred to in the illustration and text are also 1.Place the plug (A) against the bush. -
Page 39: The Piston And Connecting Rod
TS, TR, TX engines workshop manual The Piston Rings 7. On TX engines: Clean and dry the cylinder head clearance shims, the cylinder Firing Ring barrel and crankcase mating surfaces. Place the shims, dry, onto the bottom of the cylinder barrel. A barrel lapped chrome ring is situated at the top of the piston 8. -
Page 40: The Flywheel
10. Remove the Woodruff key. washer and nut. interchangeable. the stator and for personal safety. 35 00630 TS1 36 00255 TR1 ne for The flywheel is keyed on to the crankshaft and held 9.Support the flywheel at all times and keeping it 9.Lift o... -
Page 41: Flywheel Housing - Tx
TS, TR, TX engines workshop manual Removing the Fanshroud Refitting the Flywheel Housing 1. Remove the flywheel. Refitting is carried out in the reverse order with the self-locking 2. Remove the two nuts and then remove the rectifier/regulator setscrews torque loaded to 88.0Nm (65.0lbf ft). cover. -
Page 42: The Crankshaft
3. Remove the bolts securing the main bearing housing. retaining bolt up to the following engines: housing. 4. On early TS engines remove the charge winding adaptor 35 00630 TS1 36 00255 TR1 4.On early TS engines remove the charge winding adapter. - Page 43 punc through the gear end bearing as it is quite easy to 10.Rep score the bearing shell with the crankshaft. 11.Che 5.With the fuel pump bolt inserted in the centre 12.Fit t TS, TR, TX engines workshop manual bearing dowel (B), insert the dowel through 13.Hea the crankcase wall and into the centre bearing fit it...
-
Page 44: Crankshaft End Float
TS, TR, TX engines workshop manual T SERIES ENGINES WORKSHOP MANUAL 2.45 Crankshaft End Float 2.47 Crankshaft Main Bearings Notes: 2.47 CRANKSHAFT MAIN BEARINGS 1. Set a dial test indicator so that the actuating plunger makes On current engines 0.127 and 0.254mm (0.005 Main Bearing Tool 393235 Main Bearing Tool 393235 contact with the flywheel end face of the crankshaft. - Page 45 dropping onto the new bearing. Flywheel End Main Bearing Removal 12.Check that the oil holes in the housing and bearings align. 1.Remove the thrustwashers and the oil seal from the bearing housing. TS, TR, TX engines workshop manual Intermediate Main Bearing 2.Fit the nut (2) onto the screw (1).
-
Page 46: Gear End Drives
Flywheel End Main Bearing Removal / 2.Place the bolt through the boss and into the 3. With the engine decompressed turn the flywheel using a Flywheel End Main Bearing Removal/ Genuine Lister Petter Power Systems approved Replacement crankcase. 65mm socket (317-50052). -
Page 47: The Oil Dipstick
Nylon handled dipsticks have been fitted to all TR and TX nut to reces engines from: engines and were introduced on TS engines from: 2.Repla 35 01426 TS1 35 01426 TS1 3.Repla 35 06750 TS2 35 06750 TS2 the su... -
Page 48: The Oil Strainer And Pump
Replacing the Oil Sump 1.Using a new joint, replace the sump with the Oil Pump Lip Se recess corner adjacent to the oil pump. The camshaft operated oil pumps are the The se TS, TR, TX engines workshop manual 2.Replace the four long corner bolts finger tight. self-regulating, plunger type and they are not supplie 3.Replace the two bolts through the fanshroud into... - Page 49 TS, TR, TX engines workshop manual The Screw Type Seal aluminium oxide powder, failing this domestic scouring powder may be used. Fold a strip of rag some 400 mm long by 50 mm The crankcase may be sealed at the crankshaft by a screw type wide lengthwise into a 10 mm belt and wet it with the abrasive oil seal and a felt ring.
-
Page 50: Engine Fluids
Oils designed for this service meet all performance requirements of API Service Category CD. Note: US 'S' grade oils are for gasolene engines and are not recommended for Lister Petter API Service Category CE - 1983: Power Systems diesel engines. -
Page 51: Engine Fluids - Fuel
The fuel must be a distillate, and not a residual oil or blend. light duty load applications. Vaporising oils are not suitable as fuels for Lister Petter Power 5. For engines in long running installations Lister Petter Power Systems engines. - Page 52 BSMA 100 Class M1 for marine use. The fuel must be a distillate, and not a residual oil or blend. CAPTION Vaporising oils are not suitable as fuels for Lister Petter Power Systems engines. Wax formation can rapidly reduce the flow of fuel The user is cautioned that although the engines may operate through the fuel filter element.
-
Page 53: Operating Instructions
TS, TR, TX engines workshop manual 4. Operating Instructions T SERIES ENGINES WORKSHOP MANUAL T SERIES ENGINES WORKSHOP MANUAL 4.1 Preliminary Instructions 4. OPERATING INSTRUCTIONS WARNING The following information is of a general nature and should Do not attempt to use a handle if it is damaged in any 4.1 PRELIMINARY INSTRUCTIONS 4. -
Page 54: Hand Starting
TS, TR, TX engines workshop manual T SERIES ENGINES WORKSHOP MANUAL T SERIES ENGINES WORKSHOP MANUAL Figure 4.1.3 Cold Start Figure 4.2.3 Decompressor Lever Figure 4.1.3 Cold Start Figure 4.2.3 Decompressor Lever A - TS/TR; B - TX A - TS/TR; B - TX 3.Replace the plunger and inject the oil just before 3.Replace the plunger and inject the oil just before 4. -
Page 55: Electric Starting
8.If a variable speed control is fitted reduce the 4.If the ambient temperature is below -10°C WARNING Figure 4.3.2 The Engine Control speed as required. (14°F) refer to items 2. and 3. in "Cold Starting Do not pull the starting handle away from the Aid - TS/TR". -
Page 56: Routine Maintenance
The Use of Genuine Parts Routine maintenance must be performed by qualified Parts that have not been approved by the Lister Petter Power persons who are conversant with the hazards of oil, fuel, Systems organisation cannot be relied upon for correct material, electricity and machinery. -
Page 57: Spanner Torque Settings
The above and the following items. Governor link adjusting screw Check the valve clearances. Polypropylene flywheel fan - TS1 Decarbonise if the engine performance has deteriorated. Injector stud nut - TX Clean the cylinder and cylinder head cooling fins under dusty Injector leak-off banjo screw conditions. -
Page 58: Jointing Compounds
TS, TR, TX engines workshop manual 5.4 Jointing Compounds End Cover Bush - TS/TR Coat the outside diameter of the bush before assembly with Some engines will have been assembled with jointing Loctite 601 or Three Bond 1303. compounds that have been superseded Providing ail traces of Speeder Spring Anchor Pin the old compound and joint are removed the later specified Coat the threads with Loctite 222 or Three Bond 1344 before... - Page 59 TS, TR, TX engines workshop manual The variations from the standard dimensions are: Non-standard sizes are marked, by the amount they are under 0.010 in (0.254 mm) or oversize, as a suffix to the part numbers which can be found 0.020 in (0.508 mm) in the following locations: 0.030 in (0.762 mm)
- Page 60 TS, TR, TX engines workshop manual TS - All Builds 98.450 Cylinder Bore 98.475 0.192 0.28 0.127 98.323 Piston Diameter - bottom of skirt across thrust face 98.283 0.30 0.38 Firing Ring Gap 0.85 0.50 0.66 0.20 0.28 Compression Ring Gap 0.90 0.40 0.56...
- Page 61 TS, TR, TX engines workshop manual 24.987 Fuel Pump Tappet Diameter 24.962 0.013 0.10 0.068 25.000 Fuel Pump Tappet Guide Bore 25.030 15.850 Oil Pump Tappet Diameter 15.830 0.025 0.12 0.070 15.875 Oil Pump Tappet Crankcase Bore 15.900 29.960 Oil Pump Plunger Diameter 29.935 0.040 0.13...
- Page 62 TS, TR, TX engines workshop manual 67.2080 Big End Bore - in rod 67.2210 1.8352 0.0376 Bearing Shell Thickness 0.14 1.8263 0.0814 63.5000 Crankpin Diameter 63.4870 67.196 Main Bearing Housing Bore 67.221 1.8352 0.0386 Bearing Shell Thickness 0.16 1.8263 0.0934 63.4870 Crankshaft Journal Diameter 63.4750...
-
Page 63: Long Term Storage
TS, TR, TX engines workshop manual 5.5 Long Term Storage Returning the Engine to Service Refer to the appropriate sections for the relevant detailed Preparing the Engine for Storage instructions as necessary to complete this work. The following routine should be carried out when it is known a. -
Page 64: Troubleshooting
This will ensure they are refitted in the original orientation. Electrical wiring diagrams can be found in section 9. 4. When electrical troubleshooting always start at the battery If you are in any doubt, contact your local Lister Petter Power first. Systems distributor. - Page 65 White Exhaust Smoke Water in the fuel system. Drain, flush, refill and prime the filter. Faulty fuel pump. Contact a Lister Petter Power Systems distributor. Light Blue Exhaust Smoke Generally as a result of light load. Investigate the load management programme.
- Page 66 TS, TR, TX engines workshop manual Problem Method of Correction High Fuel Consumption Incorrect type of fuel. Drain the system, add fuel of the correct specification. Overload. Reduce the load. Dirty or faulty injector. Clean or replace. Choked air filter. Dismantle and clean the cap and element.
-
Page 67: Dismantle & Rebuild
TS, TR, TX engines workshop manual 7. Dismantle & Rebuild TS/TR Dismantle and Rebuild 21. Fit the service tool (317-50063) and remove the end cover. 22. Remove the thrust washer and shim from the camshaft. These notes are of a general nature and are included as an aide 23. - Page 68 TS, TR, TX engines workshop manual 57. Remove the rectifier from the flywheel housing. 14. Replace the flywheel key. 58. Remove the cable retaining clip from inside the housing. 15. Heat the crankshaft pinion gear and ensure the "0" timing 59.
-
Page 69: Tx Dismantle And Rebuild
TS, TR, TX engines workshop manual TX Dismantle and Rebuild It will be necessary to open the governor weights to ensure the assembly is pushed fully on to the shaft. These notes are of a general nature and are included as an aide 47. - Page 70 TS, TR, TX engines workshop manual 38. Stand the engine on its flywheel using a suitable piece of 2. With the sump removed grease the steel backs of the split timber between the recessed flywheel and the plinth. thrust washers and refit them into the gear end of the 39.
- Page 71 TS, TR, TX engines workshop manual 31. Rotate the crankcase to check for free movement. 52. Check the cylinder head clearance. 32. Repeat the procedure for the remaining cylinders. 53. With the cylinder head removed, replace the push rods 33. Replace the oil pump push rod and then the pump. and tubes: a very small mount of grease added to the tube 34.
-
Page 72: Flywheel Charge Windings
1. Syncro - TS and TR up to, but not on, the engine numbers r/min Amps shown. 1000 2. Nicsa - TS and TR first fitted on the following engines: 41 00433 TS1 41 00240 TR1 1500 12.5 41 01651 TS2 41 00281 TR2... - Page 73 TS, TR, TX engines workshop manual T SERIES ENGINES WORKSHOP MANUAL Syncro Fault Finding Flow Charts cro au t Fin ing Flow Charts Syncro Fault Finding Flow Charts...
- Page 74 TS, TR, TX engines workshop manual T SERIES ENGINES WORKSHOP MANUAL Syncro Fault Finding Flow Charts Syncro Fault Finding Flow Charts Flo C...
-
Page 75: Nicsa Charge Windings
T SERIES ENGINES WORKSHOP MANUAL TS, TR, TX engines workshop manual 8.3 NICSA CHARGE WINDINGS Stator Winding Resistance at 20°C (68°F) Fault Finding Leads Resistance The most common faults associated with this 8.3 Nicsa Charge Windings Stator Winding Resistance at 20°C (68°F) Yellow to Yellow 0.45 - 0.55 system are dealt with in the flow charts on the... - Page 76 TS, TR, TX engines workshop manual T SERIES ENGINES WORKSHOP MANUAL Nicsa Fault Finding Flow Charts Nicsa Fault Finding Flow Charts...
- Page 77 TS, TR, TX engines workshop manual T SERIES ENGINES WORKSHOP MANUAL Nicsa Fault Finding Flow Charts Nicsa Fault Finding Flow Charts...
- Page 78 TS, TR, TX engines workshop manual T SERIES ENGINES WORKSHOP MANUAL Nicsa Fault Finding Flow Charts Nicsa Fault Finding Flow Chart...
-
Page 79: Electrical Wiring Diagrams
TS, TR, TX engines workshop manual 9. Electrical Wiring Diagrams 9.1 Wiring Diagrams Cable Colour Code for all Diagrams All cables must be PVC insulated automobile cable to BS6862. Red = Red The cable sizes given relate to the cables between the control Y = Yellow panel, or loose components, and the engine being a maximum B = Black... - Page 80 TS, TR, TX engines workshop manual ct ical Wiring i g T SERIES ENGINES WORKSHOP MANUAL...
- Page 81 TS, TR, TX engines workshop manual Elect i al Wiring Diagram T SERIES ENGINES WORKSHOP MANUAL...
- Page 82 TS, TR, TX engines workshop manual ctr ca Wi ing Diagrams T SERIES ENGINES WORKSHOP MANUAL...
- Page 83 TS, TR, TX engines workshop manual Electrical Wiring iagram T SERIES ENGINES WORKSHOP MANUAL...
- Page 84 TS, TR, TX engines workshop manual T SERIES ENGINES WORKSHOP MANUAL ect ica Wiring Diagrams...
- Page 85 TS, TR, TX engines workshop manual T SERIES ENGINES WORKSHOP MANUAL...
-
Page 86: Technical Data
TS, TR, TX engines workshop manual 10. T echnical Data 10.1 Engine Mechanical Data - TS Injection Direct Direct Direct Cooling Cooling fan Flywheel Flywheel Flywheel Direction of rotation - looking on flywheel end Anti clockwise Anti clockwise Anti clockwise 95.25 95.25 95.25... -
Page 87: Engine Mechanical Data - Tr
TS, TR, TX engines workshop manual 10.2 Engine Mechanical Data - TR Injection Direct Direct Direct Cooling Cooling fan Flywheel Flywheel Flywheel Direction of rotation - looking on flywheel end Anti clockwise Anti clockwise Anti clockwise 98.42 98.42 98.42 Nominal bore - not to be used for machining purposes 3.875 3.875 3.875... -
Page 88: Engine Mechanical Data - Tx
TS, TR, TX engines workshop manual 10.3 Engine Mechanical Data - TX Injection Direct Direct Cooling Cooling fan Axial Axial Direction of rotation - looking on flywheel end Anti clockwise Anti clockwise 100.00 100.00 Nominal bore - not to be used for machining purposes 3.937 3.937 101.6... -
Page 89: Builds - Ts
Where the build number is preceded by a 9 this indicates that the engine is either of a non-standard configuration, or contains non-standard parts or accessories. When new parts are required for such a build it is suggested that reference be made to Lister Petter Power Systems to determine the exact engine specification and which parts are non-standard. -
Page 90: Builds - Tr
Where the build number is preceded by a 9 this indicates that the engine is either of a non-standard configuration, or contains non-standard parts or accessories. When new parts are required for such a build it is suggested that reference be made to Lister Petter Power Systems to determine the exact engine specification and which parts are non-standard. -
Page 91: Builds - Tx
Where an engine number appears with GTS this indicates that it was built into a generating set by Lister Petter Power Systems. Some builds may not be available in all cylinder configurations. -
Page 92: Formulae
TS, TR, TX engines workshop manual 11. Conversion Factors 11.1 Formulae Piston Speed BMEP kW x 60000 x 20000 stroke (mm) x r/min Bar = metres/second = 30000 Cylinders x r/min x bore area (mm ) x stroke (mm) bhp x 792000 stroke (in) x r/min lbf/in feet/minute =... -
Page 93: Conversion Factors
TS, TR, TX engines workshop manual Calorific Value Of Fuel Intermittent Power kJ/kg - 42800 1.1bhp = 1.115CV = 0.821kW Btu/lb - 18400 1.1kW = 1.474bhp = 1.495CV 1.1CV = 1.085bhp = 0.810kW 1CV = 1CH = 1PS Air Density = 1.205kg/m3 = 0.0752Ib/ft3 Continuous Power 1bhp = 1.014CV = 0.746kW... - Page 94 TS, TR, TX engines workshop manual Linear Velocity metre per second, m/s foot per second, ft/s foot per minute, ft/m inch per second, in/s 1 metre/second = 3.2808 196.850 39.3701 1 foot/second = 0.3048 60.000 12.0000 1 foot/minute = 0.0051 0.0167 0.2000 1 inch/second =...
- Page 95 TS, TR, TX engines workshop manual Pressure - Table 3 inch of water, foot of water, millimetre of mercury, inch of mercury, in H ft H mm Hg in Hg 1 in H 0.0833 1.8683 0.0735 1 ft H 12.000 22.4198 0.8827 1 mm H...
- Page 96 TS, TR, TX engines workshop manual Power - Table 1 kilowatt, metric horsepower, brake horsepower, British thermal unit per hour, Btu h 1 kW 1.3596 1.3410 3412.14 1 CV 0.7355 0.9863 2509.63 1 bhp 0.7457 1.0139 2544.43 1 Btu h 0.00029 3.9846 x 10 3.9301 x 10...
- Page 97 TS, TR, TX engines workshop manual 12. Index Agglomerator 23 Electrical Wiring Diagrams 79 Air Baffles 14 Electric Start 55 Air Cleaner 12 End Cover 21 Air Cowling 14 End Cover Oil Seal 22 Air Density 93 Engine Control 34 Associated Publications 2 Engine Features 9 Axial Fan 14...
- Page 98 TS, TR, TX engines workshop manual Injector Back Pressure 25 Injector Setting 86 Rate of Flow - Volume 94 Introduction 5 Rocker Stub Shaft 17 Rotary Oil Seal 49 Routine Maintenance 56 Jointing Compounds 58 Safety Precautions 6 Safety Precautions and Safe Working Practices 6 Safety Symbols 8 Lift Pump 23 Safe Working Practices 6...
- Page 99 TS, TR, TX engines workshop manual...
- Page 100 TS, TR, TX engines workshop manual P027-08270 | edition 8 | April 2021 © Lister Petter Power Systems Head Office Production Facility Lister Petter Power Systems Limited Lister Petter Power Systems Limited Unit 14 Estuary Court, Broadmeadow Industrial Estate Units 13-15 Quadrant Distribution Centre...
Need help?
Do you have a question about the TS1 and is the answer not in the manual?
Questions and answers
water entered the TS1 through the air cleaner will turn over by manual start but not start
Water entering through the air cleaner can cause the Lister Petter TS1 engine not to start because it may lead to water contamination in the fuel system. To address this issue, the recommended steps are:
1. Drain, flush, refill, and prime the fuel filter to remove water or contaminants from the fuel system.
2. Inspect the air cleaner and clean or replace it if necessary, as water or dirt could restrict airflow.
3. Ensure the fuel injection equipment is free from water and dirt, as even small particles can reduce efficiency.
These steps should restore proper operation.
This answer is automatically generated