Table of Contents
Advertisement
Quick Links
Advertisement
Table of Contents

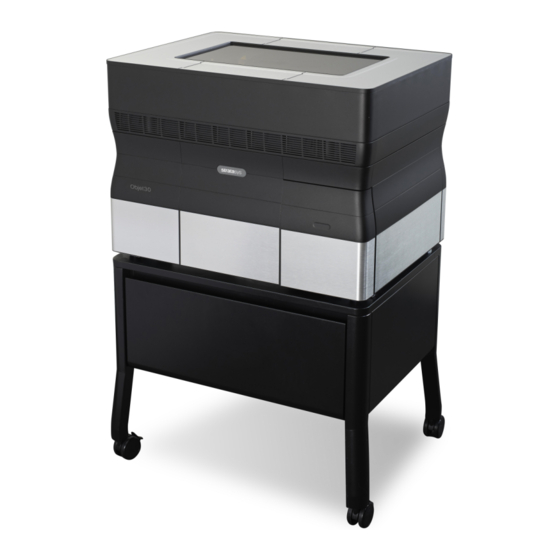
Related Manuals for Stratasys Objet24


Summary of Contents for Stratasys Objet24
- Page 1 Desktop Family 3D Printing System Operator Training Guide Basic Course...
- Page 2 Course Outline The operator training should be implemented during the installation. The following is the outline for the operator training course. System Installation & Initial Print Job Activity Topics 1. Unpack the Printer Shock sensors, printer positioning 2. Prepare for Printing Head- cover removal, inserting cartridges Observation 3.
-
Page 3: Safety Procedures
Safety Procedures Risk of burns from: Hot Surface Block – 70°C Heads - 75°C UV socket Do NOT touch these surfaces while they are hot. Main Power Supply High Voltage UV Power Supply UV Lamp Connectors ... -
Page 4: Printing Workflow
Printing Workflow Waste Container CAD ( Printed model Computer-Aided Design) Excess material is transferred to the waste container the roller bath and wiper bath. SW used by engineers and Remove model from the printer Architects for designing models with spatula Wiper wipes the print heads during purge sequence STL (... - Page 5 Introducing Desktop Family 3D Printers STRATASYS / THE 3D PRINTING SOLUTIONS COMPANY...
- Page 6 (11.81 x 7.87 x 3.95 in) (11.81 x 7.87 x 5.9 in) (11.81 x 7.87 x 5.9 in) High Speed High Speed Printing High Speed High Speed High Speed High Quality High Speed High Quality Mode Draft Draft STRATASYS / THE 3D PRINTING SOLUTIONS COMPANY...
-
Page 7: Materials Overview
MATERIALS OVERVIEW STRATASYS / MATERIALS OVERVIEW... - Page 8 • Photopolymer is a polymer that cures, or becomes solid, when exposed to light. (in our case: UV light) • When exposed to UV light the material is transformed from a soluble formulation into a hard polymer network – the model! STRATASYS / MATERIALS OVERVIEW...
- Page 9 Tango Tango Vero Bio- Vero Draft White Black Grey Blue White Clear Temp Black Grey DentPlus compatib Glaze Grey Plus Objet24 Objet30 Objet30 OrthoDesk Objet30 Dental Prime Objet30 Objet30 Prime * V3/5 only ** V5 only STRATASYS / MATERIALS OVERVIEW...
- Page 10 • Excellent detail visualization • Opaque colors • Good dimensional stability • Final product look Ideal for: • Functional engineering parts for: • Prototyping • Pre-production • Production verification • Form/fit testing • RTV molding patterns STRATASYS / MATERIALS OVERVIEW...
- Page 11 Rigid opaque | Vero Family VeroGrey VeroWhitePlus VeroBlue VeroBlackPlus RGD850 RGD835 RGD840 RGD875 STRATASYS / MATERIALS OVERVIEW...
- Page 12 Rigid material with shore value 83-86 and Properties: tensile strength of 50-65 MP • Models will have a medium opacity and smooth finish. • High-Speed concept modeling material Ideal for: • Concept models to test multiple forms in a quick timeframe STRATASYS / MATERIALS OVERVIEW...
- Page 13 Rigid Opaque | RGD240 Color: Blue • Vero-material properties: Properties: • Durable and stiff • Excellent detail visualization • Opaque color • Good dimensional stability Ideal for: • suitable for educational (non-commercial) use STRATASYS / MATERIALS OVERVIEW...
- Page 14 Our original multipurpose transparent material • Surface smoothness Properties: • Excellent technical properties • Form and fit testing of see-through parts Ideal for: • Visualization of liquid flow • Automotive lenses or similar • Medical applications STRATASYS / MATERIALS OVERVIEW...
- Page 15 With time, Clear parts become clearer • Form and fit testing of clear or see-through parts Ideal for: • Glass, eye-wear, lighting covers and light-cases • Visualization of liquid flow • Color dying • Medical applications • Artistic and exhibition modeling STRATASYS / MATERIALS OVERVIEW...
- Page 16 Minimize the number of models on the tray • Thinner walls are clearer • Assure a clean printing block area • When switching from different material preform high performance material replacement • For additional information refer to VeroClear RGD810 application note STRATASYS / MATERIALS OVERVIEW...
- Page 17 This yellow tint fades naturally over time. • Photo bleaching treatment accelerate the process and reduces the yellow tint. Significant reduction of yellowing was obtained by exposing models to fluorescent lighting while heating to 40ºC for a six-hour period. STRATASYS / MATERIALS OVERVIEW...
- Page 18 • Low cost solution temperature and light intensity • Varying results, due to the lack of precise control assures predictable results over temperature and light intensity Cost: Cost: Approx. $1,300 Approx. $50-200, depending on the number of lamps used STRATASYS / MATERIALS OVERVIEW...
- Page 19 Photobleaching Results 6 hr ~70% improvement in clarity 24 hr ~90% improvement in clarity Over 24 hr Additional improvement (minor ) Before treatment Photobleaching Photobleaching in chamber with table lamps STRATASYS / MATERIALS OVERVIEW...
- Page 20 This distance prevents the lamps from warming the models above 40ºC (104ºF) After 6 hours, inspect the models. If the results are still not satisfactory, leave the models in the chamber for up to 18 hours more. STRATASYS / MATERIALS OVERVIEW...
- Page 21 18 hours more. Caution: Verify that the model temperature does not exceed 40ºC (104ºF). Higher temperatures may cause model distortion, whereas less than 40ºC (104ºF) may not produce satisfactory results. STRATASYS / MATERIALS OVERVIEW...
- Page 22 Polypropylene-like | DurusWhite Color: White Properties: • Flexibility and toughness • Simulation of Polypropylene Ideal for: • Snap fit assemblies • Packaging applications • Form/fit/function testing STRATASYS / MATERIALS OVERVIEW...
- Page 23 • Final product Visualization Ideal for: • Moving parts and assembled parts • Exhibition and sales & marketing models • Assembly of electronic components • Wide range of ‘Fit’ testing: snap fit applications and living hinges STRATASYS / MATERIALS OVERVIEW...
- Page 24 60-62 73-77 Elongation at Break: 45%-55% 45%-55% • Rubber like materials Properties: • Different levels of elasticity • Concept design Ideal for: • Communication models • Functional prototypes that require rubber- like flexibility – athletic footwear STRATASYS / MATERIALS OVERVIEW...
- Page 25 Color: Opaque white • Durable and stiff Properties: • Excellent detail visualization • Good dimensional stability • Realistic veneer models • Diagnostic wax-ups that require A2-Shade color match Ideal for: * SUP707 has not been approved STRATASYS / MATERIALS OVERVIEW...
- Page 26 Medical | VeroDentPlus MED690 Color: Opaque dark skin tone • Great dimensional stability Properties: • Durable parts • Ortho Applications Ideal for: • Stone Models for aligners * SUP707 has not been approved STRATASYS / MATERIALS OVERVIEW...
- Page 27 (of more than 30 days) and short-term mucosal-membrane contact (of up to 24 hours). Results may vary if different conditions apply other than those existing at Stratasys laboratories during testing and those applied for the purposes of biological testing under the procedures and provisions of EN ISO 10993-1:2009, “Biological Evaluation of Medical Devices - Part 1: Evaluation and Testing within a...
- Page 28 Exhibition modeling under strong lighting conditions • Taps, pipes and household appliances • Hot air and hot water testing • Can be combined with Rubber-like material to create a versatile range of materials with adjustable properties (Connex) STRATASYS / MATERIALS OVERVIEW...
- Page 29 High Temp | RGD525 • Functional Hot Water Testing • Move functional testing to the early stage of concept design • Full functionality, no deformation STRATASYS / MATERIALS OVERVIEW...
- Page 30 • With post thermal treatment , you obtain higher thermal resistance: Up to 80 °C (176 °F) • • To achieve the expected HDT, post thermal treatment is required based on a procedure. • For additional information refer to the application note STRATASYS / MATERIALS OVERVIEW...
-
Page 31: Support Material
Easily clean of multi small parts • Can be dissolved using a dedicated • Complex Geometries Support 706 Semi translucent cleaning station • Ability to print and clean fine details and • Same dimensional stability as SUP705 interior cavities. STRATASYS / MATERIALS OVERVIEW... - Page 32 CAD to STL STRATASYS / THE 3D PRINTING SOLUTIONS COMPANY STRATASYS / THE 3D PRINTING SOLUTIONS COMPANY...
-
Page 33: How Does It Work
How Does it work? Sketches 3D CAD File Print the model Printing Result STRATASYS / THE 3D PRINTING SOLUTIONS COMPANY STRATASYS / THE 3D PRINTING SOLUTIONS COMPANY... - Page 34 CAD to STL • A CAD system is a combination of hardware and software that enables engineers and architects to design everything from furniture to airplanes STRATASYS / THE 3D PRINTING SOLUTIONS COMPANY STRATASYS / THE 3D PRINTING SOLUTIONS COMPANY...
- Page 35 The STL file approximates the surfaces of a solid model with triangles • The number and size of the triangles determine how accurately curved surfaces are printed. The more complex the surface, the more triangles produced STRATASYS / THE 3D PRINTING SOLUTIONS COMPANY STRATASYS / THE 3D PRINTING SOLUTIONS COMPANY...
- Page 36 The process is often as simple as: File Save As *.STL Save As dialog box in PRO / E Save As dialog box in SolidWorks STRATASYS / THE 3D PRINTING SOLUTIONS COMPANY STRATASYS / THE 3D PRINTING SOLUTIONS COMPANY...
- Page 37 When creating a STL file, the goal is to achieve a balance between file size and a fully-defined model with smooth curved geometries. Smooth curved File size geometries STRATASYS / THE 3D PRINTING SOLUTIONS COMPANY STRATASYS / THE 3D PRINTING SOLUTIONS COMPANY...
- Page 38 CAD to STL Faceted STL - file translated File translated with with coarse tolerance fine tolerance (2352 Triangles | 117684 Bytes) (6162 Triangles | 308184 Bytes) STRATASYS / THE 3D PRINTING SOLUTIONS COMPANY STRATASYS / THE 3D PRINTING SOLUTIONS COMPANY...
-
Page 39: Export Options
You control the number and size of the triangles by setting the following parameters when you create the STL file from the CAD design: Angle Control Deviation / Chordal Tolerance STRATASYS / THE 3D PRINTING SOLUTIONS COMPANY STRATASYS / THE 3D PRINTING SOLUTIONS COMPANY... - Page 40 Export Options (SolidWorks) STRATASYS / THE 3D PRINTING SOLUTIONS COMPANY STRATASYS / THE 3D PRINTING SOLUTIONS COMPANY...
- Page 41 Checked an assembly in a single STL file For additional information about other CAD software visit stratasys.com STRATASYS / THE 3D PRINTING SOLUTIONS COMPANY STRATASYS / THE 3D PRINTING SOLUTIONS COMPANY...
-
Page 42: File Resolution
File Resolution Coarse Fine Custom STRATASYS / THE 3D PRINTING SOLUTIONS COMPANY STRATASYS / THE 3D PRINTING SOLUTIONS COMPANY... - Page 43 256 different binary codes. In order to save time and file size always export your STL file as a Binary file (6 to 1 ratio) STRATASYS / THE 3D PRINTING SOLUTIONS COMPANY STRATASYS / THE 3D PRINTING SOLUTIONS COMPANY...
- Page 44 The STL File – Storage Format Export Options dialog box - SolidWorks Export Options dialog box - Pro / E STRATASYS / THE 3D PRINTING SOLUTIONS COMPANY STRATASYS / THE 3D PRINTING SOLUTIONS COMPANY...
- Page 45 Stratasys Printing Software STRATASYS / THE 3D PRINTING SOLUTIONS COMPANY STRATASYS / THE 3D PRINTING SOLUTIONS COMPANY...
- Page 46 OUTLINE • GrabCad Workflow -for more information about GrabCAD: • https://grabcad.com/grabcad.tutorials-1/tutorials • https://help.grabcad.com/category/192-getting-started • Objet Studio Workflow STRATASYS / THE 3D PRINTING SOLUTIONS COMPANY STRATASYS / THE 3D PRINTING SOLUTIONS COMPANY...
- Page 47 GrabCAD Workflow STRATASYS / THE 3D PRINTING SOLUTIONS COMPANY STRATASYS / THE 3D PRINTING SOLUTIONS COMPANY...
- Page 48 GrabCAD Print Interface The interface has two screens: Print— Schedule— for arranging models and for monitoring and preparing them for printing. managing print jobs. STRATASYS / THE 3D PRINTING SOLUTIONS COMPANY STRATASYS / THE 3D PRINTING SOLUTIONS COMPANY...
-
Page 49: Download And Install
You'll need to be a GrabCAD member in order to use GrabCAD Print. You will also need access to a company account. Step 1:Login and download https://grabcad.com Step 2:GCP Installation http://help.grabcad.com/article/223-setting-up-grabcad-print-for-your-j750 STRATASYS / THE 3D PRINTING SOLUTIONS COMPANY STRATASYS / THE 3D PRINTING SOLUTIONS COMPANY... - Page 50 Calculate the time and material needed for producing the tray Production Estimates before sending it to the printer. Print Send the tray to print STRATASYS / THE 3D PRINTING SOLUTIONS COMPANY STRATASYS / THE 3D PRINTING SOLUTIONS COMPANY...
-
Page 51: Add A Printer
Add a Printer Click add a printer Open the printer panel STRATASYS / THE 3D PRINTING SOLUTIONS COMPANY STRATASYS / THE 3D PRINTING SOLUTIONS COMPANY... - Page 52 You can also use the IP address in order to add the printer You can choose to work off line by adding an off- line printer STRATASYS / THE 3D PRINTING SOLUTIONS COMPANY STRATASYS / THE 3D PRINTING SOLUTIONS COMPANY...
- Page 53 Calculate the time and material needed for producing the tray Production Estimates before sending it to the printer. Print Send the tray to print STRATASYS / THE 3D PRINTING SOLUTIONS COMPANY STRATASYS / THE 3D PRINTING SOLUTIONS COMPANY...
- Page 54 Insert Model Click on Add Models Select the desired stl file STRATASYS / THE 3D PRINTING SOLUTIONS COMPANY STRATASYS / THE 3D PRINTING SOLUTIONS COMPANY...
- Page 55 Open the Analysis Mode When inserting a model there might be some open faces, inverted normals, or other technical problems with the mesh of the model STRATASYS / THE 3D PRINTING SOLUTIONS COMPANY STRATASYS / THE 3D PRINTING SOLUTIONS COMPANY...
- Page 56 Insert a model | STL Assembly "Healthy" parts are shown as transparent with a green outline, and models with problems are shown as solid with a red outline STRATASYS / THE 3D PRINTING SOLUTIONS COMPANY STRATASYS / THE 3D PRINTING SOLUTIONS COMPANY...
- Page 57 Inverted Normals- this occurs when the coordinates for a triangle are stored in an incorrect order, resulting in the "inside" face being inconsistent with the surrounding triangles STRATASYS / THE 3D PRINTING SOLUTIONS COMPANY STRATASYS / THE 3D PRINTING SOLUTIONS COMPANY...
- Page 58 Insert a model Click File Select "Insert File" GrabCAD Print allows you to print from a huge variety of file types STRATASYS / THE 3D PRINTING SOLUTIONS COMPANY STRATASYS / THE 3D PRINTING SOLUTIONS COMPANY...
- Page 59 Tray Materials Select desired support material STRATASYS / THE 3D PRINTING SOLUTIONS COMPANY STRATASYS / THE 3D PRINTING SOLUTIONS COMPANY...
- Page 60 In the Grid Style section, there are three different support strength options: • Standard- for models needing average support (most models). • Heavy- for large models needing much support. • Lite- for delicate models needing little support. STRATASYS / THE 3D PRINTING SOLUTIONS COMPANY STRATASYS / THE 3D PRINTING SOLUTIONS COMPANY...
- Page 61 Calculate the time and material needed for producing the tray Production Estimates before sending it to the printer. Print Send the tray to print STRATASYS / THE 3D PRINTING SOLUTIONS COMPANY STRATASYS / THE 3D PRINTING SOLUTIONS COMPANY...
- Page 62 Model Manipulation | Scaling the Model Select the whole assembly Click Scale Enter scaling parameters STRATASYS / THE 3D PRINTING SOLUTIONS COMPANY STRATASYS / THE 3D PRINTING SOLUTIONS COMPANY...
- Page 63 Click Orient Change model orientation Click the "Orient Face to Plane" to pick any surface on the model and orient it to a few different directions STRATASYS / THE 3D PRINTING SOLUTIONS COMPANY STRATASYS / THE 3D PRINTING SOLUTIONS COMPANY...
- Page 64 Model Manipulation | Orient Face to Plane Click the "Orient Face to Plane" to pick any surface on the model and orient it to a few different directions STRATASYS / THE 3D PRINTING SOLUTIONS COMPANY STRATASYS / THE 3D PRINTING SOLUTIONS COMPANY...
- Page 65 Model Manipulation | Orient Face to Plane Select the desired plan Select the desired surface STRATASYS / THE 3D PRINTING SOLUTIONS COMPANY STRATASYS / THE 3D PRINTING SOLUTIONS COMPANY...
- Page 66 Model Manipulation | Arrange Tray Select ‘Arrange’ Select ‘Arrange Tray’ to optimize the arrangement STRATASYS / THE 3D PRINTING SOLUTIONS COMPANY STRATASYS / THE 3D PRINTING SOLUTIONS COMPANY...
- Page 67 Model Manipulation | How to Change the Tray’s View? To change the tray’s view Click on View Select one of the view options Click the " 2D Views" menu item STRATASYS / THE 3D PRINTING SOLUTIONS COMPANY STRATASYS / THE 3D PRINTING SOLUTIONS COMPANY...
- Page 68 The position of the objects is affected by : orientation and placement • You can let GrabCAD Print determine the optimum orientation and position, or you can control them STRATASYS / THE 3D PRINTING SOLUTIONS COMPANY STRATASYS / THE 3D PRINTING SOLUTIONS COMPANY...
- Page 69 This ensures that the objects are positioned properly, and that they will be printed in the shortest time and with a minimum of material. Select ‘Optimized Arrangement’ and then click Arrange Tray To automatically arrange objects on the build tray Select ‘Arrange’ STRATASYS / THE 3D PRINTING SOLUTIONS COMPANY STRATASYS / THE 3D PRINTING SOLUTIONS COMPANY...
- Page 70 Calculate the time and material needed for producing the tray Production Estimates before sending it to the printer. Print Send the tray to print STRATASYS / THE 3D PRINTING SOLUTIONS COMPANY STRATASYS / THE 3D PRINTING SOLUTIONS COMPANY...
- Page 71 You can calculate the time and material resources needed for producing trays before sending them to the printer. Desktop30 Prime • The time it takes GrabCAD Print to perform this calculation depends on the number of objects on the tray and their complexity. STRATASYS / THE 3D PRINTING SOLUTIONS COMPANY STRATASYS / THE 3D PRINTING SOLUTIONS COMPANY...
- Page 72 Estimate Desktop30 Prime STRATASYS / THE 3D PRINTING SOLUTIONS COMPANY STRATASYS / THE 3D PRINTING SOLUTIONS COMPANY...
- Page 73 Calculate the time and material needed for producing the tray Production Estimates before sending it to the printer. Print Send the tray to print STRATASYS / THE 3D PRINTING SOLUTIONS COMPANY STRATASYS / THE 3D PRINTING SOLUTIONS COMPANY...
-
Page 74: Printing The Tray
Printing the Tray Click Print. STRATASYS / THE 3D PRINTING SOLUTIONS COMPANY STRATASYS / THE 3D PRINTING SOLUTIONS COMPANY... - Page 75 Idle, the connection is local and not remote through GrabCAD Print Server. STRATASYS / THE 3D PRINTING SOLUTIONS COMPANY STRATASYS / THE 3D PRINTING SOLUTIONS COMPANY...
- Page 76 • Change the order of jobs in the print queue • View job history • View the amount of available printing material remaining • View the amount of waste in the container STRATASYS / THE 3D PRINTING SOLUTIONS COMPANY STRATASYS / THE 3D PRINTING SOLUTIONS COMPANY...
- Page 77 Printer Scheduler Click printer scheduler. STRATASYS / THE 3D PRINTING SOLUTIONS COMPANY STRATASYS / THE 3D PRINTING SOLUTIONS COMPANY...
- Page 78 Printer Scheduler Make sure that the printer is on-line. (See the printer controller.) STRATASYS / THE 3D PRINTING SOLUTIONS COMPANY STRATASYS / THE 3D PRINTING SOLUTIONS COMPANY...
- Page 79 Click a job to get more information You can reorder jobs in a printer's queue with click-and-drag. Right-click on a job to move or delete it. STRATASYS / THE 3D PRINTING SOLUTIONS COMPANY STRATASYS / THE 3D PRINTING SOLUTIONS COMPANY...
- Page 80 Jobs that require attention will have a warning icon and a tooltip explaining why. Use the slider in the lower right corner to control the time scale. STRATASYS / THE 3D PRINTING SOLUTIONS COMPANY STRATASYS / THE 3D PRINTING SOLUTIONS COMPANY...
- Page 81 Printer Scheduler Clicking a printer from the list will show details such as firmware version and current materials loaded. STRATASYS / THE 3D PRINTING SOLUTIONS COMPANY STRATASYS / THE 3D PRINTING SOLUTIONS COMPANY...
- Page 82 Objet Studio Workflow STRATASYS / THE 3D PRINTING SOLUTIONS COMPANY STRATASYS / THE 3D PRINTING SOLUTIONS COMPANY...
- Page 83 Objet Studio GUI (Graphic User Interface) • The interface has two screens: Tray Settings— Job Manager— for arranging models and for monitoring and preparing them for printing. managing print jobs. STRATASYS / THE 3D PRINTING SOLUTIONS COMPANY STRATASYS / THE 3D PRINTING SOLUTIONS COMPANY...
- Page 84 Objet Studio GUI (Graphic User Interface) • An additional ribbon, Model Settings, appears when models are selected for manipulating. STRATASYS / THE 3D PRINTING SOLUTIONS COMPANY STRATASYS / THE 3D PRINTING SOLUTIONS COMPANY...
- Page 85 Calculate the time and material needed for producing the tray Production Estimates before sending it to the printer. Build Send the tray to the Job Manager for printing STRATASYS / THE 3D PRINTING SOLUTIONS COMPANY STRATASYS / THE 3D PRINTING SOLUTIONS COMPANY...
- Page 86 Select STL file Insert Model Make sure this check box is Click Insert selected to automatically position models on the build tray for efficient model building STRATASYS / THE 3D PRINTING SOLUTIONS COMPANY STRATASYS / THE 3D PRINTING SOLUTIONS COMPANY...
- Page 87 Calculate the time and material needed for producing the tray Production Estimates before sending it to the printer. Build Send the tray to the Job Manager for printing STRATASYS / THE 3D PRINTING SOLUTIONS COMPANY STRATASYS / THE 3D PRINTING SOLUTIONS COMPANY...
-
Page 88: Automatic Placement
Automatic Placement • Automatic Placement - objects are automatically arranged in an optimal way for printing (model geometric consideration). Click Placement. STRATASYS / THE 3D PRINTING SOLUTIONS COMPANY STRATASYS / THE 3D PRINTING SOLUTIONS COMPANY... - Page 89 • A message will appear when sending the tray to Build, informing that Automatic Placement was not performed. Tray before automatic placement Tray after automatic placement STRATASYS / THE 3D PRINTING SOLUTIONS COMPANY STRATASYS / THE 3D PRINTING SOLUTIONS COMPANY...
- Page 90 Automatic Placement cont. Best practice: Click Automatic Placement even if you inserted objects with Orient Automatically selected. STRATASYS / THE 3D PRINTING SOLUTIONS COMPANY STRATASYS / THE 3D PRINTING SOLUTIONS COMPANY...
- Page 91 Calculate the time and material needed for producing the tray Production Estimates before sending it to the printer. Build Send the tray to the Job Manager for printing STRATASYS / THE 3D PRINTING SOLUTIONS COMPANY STRATASYS / THE 3D PRINTING SOLUTIONS COMPANY...
- Page 92 Note: By default, the material selection settings on the ribbon correspond to the material cartridges loaded in the printer. STRATASYS / THE 3D PRINTING SOLUTIONS COMPANY STRATASYS / THE 3D PRINTING SOLUTIONS COMPANY...
-
Page 93: Surface Finish
Select Matte or Glossy from the Model Setting ribbon or from the model toolbar The assembly or selected parts can be printed with a matte or glossy finish. STRATASYS / THE 3D PRINTING SOLUTIONS COMPANY STRATASYS / THE 3D PRINTING SOLUTIONS COMPANY... -
Page 94: Printing Mode
Printing Mode Relevant only for V3 Prime Printer Select HQ/HS/Draft mode that is the most suitable for your job STRATASYS / THE 3D PRINTING SOLUTIONS COMPANY STRATASYS / THE 3D PRINTING SOLUTIONS COMPANY... - Page 95 Calculate the time and material needed for producing the tray Production Estimates before sending it to the printer. Build Send the tray to the Job Manager for printing STRATASYS / THE 3D PRINTING SOLUTIONS COMPANY STRATASYS / THE 3D PRINTING SOLUTIONS COMPANY...
-
Page 96: Tray Validation
• After positioning all objects on the build tray, verify that the tray is “valid” and can be printed. • This ensures that models do not overlap when you position them on the build tray. STRATASYS / THE 3D PRINTING SOLUTIONS COMPANY STRATASYS / THE 3D PRINTING SOLUTIONS COMPANY... - Page 97 Objects outside the tray Overlapping objects Bad STL file • Model material can affect positioning. Therefore, make sure to select the material before performing Tray Validation. STRATASYS / THE 3D PRINTING SOLUTIONS COMPANY STRATASYS / THE 3D PRINTING SOLUTIONS COMPANY...
- Page 98 Requires much less time to print most trays, compared to HQ mode. • Prints models in 36‐micron layers, suitable for producing large models and initial designs. Draft • Fastest printing mode. • Most economical printing mode. STRATASYS / THE 3D PRINTING SOLUTIONS COMPANY STRATASYS / THE 3D PRINTING SOLUTIONS COMPANY...
- Page 99 Calculate the time and material needed for producing the tray Production Estimates before sending it to the printer. Build Send the tray to the Job Manager for printing STRATASYS / THE 3D PRINTING SOLUTIONS COMPANY STRATASYS / THE 3D PRINTING SOLUTIONS COMPANY...
-
Page 100: Production Estimates
Production Estimates • You can calculate the time and material resources needed for producing trays before sending them to the printer. STRATASYS / THE 3D PRINTING SOLUTIONS COMPANY STRATASYS / THE 3D PRINTING SOLUTIONS COMPANY... - Page 101 Calculate the time and material needed for producing the tray Production Estimates before sending it to the printer. Build Send the tray to the Job Manager for printing STRATASYS / THE 3D PRINTING SOLUTIONS COMPANY STRATASYS / THE 3D PRINTING SOLUTIONS COMPANY...
- Page 102 • To send the tray to the print queue click ‘Build’: • If the build‐tray file has not been saved, the Save As dialog box opens for you to save it now. STRATASYS / THE 3D PRINTING SOLUTIONS COMPANY STRATASYS / THE 3D PRINTING SOLUTIONS COMPANY...
- Page 103 Tray that is saved as Objtf / Objzf format will include: • Printing mode • Surface specification (matte/glossy) • Material type for every shell • Grid style STRATASYS / THE 3D PRINTING SOLUTIONS COMPANY STRATASYS / THE 3D PRINTING SOLUTIONS COMPANY...
- Page 104 Saving the Tray Model that is saved as ObjDF format will include: • Surface specification (matte/glossy) • Material type for every shell • Grid style STRATASYS / THE 3D PRINTING SOLUTIONS COMPANY STRATASYS / THE 3D PRINTING SOLUTIONS COMPANY...
-
Page 105: Job Manager
• Change the order of jobs in the print queue • View job history • View the amount of available printing material remaining • View the amount of waste in the container STRATASYS / THE 3D PRINTING SOLUTIONS COMPANY STRATASYS / THE 3D PRINTING SOLUTIONS COMPANY... - Page 106 Client computer: jobs from that computer Time- • printing times • number of slices sent to the printer History- previous jobs and their final status. STRATASYS / THE 3D PRINTING SOLUTIONS COMPANY STRATASYS / THE 3D PRINTING SOLUTIONS COMPANY...
- Page 107 Job Queue or the amount of waste in the History list. the container. On a server, you can change the perspectives by clicking here. STRATASYS / THE 3D PRINTING SOLUTIONS COMPANY STRATASYS / THE 3D PRINTING SOLUTIONS COMPANY...
- Page 108 Job Manager allows you to Stop a job in progress. Select the job you wish to stop Click Stop on the pop-up menu or on the ribbon. STRATASYS / THE 3D PRINTING SOLUTIONS COMPANY STRATASYS / THE 3D PRINTING SOLUTIONS COMPANY...
- Page 109 Click Resume on the pop-up menu check the printer control application. or on the ribbon. If necessary, change the number. Click OK STRATASYS / THE 3D PRINTING SOLUTIONS COMPANY STRATASYS / THE 3D PRINTING SOLUTIONS COMPANY...
-
Page 110: Deleting A Job
You can delete a job from the Jobs Queue and from the History list. Select this job to delete it. Click Delete on the pop-up menu or on the ribbon. Click Yes to confirm. STRATASYS / THE 3D PRINTING SOLUTIONS COMPANY STRATASYS / THE 3D PRINTING SOLUTIONS COMPANY... - Page 111 Deleting a Job The job appears in the History list STRATASYS / THE 3D PRINTING SOLUTIONS COMPANY STRATASYS / THE 3D PRINTING SOLUTIONS COMPANY...
-
Page 112: Editing A Job
You can open a stopped or waiting job in the Jobs Queue to make changes before printing. Select this job you wish to edit. Click Edit on the pop-up menu or the ribbon. STRATASYS / THE 3D PRINTING SOLUTIONS COMPANY STRATASYS / THE 3D PRINTING SOLUTIONS COMPANY... - Page 113 Editing a Job After editing the tray, click Return to Job Manger to send it back the Jobs Queue. STRATASYS / THE 3D PRINTING SOLUTIONS COMPANY STRATASYS / THE 3D PRINTING SOLUTIONS COMPANY...
- Page 114 Note: if the job you wish to schedule is the only one in the Jobs Queue, it must be stopped first before scheduling Select the job from the Jobs Queue Click Stop on the pop-up menu STRATASYS / THE 3D PRINTING SOLUTIONS COMPANY STRATASYS / THE 3D PRINTING SOLUTIONS COMPANY...
- Page 115 Schedule a Job Enter start date and time STRATASYS / THE 3D PRINTING SOLUTIONS COMPANY STRATASYS / THE 3D PRINTING SOLUTIONS COMPANY...
- Page 116 APPENDIX STRATASYS / THE 3D PRINTING SOLUTIONS COMPANY...
- Page 117 Surface Finish | Matte or Glossy Even tough the top is glossy, notice the Matte surface, Surfaces coated with support material will have a matte finish STRATASYS / THE 3D PRINTING SOLUTIONS COMPANY...
- Page 118 Surface Finish | Matte or Glossy Matte • All surfaces interface support • Uniform finish STRATASYS / THE 3D PRINTING SOLUTIONS COMPANY...
- Page 119 Surface Finish | Matte or Glossy Glossy • Support only where necessary • Matte bottom, glossy top surface(s) STRATASYS / THE 3D PRINTING SOLUTIONS COMPANY...
- Page 120 Surface Finish | Matte or Glossy Why do we print with Matte? • Optimal overall part accuracy • Sharper edges and corners need to be kept • Uniform surface finish throughout part is needed STRATASYS / THE 3D PRINTING SOLUTIONS COMPANY...
- Page 121 • Minimizing support material use when printing • Minimizing tray printing time • A glossy or matt finish on the model • Printing models with fine details STRATASYS / THE 3D PRINTING SOLUTIONS COMPANY STRATASYS / THE 3D PRINTING SOLUTIONS COMPANY...
- Page 122 For models that have large holes or hollows, open on at least one side (like a pipe or a deep shell), print a model standing up, so support material does not fill the hollow. Support material needed inside cup Support material needed here STRATASYS / THE 3D PRINTING SOLUTIONS COMPANY STRATASYS / THE 3D PRINTING SOLUTIONS COMPANY...
- Page 123 • The lines on the tray represent the passes that the printing head will make from the left of the tray to the right and back. STRATASYS / THE 3D PRINTING SOLUTIONS COMPANY STRATASYS / THE 3D PRINTING SOLUTIONS COMPANY...
- Page 124 Place the largest dimension of along the X-axis. • It takes longer to add more layers than it does to continue a pass in the X/Y direction STRATASYS / THE 3D PRINTING SOLUTIONS COMPANY STRATASYS / THE 3D PRINTING SOLUTIONS COMPANY...
- Page 125 Place the tallest parts on the top left of the tray. • Position the highest side model and if possible it’s highest side on the left STRATASYS / THE 3D PRINTING SOLUTIONS COMPANY STRATASYS / THE 3D PRINTING SOLUTIONS COMPANY...
- Page 126 Printing Models With Fine Details The side with fine details should be positioned face-up and printed with a glossy finish. The surface shown here was printed face-up STRATASYS / THE 3D PRINTING SOLUTIONS COMPANY STRATASYS / THE 3D PRINTING SOLUTIONS COMPANY...
- Page 127 PRINTER CONTROL SOFTWARE STRATASYS / THE 3D PRINTING SOLUTIONS COMPANY STRATASYS / THE 3D PRINTING SOLUTIONS COMPANY...
- Page 128 Introduction • Features powerful wizards and facilitate system maintenance • Includes all monitoring and control of the printer • Located within the printer STRATASYS / THE 3D PRINTING SOLUTIONS COMPANY STRATASYS / THE 3D PRINTING SOLUTIONS COMPANY...
-
Page 129: User Interface
User Interface Printer mode Information Progress Bar Display Toggle Button Stop Button Model Material Cartridges Online/Offline Button Support Material Cartridges STRATASYS / THE 3D PRINTING SOLUTIONS COMPANY STRATASYS / THE 3D PRINTING SOLUTIONS COMPANY... - Page 130 UV lamp state counters Temp. of Waste weight support head Temp. of Model head Model/Support material in Temp. at the print block reservoir front of the block. STRATASYS / THE 3D PRINTING SOLUTIONS COMPANY STRATASYS / THE 3D PRINTING SOLUTIONS COMPANY...
-
Page 131: Printer Interface Color Key
(the waste container must be replied). • Blue- not ready for printing For example, the UV is not on or not operating at full power STRATASYS / THE 3D PRINTING SOLUTIONS COMPANY STRATASYS / THE 3D PRINTING SOLUTIONS COMPANY... -
Page 132: Options Menu
Pattern test The Pattern test displays the condition of the nozzles in the print heads and enables to identify missing ones STRATASYS / THE 3D PRINTING SOLUTIONS COMPANY STRATASYS / THE 3D PRINTING SOLUTIONS COMPANY... - Page 133 Options Menu | Wizards Objet24 • Objet30 • Objet30Pro • Objet30 Orthodesk Detailed procedures on using the wizards can be found in the Operator Maintenance presentation. STRATASYS / THE 3D PRINTING SOLUTIONS COMPANY STRATASYS / THE 3D PRINTING SOLUTIONS COMPANY...
- Page 134 This wizard runs automatically when needed, as part of the Pre-Print mode (before printing begins). ReInitiate It’s purpose is to drain existing materials in tubes since the viscosity changes over time and may cause quality issues. STRATASYS / THE 3D PRINTING SOLUTIONS COMPANY STRATASYS / THE 3D PRINTING SOLUTIONS COMPANY...
- Page 135 Material replacement wizard. • The wizard enables you to select the cartridge(s) and the type of material you want to install and use. STRATASYS / THE 3D PRINTING SOLUTIONS COMPANY STRATASYS / THE 3D PRINTING SOLUTIONS COMPANY...
- Page 136 Material replacement wizard. • The wizard enables you to select the cartridge(s) and the type of material you want to install and use. STRATASYS / THE 3D PRINTING SOLUTIONS COMPANY STRATASYS / THE 3D PRINTING SOLUTIONS COMPANY...
- Page 137 This cycle ensures that models will have the color (and the When to use: mechanical properties) of the new material, when replacing a dark colored material (such as VeroBlack) with a lighter-colored material. STRATASYS / THE 3D PRINTING SOLUTIONS COMPANY STRATASYS / THE 3D PRINTING SOLUTIONS COMPANY...
-
Page 138: Built-In Test (Bit)
A suite of tests for regularly checking of SW parameters. May be used also for troubleshooting • Running these tests can help identify problems in the printer software STRATASYS / THE 3D PRINTING SOLUTIONS COMPANY STRATASYS / THE 3D PRINTING SOLUTIONS COMPANY... - Page 139 Options Menu - Maintenance Counters STRATASYS / THE 3D PRINTING SOLUTIONS COMPANY STRATASYS / THE 3D PRINTING SOLUTIONS COMPANY...
- Page 140 Option Menu - Collect Service Data • Service information is gathered and saved. • Can be used for remote troubleshooting. STRATASYS / THE 3D PRINTING SOLUTIONS COMPANY STRATASYS / THE 3D PRINTING SOLUTIONS COMPANY...
- Page 141 • For one week or more first run the material flush/fill wizard in order to flush the system with cleansers and than run the shutdown wizard. STRATASYS / THE 3D PRINTING SOLUTIONS COMPANY STRATASYS / THE 3D PRINTING SOLUTIONS COMPANY...
-
Page 142: Backing-Up And Restoring Printer Settings
You can back up printer modes and configuration settings, and restore them, if necessary, using desktop icons Use these backup and restore tools only if a customer Support engineer instructs you to do so. STRATASYS / THE 3D PRINTING SOLUTIONS COMPANY STRATASYS / THE 3D PRINTING SOLUTIONS COMPANY... - Page 143 OPERATOR MAINTENANCE PROCEDURES STRATASYS / THE 3D PRINTING SOLUTIONS COMPANY...
- Page 144 • The Benefits of Routine Maintenance Prevent malfunctions that might occur. Daily Ensure high printing quality. Weekly Increase printer reliability. Monthly Improve printer productivity. STRATASYS / THE 3D PRINTING SOLUTIONS COMPANY...
-
Page 145: Preventive Maintenance Procedures
Print Heads Cleaning Wiper Assembly Cleaning Every 300 hours Every 500 hours / Once a year / Once every six months Every 1000 hours UV Lamp calibration Load Cells calibration User Maintenance Head Optimization STRATASYS / THE 3D PRINTING SOLUTIONS COMPANY... - Page 146 Reactive Maintenance Procedures Reactive Built-In Test (BIT) Replace the waste container Replace the odor filter Replace the wiper blade Clean/Replace the roller waste collector Replace a print head Replace UV Lamp System Shut down STRATASYS / THE 3D PRINTING SOLUTIONS COMPANY...
- Page 147 DAILY/ AFTER EVERY PRINT JOB Print Heads Cleaning Build tray & Cover Glass cleaning STRATASYS / THE 3D PRINTING SOLUTIONS COMPANY...
- Page 148 How: Clean the build tray and surrounding area with a wet cleaning cloth or paper towel. Wet the cloth with water only. You can use a small vacuum cleaner to clean the surrounding area STRATASYS / THE 3D PRINTING SOLUTIONS COMPANY...
- Page 149 What: the print heads jet model and support material on the tray. Why: cleaning the heads by removing resin from around and in-between the heads prevents the print nozzles from becoming clogged with material. When: after every print job. Single Print Head STRATASYS / THE 3D PRINTING SOLUTIONS COMPANY...
- Page 150 2. Use isopropanol/ethanol soaked cloth and Mirror to clean the heads. The print head surface is hot, up to 75°C degrees. Do not touch them with your bare hands. Do not use sharp tools to clean between the heads. STRATASYS / THE 3D PRINTING SOLUTIONS COMPANY...
- Page 151 WEEKLY Pattern Test Wiper Blade Cleaning STRATASYS / THE 3D PRINTING SOLUTIONS COMPANY...
-
Page 152: Pattern Test
• Tape a sheet of pink paper to the center of the build tray. • Run the Pattern test (Options Pattern test). • Inspect the pink paper to see if there are missing lines (nozzles). STRATASYS / THE 3D PRINTING SOLUTIONS COMPANY... - Page 153 Wiper Cleaning Too many missing lines, especially in the same area, is an indication that the quality of printing will be poor. Lines printed by Lines printed by support print head model print head STRATASYS / THE 3D PRINTING SOLUTIONS COMPANY...
-
Page 154: Wiper Cleaning
• How: 1. Run the wiper cleaning wizard (Options wizards wiper cleaning). 2. Use a soaked cloth with isopropanol or ethanol to clean it. Visually inspect the wiper and if necessary replace it. STRATASYS / THE 3D PRINTING SOLUTIONS COMPANY... - Page 155 MONTHLY Head Alignment STRATASYS / THE 3D PRINTING SOLUTIONS COMPANY...
-
Page 156: Head Alignment
3. The transparency sheet is printed with sets of seven vertical lines in seven columns. Each column displays the results from a different print head. The lower row is printed The upper row is printed by the support print head by the model print head. STRATASYS / THE 3D PRINTING SOLUTIONS COMPANY... - Page 157 The alignment of the upper and lower rows in line 8 is the optimum alignment. • If the upper and lower rows of another line align ,such as line 10, the wizard updates the parameters for the head alignment and re-prints the lines. STRATASYS / THE 3D PRINTING SOLUTIONS COMPANY...
- Page 158 EVERY 300 HOURS UV Lamp calibration Head Optimization STRATASYS / THE 3D PRINTING SOLUTIONS COMPANY...
- Page 159 1. Run the UV Calibration Wizard (Options wizards UV Calibration). 2. Select ‘UV Intensity Calibration’. 3. Expose the UV sensor and check that the glass is clean. 4. The print block passes over the sensor. The wizard calculates the required UV level. STRATASYS / THE 3D PRINTING SOLUTIONS COMPANY...
- Page 160 7. If the lamp can not be adjusted with the specified range, run the wizard again before replacing the lamp and check that the UV lamp glass is clean and the sensor is completely un covered. STRATASYS / THE 3D PRINTING SOLUTIONS COMPANY...
- Page 161 • Every 300 printing hours. • Whenever the condition of print heads is negatively affecting the quality of printed models or if you suspect that there is a problem with one or more of the print heads. STRATASYS / THE 3D PRINTING SOLUTIONS COMPANY...
- Page 162 Head Optimization How: • Run the Head optimization Wizard (Options wizards Head optimization). • Select Optimize all print heads and click Next. • Samples are printed on the build tray STRATASYS / THE 3D PRINTING SOLUTIONS COMPANY...
- Page 163 • Enter the number of missing nozzles in the wizard. • Remove the sample, weigh it and enter the weight in the wizard. • The wizard uses the data collected to analyze the condition of the print heads and optimize them. STRATASYS / THE 3D PRINTING SOLUTIONS COMPANY...
- Page 164 Head Optimization If the wizard determines that a print head is faulty you need to contact your service provider. STRATASYS / THE 3D PRINTING SOLUTIONS COMPANY...
-
Page 165: Every 500 Hours
Every 500 Hours Load Cell Calibration STRATASYS / THE 3D PRINTING SOLUTIONS COMPANY... -
Page 166: Load Cell Calibration
Observe the numbers and wait until the level is relatively stable- two units above or below the average level shown. Select the Values are stable check box, and click Next. Click Done in the final wizard screen. STRATASYS / THE 3D PRINTING SOLUTIONS COMPANY... - Page 167 Once a year / Every 1000 hours User Maintenance STRATASYS / THE 3D PRINTING SOLUTIONS COMPANY...
-
Page 168: User Maintenance
• Improves system reliability. • Reduces system downtime and costly repairs. • Protects and prolong the life of your system. • When: once a year or every 1000 printing hours. Whatever comes first. STRATASYS / THE 3D PRINTING SOLUTIONS COMPANY... - Page 169 Clean the print heads • Perform pattern test Print Heads • Check alignment of the heads • Run Head optimization wizard • Run Built-in test • Printer Software Perform Backup Data • Restart computer STRATASYS / THE 3D PRINTING SOLUTIONS COMPANY...
- Page 170 Reactive Maintenance Procedures (WHEN NEEDED) Built-In Test (BIT) Replace a print head Replace the waste container Replace UV Lamp System Shut down Replace the odor filter Clean/Replace the roller waste collector Wiper Replacement STRATASYS / THE 3D PRINTING SOLUTIONS COMPANY...
- Page 171 What: a suite of tests for regularly checking of SW parameters. May be used also for troubleshooting. Why: running these tests can help identify problems in the printer software. When: as needed. How: open the Built-In Test (Options Built-In Test) STRATASYS / THE 3D PRINTING SOLUTIONS COMPANY...
- Page 172 What: the waste container contains partially cured polymeric material produced during the printer operation. This material is kept in a special, leak-proof, disposable container. Why: to prevent the waste from overflowing outside of the container. When: a warning message is displayed when the container weighs 1.8 kg. STRATASYS / THE 3D PRINTING SOLUTIONS COMPANY...
- Page 173 5. Place a new waste container in the cartridge drawer and connect the drain tube. Make sure that the plastic bag inside is not twisted. Dispose of the full waste container in accordance with the environmental and safety regulations. STRATASYS / THE 3D PRINTING SOLUTIONS COMPANY...
-
Page 174: Replacing The Odor Filter
When: Once a year, if needed replace before. How: • Locate the filter drawer at the rear of the printer and pull it. • Remove the used filter and install a new one. STRATASYS / THE 3D PRINTING SOLUTIONS COMPANY... - Page 175 2. Wipe it with an isopropanol-soaked cloth until clean. Be careful not to damage the roller knife 3. Inspect the roller knife. If it’s is worn out, replace the waste collector. 4. Install the waste collector in the printer. STRATASYS / THE 3D PRINTING SOLUTIONS COMPANY...
-
Page 176: Wiper Replacement
1. Using a M3 Allen key, loosen (but do not remove) the screw securing the wiper. 2. Grasp the wiper unit and remove it. 3. Insert the new wiper, making sure that it is level and tighten the securing screw. Wiper Securing Screw STRATASYS / THE 3D PRINTING SOLUTIONS COMPANY... -
Page 177: Head Replacement
Run the Head Optimization Wizard. • Remove the defective head. Note: Make sure that with the head/s you remove the two rubber O-ring seals. • Install a new print head. • Perform head alignment calibration. STRATASYS / THE 3D PRINTING SOLUTIONS COMPANY... - Page 178 1. Run the Head Optimization (Options Wizards Head Optimization) and select replace faulty heads. 2. Select the print head(s) needing replacement and click Next. 3. The printer heats and empties the print block. STRATASYS / THE 3D PRINTING SOLUTIONS COMPANY...
- Page 179 Head Replacement • Put on the protective gloves and open the printer cover. • Remove the upper cover of the head driver compartment. STRATASYS / THE 3D PRINTING SOLUTIONS COMPANY...
- Page 180 Head Replacement To replace the model head, release the support head first. Model Head Support Head STRATASYS / THE 3D PRINTING SOLUTIONS COMPANY...
- Page 181 • Press on the screws to release the print head and pull the head from beneath. • Make sure the rubber O-ring seals are on the model head. • To insert the new print head use the positioning Jig (supplied with the head). STRATASYS / THE 3D PRINTING SOLUTIONS COMPANY...
- Page 182 Head Replacement Test & align print heads • Perform the purge sequence. • Perform the Pattern test. • Run the Weight test. • Run Head Alignment wizard. STRATASYS / THE 3D PRINTING SOLUTIONS COMPANY...
-
Page 183: Uv Lamp Replacement
• Loosen the screws at the side of the lamp and disconnect the cables from Spartan board. • Remove the UV lamp assembly. • Remove the UV reflector and insert a new one. • Reassemble and connect the UV assembly. STRATASYS / THE 3D PRINTING SOLUTIONS COMPANY... - Page 184 When: if you will not use the printer for up to one week. How: • start the wizard (Options Shutdown). • Choose the unattended option. • After the printer computer shuts down, turn off the main power switch at the back of the printer. STRATASYS / THE 3D PRINTING SOLUTIONS COMPANY...
- Page 185 • Choose the option to flush system with cleaning fluid. • Remove printing cartridges and place cleaning fluids. • After the printer computer shuts down, turn off the main power switch at the back of the printer. STRATASYS / THE 3D PRINTING SOLUTIONS COMPANY...
-
Page 186: Support Removal
Support Removal STRATASYS / THE 3D PRINTING SOLUTIONS COMPANY... - Page 187 OUTLINE Design Tips for Easy Cleaning Cleaning Support SUP705 SUP706 Removal STRATASYS / THE 3D PRINTING SOLUTIONS COMPANY...
- Page 188 • Medical applications • Hands free cleaning • Easily cleaned via water jet or tank Yellowish, Semi • Visualization of liquid flow • Same dimensional stability as Support 706 translucent • Complex Geometries SUP705 STRATASYS / THE 3D PRINTING SOLUTIONS COMPANY...
- Page 189 PolyJet Support The gel-like support material is removed using a Water Jet Low pressure tap water or sodium hydroxide solution STRATASYS / FINISHING APPLICATIONS...
- Page 190 Design Tips for Easy Support Removal STRATASYS / THE 3D PRINTING SOLUTIONS COMPANY...
- Page 191 • How to clean models with hollow parts that are hard to reach? • For example let us look at a simple but long cylinder. • At the end of the printing process, the cylinder will be filled with support material that needs to be removed. Support Model STRATASYS / FINISHING APPLICATIONS...
- Page 192 • Create a second cylinder inside the model that will later be pulled out, leaving the inside of the model almost support free and ready to be washed with the WaterJet. Second cylinder to be pulled out STRATASYS / FINISHING APPLICATIONS...
- Page 193 Moving Part Assemblies • Create slots or openings in rotating assemblies to help remove support material STRATASYS / FINISHING APPLICATIONS...
- Page 194 It might me helpful to use sacrificial rod that are removable after printing. Once the sacrificial rod is removed, the support material can be removed more easily. Sacrificial rod Pen body with sacrificial core Pen body STRATASYS / FINISHING APPLICATIONS...
- Page 195 Removing support material from small voids and enclosed section can be difficult. • If possible, design deep voids with exit holes it will speed up post processing and final part finish Option A: cavity at the side Option B: cavity at the bottom Original model STRATASYS / FINISHING APPLICATIONS...
- Page 196 Cleaning SUP705 STRATASYS / FINISHING APPLICATIONS...
- Page 197 3. Use high pressure waterjet to give the part a deeper clean, be carful not to damage delicate models 4. Use a Scotch-Brite™ pad to help remove support residue. 5. Soak the part in 1-2% Sodium Hydroxide bath solution for 1-2 hours. 6. Rinse and dry STRATASYS / FINISHING APPLICATIONS...
- Page 198 Balco WaterJet...
- Page 199 Physical Description The Balco WaterJet System Installed Unit Cabinet Base STRATASYS / THE 3D PRINTING SOLUTIONS COMPANY...
- Page 200 • Standard- this cabinet is adequate for cleaning models printed on the Eden250,Eden260, Eden350 and Eden350V printers. • Large- this cabinet is suitable for cleaning all models printed on the Eden500V and Connex500 printers. STRATASYS / THE 3D PRINTING SOLUTIONS COMPANY...
-
Page 201: Physical Description
Physical Description On/Off Switch • Use the main switch at the rear of the WaterJet cabinet to turn the WaterJet on or off. STRATASYS / THE 3D PRINTING SOLUTIONS COMPANY... - Page 202 Before starting to clean a model, make sure the side door is closed. • Leave door open when not in use, in order to ventilate the unit. • Door Handle Do not spray directly on side door Locking Screw STRATASYS / THE 3D PRINTING SOLUTIONS COMPANY...
- Page 203 Physical Description Nozzle Selection • The direction of the short-pointed end of the tap of the nozzle selector valve determines which nozzle is activated. Nozzle Spray Nozzle Selector Nozzle STRATASYS / THE 3D PRINTING SOLUTIONS COMPANY...
- Page 204 The support material removed during the cleaning process washes down the water outlet at the bottom of the WaterJet cabinet. Make sure you place the waste filter over the water outlet before activating the WaterJet. STRATASYS / THE 3D PRINTING SOLUTIONS COMPANY...
- Page 205 When the round bucket fills up, the water spills into the square bucket and empties into the drainage system. • Empty the waste collector once a week to prevent the waste from building up. STRATASYS / THE 3D PRINTING SOLUTIONS COMPANY...
-
Page 206: Installation
Installation Configure the Stand • Assemble the WaterJet stand STRATASYS / THE 3D PRINTING SOLUTIONS COMPANY... - Page 207 Installation WaterJet connections • Connect the inlet hose from the pressure pump to the water supply tap. • Connect the pressure hose between the water pressure pump outlet and the WaterJet inlet. STRATASYS / THE 3D PRINTING SOLUTIONS COMPANY...
- Page 208 Installation WaterJet connections- Drain • Connect the WaterJet drain hose to the drain connection at the site. • Insert the flexible hose about 2 inches (50 mm) into the drain. STRATASYS / THE 3D PRINTING SOLUTIONS COMPANY...
- Page 209 The water pressure pump gets power from the WaterJet. • Be sure the power cable is properly grounded and can handle the electrical load of both the WaterJet and the water pressure pump: 16 A for 120 and 220-250 volt systems STRATASYS / THE 3D PRINTING SOLUTIONS COMPANY...
- Page 210 8. When you have finished removing the support material, open the side door and remove the model. 9. If there are no more models to be cleaned at this time, switch off the WaterJet. 10. Turn off the water supply to the WaterJet. STRATASYS / THE 3D PRINTING SOLUTIONS COMPANY...
- Page 211 The water tap/supply MUST remain open when the WaterJet is activated to prevent damage to the pressure pump. • The water pressure pump requires a water supply pressure of at least 1 atm. • Always turn off the water supply source after use. STRATASYS / THE 3D PRINTING SOLUTIONS COMPANY...
-
Page 212: Maintenance
Maintenance • Replacing a Fuse • Water pressure pump an example STRATASYS / THE 3D PRINTING SOLUTIONS COMPANY... -
Page 213: Spare Parts
Spare Parts • 18 Different SP For “Balco”. • Please note to Different Voltage rating STRATASYS / THE 3D PRINTING SOLUTIONS COMPANY... - Page 214 Soak the model in a 2-percent aqueous solution of caustic soda (NaOH). (typically between half-an-hour and several hours, depending on how delicate it is and how much support material needs to be removed). Rinse the model again thoroughly using the WaterJet. STRATASYS / THE 3D PRINTING SOLUTIONS COMPANY...
- Page 215 Cleaning SUP706 STRATASYS / FINISHING APPLICATIONS...
- Page 216 How to Clean PolyJet Parts | SUP706 Support 706 is based on 705 chemistry system with increased solubility (x5) There are 3 optional removal methods: Water Pressure (Waterjet) Break-Away and Dissolve Dissolve-Only STRATASYS / FINISHING APPLICATIONS...
- Page 217 1. Water Pressure (Waterjet) This method, requires a waterjet unit. Removing SUP706 in a waterjet can be faster compared to the other methods. This depends on the complexity and dimensions of the printed model. STRATASYS / FINISHING APPLICATIONS...
- Page 218 Soak the printed model in the cleaning station until the Support material dissolves. Drain all of the liquid from the basket before removing the printed model. • STEP 3: Rinse the printed model under running water to remove the cleaning solution and grid residue. STRATASYS / FINISHING APPLICATIONS...
- Page 219 Soak the printed model in the cleaning station until the Support material dissolves. Drain all of the liquid from the basket before removing the printed model. • STEP 2: Rinse the printed model under running water to remove the cleaning solution and grid residue. STRATASYS / FINISHING APPLICATIONS...
-
Page 220: Cleaning Solution
This strengthens the printed model. NOTE: SUP706 dissolves into the solution and eventually saturates it, reducing its effectiveness. Replace the solution when the Support material comprises 15% of the solution, typically after several weeks of use. STRATASYS / FINISHING APPLICATIONS... - Page 221 • Active washing cell volume: 31 x 26 x 28 cm^3 ~ 22.5L • Footprint: 60L x 54W x 49H cm^3 CSIIP CleanStation • Active washing cell volume: 40 x 35 x 40 cm^3 ~ 60L Footprint: 91L x 76W x 100H cm^3 STRATASYS / FINISHING APPLICATIONS...
- Page 222 Immediately after removing the model from the cleaning station, rinse it in tap water and gently rub the surfaces. Why? To obtain optimum surface quality and prevent a ‘white’ layer from appearing on the surfaces. Models cleaned in cleaning station Models cleaned in cleaning station and left to dry. and washed in tap water. STRATASYS / FINISHING APPLICATIONS...
- Page 223 It is important not to wash or wipe parts after dipping them in Glycerol. Why? • To improve the model’s mechanical properties. In some cases, prolonged model soaking in alkaline solution may adversely affect the mechanical properties of the model. • To strengthen the printed model. STRATASYS / FINISHING APPLICATIONS...
- Page 224 DT3 or CSIIP, to prevent the filters from clogging. Why? • To match the grid style to the part geometry. Note: The default grid for SUP706 is Lite. STRATASYS / FINISHING APPLICATIONS...
- Page 225 DT3 or CSIIP, to prevent the filters from clogging. Why? • To match the grid style to the part geometry. Note: The default grid for SUP706 is Lite. STRATASYS / FINISHING APPLICATIONS...
-
Page 226: Specification Summary
- When using WJ – same as SUP705 (All materials) Model mechanical Properties - Hands free mode in Matt – required Glycerol solution (like in SUP 707) Model Surface Quality Similar to Sup 705 STRATASYS / THE 3D PRINTING SOLUTIONS COMPANY... - Page 227 Knowledge Resources STRATASYS / THE 3D PRINTING SOLUTIONS COMPANY...
- Page 228 Outline • Support Center • Stratasys Academy • GrabCAD Community STRATASYS / THE 3D PRINTING SOLUTIONS COMPANY...
-
Page 229: Support Center
The purpose of the Support Center website is to provide you with knowledge on Stratasys products & technology Technical Software & Documentation Drivers SUPPORT Training Videos CENTER content Technical Case Application Studies Guides STRATASYS / THE 3D PRINTING SOLUTIONS COMPANY... - Page 230 Aceessing Support Center Access Stratasys.com website > Support > Support Center STRATASYS / THE 3D PRINTING SOLUTIONS COMPANY...
- Page 231 Application Briefs/guides/notes • Best Practices • Brochures • Buyers’ guides • Case Studies • eBooks • Infographics • Material Data Sheets • Printer Spec Sheets • Recycling Documents • Solution Briefs • White Papers STRATASYS / THE 3D PRINTING SOLUTIONS COMPANY...
- Page 232 Stratasys Academy • Access our learning platform for e-learning modules and registration for instructor-led courses STRATASYS / THE 3D PRINTING SOLUTIONS COMPANY...
- Page 233 Accessing Stratasys Academy If you have a user account enter details here If you are a new user, click here to register and fill the form STRATASYS / THE 3D PRINTING SOLUTIONS COMPANY...
- Page 234 Accessing Stratasys Academy Click on ‘Browse all courses to view the course catalog STRATASYS / THE 3D PRINTING SOLUTIONS COMPANY...
- Page 235 GrabCAD Community- https://grabcad.com/library • A digital community of over 6 million engineers and designers with tutorials, blogs and group discussion STRATASYS / THE 3D PRINTING SOLUTIONS COMPANY...
- Page 236 THANK YOU STRATASYS / THE 3D PRINTING SOLUTIONS COMPANY...
Need help?
Do you have a question about the Objet24 and is the answer not in the manual?
Questions and answers