Table of Contents
Advertisement
Available languages
Available languages
Quick Links
Technical Support
If you need any technical help, please visit our official support site and contact our support
team before returning the products, https://support.reolink.com.
Technische Unterstützung
Wenn Sie Hilfe brauchen, kontaktieren Sie bitte Reolink Support Team zuerst, bevor Sie Ihre
Bestellung zurücksenden. Meiste Fragen oder Probleme können von unserem Online Support
Center beantwortet und gelöst werden: https://support.reolink.com.
Support technique
Si vous avez besoin d'aide, veuillez contacter Reolink avant de retourner votre produit. La
plupart des questions peuvent être répondues via notre centre de support en ligne à l'adresse
https://support.reolink.com.
Assistenza Tecnica
Se avete bisogno di aiuto, le chiediamo gentilmente di contattare Reolink prima di restituire il
prodotto. La maggior parte delle domande può essere risolta tramite il nostro centro di
assistenza online all'indirizzo https://support.reolink.com.
Soporte técnico
Si necesita ayuda, comuníquese con Reolink antes de devolver su producto. La mayoría de las
preguntas se pueden responder a través de nuestro centro de soporte en línea en
https://support.reolink.com.
REOLINK INNOVATION LIMITED
FLAT/RM 705 7/F FA YUEN COMMERCIAL BUILDING 75-77 FA YUEN STREET MONG KOK KL
HONG KONG
Product Ident GmbH
EU
REP
Hoferstasse 9B, 71636 Ludwigsburg, Germany
prodsg@libelleconsulting.com
APEX CE SPECIALISTS LIMITED
UK
REP
89 Princess Street, Manchester, M1 4HT, UK
info@apex-ce.com
Aug 2 0 2 1
Q S G 2 _ C
58.03.005.0017
Operational Instruction
Apply to:Reolink PoE Security Camera Systems
@ReolinkTech https://reolink.com
EN/DE/FR/IT/ES
Advertisement
Table of Contents

Related Manuals for Reolink rlk16-800d8


Summary of Contents for Reolink rlk16-800d8
- Page 1 Assistenza Tecnica Operational Instruction Se avete bisogno di aiuto, le chiediamo gentilmente di contattare Reolink prima di restituire il prodotto. La maggior parte delle domande può essere risolta tramite il nostro centro di assistenza online all'indirizzo https://support.reolink.com. Apply to:Reolink PoE Security Camera Systems Soporte técnico...
-
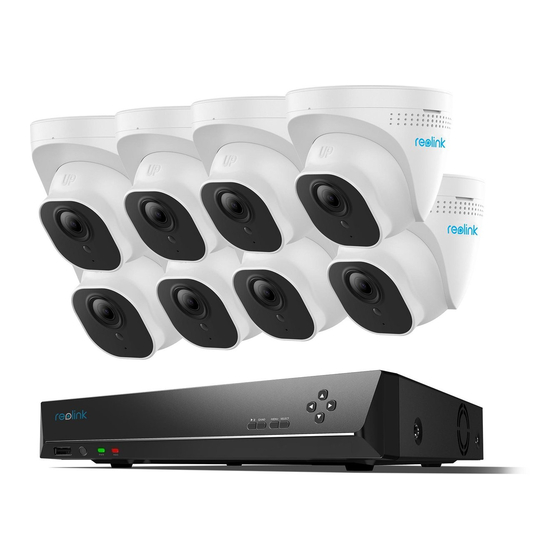
Page 2: What's In The Box
Contents What’s in the Box What's in the Box Introduce the NVR Introduce the Cameras Bullet or Dome Camera Pack of Screws Waterproof Connection Diagram Set up PoE NVR System Mount Tips for the Cameras Troubleshooting USB Mouse HDMI Cable Specifications Network Cable Network Cable... - Page 3 Introduce the NVR Introduce the Cameras Mount USB Port MENU SELECT Power LED PWR HDD Infrared Lights HDD LED Lens Control Panel Daylight Sensor USB Port Built-in Mic Power Switch Audio Out Power Input DC 52V AUDIO HDMI Waterproof Lid HDMI Port Network Cable VGA Port...
- Page 4 Mount Mount Infrared Lights Metal Case Lens Built-in Mic Daylight Sensor Infrared Lights Built-in Mic Lens Daylight Sensor Mount Metal Case Lens NOTE: Infrared Lights • Different types of cameras are introduced in this section. Please check out the camera included in the package and check out the details from the correpsonding introduction above.
-
Page 5: Connection Diagram
Connect the NVR to the monitor with a VGA or HDMI cable. NOTE: There is no VGA NOTE: Some Reolink WiFi cameras also work with Reolink PoE NVR. For more information, visit https://support.reolink.com and search Make Reolink WiFi Cameras Work cable included in the package. - Page 6 • To ensure better image quality, it’s recommended to clean the lens with a soft cloth from time to time. Download and launch the Reolink App or Client software and follow the instructions to access the • Make sure the power ports are not directly exposed to water or moisture and not blocked by dirt NVR.
-
Page 7: Troubleshooting
Notification of • Go to Menu -> System -> Maintenance and restore all settings. Compliance No Video Output on the Monitor/TV If it still doesn’t work, please contact Reolink Support https://support.reolink.com FCC Compliance Statement Decoding Resolution: If there’s no video output on the monitor from... - Page 8 By using the Product Software that is Diagramm für Anschluss the sustainable reuse of material resources, embedded on the Reolink product, you agree please recycle it responsibly. To return your to the terms of this End User License Einrichtung des PoE NVR Systems used device, please visit the Return and Agreement (“EULA”) between you and...
- Page 9 Lieferumfang NVR-Einführung USB-Port MENU SELECT Bullet- oder Dome-Kamera Päckchen Wasserdichter Strom-LED PWR HDD mit Schrauben Deckel Festplatte-LED Bedienfeld USB-Port Ein-/Ausschalter Netzwerkkabel Netzwerkkabel USB-Maus HDMI-Kabel 1 Meter 18 Meter Netzadapter Audio-Ausgang Stromeingang DC 52V AUDIO HDMI HDMI-Port VGA-Port Netzwerk Schild Kurzanleitung Montage- PoE-Ports Videoüberwachung...
- Page 10 Kameras-Einführung Montagesockel Montagesockel Infrarot-LEDs Objektiv Infrarot-LEDs Tageslichtsensor Objektiv Internes Mikrofon Tageslichtsensor Internes Mikrofon Montagesockel Wasserdichter Deckel Metallgehäuse Netzwerkkabel Objektiv Reset-Taste Infrarot-LEDs * Zum Zurücksetzen auf die Werkseinstellungen ca. 10 Sekunden lang drücken. Tageslichtsensor Strom(Optional) Internes Mikrofon Deutsch Deutsch...
- Page 11 Diagramm für Anschluss Es wird empfohlen, dass Sie alle Teile anschließen und versuchen, das System vor der endgültigen Montagesockel Installation laufen zu lassen, um sicherzustellen, dass alle Komponenten ordnungsgemäß funktionieren können. Metallgehäuse Internes Mikrofon Schließen Sie den NVR (LAN-Port) mittels eines Ethernet-Kabels an Infrarot-LEDs den Router an.
- Page 12 Zugriff auf den NVR über Smartphone oder PC Schließen Sie den NVR an eine Laden Sie die Reolink App oder den Client herunter und starten Sie sie. Dann befolgen Sie die Steckdose an und schalten Sie Anweisungen, um auf den NVR zuzugreifen.
-
Page 13: Fehlerbehebung
Fenster durch Infrarot-LEDs, Umgebungslichter oder Statuslichter geblendet wird. Maintenance und herstellen Sie alle Wenn es keinen Videoausgang von Reolink Einstellungen wieder. • Platzieren Sie die Kamera nicht in einem Schattenbereich und richten Sie sie nicht auf einen gut NVR auf dem Bildschirm gibt, versuchen Sie beleuchteten Bereich. -
Page 14: Spezifikationen
2-Jahre eingeschränkte Garantie ist für dieses Informationen: https://reolink.com/eula/. Kamera Produkt verfügbar, die nur gültig ist, wenn es Vereinfachte im offiziellen Reolink Store oder einem von EU-Konformitätserklärung Nachtsicht: 30 Meter/100 Fuß Reolink autorisierten Wiederverkäufer Tag/Nacht Modus: Auto-Umschaltung gekauft wurde. Mehr Infos: Reolink erklärt, dass dieses Gerät den... -
Page 15: Contenu De La Boîte
Contenu Contenu de la boîte Contenu de la boîte Introduction de NVR Introduction de Caméras Caméra Bullet ou Dôme Couvercle (dans l'emballage) étanche Diagramme de connexion Configurer le système NVR PoE Dépannage Spécifications Câble Ethernet Câble Ethernet Adaptateur Souris USB Câble HDMI Avis de conformité... - Page 16 Introduction de NVR Introduction de Caméras Base de montage Port USB MENU SELECT LED d'alimentation PWR HDD LED infrarouge LED de disque dur Objectif Panneau de contrôle Capteur de lumière du jour Port USB Micro intégré Interrupteur d'alimentation Sortie Audio Entrée d'alimentation DC 52V AUDIO...
- Page 17 Base de montage Base de montage LED infrarouge Boîtier Métallique Objectif Micro intégré Capteur de lumière du jour LED infrarouge Micro intégré Objectif Capteur de lumière du jour Base de montage Boîtier Métallique Objectif REMARQUE: LED infrarouge • Différents types de caméras sont présentés dans cette section. Veuillez vérifier la caméra incluse dans le paquet et consulter les détails de l'introduction correspondante ci-dessus.
-
Page 18: Diagramme De Connexion
HMDI Connectez le NVR au moniteur avec un câble VGA ou HDMI. REMARQUE: Certaines caméras WiFi Reolink fonctionnent également avec le NVR PoE Reolink. REMARQUE: aucun câble VGA Pour plus d'informations, visitez le site https://support.reolink.com et cherchez "Make Reolink n'est inclus dans l'emballage. - Page 19 • Assurez-vous que les ports d'alimentation ne sont pas directement exposés à l'eau ou à l'humidité et qu'ils ne sont pas bloqués par des saletés ou d'autres éléments. Téléchargez et lancez l'application Reolink ou le logiciel Client et suivez les instructions pour accéder au NVR.
-
Page 20: Dépannage
S'il n'y a pas de sortie vidéo sur le moniteur du réglementation FCC. L'utilisation est soumise NVR Reolink, essayez les solutions suivantes: aux deux conditions suivantes: (1) cet appareil Échec de l'accès à distance ne doit pas causer d'interférences nuisibles, et Résolution de décodage:... - Page 21 Reolink, vous acceptez les termes du Garantie limitée présent contrat de licence utilisateur final PoE Risoluzione dei Problemi (“CLUF”) entre vous et Reolink. Pour en savoir Ce produit est vendu avec une garantie plus: https://reolink.com/eula/. limitée de 2 ans qui n'est Specifiche...
-
Page 22: Cosa C'è Nella Scatola
Cosa c’è nella Scatola Presentazione di NVR Porta USB MENU SELECT Telecamera Bullet o Dome Confezione Coperchio LED di Alimentazione PWR HDD di Viti Impermeabile LED di Disco Rigido Pannello di Controllo Porta USB Interruttore d'Accensione Cavo di Cavo di Adattatore di Mouse USB Cavo di HDMI... - Page 23 Presentazione di telecamere Base di Montaggio Base di Montaggio Luci a Infrarossi Obiettivo Luci a Infrarossi Sensore Luce Diurna Obiettivo Microfono Incorporato Sensore Luce Diurna Microfono Incorporato Base di Montaggio Coperchio Impermeabile Alloggiamento Metallico Cavo di Ethernet Obiettivo Pulsante di Ripristino * Premere per circa 10 secondi per ripristinare alle Luci a Infrarossi impostazioni di fabbrica.
-
Page 24: Diagramma Di Collegamento
Diagramma di Collegamento Base di Montaggio Per garantire il corretto funzionamento di tutti i componenti, si consiglia di collegare ogni parte e provare ad avviare il sistema prima di un'installazione finale. Allogiamento Metallico Microfono Incorporato Collegare l'NVR (porta LAN) al Luci a Infrarossi router con un cavo di Ethernet. - Page 25 Accedere all'NVR tramite Smartphone o PC Collegare l'NVR a una presa di Scaricare e avviare l'App Reolink o lo software Client e seguire le istruzioni per l'accesso di NVR. corrente ed accendere l'interruttore d'accensione. • Sullo Smartphone Scansionare per scaricare l'App Reolink.
-
Page 26: Risoluzione Dei Problemi
Nel caso che non ci sia uscita video sul a causa dell'abbagliamento dalle luci a infrarossi, luci dell'ambiente e dalle luci di stato. contattare l'assistenza Reolink monitor dall'NVR Reolink, provare le soluzioni https://support.reolink.com • Non posizionare la telecamera in un'area ombreggiata e puntarla in un'area ben illuminata, seguenti: altrimenti ciò... - Page 27 Peso: 2.0kg (3.0kg for RLN16-410) possono causare operazioni indesiderate. Per questo accordo di licenza per l’utente finale maggiori informazioni, visitare: Questo prodotto viene fornito con una (“EULA”) fra voi e Reolink. Scopri di più: https://reolink.com/fcc-compliance-notice/. Telecamera garanzia limitata di 2 anni, la https://reolink.com/eula/.
-
Page 28: Contenido De La Caja
Índices Contenido de la Caja Contenido de la Caja Introducción de NVR Introducción de Cámaras Cámara Tipo Bala o Tornillos Tapa Cámara Tipo Domo (en paquete) Impermeable Diagrama de Conexión Configurar Sistema de NVR PoE Soluciones de Problema Especificaciones Cable Ethernet Cable Ethernet Adaptador de Ratón USB... - Page 29 Introducción de Cámaras Introducción de NVR Base de Montaje Puerto USB MENU SELECT LED de Alimentación PWR HDD Luces Infrarrojas LED de Disco Duro Objetivo Panel de Control Sensor de Luz Solar Puerto USB Micrófono Incorporado Interruptor Encendido/Apagado Salida de Audio Potencia de Entrada DC 52V AUDIO...
- Page 30 Base de Montaje Base de Montaje Luces Infrarrojas Caja Metálica Objetivo Micrófono Incorporado Sensor de Luz Solar Luces Infrarrojas Micrófono Incorporado Objetivo Sensor de Luz Solar Base de Montaje Caja Metálica Objetivo NOTA: • En esta sección se presentan diferentes tipos de cámaras. Verifique la cámara incluida en el Luces Infrarrojas paquete y los detalles de la introducción correspondiente anteriormente.
-
Page 31: Diagrama De Conexión
Conecte el NVR al monitor con un cable VGA o HDMI. NOTA: No hay cable de VGA NOTA: Algunas cámaras WiFi de Reolink también funcionan con Reolink PoE NVR. Para más información, consulte https://support.reolink.com y busque Make Reolink WiFi Cameras Work incluido en el paquete. - Page 32 • Para garantizar una mejor calidad de imagen, se recomienda limpiar el objetivo con un paño suave de vez en cuando. Descargue e inicie la aplicación Reolink o el software de Client y siga las instrucciones para • Asegúrese de que los puertos de alimentación no estén directamente expuestos al agua o la acceder al NVR.
-
Page 33: Especificaciones
Reolink https://support.reolink.com Si no hay salida de video en el monitor desde 12MP/8MP/5MP/4MP/3MP/1080p/720p Reolink NVR, intente las siguientes soluciones: El dispositivo cumple con la Parte 15 de las Temperatura de Funcionamiento: No puede acceder al Reglas de la FCC. El funcionamiento está... - Page 34 Al utilizar el Software del producto que está recursos materiales. Para devolver su integrado en el producto Reolink, usted dispositivo usado, utilice los sistemas de acepte los términos de este Contrato de devolución y recolección o comuníquese con Licencia de Usuario Final ("EULA") entre usted...
Need help?
Do you have a question about the rlk16-800d8 and is the answer not in the manual?
Questions and answers