Table of Contents
Advertisement
Quick Links
WM:
GENERAL
PRODUCT
SELECTION
INSTALLATION
WIRING
DIAGRAMS
WM(L)(E) KITS
TROUBLE
SHOOTING
COMPONENT
IDENTIFICATION
Marstair Division, TEV Ltd.,
Armytage Road, Brighouse,
West Yorkshire, HD6 1QF, UK.
Tel: +44 (0) 1484 405600
Fax: +44 (0) 1484 405620
Email: sales@marstair.com
TECHNICAL MANUAL
CO2 EVAPORATOR
Part numbers
Dimensions and weights
Kits
Features/accessories
Optional electric heating
Airflows, air throws
Sound power and pressure levels
Performance data
Fuses
Electrical data
Removing the case & Fitting filters
Hanging the unit
Pipework and restrictors
Gravity drain; cable routing
Remote controller WM 60 (RCC30)
WM 60
Remote return air sensor (for WM RCC30 controller)
Programmable timer (for WM)
5m high condensate pump
Fitting new condensate pump
WM 60
Exploded view of chassis with component identification
Exploded view of case
1
2
2
2
3
3
3
3
4
4
4
5
6
7
7
8
10
11
11
12
13
15
16
17
55699116-03
Advertisement
Table of Contents

Related Manuals for Marstair WM 60


Summary of Contents for Marstair WM 60
- Page 1 Electrical data INSTALLATION Removing the case & Fitting filters Hanging the unit Pipework and restrictors Gravity drain; cable routing Remote controller WM 60 (RCC30) WIRING WM 60 DIAGRAMS WM(L)(E) KITS Remote return air sensor (for WM RCC30 controller) Programmable timer (for WM)
-
Page 2: Part Numbers
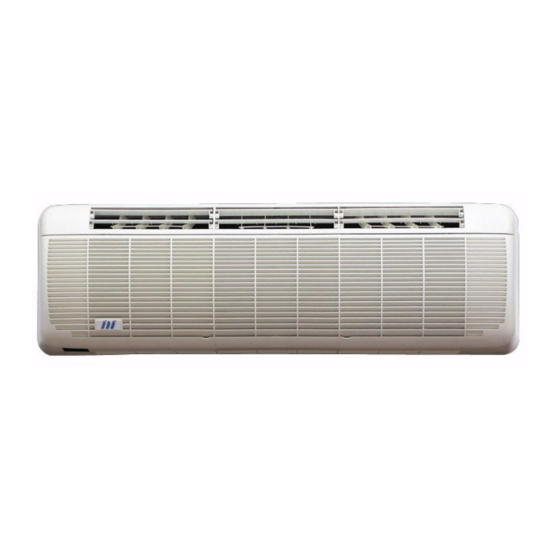
Evaporator tested to 90 bar pressure. Max operating pressure 60 bar Appropriate safety devices must be fitted to ensure maximum operating pressure is not exceeded. PART NUMBERS WM UNITS Cool Only WM 60 55600069 KITS DESCRIPTION PART NUMBER LHPW Coil FFO... - Page 3 FEATURES/ACCESSORIES INDOOR UNITS Top air discharge Adjustable air deflection Long life washable filter 3 fan speeds De-ice thermostat Electric heating Remote hard wired control Remote temperature sensor Programmable timer Gravity drain 5m high condensate pump OPTIONAL ELECTRIC HEATING (kW) 230V 50Hz 240V 50Hz WM (L) (E) AIRFLOWS...
- Page 4 Total Latent Sensible Total Latent Sensible Total Latent Sensible 4.60 1.55 3.06 3.84 1.17 2.68 3.05 0.69 2.36 WM 60 4.90 1.63 3.27 4.11 1.24 2.87 3.26 0.72 2.55 @ 23°C Air 5.96 1.89 4.07 5.02 1.43 3.60 4.03 0.75 3.28...
- Page 5 CASE REMOVAL AND FILTER CHANGE...
- Page 6 HANGING RAIL FIXING THE HANGING RAIL HANGING THE CHASSIS WM 60...
-
Page 7: Refrigeration Pipework
REFRIGERATION PIPEWORK GRAVITY DRAIN CABLE ROUTING... - Page 8 RCC 30 REMOTE CONTROLLER 97200211 - NEW INSTALLATION The position of the thermostat should account for specific site application:- i) Mount on a flat surface within the area conditioned by the unit to which it is connected. ii) Avoid draughts, heat from radiators, proximity to hot/cold water pipes, direct sunlight. iii) Avoid corners of the room where air is likely to stagnate.
-
Page 9: Temperature Control
OPERATING INSTRUCTION RCC 30 REMOTE CONTROLLER ON / OFF AND FAN SPEEDS The slider controls the fan speeds as shown above: in its lowest position the unit is in standby ie. the air conditioner has power supplied to it but does not operate. TEMPERATURE CONTROL The desired room temperature is set using the rotary switch. - Page 10 WM WIRING DIAGRAM...
- Page 11 RETURN AIR SENSOR 97200212 (FOR RCC 30 REMOTE CONTROLLER 97200211) The sensor can be fitted to the return air inlet to an air conditioning unit to improve operation eg. if the wall thermostat is placed outside the space being conditioned, or if there is considerable stratification in a room with a high ceiling, where the wall thermostat would not measure a representative temperature.
- Page 12 5m HIGH CONDENSATE PUMP KIT FOR WM UNITS This kit is for use on all versions of CWM and CWM L units and is for condensate removal where a lift of up to 5m is required. The pump runs on demand. A high level alarm will switch off the cooling signal until condensate has dropped below a pre-set level.
-
Page 13: Casing Removal
1 : CASING REMOVAL Cabinet Removal Fitting New Condensation Pump 1. Before fitting the replacement condensation pump any condensation in the drain tray must be safely collected. 2. On the back edge of the drain tray is a drain point fitted with a short piece of pipe and a rubber adaptor remove short piece of pipe leaving rubber adaptor in position and collect any condensation remaining in the drain tray. -
Page 14: Electrical Connections
Float switch fixed in position under drain tray on R/H side of unit. Outlet pipe with anti siphon valve 9. Fit a self adhesive pad on to the back of condensation pump bracket. 10. Position the bracket on the right hand side of the back plate approximately 60 mm from the bottom and 10mm in from the side using the self adhesive pad to hold it in position. -
Page 15: Troubleshooting
TROUBLE SHOOTING Unit will not cool No mains supply to the unit. Pump does not run Sensor wires disconnected from terminal connector block. Cooling is interrupted Restriction in pump flow allowing level to Rise and trip overflow circuit. Check for blockage or kink in hoses. Condensate at high level - tripping overflow circuit Pump and filter blocked - remove and clean. - Page 16 EXPLODED VIEW OF WM (L) (E) with COMPONENT IDENTIFICATION Back panel 16 Heater elements 31 Main PCB (WM L) Condensate pump PCB 17 Heater coil retaining clip 32 Main PCB (WM E) Condensate pump bracket 18 Heater cutout bracket 33 Terminals (WM L, E) Condensate pump 19 Heater cutout 34 Terminal mounting bracket...
- Page 17 EXPLODED VIEW OF CASE 1 Cover ( L/H) Vertical air deflection vane 9 Horizontal air deflector vane (lower) 2 Cover (centre) Grille (R/H) 10 Horizontal air deflector vane (upper) 3 Cover (R/H) Grille (centre) 11 Connecting rod 4 Filter Grille (L/H) 12 Blank (WM): IR lens (WM L, WM E)
Need help?
Do you have a question about the WM 60 and is the answer not in the manual?
Questions and answers