Table of Contents
Advertisement
Quick Links
Advertisement
Table of Contents

Related Manuals for Flyingvoice P10


Summary of Contents for Flyingvoice P10
- Page 1 Version 1.0.1 Oct. 2022 Flyingvoice Network Technology Co., Ltd.
- Page 2 Copyright Copyright © 2020 Flyingvoice Network Technology CO., LTD. Copyright © 2020 Flyingvoice Network Technology CO., LTD. All rights reserved. No parts of this publication may be reproduced or transmitted in any form or by any means, electronic or mechanical, photocopying, recording, or otherwise, for any purpose, without the express written permission of Flyingvoice Network Technology CO., LTD.
- Page 3 Flyingvoice does not provide any warranty and is subject to change without notice. All risks other than risks caused by use of the information are borne by the recipient. In no event, even if Flyingvoice has been suggested the occurrence of damages that are direct,...
- Page 4 Address: 1801-1802, Building 1, Chongwen Park, Nanshan Zhiyuan, Nanshan District, Shenzhen, China Hereby, Flyingvoice Network Technology Co., Ltd. declares that this device is in compliance with the essential requirements and other relevant provisions of Directive 2014/53/EU A copy of the declaration of conformity can be obtained with this user manual; this product is not restricted in the EU.
- Page 5 GNU GPL INFORMATION Flyingvoice phone firmware contains third-party software under the GNU General Public License (GPL). Flyingvoice uses software under the specific terms of the GPL. Please refer to the GPL for the exact terms and conditions of the license.
-
Page 6: Table Of Contents
3.1.2 Placing Multiple Calls ................. 18 3.1.3 Placing a Call from the Call History ............18 3.1.4 Placing a Call from the Directory ............... 18 3.1.5 Placing a Call using the RJ9 headset ............19 Flyingvoice Network Technology Co., Ltd. I/IV... - Page 7 Setting Up a Local Conference Call ..............26 Holding or Resuming a Conference Call ............26 Splitting a Conference Call.................. 26 Ending a Conference Call ................... 26 Chapter 4 Advanced Call Features ..................27 Flyingvoice Network Technology Co., Ltd. II/IV...
- Page 8 Backlight ......................39 Language ......................40 Time & Date ......................40 Changing the Administrator Password ..............40 Call Immediately key ................... 41 Phone lock ......................41 5.2 Audio Settings ...................... 41 Adjusting the Volume ..................41 Flyingvoice Network Technology Co., Ltd. III/IV...
- Page 9 Table of Contents Setting the Ring Tone ..................42 Chapter 6 Maintaining Your Phone ..................43 6.1 Rebooting Your Phone ..................43 6.2 Resetting to Factory Settings ................43 Flyingvoice Network Technology Co., Ltd. IV/IV...
-
Page 10: About This Guide
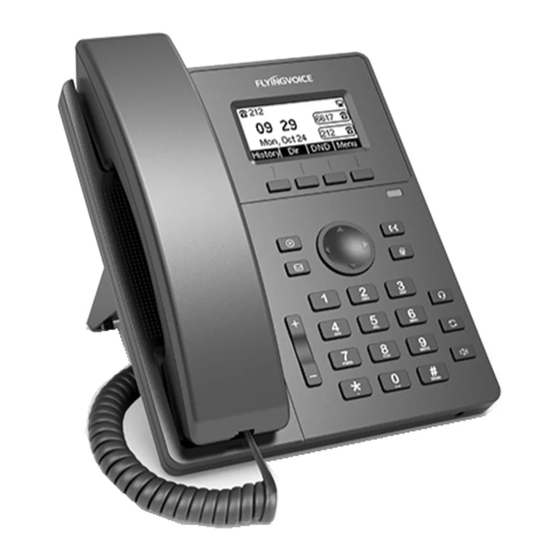
About This Guide About This Guide Thank you for choosing Flyingvoice P10(P10P) IP phone, which delivers the industry’s leading HD audio quality and a wide range of business telephony features, such as Call Hold, Call Transfer, Busy Lamp Field, Call Recording, Paging and Conference over an IP network. -
Page 11: Chapter 1 Introduction
This chapter provides the overview of phone hardware and screen layout, and how to navigate your phone for the best performance. Topics Hardware Overview LED Indicator Screen and Icons Entering Characters 1.1 Hardware Overview Topics P10/P10P Hardware P10/P10P Hardware Flyingvoice Network Technology Co., Ltd. -
Page 12: Led Indicator
(speakerphone) mode is activated Keypad Provides the digits and special characters in context-sensitive applications Power LED Indicates call status, message status, and phone’s system status Indicator Logo FLYINGVOICE Logo 1.2 LED Indicator Power LED Indicator Flyingvoice Network Technology Co., Ltd. -
Page 13: Screen And Icons
1. Status Bar: Display the default account, feature status icons, and the time. The status icons are displayed when features are activated. 2. Line Keys: Display the information associated with the line keys and feature keys on the phone. 3. Soft Keys: Display the information associated with the feature keys. Flyingvoice Network Technology Co., Ltd. -
Page 14: Calls Screen
Ringer volume is 0 Headset mode Missed Calls Voice Mail Call Forward Call is on hold Recording Line Key Icons Icons on the line key that vary by phone models. Icon indicators (associated with line) Flyingvoice Network Technology Co., Ltd. -
Page 15: Other Icons
Wait one second, and then enter the next letter. Enter numbers Select 123 mode, press the corresponding keys. Flyingvoice Network Technology Co., Ltd. - Page 16 In 123 mode, you can press the * key to choose the following special characters: .*:/@[]. Insert space Select ABC, abc, 2aB mode, press the 0 key. Delete one or more Position the cursor to the right of the character, and select the Delete soft key. characters Flyingvoice Network Technology Co., Ltd.
-
Page 17: Chapter 2 Getting Started
Chapter 2 Getting Started Chapter 2 Getting Started This chapter describes the introductory operation of the P10(P) phone and covers the For more information and help, please contact us. Topic Phone initialization Phone Status Basic network settings Wireless network settings 2.1 Phone initialization... -
Page 18: Registration
Usually, the system administrator will pre-configure the relevant parameters and deploy all phones centrally, in this case, the phones are usually already registered with accounts. The P10P IP phone supports 2 account registrations. If the phone is not registered, you need Flyingvoice Network Technology Co., Ltd. -
Page 19: Phone Interface Registration
Default Administrator Username and Password are "admin" 2. Click SIP Account->Line x, drop down and select Line Enable to enable, fill in user information (Display Name, Phone Name, Account, Password), Proxy and Registration information (Proxy server, Proxy port, Transport) Flyingvoice Network Technology Co., Ltd. - Page 20 1. Click SIP Account->Line x, drop down and select Account Disable Tips Incorrect network settings may cause the network to be unavailable and may also have an impact on the performance of the network. To learn more about the parameters, please consult your system administrator. Flyingvoice Network Technology Co., Ltd.
-
Page 21: Chapter 3 Call Features
Start typing a phone number. ⚫ Select the desired line key. ⚫ Pick up the handset, press the Speakerphone key or the HEADSET key 2. Enter a number or select a contact. 3. Select Send. Flyingvoice Network Technology Co., Ltd. -
Page 22: Placing Multiple Calls
3.1.4 Placing a Call from the Directory You can place a call to a contact directly from your directory. Procedure 1. Select Directory or navigate to Menu > Directory > Local Contacts. 2. Select the desired contact group or All Contacts. Flyingvoice Network Technology Co., Ltd. -
Page 23: Placing A Call Using The Rj9 Headset
You can answer a call when there is already an active call on your phone. When you are in an active call and an incoming call arrives on the phone, a call waiting tone beeps, and the incoming call information is displayed. Flyingvoice Network Technology Co., Ltd. -
Page 24: Answering A Call Automatically
1. Navigate to Phone-> Preferences-> Miscellaneous->Auto Answer All Phone Number -> Save & apply 3.3 Disabling Call Waiting If the call waiting feature is disabled, when there is already a call, the new incoming call will be rejected automatically. Procedure Flyingvoice Network Technology Co., Ltd. -
Page 25: Silencing Or Rejecting Incoming Calls
Tip: To deactivate DND quickly, press the DND soft key when the phone is idle. 3.5 Ending Calls You can end the current call at any time. Procedure 1. Do one of the following: Flyingvoice Network Technology Co., Ltd. -
Page 26: Muting/Unmuting Audio
If multiple calls are placed on hold, select the desired call first. Tip: When you have multiple calls on the phone and the current call is active, you can select Swap to swap to the held call. Flyingvoice Network Technology Co., Ltd. -
Page 27: Redirecting Incoming Calls
5. Optional: Enter the always/busy/no answer forward on code or off code respectively in the On Code or Off Code field. 6. Select OK. The call forward icon appears in the status bar. Deactivating Call Forward Flyingvoice Network Technology Co., Ltd. -
Page 28: Diverting Calls To A Contact
1. Press Menu -> Features -> Call Waiting -> Call Waiting Settings, click Switch key, select 2. Press the OK key to save the operation Web interface configuration Procedure 1. SIP Account->Line x -> Call Waiting, turn on call waiting, save and apply. Flyingvoice Network Technology Co., Ltd. -
Page 29: Transferring Calls
Avoid tapping or rustling papers near the microphone. ⚫ Speak in your normal voice without shouting. Tip: Check with your system administrator to find out if the local conference is enabled on your phone. Topics Flyingvoice Network Technology Co., Ltd. -
Page 30: Setting Up A Local Conference Call
2. Press the navigation key up or down to select a held call. 3. Press Resume. Ending a Conference Call When you end the conference call, the other parties drop the call. Procedure 1. Select End Call (End C). Flyingvoice Network Technology Co., Ltd. -
Page 31: Chapter 4 Advanced Call Features
Then log into the phone's web interface, go to Phone->Line key page, type select Paging, enter the group number into the value, then click the Save button. 3. After that, you can press the configured programable key to use the function. Using Paging Flyingvoice Network Technology Co., Ltd. -
Page 32: Voice Mail
3. Follow the voice prompt to listen to your voice mails. Tip: When the phone prompts that the phone receives a new voice mail, you can press the Connect soft key to dial out the voice mail access code directly. Flyingvoice Network Technology Co., Ltd. -
Page 33: Text Message
"Fail to send " is prompted, it means the recipient does not exist or other errors, the text message will be saved in the Outbox and can be changed and resend. Viewing text messages Flyingvoice Network Technology Co., Ltd. -
Page 34: Save Text Message
Delete to delete the message, or press the Option in the Sentbox message list to select Delete or Delete All. Save Text message Save to outbox: When sending a text message, it will be automatically saved to the outbox after sending failure. Procedure Flyingvoice Network Technology Co., Ltd. -
Page 35: Mwi (Message Waiting Indicator)
LCD interface, and the power indicator slowly flashes red. When all voice messages are checked or deleted, the voice icon disappears and the power indicator turns off. Tip: Not all servers support the MWI function. For more information, please consult your system administrator. Option Description Flyingvoice Network Technology Co., Ltd. -
Page 36: Directory
Managing the Local Directory Groups Managing the Local Directory Contacts Moving a Local Directory Contact to Blacklist Searching for Contacts Managing the Local Directory Groups You can manage the Local Directory groups when the phone is idle. Flyingvoice Network Technology Co., Ltd. - Page 37 The phone prompts you whether to delete the group. 4. Select OK. Managing the Local Directory Contacts You can manage the Local Directory contacts when the phone is idle. Topics Adding Contacts Viewing Contacts Editing Contacts Deleting a Contact Deleting All Contacts Flyingvoice Network Technology Co., Ltd.
- Page 38 4. Select OK. Deleting All Contacts You can delete all contacts from the Local Directory. Procedure 1. Select Directory or navigate to Menu > Directory > Local Contacts. 2. Select the desired contact group or All Contacts. Flyingvoice Network Technology Co., Ltd.
-
Page 39: Blacklist
1. Navigate to Menu > Directory > Blacklist. 2. Select Add. 3. Enter the blacklist contact’s information. 4. Select Save. Viewing Blacklist Contacts You can view the blacklist contacts from the Blacklist on your phone. Procedure Flyingvoice Network Technology Co., Ltd. - Page 40 You can move a blacklist contact to a Local Directory. Incoming calls from this contact will not be rejected automatically. Procedure 1. Navigate to Menu > Directory > Blacklist. 2. Select the desired contact, and then select Add to Contact list. The phone prompts you whether to move to contact. Flyingvoice Network Technology Co., Ltd.
-
Page 41: Call History
You can prevent someone from calling you again by saving a history record to Blacklist. Procedure 1. Select History. 2. Select the desired list. 3. Select the desired entry, and select Option > Add to Blacklist. 4. Edit the contact information. 5. Select OK. Deleting History Records Flyingvoice Network Technology Co., Ltd. - Page 42 You can delete all call records from the call history list. Procedure 1. Press History. 2. Select the desired list. 3. Select the desired entry, and select Delete All. The phone prompts you whether to delete all the records. 4. Select OK. Flyingvoice Network Technology Co., Ltd.
-
Page 43: Chapter 5 Customizing Your Phone
When the phone is in Idle, the screen brightness can be adjusted in 8 levels. Procedure 1. Navigate to Menu > Basic > Display > Active Level or Backlight Idle Intensity. 2. Select the desired level from the corresponding field. Flyingvoice Network Technology Co., Ltd. -
Page 44: Language
Changing the Administrator Password By default, you need input administrator password to access the Advanced setting menu. The default password is “admin”. For security reasons, you should change the default password as soon as possible. Procedure Flyingvoice Network Technology Co., Ltd. -
Page 45: Call Immediately Key
You can change the basic audio settings on your phone. Topics Adjusting the Volume Setting the Ring Tone Adjusting the Volume You can adjust the volume of the ringer, media, and the audio during a call. Flyingvoice Network Technology Co., Ltd. - Page 46 1. Select Directory or navigate to Menu > Directory> Local Contacts. 2. Select the desired contact group or All Contacts. 3. Choose the desired contact, and select Option > Detail. 4. Select the desired ring tone from the Ring Type field. 5. Select Save. Flyingvoice Network Technology Co., Ltd.
- Page 47 The phone prompts you whether to reset the setting. 3. Select OK. The phone begins resetting. Tip: Reset of your phone may take a few minutes. Do not power off until the phone has started up successfully. Flyingvoice Network Technology Co., Ltd.