Table of Contents
Advertisement
Quick Links
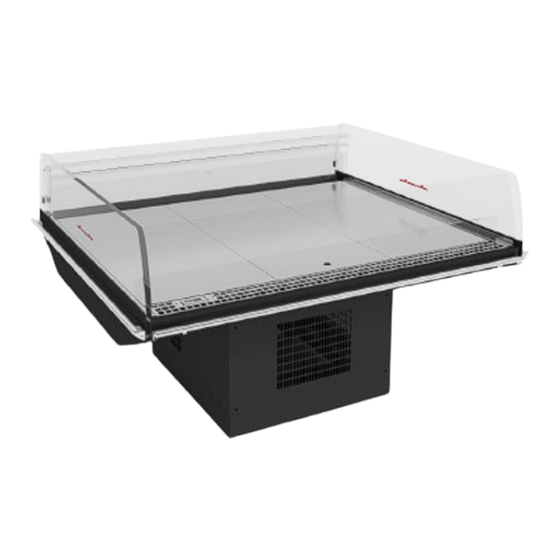
SINGLE-DECK MERCHANDISER
INSTALLATION & OPERATIONS MANUAL
WARNING / FOR YOUR SAFETY
Do not store or use gasoline or other flammable vapors
and liquids in the vicinity of this or any other appliance.
WARNING
R290 flammable refrigerant in use. Improper installation,
adjustment, alteration, service or maintenance can cause
property damage, injury or death. Read the installation,
operating and maintenance instructions thoroughly before
installing or servicing this equipment.
Introduction ............................................................ ii
Technical Data .................................................... 2-4
General Description .............................................. 5
Transport and Handling ........................................ 5
Positioning and Installation .............................. 6-8
Case Connection .............................................. 9-11
Pre-Power Checklist ........................................... 12
To ensure proper functionality and optimum performance, it is strongly recommended that Hillphoenix display cases be installed/serviced by qualified and
certified technicians who have experience working with commercial refrigerated display merchandisers and storage cabinets. For a list of Hillphoenix authorized
installation/service contractors, please visit our Web site: www.hillphoenix.com
Table of Contents
Airflow and Defrost ............................................. 13
Case Cleaning ................................................ 14-16
Troubleshooting ............................................. 17-21
Safety Devices & Service .............................. 22-23
Parts Ordering ................................................ 25-41
Appendix & Wiring Diagrams ....................... 42-52
Warranty .............................................................. 56
MIDA
3'X3', 4'X4', 4'X8'
P114309K
R.3 v.0
04/22
Advertisement
Table of Contents

Subscribe to Our Youtube Channel
Related Manuals for Dover Hillphoenix MIDA

Summary of Contents for Dover Hillphoenix MIDA
-
Page 1: Table Of Contents
SINGLE-DECK MERCHANDISER INSTALLATION & OPERATIONS MANUAL MIDA WARNING / FOR YOUR SAFETY Do not store or use gasoline or other flammable vapors and liquids in the vicinity of this or any other appliance. WARNING 3'X3', 4'X4', 4'X8' R290 flammable refrigerant in use. Improper installation, adjustment, alteration, service or maintenance can cause property damage, injury or death. - Page 2 IMPORTANT At Hill PHOENIX®, the safety of our customers and employees, as well as the ongoing performance of our products, are top priorities. To that end, we include important warning messages in all Hill PHOENIX installation and operations handbooks, accompanied by an alert symbol paired with the word "DANGER", "WARNING", or "CAUTION".
- Page 3 Rev. Date Change Description Author compressor compartment diagram, parts list, electrical diagrams and 4/21 D. Drillion troubleshooting...
-
Page 4: Technical Data
TECHNICAL DATA MIDA Mobile Single-Deck Self-Contained Mercchandiser (3'X3'), (4'X4') & (4'X8') NOTES: • "---" indicates that the feature is not an option on this case model and/or the data is not yet available. • Notes added are specific to case as pertains to data. •... - Page 5 TECHNICAL DATA MIDA Mobile Single-Deck Self-Contained Mercchandiser (3'X3'), (4'X4') & (4'X8')
- Page 6 (BLANK) CASE DIMENSIONS MIDA Mobile Single-Deck Self-Contained Mercchandiser (3'X3'), (4'X4') & (4'X8') ENGINEERED FOR STORES WITH AMBIENT CONDITIONS NOT TO EXCEED 75° AND 55% RELATIVE HUMIDITY. DUE TO ENGINEERING IMPROVEMENTS SPECIFICATIONS MAY CHANGE WITHOUT NOTICE.ALL MEASUREMENTS ARE TAKEN PER ASHRAE-72-2005 SPECIFICATIONS.HILLPHOENIX Rev.
- Page 7 GENERAL INFORMATION Thank you for choosing Hillphoenix for your food merchandising needs. This handbook contains important technical infor-mation and will assist you with the installation and operation of your new Hillphoenix display cases. By closely following the instructions, you can expect peak performance; attractive fit and finish; and long case life. We are always interested in your suggestions for improvements (e.g.
-
Page 8: Transport And Handling
CASE INSTALLATION LOCATION STORE CONDITIONS This refrigerated display case has been designed for displaying The temperature where the display case is stored must not and storing perishable food product. It is engineered for air- exceed 131°F. The display case must be shielded from conditioned stores with a maximum ambient of 75°F and sunlight and weather. - Page 9 CASE INSTALLATION Positioning the Cabinet Respect the conditions shown in the fi gures below and the indications in “TECHNICAL DATA”.
- Page 10 CASE INSTALLATION ▲ N O T E D A N G E R Electrical equipment and water drainage points are located Do not obstruct ventilation around the base of the display underneath the display case. Do not use front panels and case condensing unit.
-
Page 11: Case Connection
CASE CONNECTIONS ELECTRICAL The display case must be connected to a main power source that complies with electrical safety standards and is equipped Electrical hookups are made through the electrical raceway with a high-sensitivity magneto-thermal cut-out. that can be accessed by removing the front lower panels of the display case. - Page 12 CASE CONNECTIONS COMPRESSOR COMPARTMENT DIAGRAM A..Condenser Fan B..Compressor C..Fan Control Board D..Electrical Junction Box E..Drain F..Dissipater Pan G..Suction Line H..Discharge Line Note: Access locations and/or compartment configuration will vary based on case design. CONTROLS ON THE CONDENSING UNIT ▲...
- Page 13 CASE CONNECTIONS SAFETY LABELS Inspect the refrigerated display case and ensure all safety warnings/information applied on the refrigerated case are not removed. Any labels removed must be replaced. The following signs are applied:...
-
Page 14: Pre-Power Checklist
(BLANK) PRE-POWER CHECKLIST Before powering-up the case, be certain that all of the steps listed below have been completed to ensure proper case functionality, safety and compliance with warranty terms. Have you thoroughly examined the case for shipping damage? (see pg. 4) Have you checked to ensure the case is horizontally level? (see pg. -
Page 15: Airflow And Defrost
AIRFLOW & DEFROST AIRFLOW & PRODUCT LOAD F O R B I D D E N Hillphoenix cases provide maximum product capacity within 1. Do not load products above the load limit line. the refrigerated air envelope. Please keep products within the 2. -
Page 16: Case Cleaning
CASE CLEANING CASE CLEANING A periodic cleaning schedule should be established to maintain proper sanitation, insure maximum operating efficiency, and avoid the corrosive action of food fluids on metal parts that are left on for long periods of time. Further suggestions for case cleaning include the following: •... - Page 17 CASE CLEANING ▲ D A N G E R When carrying out cleaning work or maintenance on the condensate collection tank it is essential to disconnect the machine and all its accessories from the mains power! WARNING!!! DANGER OF BURNS Be careful of the elements inside the condensate evaporation tank: they operate at high temperature!! N O T E...
- Page 18 CASE CLEANING SCHEDULED MAINTENANCE TABLE Fig. 17 Recommended Cleaning Schedule...
- Page 19 TROUBLESHOOTING (BLANK) INSTRUCTIONS FOR PERSONNEL Table of Failures and Troubleshooting In the event of General Emergency PROBLEM POSSIBLE CAUSE SOLUTION Immediately inform those in the vicinity of the perceived 1) readjust set point 1) the parameters On danger, gesticulating if necessary; cut the electrical power to The condenser on controller to the controller incorrectly...
- Page 20 (BLANK) TROUBLESHOOTING MIDAR-290 Self-Contained Case – Set Point Summary Details Set points for various product applications are listed below: Set Point Comments: • For the MIDA4 and MIDA8, the controllers are set to Fresh Meat temperatures by default. • The MIDA4 and MIDA8 are designed to hold exceptionally low product temperatures, and are supplied at those settings by default.
- Page 21 TROUBLESHOOTING (BLANK) Step by Step Method to Modify the Case Set Point on MIDA8 Press UP/DOWN to modify the setpoint value. Then press case controller (Parameter “St”) PRG to save the setting and return to the menu.Caution: if the PRG button is not pressed, the new setting will not be Press PRG to enter display active actuators/functions saved.
-
Page 22: Troubleshooting
TROUBLESHOOTING Step by Step Moethod to Modify the Case Set Point (Parameter “St”) Hold the SET button for 1 second, the set value will begin flashing. Adjust the parameter to the desired value using the UP and DOWN arrows Adjust the parameter to the desired value using the UP and DOWN arrows. - Page 23 TROUBLESHOOTING Press SET to temporarily save the new values. Press the SET button for more than 3 seconds to permanently save the selected values and exit.
-
Page 24: Safety Devices & Service
SAFETY DEVICES & SERVICE SAFETY DEVICES DESCRIPTION OF DANGERS AND RISKS RESIDUAL Residual Dangers F O R B I D D E N Dangers that have not been reduced/eliminated with the safety It is absolutely forbidden for the user to tamper with measures adopted on the refrigerated case can nevertheless be safety devices. - Page 25 SAFETY DEVICES & SERVICE REFRIGERANT CHARGING Follow the charge amount specified on the data tag. It is This piece of equipment uses a R-290 Refrigeration sytem. This recommended to use the shortest hoses possible to prvent equipment has been clearly marked on the serial tag the type undercharging.
-
Page 26: Parts Ordering
PARTS ORDERING THIS PAGE LEFT BLANK... - Page 27 PARTS ORDERING Contact the Service Parts Department at: Shop Online: www.partsonestore.com Email: orderparts@doverfoodretail.com Phone: 833-3PARTS1 (1-833-372-7871) For MIDA parts: choose (Case) Provide the following information about the part you are ordering: • Model number and serial number* of the case for which the part is intended. •...
- Page 28 (BLANK) PARTS LIST PARTS INDEX MIDA - 4x4 Provide the following information about the part you are ordering: • Model number and serial number* of the case for which the part is intended. • Length of the part (if applicable). •...
- Page 29 PARTS LIST (BLANK) END WALLS / SIDE BUMPER LEFT END WALL RIGHT END WALL DESCRIPTION LEFT RIGHT Plexiglass end wall P113544B P113544B End wall bumper rail kit P116638M P116638M Cap for bumper rail P113547F P113547F Label “Load limit line” P113549B P113549B Support for Plexiglass end wall P113548D...
- Page 30 (BLANK) PARTS LIST PLEXIGLASS/BUMPER RAIL / DISPLAY AREA DESCRIPTION Part Number Tempered Front and Rear curved glass P113550K Anti-condensation Front P113551G Display deck with hole P113553C End wall bumper rail kit See prior page Product holder P113554A Rear Air inlet P113555K Rear closed air inlet P113556G...
- Page 31 PARTS LIST (BLANK) EVAPORATOR / EVAPORATOR FANS DESCRIPTION Part Number Protective metal grid Ø200 for evaporator fan P113562D "C" Serial Number: P113563B *Evaporator fan complete with impeller and metal ring "D" Serial Number: P117257G Evaporator R290 P113564M NOTE: The Evaporator Fan will differ based on the serial number of the MIDA case. If the MIDA case serial number ends in “C”, please use “C”...
- Page 32 PARTS LIST LOWER PARTS DESCRIPTION Part Number ON-OFF switch 16A P113565H Carel Thermostat PJEZC0H100 115V 3 RELE 2HP 2NTC P113566F Temp Sensor MIDA 4 P116632B "C" Serial Number: P116636D *Condensing Unit Relay MIDA 4 "D" Serial Number: P117256K Left side base panel INOX P113567D Rear base panel INOX P113568B...
- Page 33 PARTS LIST CONDENSOR UNIT PARTS - MIDA 4 DESCRIPTION Part Number Compressor MIDA 4 P113574K Condensing Fan Motor MIDA 4 P113575G Condensing Fan Blade MIDA 4 P116622C Condensor Fan Guard MIDA 4 P116623A Compressor Start Capacitor MIDA 4 P116624K Compressor Start Relay (ePTC) MIDA 4 P116625G Clikson MIDA 4 P116627C...
- Page 34 (BLANK) PARTS LIST ELECTRICAL CORD DESCRIPTION Part Number Electrical plug NEMA 5-15 Straight Blade Plug P113636D Electrical plug NEMA L5-15 Locking Plug P117255A...
- Page 35 PARTS LIST (BLANK) MIDA-8 JOINING KIT DESCRIPTION Part Number Front-Rear close panel INOX P113577C Joining kit P113578A Cables profile P113579K Case Controller MIDA-8 P116633M 1 P116633M Temp Sensor MIDA-8 P116634H Anti-Fog Front Double P117551C NOTE: All parts on MIDA-8 same as MIDA-4 parts unless shown on this page.
- Page 36 (BLANK) PARTS LIST MIDA-4x4 & MIDA-4x8 PARTS ORDERING NOTES...
- Page 37 PARTS LIST (BLANK) PARTS INDEX MIDA-3x3 Provide the following information about the part you are ordering: • Model number and serial number* of the case for which the part is intended. • Length of the part (if applicable). • Color of part (if painted) or color of polymer part. •...
- Page 38 (BLANK) PARTS LIST END WALLS / SIDE BUMPER DESCRIPTION Part Number Label “Load limit line” P114171B Plexiglass end wall P114172M End wall bumper rail kit P114173H...
- Page 39 PARTS LIST (BLANK) END WALLS / SIDE BUMPER DESCRIPTION Part Number Air Inlet End Wall DX/SX P114146E Plexi Worktop P114147C Honeycomb P114148A Honeycomb Holder P114149K Front/ Rear Glass P114150F Rear Closed Air Inlet P114151D Product Holder P114152B Front Holed Air Inlet P114153M Front Air Inlet P114154H...
- Page 40 (BLANK) PARTS LIST EVAPORATOR / EVAPORATOR FANS DESCRIPTION Part Number Evaporator R290 P114156D Protective Metal Grid For Evaporator Fan P113562D Evaporator Fan Complete with Impeller and Metal Ring P113563B...
- Page 41 PARTS LIST (BLANK) LOWER PARTS DESCRIPTION Part Number Rear Base Panel P114159H Left Side Base Panel P114160E Front Base Panel P114161C Right Side Base Panel P114162A Electrical Plug P113576E Carel Thermostat PJEZCOH100 P113566F Temp Sensor MIDA 3 P116632B Condensing Unit Relay MIDA 3 P116637B On/Off Switch P113565H...
- Page 42 (BLANK) PARTS LIST CONDENSOR UNIT PARTS - MIDA 3 DESCRIPTION Part Number Compressor MIDA 3 P114170D Condensing Fan Motor MIDA 3 P114169G Condensing Fan Blade MIDA 3 P116622G Condensor Fan Guard MIDA 3 P116623A Compressor Start Capacitor MIDA 3 P116624K Compressor Start Relay (ePTC) MIDA 3 P116626E Clikson MIDA 3...
- Page 43 PARTS LIST (BLANK) MIDA-3X3 PARTS ORDERING NOTES...
- Page 44 APPENDIX MIDA-3X3 & MIDA 4X4...
- Page 46 APPENDIX MIDA-4X8...
- Page 48 MIDA-3X3 WIRING DIAGRAM...
- Page 49 MIDA-4X4 WIRING DIAGRAM ("C" SERIAL NUMBER)
- Page 50 MIDA-4X4 WIRING DIAGRAM ("D" SERIAL NUMBER)
- Page 51 MIDA-4X8 WIRING DIAGRAM ("C" SERIAL NUMBER) (BLANK)
- Page 52 (BLANK) MIDA-4X8 WIRING DIAGRAM ("C" SERIAL NUMBER)
- Page 53 MIDA-4X8 WIRING DIAGRAM ("D" SERIAL NUMBER) TO TERMIANAL BOX 2...
- Page 54 MIDA-4X8 WIRING DIAGRAM ("D" SERIAL NUMBER)
- Page 55 CONTROLLER SET POINT FACTORY SETTINGS (°F) (BLANK) PROBE PARAMETERS DEFAULT ACTUAL Select °C/°F Disable decimal point Probe Calibration ALARM PARAMETERS DEFAULT ACTUAL Low Temperature Alarm Threshold/Deviation High Temperature Alarm Threshold/Deviation Digital input configuration High Condenser Temperature Alarm High Condenser Temperature Alarm Differential High condenser temperature alarm delay [min] Low and high temperature alarm delay FAN PARAMETERS...
- Page 57 Warning Maintenance & Case Care When cleaning cases the following must be performed PRIOR to cleaning: To avoid electrical shock, be sure all electric power is turned off before cleaning. In some installations, more than one switch may have to be turned off to completely de-energize the case. Do not spray cleaning solution or water directly on fan motors or any electrical connections.
-
Page 58: Warranty
Hill PHOENIX, Inc. Hereinafter Referred To As Manufacturer LIMITED WARRANTY GENERAL WARRANTY Manufacturer’s products are warranted to be free from defects in materials and workmanship under normal use and maintenance for fourteen months from date of shipment from manufacturer (the “Base Warranty Period”). In the event of a qualifying warranty claim, a new or rebuilt part to replace any defective part will be provided without charge.
Need help?
Do you have a question about the Hillphoenix MIDA and is the answer not in the manual?
Questions and answers