Table of Contents
Advertisement
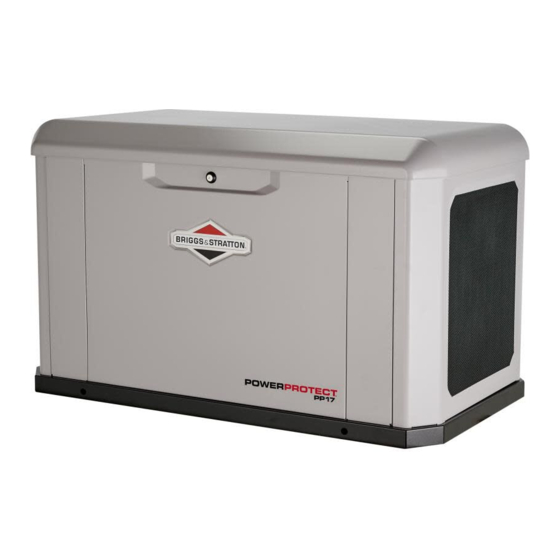
Single Phase Air-Cooled Standby Generator System
This generator is rated in accordance with UL (Underwriters Laboratories) 2200 (stationary engine generator
assemblies) and CSA (Canadian Standards Association) standard C22.2 N. 100-14 (motors and generators).
© Briggs & Stratton
All Rights Reserved.
Installation and Operation Manual
17 kW 20 kW 26 kW
80106286
Revision C
Advertisement
Chapters
Table of Contents

Related Manuals for Briggs & Stratton 040661


Summary of Contents for Briggs & Stratton 040661
- Page 1 Installation and Operation Manual 17 kW 20 kW 26 kW Single Phase Air-Cooled Standby Generator System This generator is rated in accordance with UL (Underwriters Laboratories) 2200 (stationary engine generator assemblies) and CSA (Canadian Standards Association) standard C22.2 N. 100-14 (motors and generators). ©...
-
Page 2: Table Of Contents
Table of Contents TABLE OF CONTENTS CALIFORNIA PROPOSITION 65 ........3 Setting the Exercise Timer ............ 33 THANK YOU ................3 MAINTENANCE ..............33 WHERE TO FIND BRIGGS & STRATTON ......3 Servicing the System ............... 33 FOR FUTURE REFERENCE ..........3 Maintenance Schedule ............34 IMPORTANT SAFETY INSTRUCTIONS......3 Maintaining the Generator ............ -
Page 3: California Proposition 65
California Proposition 65 CALIFORNIA PROPOSITION FOR FUTURE REFERENCE Fill out the following information and keep it with the receipt. Keep this information at hand to contact the installer or authorized dealer in the future regarding service or repair of the unit. WARNING This product can expose you to chemicals including used engine oil, which is known to... -
Page 4: Safety Alert Symbol And Signal Words
Safety Symbols and Meanings Important Safety Instructions Safety Alert Symbol and Signal Explosion Words The safety alert symbol identifies safety Electric Shock information about hazards that can result in personal injury. A signal word (DANGER, WARNING, or CAUTION) accompanies the alert symbol to indicate the likelihood and the potential severity of injury. -
Page 5: Safety Messages
Important Safety Instructions Safety Messages Safety Messages WARNING Battery electrolyte fluid contains acid and is extremely caustic. Contact with battery contents could cause severe chemical WARNING Failure to read and obey the burns. Operator’s Manual, all warnings, and operating • DO NOT open or mutilate the battery. instructions could result in death or serious injury. - Page 6 Safety Messages Important Safety Instructions WARNING WARNING Hazardous Voltage – With the battery connected, Installing low- and high-voltage wire in the same the generator may crank and start without warning, conduit could cause electric shock or burns, resulting resulting in death or serious injury. in death or serious injury.
- Page 7 Important Safety Instructions Safety Symbols and Meanings WARNING Generator voltage could Improperly treating the generator cause electrical shock or burns, resulting in death or could damage it and shorten its life. serious injury. • Operate the generator only for intended uses. •...
-
Page 8: Fcc Part 15 Information To User
Owner Responsibilities General Information FCC Part 15 Information to User Equipment Description Pursuant to part 15.21 of the FCC Rules, beware that changes or modifications to the product not expressly This product does NOT qualify for approved by Briggs & Stratton could void your authority either an emergency standby or legally required standby to operate the product. -
Page 9: Installation Factors To Consider
Generator Placement Shipment Contents Installation Factors to Consider The generator system does not include (An owner needs): The illustrations shown in this manual depict typical • Carbon monoxide detector(s) circumstances. They are meant to familiarize you with the • Smoke detector(s) installation options available for the generator. -
Page 10: Generator Location Considerations
Reducing the Risk of Carbon Monoxide Poisoning Generator Placement Generator Location • DO NOT run this product inside homes, garages, basements, crawl spaces, sheds, or other partially Considerations enclosed spaces, even if using fans or opening doors and windows for ventilation. Carbon The installation location of the generator directly affects: monoxide can quickly build up in these spaces and can linger for hours, even after this product has... - Page 11 Generator Placement Reducing the Risk of Carbon Monoxide Poisoning If you (or someone nearby) suffers from any of the above symptoms, immediately seek fresh air and call for emergency medical help for possible carbon monoxide poisoning. If your carbon monoxide alarm sounds while using this product, immediately seek fresh air (even if you experience none of the previously mentioned symptoms).
- Page 12 Reducing the Risk of Carbon Monoxide Poisoning Generator Placement Protecting the Structure Check the structure to ensure that the sealing and caulking remains adequate enough to prevent air from leaking in or out. Examine the structure for voids, cracks, or openings surrounding windows, doors, soffits, pipes, and vents, as these areas can permit exhaust gas and CO to enter the structure.
- Page 13 Generator Placement Reducing the Risk of Carbon Monoxide Poisoning The following table includes some examples of potential entry points for CO gas. LOCATION ENTRY POINT EXPLANATION Windows and Openings that are part of a structure’s architecture can permit fresh air and CO into doors the structure, especially when open.
-
Page 14: Reducing The Risk Of Fire
Reducing the Risk of Fire Generator Placement Reducing the Risk of Fire Distance Requirements An owner must maintain minimum clearances around the To help prevent fires, the generator must be installed a generator enclosure. These clearances exist primarily for safe distance from all combustible materials. The unit’s fire prevention, but they also ensure adequate space for engine, alternator, and exhaust system components can maintenance tasks, such as removing the unit’s front and... -
Page 15: Federal And International Standards
Generator Placement Federal and International Standards LOCATION ITEM EXPLANATION Maintain a 3 ft (.91 m) minimum clearance from the front and ends of the generator. Keep shrubs, bushes, plants, and trees this same Front and end clearance minimum distance from the unit and never use vegetation to conceal the unit. -
Page 16: Other General Location Guidelines
Reducing the Risk of Fire Installation INSTALLATION Combining results from these full-scale tests and the requirements of NFPA 37, Sec 4.1.4, the guidelines for installation of the generators previously mentioned Lifting the Generator change to 18 inches (45.72 cm) from the back side of the generator to a stationary wall or building. -
Page 17: Cold Weather Kit
Installation Anchoring and Wind Rating Cold Weather Kit Anchor Types Quantity (4) 3/8-inch dia. ITW Red Head Large If the generator operates in temperatures below 30° F Diameter Tapcon (LTD) with 1-1/2-inch embedment, (-1° C), Briggs & Stratton highly recommends that the 2-inch min. -
Page 18: Electrical And Fuel Inlet Locations
Access Panels Installation Electrical and Fuel Inlet Locations The 3/4-inch N.P.T. fuel inlet connector (A) and electrical inlet locations (B) are shown in Figure 7. A 1.73 inch (44 mm) knock-out hole is provided for the electrical inlet. Make sure that the installed conduit(s) enter the unit in zone (C) as shown in the drawing below so that they properly enter the electrical box and do not interfere with the fully opened roof. -
Page 19: Fuel Installation Plan
Installation Fuel Installation Plan Removing the end cap, controller end (C): Removing the control box wiring cover (F): Loosen two self-retaining fasteners (I) that secure Remove two fasteners (L) that secure the control box the end cap to the unit. wiring cover to the control box. - Page 20 Fuel Installation Plan Installation • Install a manual shut-off valve in the interior of the WARNING Propane and natural building. gas are extremely flammable and explosive, which • Increase strength and flexibility of the piping supports could cause burns, fire, or explosion, resulting in and connections in areas prone to earthquakes, death or serious injury.
- Page 21 Installation Fuel Installation Plan Fuel Consumption Fuel Type The following chart shows estimated fuel supply Consider the type of fuel that your generator uses, as it requirements at half and full load for natural gas and affects the entire installation process. The system was liquefied petroleum vapor fuels.
- Page 22 Fuel Installation Plan Installation Power Loss Air density decreases at high altitudes, resulting in less available engine power. Engine power can decrease by 4.8% for each 1000 ft (305 m) above rated altitude of 800 ft (250 m) and by 1.1% for each 10° F (5.6° C) above 77°...
-
Page 23: Electrical Field Connections
Installation Electrical Field Connections B. For NG, rotate the lever clockwise 90° so the 18. Navigate to “select profile” and press “select” on the handle position of the lever will be up and down correct profile for the generator. For example, choose and the “NG”... - Page 24 Electrical Field Connections Installation System Connector Location 80014586 Figure 14 Legend for System Connector Location: (A) Utility Connection — Connects utility 240VAC from the fuse (F) Power Connection (L 1 and L2) — Offers power block in ATS to the controller. Connect only one wire per connection to the transfer switch terminal.
- Page 25 Installation Electrical Field Connections DESCRIPTION WIRE TYPE CONNECT TO NOTES NUMBER +12V #18 AWG (1 mm2) conductors, Transfer Switch Transfer Switch Transfer Signal 600V minimum, 90° C Cu wire. Basic Controller J7-8 (only works with Basic Transfer 12VDC Switch Controller) #18 AWG (1 mm2) conductors, Transfer Switch Basic 600V minimum, 90°...
- Page 26 Electrical Field Connections Installation Generator AC System Connection Grounding the Generator The generator uses a single-phase, three-wire AC Unless mandated by local code, additional chassis connection system. The stator assembly consists of a grounding to earth at the generator is not required. Any pair of stationary windings with two leads appearing grounding at the generator must use metal piercing lock from each winding.
-
Page 27: Final Installation Considerations
Installation Final Installation Considerations Final Installation Considerations WARNING Battery electrolyte fluid contains acid and is extremely caustic. Contact Engine Oil with battery contents could cause severe chemical burns. • DO NOT open or mutilate the battery. Any attempt to crank or start the •... -
Page 28: System Controller
Initial Start-Up (No Load) Installation System Controller Initial Start-Up (No Load) WARNING See the separate online manual titled Exhaust heat/gases could Operation Instructions GC1030 SERIES GENSET Controller ignite combustibles, causing a fire and resulting in (part number 80086364) for details on setup and death or serious injury. - Page 29 Installation Initial Start-Up (No Load) 11. Push the stop/config button on the controller. The engine enters cool-down mode for approximately five minutes. Push the button again to stop the engine. 12. Install the control box cover. Figure 17 Part No. 80106286 Revision C...
-
Page 30: Operation
Controls Operation OPERATION Controls WARNING Failure to read and obey the operator’s manual, all warnings, and operating instructions could result in death or serious injury. Front View Figure 18 Generator is shown with roof and access covers removed for clarity. Legend for System Connector Locations: (A) Lifting Holes —... - Page 31 Operation Controls Back View Figure 19 (A) Lifting Holes — Provided at each corner for lifting generator (G) Oil Fill Cap — The location for adding oil to the engine (B) Fuel Solenoid — Automatically opens and closes to supply (H) Electrical Field Wiring Inlet —...
-
Page 32: Important Owner's Considerations
Important Owner’s Considerations Operation • No light: Unit controller in MANUAL mode or no battery power or ON/OFF switch in OFF position Important Owner’s Considerations WARNING Engine exhaust contains carbon monoxide, a poisonous gas that could kill people and animals in minutes. People and animals cannot smell it, see it, or taste it. -
Page 33: Automatic Operation Sequence
Maintenance Servicing the System 15-Amp Fuse Push and hold the stop/config button (B) to save your settings. Ensure that the fuse is correctly installed before operating the generator. Automatic Operation Sequence The generator’s controller monitors utility voltage. If the utility voltage drops below a preset level, the controller signals the engine to crank and start. -
Page 34: Maintenance Schedule
Cleaning the Generator Maintenance Maintaining the Generator 2. Remove utility power to the generator to de-energize the battery charger. The generator’s warranty does not cover items that have 3. Unlock and open the roof as described in the Access been subjected to operator abuse or negligence. To Panels section. -
Page 35: Maintaining The Engine
Maintenance Maintaining the Engine Push the ON/OFF switch on the back of the Remove the 15-amp fuse from the fuse holder located generator to the OFF (0) position. below the controller. 2. Remove utility power to the generator to de-energize Disconnect the negative (-) cable at the battery. -
Page 36: Changing Engine Oil And Oil Filter
Adjusting the Valve Lash Maintenance Changing Engine Oil and Oil Filter Note: An acceptable oil at all temperatures includes full synthetic oil that: Change the oil while the engine is still warm from • Meets International Lubricant running. Specification Advisory Committee (ILSAC) GF-2 standards Push the ON/OFF switch on the back of the generator to the OFF (0) position. -
Page 37: Electronic Governor System
Maintenance Electronic Governing Check 12. After setting the proper clearance, hold the adjusting Since the electronic governing system controls the screw while torquing the locknut to 70 in-lb (8 N·m). engine throttle demand based on generator load, the following service codes and/or conditions could arise 13. -
Page 38: Servicing The Spark Plugs
Maintenance Schedule Maintenance Servicing the Spark Plugs WARNING Unintentional sparking could cause fire or electric shock, resulting in death or serious injury. WHEN ADJUSTING OR MAKING REPAIRS TO YOUR GENERATOR – • Disconnect the spark plug wire from the spark plug and place the wire where it cannot contact the spark plug. -
Page 39: Engine Air Cleaner
Maintenance Maintaining the Fuel System Engine Air Cleaner Maintaining the Exhaust System WARNING WARNING Gaseous vapors are Contact with the muffler area extremely flammable and explosive. Fire or explosion could cause burns, resulting in serious injury. can cause severe burns or death. •... -
Page 40: Mixer And Throttle Control Device
Maintaining the Electrical System Maintenance Acknowledging and Resetting the • Check to ensure the regulator is correctly mounted and that the mounting bolts are tight. Alarms (Service Code Detection • Check the regulator for external damage. System) Mixer and Throttle Control Device Push the up and down arrows (A) simultaneously to reset the alarm. - Page 41 Maintenance Maintaining the Electrical System • Replace the spark plugs at the required intervals listed Push the ON/OFF switch on the back of the in the Maintenance Schedule section. generator to the OFF (0) position. • Ensure that all electrical components are securely 2.
- Page 42 Maintaining the Electrical System Troubleshooting Charging the Battery If necessary, charge the battery. Charge it using the following steps: Push the ON/OFF switch on the back of the generator to the OFF (0) position. 2. Remove utility power to the generator to de-energize the battery charger.
-
Page 43: Troubleshooting
Troubleshooting Maintaining the Electrical System TROUBLESHOOTING See the Alarms section of the separate online manual titled Operation Instructions GC1030 SERIES GENSET Controller (part number 80086364) for details on service alarm description and causes. Troubleshooting PROBLEM CAUSE CORRECTION The engine is running, but no AC Open or defective circuit breaker Reset or replace the circuit output is available. - Page 44 Maintaining the Electrical System Troubleshooting PROBLEM CAUSE CORRECTION The circuits lose power. An open generator circuit Reset the circuit breaker. breaker 2. See the transfer switch manual. 2. Transfer switch problems The unit does not exercise. Controller not set to auto. Push the auto button on the controller.
-
Page 45: Drawings And Schematics
Troubleshooting Maintaining the Electrical System DRAWINGS AND SCHEMATICS Part No. 80106286 Revision C... -
Page 46: Specifications
Engine Specifications Troubleshooting SPECIFICATIONS Generator Specifications 17 kW 20 kW 26 kW Running Amperage, Standby (LP/NG) (Amps) 70.8/70.8 A 83.3/83.3 A 108.3/100 A Rated AC Voltage 120/240 V Phase Single Frequency 60 Hz Generator Breaker 80 A 100 A 125 A Operating Ambient Temperature -20°... - Page 47 Manual de instalación y funcionamiento Español 17 kW 20 kW 26 kW Grupo electrógeno de reserva monofásico enfriado por aire Español Este grupo electrógeno está clasificado conforme a la norma UL (Underwriters Laboratories) 2200 Español (conjuntos de grupos electrógenos con motores fijos) y a la norma CSA (Canadian Standards Association) C22.2 N.
- Page 48 Table of Contents TABLE OF CONTENTS PROPUESTA 65 DE CALIFORNIA (CALIFORNIA Secuencia de funcionamiento automático ........ 33 PROPOSITION 65) ................3 Configuración del temporizador de actividad ......33 AGRADECIMIENTO ................3 MANTENIMIENTO ................ 33 DÓNDE ENCONTRAR A BRIGGS & STRATTON .......3 Mantenimiento del sistema ............... 33 PARA CONSULTAS EN EL FUTURO ..........3 Programa de mantenimiento ............
-
Page 49: Propuesta 65 De California (California Proposition 65)
Propuesta 65 de California (California Proposition 65) PROPUESTA 65 DE PARA CONSULTAS EN EL CALIFORNIA (CALIFORNIA FUTURO PROPOSITION 65) Complete la siguiente información y guárdela junto con el recibo. Mantenga esta información a mano para comunicarse con el instalador o el distribuidor autorizado ADVERTENCIA Este producto puede exponerlo a en el futuro en relación con el mantenimiento o la... -
Page 50: Símbolo De Alerta De Seguridad Y Palabras De Aviso
Símbolos de seguridad y su significado Instrucciones importantes de seguridad Símbolo de alerta de seguridad y Explosión palabras de aviso El símbolo de alerta de seguridad identifica la información de seguridad sobre peligros que pueden Electrocución generar lesiones. El símbolo de alerta se utiliza con una palabra de aviso (PELIGRO, ADVERTENCIA o PRECAUCIÓN) para indicar la probabilidad de que ocurra una lesión y la posible gravedad de la misma. -
Page 51: Mensajes De Seguridad
Instrucciones importantes de seguridad Mensajes de seguridad Mensajes de seguridad ADVERTENCIA El fluido electrolítico de la batería contiene ácido y es sumamente cáustico. El contacto con el contenido de la batería podría ADVERTENCIA Si no se lee y no se respeta ocasionar quemaduras químicas de gravedad. - Page 52 Mensajes de seguridad Instrucciones importantes de seguridad ADVERTENCIA ADVERTENCIA Con la batería conectada, el Tensión peligrosa - Instalar grupo electrógeno puede arrancar sin previo aviso y cables de alta y baja tensión en el mismo conducto causar así lesiones graves o la muerte. podría ocasionar electrocución o quemaduras que causen lesiones graves o la muerte.
- Page 53 Instrucciones importantes de seguridad Mensajes de seguridad AVISO ADVERTENCIA La tensión del grupo La manipulación inadecuada del electrógeno podría provocar electrocución o grupo electrógeno podría dañarlo y acortar su vida útil. quemaduras que causen lesiones graves o la muerte. • Opere el generador únicamente para los usos •...
-
Page 54: Información General
Responsabilidades del propietario Información general Información de la Sección 15 Descripción del equipo de las normas de la FCC para el AVISO usuario Este producto NO reúne los requisitos de un sistema de reserva de emergencia o de un sistema de reserva exigido por la ley, como se define en la norma De conformidad con el artículo 15.21 de las normas de la 70 NFPA (NEC). -
Page 55: Factores De La Instalación A Tener En Cuenta
Ubicación del grupo electrógeno Contenido del envío Factores de la instalación a tener El sistema del grupo electrógeno no incluye (el propietario necesitará): en cuenta • Detector(es) de monóxido de carbono • Detector(es) de humo Las ilustraciones que se incluyen en el presente manual representan circunstancias típicas. -
Page 56: Consideraciones Respecto De La Ubicación Del Grupo Electrógeno
Reducción de riesgo de intoxicación por CO Ubicación del grupo electrógeno Consideraciones respecto de la • NO utilice este producto dentro de hogares, garajes, sótanos, entrepisos, cobertizos u otros ubicación del grupo electrógeno espacios parcialmente cerrados, incluso si usa ventiladores o deja puertas y ventanas abiertas La ubicación de la instalación del grupo electrógeno para ventilar. - Page 57 Ubicación del grupo electrógeno Reducción de riesgo de intoxicación por CO Si usted (o alguien cerca de usted) sufre alguno de los Nunca ubique el grupo electrógeno de reserva en un síntomas anteriores, diríjase de inmediato a un lugar con lugar en el que se puedan acumular hojas o residuos.
- Page 58 Reducción de riesgo de intoxicación por CO Ubicación del grupo electrógeno Protección de la estructura Controle la estructura para garantizar que el sellado y enmasillado siguen siendo suficientemente adecuados para evitar el ingreso o la salida de aire por filtraciones. Examine la estructura para detectar huecos, grietas o aberturas alrededor de ventanas, puertas, plafones, tuberías y ventilaciones, ya que pueden permitir que el...
- Page 59 Ubicación del grupo electrógeno Reducción de riesgo de intoxicación por CO En la siguiente tabla se incluyen algunos ejemplos de posibles puntos de entrada para el gas de CO. UBICACIÓN PUNTO DE EXPLICACIÓN ENTRADA Las aberturas que forman parte del diseño arquitectónico de una estructura pueden Puertas y permitir el ingreso de aire y CO en la estructura, especialmente cuando están ventanas...
-
Page 60: Reducción Del Riesgo De Incendio
Reducción del riesgo de incendio Ubicación del grupo electrógeno Reducción del riesgo de incendio Requisitos de distancia El propietario deberá mantener las distancias mínimas Para ayudar a prevenir incendios, el grupo electrógeno alrededor del recinto del grupo electrógeno. Estas se debe instalar a una distancia segura de todos los distancias existen principalmente para la prevención de materiales combustibles. -
Page 61: Normas Federales E Internacionales
Ubicación del grupo electrógeno Normas federales e internacionales UBICACIÓN ELEMENTO EXPLICACIÓN Mantenga una distancia mínima de 3 pies (0.91 m) frontal y de los paneles finales del grupo electrógeno. Mantenga arbustos, matorrales, Distancia delantera y final plantas y árboles a esta misma distancia mínima de la unidad y nunca use vegetación para ocultarla. -
Page 62: Otros Lineamientos Generales De Ubicación
Reducción del riesgo de incendio Instalación INSTALACIÓN Si se combinan los resultados de estos ensayos a escala completa y los requisitos de la norma NFPA 37, Sección 4.1.4, los lineamientos para la instalación Elevación del grupo electrógeno de los grupos electrógenos previamente indicados cambian a 18 pulgadas (45.72 cm) del lado posterior del grupo electrógeno a una pared fija o edificio. -
Page 63: Kit Para Climas Fríos
Instalación Anclaje y clasificación del viento Kit para climas fríos Tipos de anclaje Cantidad (4) 3/8” diám. ITW Red Head de gran diámetro Si el grupo electrógeno funciona a temperaturas de Tapcon (LTD) con empotrado 1-1/2” , 2” de borde mín. de menos de 30°... -
Page 64: Ubicaciones De Las Entradas De Electricidad Y Combustible
Paneles de acceso Instalación Ubicaciones de las entradas de Cada grupo electrógeno se envía con un juego de llaves idénticas sujetas al solenoide de combustible. electricidad y combustible El conector de entrada de combustible de 3/4 pulgada N.P.T. (A) y las ubicaciones de las entradas de electricidad (B) se muestran en la . -
Page 65: Esquema De Instalación De Combustible
Instalación Esquema de instalación de combustible Extracción de la tapa de extremo, extremo del Extracción de la cubierta de cableado de la caja de controlador (C): control (F): Afloje las dos sujeciones con autorretención (I) que Extraiga dos sujeciones (L) que sujetan la cubierta de sujetan la tapa de extremo a la unidad. - Page 66 Esquema de instalación de combustible Instalación • Se deberá instalar como mínimo una válvula de ADVERTENCIA cierre manual (F) accesible y aprobada en la línea de El propano y el gas suministro de combustible dentro de los 6 pies natural son sumamente inflamables y explosivos, con lo (1.8 m) del grupo electrógeno.
- Page 67 Instalación Esquema de instalación de combustible Consumo de combustible Tipo de combustible Deberá tener en cuenta el tipo de combustible que usa su En el siguiente cuadro se presentan los requisitos grupo electrógeno dado que afecta a todo el proceso de estimados de suministro de combustible con la carga instalación.
- Page 68 Esquema de instalación de combustible Instalación Pérdida de potencia La densidad del aire se reduce a grandes altitudes, lo que provoca que haya menor potencia de motor disponible. La potencia del motor se puede reducir en un 4.8% por cada 1000 pies (305 m) por encima de la altitud nominal de 800 pies (250 m) y en un 1.1% por cada 10°...
-
Page 69: Conexiones Del Campo Eléctrico
Instalación Conexiones del campo eléctrico B. Para GN, gire la palanca 90° en el sentido de las 17. Para ajustar el controlador del grupo electrógeno agujas del reloj de manera que la posición de para el combustible PL, ingrese al menú de la manija de la palanca sea arriba y abajo y las configuración con la contraseña del distribuidor, que letras “GN”... - Page 70 Conexiones del campo eléctrico Instalación Ubicación del conector del sistema 80014586 Figura 14 Leyenda para la ubicación del conector del sistema: (A) Conexión a la red pública — Conecta 240 VCA de la red (F) Conexión de energía (L1 y L2) — Ofrece conexión de pública del bloque de fusibles de ATS al controlador.
- Page 71 Instalación Conexiones del campo eléctrico NÚMERO DESCRIPCIÓN TIPO DE CABLE SE CONECTA A NOTAS CLAVIJA +12V Conductores de #18 AWG (1 mm2), Interruptor de Señal de transferencia del 600V como mínimo, cable de Cu 90° C. transferencia, interruptor de transferencia controlador básico J7-8 (solo funciona con el 12 VCC...
- Page 72 Conexiones del campo eléctrico Instalación Conexión del sistema de CA del grupo Conexión a tierra del grupo electrógeno electrógeno El grupo electrógeno usa un sistema de conexión de CA A menos que lo exija el código local, no se requiere una monofásico de tres cables.
-
Page 73: Consideraciones Finales Para La Instalación
Instalación Consideraciones finales para la instalación Consideraciones finales para la ADVERTENCIA El fluido electrolítico instalación de la batería contiene ácido y es sumamente cáustico. El contacto con el contenido de la batería podría Aceite de motor ocasionar quemaduras químicas de gravedad. •... -
Page 74: Controlador Del Sistema
Arranque inicial (sin carga) Instalación Controlador del sistema Arranque inicial (sin carga) AVISO Consulte el manual en línea por ADVERTENCIA El calor/los gases de escape separado titulado “Instrucciones de funcionamiento del podrían encender elementos combustibles y controlador del grupo electrógeno SERIE GC1030 ocasionar un incendio que provoque lesiones graves o GENSET”...
Need help?
Do you have a question about the 040661 and is the answer not in the manual?
Questions and answers
I have two B&S model 040276A generators (style 20kw LPG series 20000). Please confirm that the LPG supply line to the fuel port requires 11-14" wc. There is a factory supplied Garretson regulator inside the generator enclosure, what does this do.