Table of Contents
Advertisement
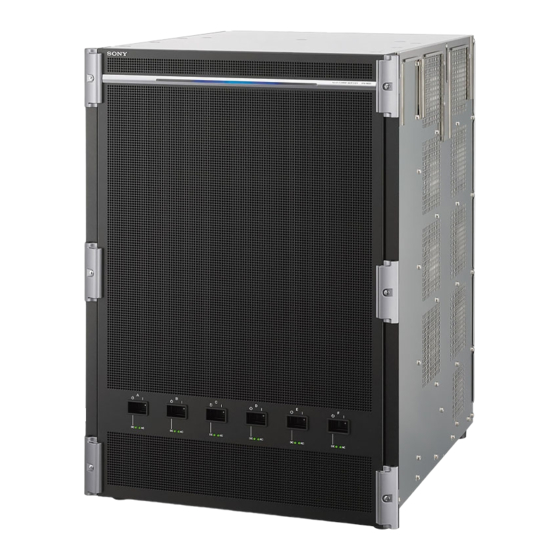
SWITCHER PROCESSOR PACK
XVS-9000-C
XVS-8000-C
XVS-7000-C
XVS-6000-C
XVS-9000
XVS-8000
XVS-7000
XVS-6000
XKS-8160
XKS-8210
XKS-8440
XKS-8460
XKS-8470
XKS-8475
XKS-S8110
XKS-S8112
XKS-S8165
XKS-S8167
XKS-S9112
SERVICE MANUAL
1st Edition (Revised 5)
XKS-S9167
XKS-T8110
XKS-T8165
XKS-7210
XKS-S8111
XKS-Q8111
XKS-Q8166
XKS-C8111
XKS-C8166
XKS-C9111
XKS-C9121
XKS-C9111N
XKS-C9121N
Advertisement
Table of Contents

Related Manuals for Sony XVS-9000-C


Summary of Contents for Sony XVS-9000-C
- Page 1 SWITCHER PROCESSOR PACK XVS-9000-C XVS-8000-C XVS-7000-C XVS-6000-C XVS-9000 XKS-S9167 XVS-8000 XKS-T8110 XVS-7000 XKS-T8165 XVS-6000 XKS-7210 XKS-8160 XKS-S8111 XKS-8210 XKS-Q8111 XKS-8440 XKS-Q8166 XKS-8460 XKS-C8111 XKS-8470 XKS-C8166 XKS-8475 XKS-C9111 XKS-S8110 XKS-C9121 XKS-S8112 XKS-C9111N XKS-S8165 XKS-C9121N XKS-S8167 XKS-S9112 SERVICE MANUAL 1st Edition (Revised 5)
- Page 2 Conditions of Use: (1) Please use this information only for the purpose of sales, installation, configuration, and use of Sony products. Using this information for any purpose other than the purpose described foregoing is forbidden. (2) Do not copy, replicate, reproduce, alter, translate, transmit, sell, lease, or distribute this information in whole or in part without the prior written permission of the author.
- Page 3 XKS-S8111 (SY) 10001 and Higher XKS-S8112 (SY) 10001 and Higher XKS-S8165 (SY) 10001 and Higher XKS-S8167 (SY) 10001 and Higher XKS-S9112 (SY) 10001 and Higher XKS-S9167 (SY) 10001 and Higher XKS-T8110 (SY) 10001 and Higher XKS-T8165 (SY) 10001 and Higher XVS-9000-C/XVS-8000-C/XVS-7000-C/XVS-6000-C...
- Page 4 • Wenn Ausgänge an der 12G-SDI Ausgangskarte XKS-S8167/XKS-S9167 aktiviert sind, ohne dass ein Kabel angeschlossen ist, kann dies Funk- störungen verursachen. Deaktivieren Sie nicht angeschlossene Ausgangsstifte über das Menü. Informationen zum Einstellen von Ausgängen finden Sie im Benutzerhandbuch zum System XVS-9000/XVS-8000/XVS-7000/XVS-6000. XVS-9000-C/XVS-8000-C/XVS-7000-C/XVS-6000-C...
- Page 5 Batterien nur durch den vom Hersteller empfohlenen Kasser batteriet i henhold til gjeldende avfallsregler. oder einen gleichwertigen Typ ersetzen. Wenn Sie die Batterie entsorgen, müssen Sie die Gesetze der jeweiligen Region und des jeweiligen Landes befolgen. XVS-9000-C/XVS-8000-C/XVS-7000-C/XVS-6000-C...
-
Page 7: Table Of Contents
Cleaning the Fans..................... . .2-4 XVS-9000-C/XVS-8000-C/XVS-7000-C/XVS-6000-C... - Page 8 CNI-45 Board (XKS-S9112)/CNI-45A Board (XKS-S8112)............5-10 XVS-9000-C/XVS-8000-C/XVS-7000-C/XVS-6000-C...
- Page 9 CNI-45/CNI-45A Boards......................6-37 XVS-9000-C/XVS-8000-C/XVS-7000-C/XVS-6000-C...
- Page 10 Frame Wiring (XVS-6000)......................7-49 XVS-9000-C/XVS-8000-C/XVS-7000-C/XVS-6000-C...
-
Page 11: Manual Structure
The following manuals are prepared for XVS-9000-C/XVS-8000-C/XVS-7000-C/XVS-6000-C and the optional boards and units. • Operation Manual (Supplied with XVS-9000-C/XVS-8000-C/XVS-7000-C/XVS-6000-C) This manual describes the overview, system connection example and specifications of options of XVS-9000-C/ XVS-8000-C/XVS-7000-C/XVS-6000-C. • User’s Guide (Supplied with XVS-9000-C/XVS-8000-C/XVS-7000-C/XVS-6000-C) This manual describes the application and operation of XVS-9000-C/XVS-8000-C/XVS-7000-C/XVS-6000-C. -
Page 13: Service Overview
• Use the Power Cord (3-core mains lead)/Appliance Connector/Plug conforming to the proper ratings (Voltage, Ampere). If you have questions on the use of the above Power Cord/ Appliance Connector/Plug, please contact your local Sony Sales Office/Service Center. WARNING •... -
Page 14: Location Of Main Parts (Xvs-9000)
XPT + Multi viewer board XVS-9000 Rear board Board name Function Remarks CN-4020 External control board XVS-9000 CNI-45 12G-SDI Input board XKS-S9112 CNO-44 12G-SDI Output board XKS-S9167 CNO-45 100G output board XKS-C9121 NET-42 100G input board/NMI input board XKS-C9111, XKS-C9121/XKS-C9111N, XKS-C9121N XVS-9000-C/XVS-8000-C/XVS-7000-C/XVS-6000-C... -
Page 15: Other Parts
DC fan (120 square) Right side of the XVS-9000 - Rear side of the fan slot A to D DC fan (120 square) - Right side of the XVS-9000 Rear side of the fan slot A to D Continued XVS-9000-C/XVS-8000-C/XVS-7000-C/XVS-6000-C... - Page 16 Name Function Remarks DC fan (80 square) - Right side of the XVS-9000 Rear side of the fan slot E XVS-9000-C/XVS-8000-C/XVS-7000-C/XVS-6000-C...
-
Page 17: Location Of Main Parts (Xvs-8000)
QSFP IP input and FC connector board XKS-Q8111 CNO-43 SDI output board XKS-S8165 CNO-44A 12G-SDI Output board XKS-S8167 NET-28A IP output board XKS-T8165 NET-32A QSFP IP output and FC connector board XKS-Q8166 NET-42A 100G input board XKS-C8111 NET-42B 100G output board XKS-C8166 XVS-9000-C/XVS-8000-C/XVS-7000-C/XVS-6000-C... -
Page 18: Other Parts
Rear side of the fan slot A, B, C DC fan (120 square) Right side of the XVS-8000 - Front side of the fan slot A, B DC fan (80 square) - Right side of the XVS-8000 Front side of the fan slot C XVS-9000-C/XVS-8000-C/XVS-7000-C/XVS-6000-C... -
Page 19: Location Of Main Parts (Xvs-7000)
QSFP IP input and FC connector board XKS-Q8111 CNO-43 SDI output board XKS-S8165 CNO-44A 12G-SDI Output board XKS-S8167 NET-28A IP output board XKS-T8165 NET-32A QSFP IP output and FC connector board XKS-Q8166 NET-42A 100G input board XKS-C8111 NET-42B 100G output board XKS-C8166 XVS-9000-C/XVS-8000-C/XVS-7000-C/XVS-6000-C... -
Page 20: Other Parts
Power supply unit D (APS-406) DC fan (120 square) Right side of the XVS-7000 - Rear side of the fan slot A, B DC fan (120 square) - Right side of the XVS-7000 Front side of the fan slot A, B XVS-9000-C/XVS-8000-C/XVS-7000-C/XVS-6000-C... -
Page 21: Location Of Main Parts (Xvs-6000)
QSFP IP input and FC connector board XKS-Q8111 CNO-43 SDI output board XKS-S8165 CNO-44A 12G-SDI Output board XKS-S8167 NET-28A IP output board XKS-T8165 NET-32A QSFP IP output and FC connector board XKS-Q8166 NET-42A 100G input board XKS-C8111 NET-42B 100G output board XKS-C8166 XVS-9000-C/XVS-8000-C/XVS-7000-C/XVS-6000-C... -
Page 22: Other Parts
- Power supply unit B (APS-406) DC fan (120 square) Right side of the XVS-6000 - Rear side of the fan slot DC fan (120 square) - Right side of the XVS-6000 Front side of the fan slot 1-10 XVS-9000-C/XVS-8000-C/XVS-7000-C/XVS-6000-C... -
Page 23: Tools And Fixtures
Extension board A-2117-749-A Used to extend the following rear boards. EX-1296 CNI-43, CNI-44, CNI-45, CNI-45A, CNO-43, CNO-44, CNO-44A, CNO-45, NET-28/28A, NET-32/NET-32A, NET-42/NET-42A/NET-42B board (Refer to “1-9-2. Extension Board EX-1296” for using this extension board) 1-11 XVS-9000-C/XVS-8000-C/XVS-7000-C/XVS-6000-C... -
Page 24: Circuit Protection Parts
The fuse and the IC link are essential parts for safe operation. Replace it with one whose part number is listed in the manual. If the components are replaced with any parts other than the specified ones, this may cause a fire or electric shock. 1-12 XVS-9000-C/XVS-8000-C/XVS-7000-C/XVS-6000-C... - Page 25 Fuse (5 A/125 V) 1-533-627-21 F103 A-10 Fuse (5 A/125 V) 1-533-627-21 F104 Fuse (5 A/125 V) 1-533-627-21 F105 L-10 Fuse (5 A/125 V) 1-533-627-21 F106 D-10 Fuse (5 A/125 V) 1-533-627-21 F108 H-11 Fuse (5 A/125 V) 1-533-627-21 Continued 1-13 XVS-9000-C/XVS-8000-C/XVS-7000-C/XVS-6000-C...
- Page 26 1-533-627-21 F205 Fuse (5 A/125 V) 1-533-627-21 F206 Fuse (5 A/125 V) 1-533-627-21 F207 Fuse (5 A/125 V) 1-533-627-21 F208 Fuse (5 A/125 V) 1-533-627-21 F209 Fuse (5 A/125 V) 1-533-627-21 F210 Fuse (5 A/125 V) 1-533-627-21 Continued 1-14 XVS-9000-C/XVS-8000-C/XVS-7000-C/XVS-6000-C...
- Page 27 Fuse (10 A/125 V) 1-576-329-21 XKS-S8112 CNI-45A F200 Fuse (10 A/125 V) 1-576-329-21 XKS-S9112 CNI-45 XKS-S8167 CNO-44A F200 Fuse (10 A/125 V) 1-576-329-21 XKS-S9167 CNO-44 XKS-T8110 NET-28 F2601 Fuse (10 A/125 V) 1-576-566-21 XKS-T8165 NET-28A F2601 Fuse (10 A/125 V) 1-576-566-21 1-15 XVS-9000-C/XVS-8000-C/XVS-7000-C/XVS-6000-C...
-
Page 28: Lead-Free Solder
• The ordinary soldering iron can be used but the iron tip has to be applied to the solder joint for a slightly longer time. The printed pattern (copper foil) may peel away if the heated tip is applied for too long, so be careful. 1-16 XVS-9000-C/XVS-8000-C/XVS-7000-C/XVS-6000-C... -
Page 29: Using Extension Boards
Remove the front panel. (Refer to “4-2. Front Panel”) Remove the board to be inspected or adjusted. Note When a blank panel is attached to the slot of the board to be inspected or adjusted, detach the blank panel. 1-17 XVS-9000-C/XVS-8000-C/XVS-7000-C/XVS-6000-C... - Page 30 Insert extension board EX-1132B into the slot from which the board was removed referring to the following figure. EX lever Extension board EX-1132B EX lever This figure shows XVS-8000. Close the right and left EX levers in the arrow directions to securely lock the extension board. 1-18 XVS-9000-C/XVS-8000-C/XVS-7000-C/XVS-6000-C...
- Page 31 This figure shows XVS-8000. Connectors Inspect or adjust Rail of Extension board board When removing the inspected or adjusted board, open the right and left levers in the arrow directions. Lever Inspect or adjust board Lever This figure shows XVS-8000. 1-19 XVS-9000-C/XVS-8000-C/XVS-7000-C/XVS-6000-C...
-
Page 32: Extension Board Ex-1296
Insert the board removed in step 3 into the rail of the EX-1296 extension board, and securely connect the connectors of both boards. Using a slot Using 2 slots Connectors Connectors Inspect or adjust board Inspect or adjust board 1-20 XVS-9000-C/XVS-8000-C/XVS-7000-C/XVS-6000-C... -
Page 33: Replacement Of Eject Lever Of The Dvp-68 Board
Push the plate nut F in the direction of the arrow (direction towards board) so that the convex portion of the eject lever fits into the hole of the board, then tighten the set screw (PSW3 x 14) of the eject lever. 1-21 XVS-9000-C/XVS-8000-C/XVS-7000-C/XVS-6000-C... -
Page 34: Replacement Of Filter
Power supply fixing plate Projections Front panel Note When attaching the filter retainer, put it in between the two projections with the warping direction as shown in the illustration. Remove the six screws, then remove the power supply fixing plate. 1-22 XVS-9000-C/XVS-8000-C/XVS-7000-C/XVS-6000-C... - Page 35 Remove the filter. Power supply fixing plate PSW3 x 6 Filter Front panel Install the removed parts by reversing the steps of removal. 1-23 XVS-9000-C/XVS-8000-C/XVS-7000-C/XVS-6000-C...
-
Page 36: And Ca-92A Boards
10001 and higher XVS-7000 (CN) 50001 and higher XVS-8000 (SY) 10001 and higher XVS-8000 (CN) 50001 and higher XVS-9000 (SY) 10001 and higher XVS-9000 (CN) 50001 and higher CA-92A XVS-9000 (SY) 10001 and higher CA-92A XVS-9000 (CN) 50001 and higher 1-24 XVS-9000-C/XVS-8000-C/XVS-7000-C/XVS-6000-C... -
Page 37: Ip Video Interface (Nmi) Boards
• XKS-Q8111: “XVS-Q8111_X.XX.encrypted.web.zip”(X.XX means the version number) • XKS-Q8166: “XVS-Q8166_X.XX.encrypted.web.zip”(X.XX means the version number) Note For obtaining the latest data file for update, contact your local Sony Sales Office/Service Center. Preparation Copy the data file for update to a USB memory device. - Page 38 Click [Browse] in the [Update File] field of [System Update] and select the update data file in the connected USB memory. Click [Start Update]. Firmware update starts. Upon completion of the update, a message “Completed.” appears. Click [OK]. 1-26 XVS-9000-C/XVS-8000-C/XVS-7000-C/XVS-6000-C...
-
Page 39: Ip Video Interface (St2110) Boards
〇 〇 Downloading the information file — 〇 Uploading the installation key 〇 — Changing SNMP settings 〇 〇 Changing NMOS settings 〇 〇 Browsing and downloading log data (access to /logview.cgi?html) 〇 〇 Rebooting boards — 〇 1-27 XVS-9000-C/XVS-8000-C/XVS-7000-C/XVS-6000-C... -
Page 40: Changing Account
- XKS-C9111/XKS-C9121: “XKS-C9111_XKS-C9121_X.XX.encrypted.web.zip” (X.XX means the version number) Note • For obtaining the latest data file for update, contact your local Sony Sales Office/Service Center. • If the board firmware version to be updated is V1.20 or older, refer to the procedure in “1-13-1. Updating the Firmware”. -
Page 41: Acquiring Log
• Personal computer (PC): A PC that can be connected to the IP Video Interface board through a network and supports the following recommended web browsers. Recommended web browsers - Google Chrome (64bit) 72 (Verified version) or later Procedure Enable Service Port of the ST2110 board using XVS MENU (7311.1). Run the web browser on the PC. 1-29 XVS-9000-C/XVS-8000-C/XVS-7000-C/XVS-6000-C... -
Page 42: Installing The Software License
Purchase the software license and acquire the purchase code (purchase key). Overview of installation procedure Download the device information file. Access the web menu on the board and download the device information file (DEVICE.DAT) to the USB memory. 1-30 XVS-9000-C/XVS-8000-C/XVS-7000-C/XVS-6000-C... - Page 43 Procedure Connect the USB memory that stores the downloaded device information file to the PC. Enter “https://ulms.sony.net/” in the address bar to access Upgrade and License Management Suite (ULMS). Note • User registration of Sony Professional ID is required to use ULMS.
-
Page 44: Setting The Snmp Function
This section describes SNMP settings on the IP Video Interface (ST2110) board. Use the [SNMP] tab of the web menu to make the settings. Note To make the SNMP function available, the option license must be enabled. For details, refer to “1-14-5. Installing the Software License”. 1-32 XVS-9000-C/XVS-8000-C/XVS-7000-C/XVS-6000-C... - Page 45 Used to set the SNMP community name. Up to 64 ASCII code characters public Network Interface Used to display the corresponding network interface. XKS-C81XX: LAN1/1&LAN2/1 XKS-C91XX: LAN1-1/1&LAN1-2/1 Version Used to select the SNMP version. V1 & V2C Continued 1-33 XVS-9000-C/XVS-8000-C/XVS-7000-C/XVS-6000-C...
-
Page 46: Nmos Function Settings
This section describes settings for NMOS of the IP Video Interface (ST2110) board. Use the [NMOS] tab of the web menu to make the settings. Note To make the NMOS function available, the board firmware version must be 1.40 or later. 1-34 XVS-9000-C/XVS-8000-C/XVS-7000-C/XVS-6000-C... - Page 47 Used to enable or disable the function that automat- Enable ically discovers RDS to be connected. Disable Primary IP Ad- Used to set the address of the RDS to be connected. 0.0.0.0 to 255.255.255.255 dress This item is used when RDS Discovery is disabled. Continued 1-35 XVS-9000-C/XVS-8000-C/XVS-7000-C/XVS-6000-C...
- Page 48 RDS recovery used when RDS Discovery is enabled is displayed. • DHCP of this board is enabled. • DNS information is given from the DHCP server. • RDS information is provided from the DNS server. Continued 1-36 XVS-9000-C/XVS-8000-C/XVS-7000-C/XVS-6000-C...
- Page 49 RDS Connection Used to display the status of connection to the RDS. SHUTDOWN When the connection is successful, the address and port number DISCOVERING of the destination are also displayed together. DISCOVERY FAILED REGISTERING REGISTRATION FAILED REGISTERED, X.X.X.X:X 1-37 XVS-9000-C/XVS-8000-C/XVS-7000-C/XVS-6000-C...
-
Page 51: Periodic Maintenance And Inspection
Refer to the period indicated in the following list for maintenance. This section describes the recommended replacement parts and recommended replacement time. This table does not describe the guarantee period of part. The replacement period of each part is changed according to the environment and condition. XVS-9000-C/XVS-8000-C/XVS-7000-C/XVS-6000-C... - Page 52 Model Part name Sony Part No. Mainte- Cleaning/ Reference Sec- cati- nance Replacement tion Suggested period XVS-9000 Filter Cleaning Once in two Refer to the Installa- 4-744-391-01 months. tion Manual. DC fan (Square Cleaning/ Re- Cleaning: Once After replacement, 1-855-435-11...
- Page 53 Model Part name Sony Part No. Mainte- Cleaning/ Reference Sec- cati- nance Replacement tion Suggested period XVS-7000 Filter 4-688-796-01 Cleaning Once in two S/N (SY) 10001 to months. 11000 Refer to the Installa- tion Manual. Filter 4-688-796-02 Cleaning Once in two S/N (SY) 11001 and months.
-
Page 54: Cleaning
Remove the relevant fan following the fan replacement method (Refer to “4-4. DC Fan”.) Clean the frame and blades of the fan with a cleaning cloth moistened with cleaning fluid. • Cleaning cloth (Sony part No.: 3-184-527-01) • Cleaning fluid (Sony part No.: 9-919-573-01) Fans This figure shows XVS-8000. -
Page 55: Troubleshooting
LED1 LED0 Waiting for board Failure of the board Replace the board. startup Waiting for DHCP The network is not operating Re-check the network connection and settings. acquisition correctly. PWS-110SC1 is not running. Start the PWS-110SC1. Continued XVS-9000-C/XVS-8000-C/XVS-7000-C/XVS-6000-C... - Page 56 LED1 LED0 Waiting for DHCP The network is not operating Re-check the network connection and settings. acquisition correctly. PWS-110SC1 is not running. Start the PWS-110SC1. Continued If this manual is required, please contact your local Sony Sales Office/Service Center. XVS-9000-C/XVS-8000-C/XVS-7000-C/XVS-6000-C...
- Page 57 Waiting for FPGA Failure in initialization during Restart the unit or reset the switcher by Menu7315 initialization the startup process according to the User’s Guide of the system. If this manual is required, please contact your local Sony Sales Office/Service Center. XVS-9000-C/XVS-8000-C/XVS-7000-C/XVS-6000-C...
-
Page 59: Replacement Of Main Parts
Tightening torque PSW 3x6 : 0.80 ±0.12 N·m PSW 3x30 : 0.80 ±0.12 N·m M3 (Shoulder screw) : 0.80 ±0.12 N·m When using the torque driver with the notation of cN·m, interpret it as follows. Example:0.8 N·m = 80 cN·m XVS-9000-C/XVS-8000-C/XVS-7000-C/XVS-6000-C... -
Page 60: Front Panel
• When attaching the front panel, do not use the electric screwdriver. It may damage the screws. • When attaching the front panel, hook it on the two hooks of the top panel first, then attach the lower side. Install the removed parts by reversing the steps of removal. XVS-9000-C/XVS-8000-C/XVS-7000-C/XVS-6000-C... -
Page 61: Xvs-8000/7000/6000
• Do not use an electric screwdriver to attach the front panel. Using an electric screwdriver to attach the front panel may damage screws. • When installing the front panel, pass the harness to the clamper. (This step is not required for XVS-6000.) XVS-9000-C/XVS-8000-C/XVS-7000-C/XVS-6000-C... -
Page 62: Switching Regulator
Open the lever, and remove the switching regulator. Power switch Switching regulator Lever Installing Procedure While the lever is opened as shown in the illustration, push the switching regulator until it stops. Close the lever. Lever Switching regulator Lever XVS-9000-C/XVS-8000-C/XVS-7000-C/XVS-6000-C... -
Page 63: Xvs-8000/7000/6000
Power switch Switching regulator This figure shows XVS-8000. Lever Installing Procedure While the lever is opened as shown in the illustration, push the switching regulator until it stops. Close the lever. Lever Lever Switching regulator This figure shows XVS-8000. XVS-9000-C/XVS-8000-C/XVS-7000-C/XVS-6000-C... -
Page 64: Dc Fan
When attaching the fan holder assemblies, match the fan name on the label and the imprinting mark of the main unit. Install the removed parts by reversing the steps of removal. 4-4-2. DC Fan (Fan Holder Assembly (A)) Preparation Remove the fan holder assembly. (Refer to “4-4-1. Fan Holder Assembly”) XVS-9000-C/XVS-8000-C/XVS-7000-C/XVS-6000-C... -
Page 65: Dc Fan (Fan Holder Assembly (B)) (Xvs-8000)
Install the removed parts by reversing the steps of removal. 4-4-3. DC Fan (Fan Holder Assembly (B)) (XVS-8000) Preparation Remove the fan holder assembly. (Refer to “4-4-1. Fan Holder Assembly”) Procedure Disconnect the harness from the connector (CN002) on the CN-3824 board. XVS-9000-C/XVS-8000-C/XVS-7000-C/XVS-6000-C... -
Page 66: Dc Fan (Fan Holder Assembly (C)) (Xvs-9000)
CN002 Hole of the chassis Clamper Note When attaching the DC fan, pay attention to the position of label and harness. Install the removed parts by reversing the steps of removal. 4-4-4. DC Fan (Fan Holder Assembly (C)) (XVS-9000) XVS-9000-C/XVS-8000-C/XVS-7000-C/XVS-6000-C... - Page 67 Procedure Remove the three screws, then remove the fan holder assembly (C) holding the handle. Handle Fan holder assembly (C) PSW3 x 6 XVS-9000-C/XVS-8000-C/XVS-7000-C/XVS-6000-C...
- Page 68 PSW3 x 30 PSW3 x 30 Harness DC fan (80 square) Label CN003 CN-3824 board Note When attaching the DC fan, pay attention to the position of label and harness. Install the removed parts by reversing the steps of removal. 4-10 XVS-9000-C/XVS-8000-C/XVS-7000-C/XVS-6000-C...
-
Page 69: Cn-3824 Board
Remove the two shoulder screws, then remove the CN-3824 board in the direction of the arrow. CN-3824 board (Shoulder screw) Note When installing the CN-3824 board, confirm that it remove, after tightened the two shoulder screws. Install the removed parts by reversing the steps of removal. 4-11 XVS-9000-C/XVS-8000-C/XVS-7000-C/XVS-6000-C... -
Page 70: Front Board
Remove the MIX-57 board. MIX-57 board Unlock button Unlock button This figure shows XVS-8000. Eject lever Eject lever Installing Procedure While the eject levers are opened as shown in the illustration, insert the MIX-57 board into the board guide. 4-12 XVS-9000-C/XVS-8000-C/XVS-7000-C/XVS-6000-C... - Page 71 (2) until the unlock buttons pop out (3). Board guide MIX-57 board Eject lever Eject lever MIX-57 board (3) (2) Eject levers This figure shows XVS-8000. Unlock button Unlock button Install the removed parts by reversing the steps of removal. 4-13 XVS-9000-C/XVS-8000-C/XVS-7000-C/XVS-6000-C...
-
Page 72: Rear Board
• CNI-44 board • CNI-45 board • CNI-45A board • CNO-43 board • CNO-44 board • CNO-44A board • CNO-45 board • NET-28A board • NET-32 board • NET-32A board • NET-42 board • NET-42A board • NET-42B board 4-14 XVS-9000-C/XVS-8000-C/XVS-7000-C/XVS-6000-C... - Page 73 Spring plate Handle Handle NET-28 board NET-42 board or Handle Handle NET-42/CNO-45 board Note When installing the NET-28 board or NET-42 board, insert making sure the board's upper and lower spring plates do not catch on the board. 4-15 XVS-9000-C/XVS-8000-C/XVS-7000-C/XVS-6000-C...
- Page 74 The protection sheet (NET-28) is attached to the NET-28/NET-28A board as following procedures. (1) Bend the protection sheet (NET-28) to the line. Protection sheet (NET-28) Bend line (2) Attach the protection sheet (NET-28) to the board. (3) Cover the "a" portion of protection sheet (NET-28) to the connector (CND1). 4-16 XVS-9000-C/XVS-8000-C/XVS-7000-C/XVS-6000-C...
- Page 75 (4) Insert the "b" portion of protection sheet (NET-28) to the clearance between heatsink of IC301 and the board. NET-28/NET-28A board Protection sheet (NET-28) A side Heatsink of IC301 Protection sheet (NET-28) Connector (CND1) Protection sheet (NET-28) 4-17 XVS-9000-C/XVS-8000-C/XVS-7000-C/XVS-6000-C...
- Page 76 (6) Press the two push pins from the board of A side, push them out in the B side of the board. (7) Insert the two push pins of board to the two holes of the protection sheet (NET-28). Push pin NET-28/NET-28A board Panel B side Long part of protection sheet (NET-28) Push pin Protection sheet (NET-28) 4-18 XVS-9000-C/XVS-8000-C/XVS-7000-C/XVS-6000-C...
-
Page 77: Cn-3825 Board
(2) Draw the SW panel to the arrow, disconnect the connector (CN005) on the CN-3825 board from the connector on the CN-3826 board. SW panel PSW3 x 6 Connector (CN-3826 board) CN005 (CN-3825 board) This figure shows XVS-8000. PSW3 x 6 4-19 XVS-9000-C/XVS-8000-C/XVS-7000-C/XVS-6000-C... - Page 78 CN-3825 board CN004 Clamper PSW3 x 6 CN003 Clamper Harness CN002 Clamper Harness CN001 Harness Clamper XVS-6000 CN-3825 board PSW3 x 6 CN002 Clamper Harness CN001 Harness Clamper Install the removed parts by reversing the steps of removal. 4-20 XVS-9000-C/XVS-8000-C/XVS-7000-C/XVS-6000-C...
-
Page 79: Cn-3826 Board
Remove the screw, then remove the CN-3826 board. This figure shows XVS-8000. PSW3 x 6 CN-3826 board Note Tighten the screw, after install the SW panel. (Refer to “4-8. CN-3825 Board”) Install the removed parts by reversing the steps of removal. 4-21 XVS-9000-C/XVS-8000-C/XVS-7000-C/XVS-6000-C... -
Page 80: Cn-4018 Board
(1) Remove the four screws. (2) Draw the SW panel to the arrow, disconnect the connector (CN007) on the CN-4018 board from the connector on the CN-4019 board. PSW3 x 6 SW panel Connector (CN-4019 board) CN005 (CN-4018 board) PSW3 x 6 4-22 XVS-9000-C/XVS-8000-C/XVS-7000-C/XVS-6000-C... - Page 81 (3) Remove the three screws, then remove the CN-4018 board. Clampers CN006 Clamper 3 x 6 Clampers CN005 CN002 Harnesses CN004 CN003 Harness CN-4018 board Harness CN001 Clamper Harnesses Install the removed parts by reversing the steps of removal. 4-23 XVS-9000-C/XVS-8000-C/XVS-7000-C/XVS-6000-C...
-
Page 82: Cn-4019 Board
Procedure Remove the screw, then remove the CN-4019 board. PSW3 x 6 CN-4019 board Note Tighten the screw, after install the SW panel. (Refer to “4-10. CN-4018 Board”) Install the removed parts by reversing the steps of removal. 4-24 XVS-9000-C/XVS-8000-C/XVS-7000-C/XVS-6000-C... -
Page 83: Board
Remove the front panel. (Refer to “4-2. Front Panel”) Procedure Remove the two screws, then remove the FP-301 board in the direction of the arrow. Front panel PSW3 x 6 FP-301 board Install the removed parts by reversing the steps of removal. 4-25 XVS-9000-C/XVS-8000-C/XVS-7000-C/XVS-6000-C... - Page 84 Remove the front board. (Refer to “4-6. Front Board”) Remove as many front boards as required for easily replacing the HN-442 board. Procedure Remove the two screws, then remove the HN-442 board assembly. HN-442 board assembly PSW3 x 6 4-26 XVS-9000-C/XVS-8000-C/XVS-7000-C/XVS-6000-C...
- Page 85 When attaching the HN-442 board assembly, remove the front boards in the lower side to allow you to work easily. Then, securely insert it into the connector on the motherboard while holding the connector on the HN-442 board. Install the removed parts by reversing the steps of removal. 4-27 XVS-9000-C/XVS-8000-C/XVS-7000-C/XVS-6000-C...
-
Page 86: Board (Xvs-9000)
Air guide CN301 3 x 6 CN302 Flexible frat cables with connector Note When installing the CNO-45 board, tighten the screws in the following sequence: (a), (b), others. Install the removed parts by reversing the steps of removal. 4-28 XVS-9000-C/XVS-8000-C/XVS-7000-C/XVS-6000-C... -
Page 87: Mpu-163B Board (Xvs-9000/8000/7000/6000)/Mpu-163C Board (Xvs-9000)
When installing the dummy plate or CNO-45 board, tighten the screws in the following sequence: (a), (b), others. Installing Procedure Insert the MPU-163B board/MPU-163C board into the socket at an angle. Turn the memory module to horizontal position until a clicking sound is made. Assemble this unit. 4-29 XVS-9000-C/XVS-8000-C/XVS-7000-C/XVS-6000-C... -
Page 89: Circuit Description
This circuit converts the SDI signal sent from the serial crosspoint circuit to a multiviewer output signal. The multiviewer circuit can display the SDI signal selected arbitrarily in the cross point circuit on a screen split into 4/10/13/16. XVS-9000/XVS-8000/XVS-7000/XVS-6000 contains two multiviewer circuits. XVS-9000-C/XVS-8000-C/XVS-7000-C/XVS-6000-C... - Page 90 Compare circuit The compare circuit can simultaneously compare up to 8 pairs (16 signals) of HD and 3GSDI signals with the SDI signals supplied from the serial cross point circuit. XVS-9000-C/XVS-8000-C/XVS-7000-C/XVS-6000-C...
-
Page 91: M/E Block
DVP board, and is then combined with other signals. Furthermore, this mixer has functions to send video and key signals to the resizer circuit as a simple DME function and to receive return video and key signals from the resizer circuit. XVS-9000-C/XVS-8000-C/XVS-7000-C/XVS-6000-C... - Page 92 Resizer circuit: IC301, 302 This block applies resizer effects to the signal sent from the mixer block, and sends the signal to which resizer effects were applied to the mixer block. XVS-9000-C/XVS-8000-C/XVS-7000-C/XVS-6000-C...
-
Page 93: Output Processor Block
Out processes (including CCR, video process, blanking, SafeTitle, superimposition, and output phase adjustment) and the AUX KEY process are added to the SDI signals sent from the serial cross point circuit, and then processed SDI signals are sent to the CNO-43 board. The OUT-38A board contains four AUX KEY circuits. XVS-9000-C/XVS-8000-C/XVS-7000-C/XVS-6000-C... -
Page 94: Control Section
PS_I2C bus. Based on the obtained information, power consumption of video boards in the unit is controlled by the DC_ENABLE signal. XVS-9000 is MB-1249 board, XVS-8000 is MB-1223 board, XVS-7000 is MB-1233 board, XVS-6000 is MB-1234 board. XVS-9000-C/XVS-8000-C/XVS-7000-C/XVS-6000-C... -
Page 95: Board (Xvs-8000/Xvs-7000/Xvs-6000)
GPI input/output circuit. The Gigabit Ethernet signal and the GPI Input Output signal are connected to the CA-92 board. The reference signal is distributed to the CA-92 board and the CA-92A board by the buffer circuit. XVS-9000-C/XVS-8000-C/XVS-7000-C/XVS-6000-C... -
Page 96: Board (Xvs-9000)
+5 V from the +12 V supplied from the MB-1249 board, and then supplies the +5 V to the FP-301 board. The HN-442 board also supplies the CENTER signal generated on the CA-92 board to the FP-301 board through the MB-1249 board. XVS-9000-C/XVS-8000-C/XVS-7000-C/XVS-6000-C... -
Page 97: Sdi Video Interface Section
This CADEC IC configures the FPGA (IC1) by using the selected single-type configuration data from the FLASH_ ROM (IC1803) configuration data by the initialization processing during the power-on process and by switching configuration data by MENU to make initial settings. XVS-9000-C/XVS-8000-C/XVS-7000-C/XVS-6000-C... -
Page 98: Board (Xks-S9112)/Cni-45A Board (Xks-S8112)
This CADEC IC controls the clock generator (IC1402). SDI cable equalizer IC control This CADEC IC controls the SDI cable equalizer: IC300, IC301, IC302, IC303, IC400, IC401, IC402, IC403, IC500, IC501, IC502, IC503, IC600, IC601, IC602, and IC603. 5-10 XVS-9000-C/XVS-8000-C/XVS-7000-C/XVS-6000-C... -
Page 99: Board (Xks-S8165)
• This board does not have functions (format conversion, etc.), but only outputs SDI signals (12G, 3G, HD, and SD). • Only one type of FPGA (IC2, IC3) configuration data. • SDI_IN inputs 16-channel signals from the mother board and SDI_OUT supports 16 channels (4 channels in the case of 12G). 5-11 XVS-9000-C/XVS-8000-C/XVS-7000-C/XVS-6000-C... - Page 100 Local_Bus communication (CNO-44 board) This FPGA sends/receives commands and status data to/from the upper CPU through the local bus. I2C communication (CNO-44A board) This FPGA sends/receives commands and status data to/from the upper CPU through the I2C interface. 5-12 XVS-9000-C/XVS-8000-C/XVS-7000-C/XVS-6000-C...
-
Page 101: Ip Video Interface Section
• Communication with the Host CPU (Nios2) • Control of Network PHY Network PHY The Network PHY's firmware is stored in the serial flash memory (IC1506, IC2304, IC4104, IC4904). The Network PHY CPU has the following main function. 5-13 XVS-9000-C/XVS-8000-C/XVS-7000-C/XVS-6000-C... -
Page 102: Board (Xks-Q8111) And Net-32A Board (Xks-Q8166)
The Nios 2 processor in the FPGA totally controls the board. The firmware of the Nios 2 processor is stored in the flash memory (IC402, IC403, IC2403, IC2404) and works with the SRAM (IC401, IC2401) as work RAM. 5-14 XVS-9000-C/XVS-8000-C/XVS-7000-C/XVS-6000-C... -
Page 103: Net-42B Board (Xks-C8166)
The SDI signal transmitted from the switcher to the FPGA (IC004, IC002) is converted to an IP (RTP) signal, and then the converted IP (RTP) signal is transmitted to the FPGA (IC003, IC001) through the Aurora interface. The IP (RTP) 5-15 XVS-9000-C/XVS-8000-C/XVS-7000-C/XVS-6000-C... - Page 104 After the configuration has been completed, the CADEC releases the CPU module reset to boot the CPU module. • Monitoring power supply states • Controls the clock cleaner (IC701, IC702, IC5102) • Controls the PCIe switch (IC602) • This CADEC sends/receives commands and status data to/from the upper CPU through the local bus. 5-16 XVS-9000-C/XVS-8000-C/XVS-7000-C/XVS-6000-C...
-
Page 105: Frame Memory Section
After the FPGA configuration has been completed, this CADEC releases the CPU reset. The CPU runs with the boot data and application data in the FLASH_ROM (IC1901). Communication between CPU and FPGA The CPU reads and writes registers of the FPGA through the CADEC, and decodes addresses to access registers. 5-17 XVS-9000-C/XVS-8000-C/XVS-7000-C/XVS-6000-C... - Page 106 This CADEC manages accesses from the CPU to the flash memory for applications and FPGA configuration data. Status/beacon/power LED control and 7SEG LED control Monitoring board power status Control of clock generator VIDEO system: IC2004 and IC2005 CPU system: IC3204, IC3206 and IC3207 5-18 XVS-9000-C/XVS-8000-C/XVS-7000-C/XVS-6000-C...
-
Page 107: Format Converter Section
Flash memory access management This CADEC controls accesses to the flash memory for FPGA configuration data (such as rewriting from the local bus). Status/beacon/power LED control Monitoring board power status Control of clock generator This CADEC controls the Clock_Cleaner (IC2004, IC2005). 5-19 XVS-9000-C/XVS-8000-C/XVS-7000-C/XVS-6000-C... -
Page 108: Dme Section
Output data is sent to the AINTPL block. The FINTPU block has the following main functions. • Antialias Filter (in horizontal and vertical directions) • Scan Conversion • Defocus/Blur • EffectG2 Mask or Mask 5-20 XVS-9000-C/XVS-8000-C/XVS-7000-C/XVS-6000-C... -
Page 109: Board (Xks-8475)
Furthermore, this block performs Scan Convert for video/key signals by using the DDR3 SDRAM connected to this device, and also executes the following filter functions in the horizontal and vertical directions. • Defocus Filter • Blur Filter • Antialias Filter 5-21 XVS-9000-C/XVS-8000-C/XVS-7000-C/XVS-6000-C... - Page 110 For 4K 2SI, this block receives multiple signals processed by the DVP-68 board and performs the following Global Effect processing. • Combiner Priority • Brick • Shadow The video/key signals to which effect processing has been added are sent to the cross point block as SDI signal at the final stage of this block. 5-22 XVS-9000-C/XVS-8000-C/XVS-7000-C/XVS-6000-C...
-
Page 111: Spare Parts
Therefore, specified parts should be used in the case 指定の部品を使ってください。 of replacement. 2. Standardization of Parts 2. 部品の共通化 Some repair parts supplied by Sony differ from those ソニーから供給する補修用部品は,セットに使われ used for the unit. These are because of parts common- ているものと異なることがあります。 ality and improvement. -
Page 112: Exploded Views (Xvs-9000)
B4 x 10 Refer to “Front Panel” Part No. SP Description A-2107-154-A s FRONT BLANK ASSY X-3605-751-1 s FOOT ASSY 1-474-652-13 s REGULATOR, SWITCHING 3-650-537-01 s WASHER 3-994-237-01 s SPACER 7-682-562-04 s SCREW +B 4X10 7-682-947-01 s SCREW +PSW 3X6 XVS-9000-C/XVS-8000-C/XVS-7000-C/XVS-6000-C... -
Page 113: Front Panel
4-586-402-01 s HOLDER 4-744-389-01 s PLATE, POWER FIXED 4-744-391-01 s FILTER 4-744-392-01 s RETAINER,FILTER 4-744-396-01 s PANEL, FRONT 4-812-134-11 s RIVET (DIA. 3.5), NYLON 7-628-253-05 s SCREW +PS 2X4 7-682-647-01 s SCREW +PS 3X6 7-682-947-01 s SCREW +PSW 3X6 XVS-9000-C/XVS-8000-C/XVS-7000-C/XVS-6000-C... -
Page 114: Main Chassis
4-586-453-01 s COVER,SWITCH 4-586-460-01 s CUSHION,HANDLE VIBRATION PROOF 4-744-379-01 s PLATE (R), LOCK 4-744-380-01 s PLATE (L), LOCK 4-744-388-01 s HANDLE 4-884-982-03 s SCREW, STEP 7-682-562-04 s SCREW +B 4X10 7-682-947-01 s SCREW +PSW 3X6 7-682-950-01 s SCREW +PSW 3X12 XVS-9000-C/XVS-8000-C/XVS-7000-C/XVS-6000-C... -
Page 115: Rear
3-733-690-01 s +B 4X6 (CU,NI) 4-744-382-01 s PANEL, REAR 4-744-387-01 s PANEL (CN-4020) 4-744-393-01 s PANEL (2), REAR 4-744-398-01 s LABEL, CN SLOT 7-621-759-45 s +PSW, 2.6X6 7-682-947-01 s SCREW +PSW 3X6 7-682-950-01 s SCREW +PSW 3X12 7-682-961-01 s SCREW +PSW 4X8 XVS-9000-C/XVS-8000-C/XVS-7000-C/XVS-6000-C... -
Page 116: Fan
X-2592-777-1 s HOLDER ASSY, FAN PC BOARD 1-787-908-12 s FAN, DC (80 SQUARE) 1-855-201-11 s FAN, DC (120 SQUARE) 1-855-435-11 s FAN, DC (120 SQUARE) 2-102-434-01 s SCREW (M3 (ECO)), STEP 3-172-089-01 o HANDLE 7-682-947-01 s SCREW +PSW 3X6 7-682-955-01 s SCREW +PSW 3X30 XVS-9000-C/XVS-8000-C/XVS-7000-C/XVS-6000-C... -
Page 117: Exploded Views (Xvs-8000)
1-971-159-12 s HARNESS, SUB CN3825-FP 4-586-401-01 s LIGHT, GUIDE 4-586-402-01 s HOLDER 3-172-089-01 o HANDLE 3-650-537-01 s WASHER 4-586-403-01 s FILTER 3-655-653-01 s BAND (TAITON), BINDING (S/N 10001 to 11000 (SY) 3-994-237-01 s SPACER S/N 10001 to 11000 (SY)) XVS-9000-C/XVS-8000-C/XVS-7000-C/XVS-6000-C... - Page 118 4-812-134-11 s RIVET (DIA. 3.5), NYLON 4-746-592-01 s RETAINER,FILTER (8) (S/N 11001 and Higher (SY) S/N 51001 and Higher (CN)) 7-628-253-05 s SCREW +PS 2X4 7-682-562-04 s SCREW +B 4X10 7-682-647-01 s SCREW +PS 3X6 7-682-947-01 s SCREW +PSW 3X6 XVS-9000-C/XVS-8000-C/XVS-7000-C/XVS-6000-C...
-
Page 119: Main Chassis
4-586-453-01 s COVER,SWITCH 4-586-454-01 s LABEL, SLOT NUMBER 4-586-456-01 s PLATE (R), LOCK 4-586-457-01 s PLATE (L), LOCK 4-586-460-01 s CUSHION,HANDLE VIBRATION PROOF 4-586-463-01 s HANDLE 4-884-982-03 s SCREW, STEP 7-682-562-04 s SCREW +B 4X10 7-682-947-01 s SCREW +PSW 3X6 XVS-9000-C/XVS-8000-C/XVS-7000-C/XVS-6000-C... -
Page 120: Rear
7-682-950-01 s SCREW +PSW 3X12 1-971-161-11 s HARNESS, SUB INLET-NF 7-682-961-01 s SCREW +PSW 4X8 1-971-162-11 s HARNESS, SUB INLET-BREAKER 2-990-241-02 s HOLDER (A), PLUG 3-172-089-01 o HANDLE 3-725-295-21 s SCREW, (+) (B3) 4-586-455-01 s LABEL, CN SLOT 6-10 XVS-9000-C/XVS-8000-C/XVS-7000-C/XVS-6000-C... -
Page 121: Exploded Views (Xvs-7000)
3-655-653-01 s BAND (TAITON), BINDING S/N 51001 and Higher (CN)) 3-994-237-01 s SPACER 4-586-406-01 s BRACKET, BAR 4-170-582-02 s BRACKET, PANEL (S/N 10001 to 11000 (SY) S/N 50001 to 51000 (CN)) 4-183-472-01 s ESCUTCHEON 4-549-457-21 s PANEL (SIU), BAR 6-11 XVS-9000-C/XVS-8000-C/XVS-7000-C/XVS-6000-C... - Page 122 4-812-134-11 s RIVET (DIA. 3.5), NYLON 4-746-591-01 s RETAINER,FILTER (7) (S/N 11001 and Higher (SY) S/N 51001 and Higher (CN)) 7-628-253-05 s SCREW +PS 2X4 7-682-562-04 s SCREW +B 4X10 7-682-647-01 s SCREW +PS 3X6 7-682-947-01 s SCREW +PSW 3X6 6-12 XVS-9000-C/XVS-8000-C/XVS-7000-C/XVS-6000-C...
-
Page 123: Main Chassis
4-586-460-01 s CUSHION,HANDLE VIBRATION PROOF 4-586-463-01 s HANDLE 4-688-790-01 s PLATE (R), LOCK 4-688-791-01 s PLATE (L), LOCK 4-688-793-01 s PANEL, SW 4-688-798-02 s LABEL, SLOT NUMBER 4-884-982-03 s SCREW, STEP 7-682-562-04 s SCREW +B 4X10 7-682-947-01 s SCREW +PSW 3X6 6-13 XVS-9000-C/XVS-8000-C/XVS-7000-C/XVS-6000-C... -
Page 124: Rear
1-971-162-11 s HARNESS, SUB INLET-BREAKER 2-990-241-02 s HOLDER (A), PLUG 3-172-089-01 o HANDLE 3-725-295-21 s SCREW, (+) (B3) 4-688-789-01 s LABEL, CN SLOT 4-688-795-01 s PANEL, REAR 7-682-947-01 s SCREW +PSW 3X6 7-682-950-01 s SCREW +PSW 3X12 7-682-961-01 s SCREW +PSW 4X8 6-14 XVS-9000-C/XVS-8000-C/XVS-7000-C/XVS-6000-C... -
Page 125: Exploded Views (Xvs-6000)
3-994-237-01 s SPACER S/N 51001 and Higher (CN)) 4-170-582-02 s BRACKET, PANEL 4-586-406-01 s BRACKET, BAR 4-183-472-01 s ESCUTCHEON (S/N 10001 to 11000 (SY) S/N 50001 to 51000 (CN)) 4-457-840-01 s GASKET Q160 4-549-457-31 s PANEL (SIU), BAR 6-15 XVS-9000-C/XVS-8000-C/XVS-7000-C/XVS-6000-C... - Page 126 4-812-134-11 s RIVET (DIA. 3.5), NYLON 4-746-590-01 s RETAINER,FILTER (6) (S/N 11001 and Higher (SY) S/N 51001 and Higher (CN)) 7-628-253-05 s SCREW +PS 2X4 7-682-562-04 s SCREW +B 4X10 7-682-647-01 s SCREW +PS 3X6 7-682-947-01 s SCREW +PSW 3X6 6-16 XVS-9000-C/XVS-8000-C/XVS-7000-C/XVS-6000-C...
-
Page 127: Main Chassis
4-688-805-01 s PLATE (L), LOCK 4-688-806-01 s PANEL, PSU BLANK 4-688-809-01 s HANDLE (S) 4-688-811-02 s LABEL, SLOT NUMBER 4-688-816-01 s PANEL, SW 4-688-817-01 s PLATE (R), LOCK 4-884-982-03 s SCREW, STEP 7-682-562-04 s SCREW +B 4X10 7-682-947-01 s SCREW +PSW 3X6 6-17 XVS-9000-C/XVS-8000-C/XVS-7000-C/XVS-6000-C... -
Page 128: Rear
1-971-162-11 s HARNESS, SUB INLET-BREAKER 2-990-241-02 s HOLDER (A), PLUG 3-172-089-01 o HANDLE 3-725-295-21 s SCREW, (+) (B3) 4-688-812-01 s LABEL, CN SLOT 4-688-818-01 s PANEL, REAR 7-682-947-01 s SCREW +PSW 3X6 7-682-950-01 s SCREW +PSW 3X12 7-682-961-01 s SCREW +PSW 4X8 6-18 XVS-9000-C/XVS-8000-C/XVS-7000-C/XVS-6000-C... -
Page 129: Exploded Views (Fan)
X-2592-777-1 s HOLDER ASSY, FAN PC BOARD 1-787-908-12 s FAN, DC (80 SQUARE) (For XVS-8000) 7-682-947-01 s SCREW +PSW 3X6 1-855-201-11 s FAN, DC (120 SQUARE) 7-682-955-01 s SCREW +PSW 3X30 1-855-435-11 s FAN, DC (120 SQUARE) 2-102-434-01 s SCREW (M3 (ECO)), STEP 6-19 XVS-9000-C/XVS-8000-C/XVS-7000-C/XVS-6000-C... -
Page 130: Exploded Views (Boards)
7-682-549-09 s SCREW +B 3X10 7-682-947-01 s SCREW +PSW 3X6 1-857-571-12 s PC BOARD, MOUNT(CPU-DP MODULE) 7-682-951-01 s SCREW +PSW 3X14 4-187-619-01 s SHEET,RADIATION(25X25X2) 7-685-145-14 s SCREW +P 3X6 TYPE2 NON-SLIT 4-812-134-11 s RIVET (DIA. 3.5), NYLON 6-714-073-01 s IC 88E1118R-A0-NNC2C000 6-20 XVS-9000-C/XVS-8000-C/XVS-7000-C/XVS-6000-C... -
Page 131: Dvp-53A Board
A-1771-683-A s ASSY, PBS 4-143-559-01 s PIN, PUSH X-2583-078-2 s BOARD LEVER GF ASSY 4-183-612-01 s SHEET, WIND SHIELDING 1-857-571-12 s PC BOARD, MOUNT(CPU-DP MODULE) 4-187-619-01 s SHEET,RADIATION(25X25X2) 3-531-576-51 o RIVET 4-187-619-01 s SHEET,RADIATION(25X25X2) 3-561-426-01 s CUSHION 4-187-620-01 s SHEET,RADIATION(33X33X1.5) 6-21 XVS-9000-C/XVS-8000-C/XVS-7000-C/XVS-6000-C... - Page 132 4-812-134-11 s RIVET (DIA. 3.5), NYLON 6-714-073-01 s IC 88E1118R-A0-NNC2C000 4-545-123-01 s LABEL(10A), FUSE 7-626-320-61 s PIN, SPRING 3X18 7-682-549-09 s SCREW +B 3X10 7-682-947-01 s SCREW +PSW 3X6 7-682-951-01 s SCREW +PSW 3X14 7-685-145-14 s SCREW +P 3X6 TYPE2 NON-SLIT 6-22 XVS-9000-C/XVS-8000-C/XVS-7000-C/XVS-6000-C...
-
Page 133: Mix-57/Mix-57A Boards
7-682-951-01 s SCREW +PSW 3X14 4-143-559-01 s PIN, PUSH 7-685-145-14 s SCREW +P 3X6 TYPE2 NON-SLIT 4-187-619-01 s SHEET,RADIATION(25X25X2) 4-586-519-01 s SHEET (1 (28X28)), RADIATION 4-812-134-11 s RIVET (DIA. 3.5), NYLON 6-714-073-01 s IC 88E1118R-A0-NNC2C000 4-545-123-01 s LABEL(10A), FUSE 6-23 XVS-9000-C/XVS-8000-C/XVS-7000-C/XVS-6000-C... -
Page 134: Out-38/Out-38A Boards
SP Description Part No. SP Description A-1771-683-A s ASSY, PBS 4-143-557-01 s SPRING, COMPRESSION A-2084-271-A s MOUNTED CIRCUIT BOARD, OUT-38 (for OUT-38 board) 4-143-559-01 s PIN, PUSH X-2583-078-2 s BOARD LEVER GF ASSY 4-187-620-01 s SHEET,RADIATION(33X33X1.5) 3-561-426-01 s CUSHION 6-24 XVS-9000-C/XVS-8000-C/XVS-7000-C/XVS-6000-C... - Page 135 OUT-38/OUT-38A Boards Part No. SP Description 4-545-123-01 s LABEL(10A), FUSE 7-626-320-61 s PIN, SPRING 3X18 7-682-947-01 s SCREW +PSW 3X6 7-682-951-01 s SCREW +PSW 3X14 7-685-145-14 s SCREW +P 3X6 TYPE2 NON-SLIT 6-25 XVS-9000-C/XVS-8000-C/XVS-7000-C/XVS-6000-C...
-
Page 136: Vpr-129/Vpr-129A Boards
Front view Front view (XVS-7000) (XVS-6000) (XVS-9000) (XVS-8000) VPR-129 Board PSW3 x 6 PSW3 x 6 3 x 14 3 x 18 3 x 6 VPR-129 P3 x 6 Board 3 x 14 3 x 18 P3 x 6 6-26 XVS-9000-C/XVS-8000-C/XVS-7000-C/XVS-6000-C... - Page 137 VPR-129 board) 6-724-297-01 s IC FD12N-04GN(SF814L3 (for VPR-129A board) 6-723-679-01 s IC THNSN8480PCSE4PDE1 (for VPR-129 board) 7-626-320-61 s PIN, SPRING 3X18 7-682-947-01 s SCREW +PSW 3X6 7-682-951-01 s SCREW +PSW 3X14 7-685-145-14 s SCREW +P 3X6 TYPE2 NON-SLIT 6-27 XVS-9000-C/XVS-8000-C/XVS-7000-C/XVS-6000-C...
-
Page 138: Xpt-38 Board
A-2084-268-A s MOUNTED CIRCUIT BOARD, XPT-38 3-942-866-02 s NUT (M3) (3X0.5), NYLON 4-143-559-01 s PIN, PUSH 4-187-620-01 s SHEET,RADIATION(33X33X1.5) 4-545-123-01 s LABEL(10A), FUSE 7-626-320-61 s PIN, SPRING 3X18 7-682-947-01 s SCREW +PSW 3X6 7-682-951-01 s SCREW +PSW 3X14 6-28 XVS-9000-C/XVS-8000-C/XVS-7000-C/XVS-6000-C... -
Page 139: Cn-3807 Board
1003 1001 Part No. SP Description 1001 A-2082-225-A s MOUNTED CIRCUIT BOARD, CN-3807 1002 2-655-586-01 s SCREW +B M2.6 EG 1003 3-172-089-01 o HANDLE 1004 3-637-901-02 s SCREW M2.6X5 1005 4-586-498-01 s PANEL (CN-3807) 7-621-759-45 s +PSW, 2.6X6 6-29 XVS-9000-C/XVS-8000-C/XVS-7000-C/XVS-6000-C... -
Page 140: Cni-43/Cno-43 Boards
(XVS-7000) (XVS-6000) 1103 1101 1102 1101 Part No. SP Description 1101 3-172-089-01 o HANDLE 1102 3-637-901-02 s SCREW M2.6X5 1103 4-586-501-01 s PANEL (CNI/CNO)(IN) (CNI-43) (IN) (for CNI-43 board) 4-586-501-11 s PANEL (CNI/CNO)(OUT) (CNO-43) (OUT) (for CNO-43 board) 6-30 XVS-9000-C/XVS-8000-C/XVS-7000-C/XVS-6000-C... -
Page 141: Cni-44 Board
3-172-089-01 o HANDLE 1152 3-531-576-01 s RIVET 1153 3-637-901-02 s SCREW M2.6X5 1154 4-143-559-01 s PIN, PUSH 1155 4-586-501-21 s PANEL (CNI/CNO)(IN FC) 1156 4-586-519-01 s SHEET (1 (28X28)), RADIATION 1157 4-689-070-01 s SHEET, PROTECTION 1158 6-724-297-01 s IC FD12N-04GN(SF814L3 6-31 XVS-9000-C/XVS-8000-C/XVS-7000-C/XVS-6000-C... -
Page 142: Net-28/Net-28A Boards
SLOT No. 7 SLOT No. 11 SLOT No. 16 SLOT No. 12 SLOT No. 17 Rear view Rear view Rear view (XVS-8000) (XVS-7000) (XVS-6000) 1204 1203 1204 1204 1206 1207 1206 PSW2.6 x 6 1206 1202 1201 1202 1205 6-32 XVS-9000-C/XVS-8000-C/XVS-7000-C/XVS-6000-C... - Page 143 X-2592-917-1 s PANEL (NET-28) (OUT) ASSY (for NET-28A board) 3-172-089-01 o HANDLE 1203 4-143-557-01 s SPRING, COMPRESSION 1204 4-143-559-01 s PIN, PUSH 1205 4-586-499-01 s SHEET (NET-28), PROTECTION 1206 4-586-519-01 s SHEET (1 (28X28)), RADIATION 1207 4-545-123-01 s LABEL(10A), FUSE 7-621-759-45 s +PSW, 2.6X6 6-33 XVS-9000-C/XVS-8000-C/XVS-7000-C/XVS-6000-C...
-
Page 144: Net-32/Net-32A Boards
1306 PSW2.6 x 6 1301 1302 1305 1307 1309 1308 1303 Part No. SP Description Part No. SP Description 1301 X-2594-356-1 s PANEL (NET-32, IN) ASSY X-2594-357-1 s PANEL (NET-32, OUT) ASSY (for NET-32 board) (for NET-32A board) 6-34 XVS-9000-C/XVS-8000-C/XVS-7000-C/XVS-6000-C... - Page 145 3-531-576-01 s RIVET 1304 4-143-557-01 s SPRING, COMPRESSION 1305 4-143-559-01 s PIN, PUSH 1306 4-586-519-01 s SHEET (1 (28X28)), RADIATION 1307 4-586-519-11 s SHEET (1 (20X20)), RADIATION 1308 4-689-070-01 s SHEET, PROTECTION 1309 4-693-514-01 s CUSHION 7-621-759-45 s +PSW, 2.6X6 6-35 XVS-9000-C/XVS-8000-C/XVS-7000-C/XVS-6000-C...
-
Page 146: Dvp-68 Board
7-626-320-61 s PIN, SPRING 3X18 1405 4-143-557-01 s SPRING, COMPRESSION 7-682-947-01 s SCREW +PSW 3X6 7-682-951-01 s SCREW +PSW 3X14 1406 4-143-559-01 s PIN, PUSH 7-685-145-14 s SCREW +P 3X6 TYPE2 NON-SLIT 1407 4-564-357-01 s SHEET (3 (40X45)), RADIATION 6-36 XVS-9000-C/XVS-8000-C/XVS-7000-C/XVS-6000-C... -
Page 147: Cni-45/Cni-45A Boards
1504 3-637-901-02 s SCREW M2.6X5 1505 4-143-557-01 s SPRING, COMPRESSION 1506 4-143-559-01 s PIN, PUSH 1507 4-689-070-01 s SHEET, PROTECTION 1508 4-744-861-01 s LID, CONNECTOR 1509 4-744-863-01 s PANEL (12G-SDI IN), CN 1510 4-744-871-01 s SHEET (1 (38X38)),RADIATION 6-37 XVS-9000-C/XVS-8000-C/XVS-7000-C/XVS-6000-C... -
Page 148: Cno-43/Cno-44/Cno-44A Boards
3-561-426-01 s CUSHION 1603 3-637-901-02 s SCREW M2.6X5 1604 4-143-557-01 s SPRING, COMPRESSION 7-621-759-45 s +PSW, 2.6X6 1605 4-143-559-01 s PIN, PUSH 1606 4-470-978-01 s GASKET (DP) 1607 4-744-861-01 s LID, CONNECTOR 1608 4-744-862-01 s PANEL (12G-SDI OUT), CN 6-38 XVS-9000-C/XVS-8000-C/XVS-7000-C/XVS-6000-C... -
Page 149: Net-42A/Net-42B Boards
4-143-559-01 s PIN, PUSH 1702 2-640-315-02 o SCREW (M2X5), SMALL, +P, SW 1708 4-744-871-01 s SHEET (1 (38X38)), RADIATION 1703 3-172-089-01 o HANDLE 1704 3-531-576-11 s RIVET 1705 3-561-426-01 s CUSHION 7-621-759-45 s +PSW, 2.6X6 1706 4-143-557-01 s SPRING, COMPRESSION 6-39 XVS-9000-C/XVS-8000-C/XVS-7000-C/XVS-6000-C... -
Page 150: Net-42 Board
7-621-759-45 s +PSW, 2.6X6 A-5007-043-A s MPU-163C COMPL (for XKS-C9111N) 7-682-947-01 s SCREW +PSW 3X6 1802 2-640-315-02 o SCREW (M2X5), SMALL, +P, SW 1803 3-172-089-01 o HANDLE 1804 3-531-576-11 s RIVET 1805 4-143-557-01 s SPRING, COMPRESSION 1806 4-143-559-01 s PIN, PUSH 6-40 XVS-9000-C/XVS-8000-C/XVS-7000-C/XVS-6000-C... -
Page 151: Cno-45/Net-42 Boards
A-2229-034-A s CNO-45 COMPL 1903 2-640-315-02 o SCREW (M2X5), SMALL, +P, SW 7-621-759-45 s +PSW, 2.6X6 1904 3-172-089-01 o HANDLE 7-682-947-01 s SCREW +PSW 3X6 1905 3-531-576-11 s RIVET 1906 4-143-557-01 s SPRING, COMPRESSION 1907 4-143-559-01 s PIN, PUSH 6-41 XVS-9000-C/XVS-8000-C/XVS-7000-C/XVS-6000-C... -
Page 152: Supplied Accessories
6-8. Supplied Accessories Supplied Accessories Q'ty Part No. SP Description 1-695-542-22 s TERMINATOR 75 4-589-310-06 s OPERATION MANUAL 4-589-402-09 s CD-ROM 8pcs 7-682-562-04 s SCREW +B 4X10 8pcs 7-682-962-01 s SCREW +PSW 4X10 (for XVS-8000/ XVS-7000 only) 6-42 XVS-9000-C/XVS-8000-C/XVS-7000-C/XVS-6000-C... -
Page 153: Diagrams
CNO/NET XPT-38 VPR-129A 16(K) OUT-38 8(BG) 8(MV) XPT-38 OUT-38A (290x290) APS-406 160(NMI) 16(K) 4k=40in MIX-57 8(BG) 16(K) 8(BG) 16(K) MIX-57 8(BG) 16(K) 8(BG) 16(K) MIX-57 8(BG) VPR-129(FM) 2(CCR)+8(FC) 16(FC) VPR-129A 2(CCR)+8(FC) 4(CCR) (FC/CCR) 16(MV) XPT-38 (290x290) 16(MV) XPT-38 (290x290) XVS-9000-C/XVS-8000-C/XVS-7000-C/XVS-6000-C... - Page 154 FRONT VPR-129A VPR-129 DVP-53A OUT-38 8(FC9-16) (FC/CCR) CNO/NET DVP-53A CA-92 CNO/NET MIX-57 APS-406 CNO/NET MIX-57 24(OUT) CNO/NET MIX-57 OUT-38 CNO/NET VPR-129 XPT-38 48(FC1-8/MON9-12) 24(OUT) XPT-38 OUT-38A XPT-38 BGCL VPR-129A GEN. OUT-38 OUT-38A CA-92 XPT-38 12(FC1-8/MON9-12) APS-406 BGCL 8(MV1-8) GEN. XVS-9000-C/XVS-8000-C/XVS-7000-C/XVS-6000-C...
- Page 155 Transformer GbE2 SLOT 18 J2601 Transformer (Debug) HUB2 SLOT 18 Transformer IC1601 RJ45 Transformer GbE1 CLK3 UART CLK2 VCLK[12:0] CPU Main LMH1983 (Debug) IC2003 CLK1 VCLK_R[15:0] (HD) VCLK_HD[1:0] UART2 RS-485 HF_CK0 HF_CK1 LVDS VCLK2_R[15:0] (SD) VCLK_SD[1:0] Thermal EEPROM sensor XVS-9000-C/XVS-8000-C/XVS-7000-C/XVS-6000-C...
- Page 156 CN102 IC002(NM) IC001 IC001 IC002 EEPROM MB_3.3V EEPROM MB_3.3V EEPROM EEPROM CNB1 MB_3.3V I2C BUS MB_3.3V MB_3.3V MB_SCL IC201 CNB1 MB_SDA FL201-FL208 I2C BUS CN201 MB_3.3V GPI IN IN1-8 Filter RY201-RY204 GPI OUT Relay EXPANDER Q203,Q205,Q206,Q208 GPI OUT Buffer XVS-9000-C/XVS-8000-C/XVS-7000-C/XVS-6000-C...
- Page 157 DC OK Green LED HARNESS Fault Orange LED POWER +12V SUPPLY UNIT D PS4_+5V_STANDBY R004 R023-R028 PS4_INHIBIT PS4_I2C_GA2 PS4_I2C_GA1 CN004 PS4_I2C_GA0 H:OFF PS4_ENABLE PS4_ENABLE PS4_ON L:ON AC OK Green LED POWER R032 DC OK Green LED HARNESS Fault Orange LED XVS-9000-C/XVS-8000-C/XVS-7000-C/XVS-6000-C...
- Page 158 PS5_AC_OK CL005 PS5_DC_OK PS5_DC_OK CL015 harness CN3825-SW PS5_FAULT PS5_FAULT CL025 PS5_EXIST PS5_EXIST POWER F PS6_+5V_STANDBY PS6_INHIBIT +12V PS6_I2C_GA2 H:OFF PS6_I2C_GA1 L:ON CN006 PS6_I2C_GA0 PS6_ENABLE PS6_ENABLE PS6_ON PS6_AC_OK PS6_AC_OK CL006 PS6_DC_OK PS6_DC_OK CL016 harness CN3825-SW PS6_FAULT PS6_FAULT CL026 PS6_EXIST PS6_EXIST XVS-9000-C/XVS-8000-C/XVS-7000-C/XVS-6000-C...
- Page 159 Distributor IN17BP/N CNF1 IC308 IC802 IN18 IN18AP/N CNF1 Cable Equalizer Reclock & Distributor IN18BP/N CNF1 IC309 IC803 IN19 IN19AP/N CNF1 Cable Equalizer Reclock & Distributor IN19BP/N CNF1 IC310 IC804 IN20 IN20AP/N CNF1 Cable Equalizer Reclock & Distributor IN20BP/N CNF1 XVS-9000-C/XVS-8000-C/XVS-7000-C/XVS-6000-C...
- Page 160 F1502 10A/125V IC1405 10A/125V IC1502 IC1602 IC1601 DC-DC +2.5V +1.0V +1.0V 2.5V FPGA DC-DC +3.3V-C DC-DC +1.2V-C 2.5V_PG(to IC2) 1.0V_PG (to IC2) 3.3V 1.2V CADEC_PG IC1403 (to IC2) DC-DC +3.0V-F 3.0V 3.0V_F_PG(to IC2) IC1402 +3.3V-F DC-DC 3.3V 3.3V_F_PG(to IC2) XVS-9000-C/XVS-8000-C/XVS-7000-C/XVS-6000-C...
- Page 161 IN7_CD IN15_CD to IC2 to IC3 D403 D603 IC403 IC603 IN16 SDI-IN8 SDI-IN16 Cable EQ Cable EQ to IC2 to IC3 IN8_CD IN16_CD to IC2 to IC3 GS_GSPI[0] GS_GSPI[1] GS_GSPI[2] GS_GSPI[3] from IC1 from IC1 from IC1 from IC1 XVS-9000-C/XVS-8000-C/XVS-7000-C/XVS-6000-C...
- Page 162 148MHz 296MHz POWER from D-DCON CN-F1 IC901 GOOD BLOCK IC1400, IC1402 IC1401 VCLK 74MHz VCLK2 IC1403, IC1405,IC1406 IC1404 GS_GSPI[0] GS_GSPI[1] to CableEQ CLK CTRL GS_GSPI[2] GS_GSPI[3] D1401 D1400 100MHz D1000 D800 D801 D802 Board STS0 STS1 Suffix R848,R849 7-10 XVS-9000-C/XVS-8000-C/XVS-7000-C/XVS-6000-C...
- Page 163 GP3_EN1 IC2803 IC2806 EN_DET +1.8V-FB1_PG GP3_EN2 +12V-I +1.2V-FBC +1.03V-FB1 DC-DC GP1_EN4 1.2V 1.03V +1.03V-FB1_PG IC2804 +1.03V-FB2 1.03V +1.03V-FB2_PG IC2801 +1.03V-FB3 1.03V +1.03V-FB3_PG IC2802 +1.03V-FB4 1.03V +1.03V-FB4_PG IC4101 +12V-I DC-DC 0.95V-FA 0.95V GP1_EN5 0.95V-FA_PG IC4102 DC-DC 0.95V-FB 0.95V 0.95V-FB_PG 7-11 XVS-9000-C/XVS-8000-C/XVS-7000-C/XVS-6000-C...
- Page 164 IC404 CNF1 OUT16P/N Cable Driver OUT16 IC501 NoMount CNF1 OUT17P/N Cable Driver OUT17 NoMount IC502 NoMount CNF1 OUT18P/N Cable Driver OUT18 NoMount IC503 NoMount CNF1 OUT19P/N Cable Driver OUT19 NoMount IC504 NoMount CNF1 OUT20P/N Cable Driver OUT20 NoMount 7-12 XVS-9000-C/XVS-8000-C/XVS-7000-C/XVS-6000-C...
- Page 165 148MHz 296MHz POWER from D-DCON CN-F1 IC901 GOOD BLOCK IC1400, IC1402 IC1401 VCLK 74MHz VCLK2 IC1403, IC1405,IC1406 IC1404 GS_GSPI[0] GS_GSPI[1] to Cable DV CLK CTRL GS_GSPI[2] GS_GSPI[3] D1401 D1400 100MHz D1000 D800 D801 D802 Board STS0 STS1 Suffix R848,R849 7-13 XVS-9000-C/XVS-8000-C/XVS-7000-C/XVS-6000-C...
- Page 166 GP3_EN1 IC2803 IC2806 EN_DET +1.8V-FB1_PG GP3_EN2 +12V-I +1.2V-FBC +1.03V-FB1 DC-DC GP1_EN4 1.2V 1.03V +1.03V-FB1_PG IC2804 +1.03V-FB2 1.03V +1.03V-FB2_PG IC2801 +1.03V-FB3 1.03V +1.03V-FB3_PG IC2802 +1.03V-FB4 1.03V +1.03V-FB4_PG IC4101 +12V-I DC-DC 0.95V-FA 0.95V GP1_EN5 0.95V-FA_PG IC4102 DC-DC 0.95V-FB 0.95V 0.95V-FB_PG 7-14 XVS-9000-C/XVS-8000-C/XVS-7000-C/XVS-6000-C...
- Page 167 74MHz PG_+0.95V-FA VCLK2 IC1403, PG_+0.95V-FB IC1404 PG_+1.03V-FA PG_+1.03V-FB IC1405, IC1406 PG_+1.8V-FA1 PG_+1.8V-FB1 PG_GP3_FA CLK CTRL PG_GP3_FB D1401 D1400 Board D1000 D800 D801 D802 STS0 STS1 100MHz Suffix IC1006,IC1007 IC1102,IC1103 MLVDS R848,R849 from/to IC2 IC1008,IC1009 IC1202,IC1203 MLVDS from/to IC3 7-15 XVS-9000-C/XVS-8000-C/XVS-7000-C/XVS-6000-C...
- Page 168 GP3_EN1 IC2803 IC2806 EN_DET +1.8V-FB1_PG GP3_EN2 +12V-I +1.2V-FBC +1.03V-FB1 DC-DC 1.2V 1.03V GP1_EN4 +1.03V-FB1_PG IC2804 +1.03V-FB2 1.03V +1.03V-FB2_PG IC2801 +1.03V-FB3 1.03V +1.03V-FB3_PG IC2802 +1.03V-FB4 1.03V +1.03V-FB4_PG IC4101 +12V-I +0.95V-FA DC-DC GP1_EN5 0.95V +0.95V-FA_PG IC4102 +0.95V-FB DC-DC 0.95V +0.95V-FB_PG 7-16 XVS-9000-C/XVS-8000-C/XVS-7000-C/XVS-6000-C...
- Page 169 DDR2 IC2900 ME_BKGDAA (SDI) DMEVC_B IP_SS_RSZ34_CH1(Y/C/K) DMEVY_B BSC5 DMEVY_B IP_SS_RSZ34_CH2(Y/C/K) DDR2 IC2901 DMEKC_B ME_BKGDAB DMEKC_B IP_SS_RSZ34_CH3(Y/C/K) BSC6 (lvds) DMEKY_B DDR2 IC3000 DMEKY_B IP_SS_RSZ34_CH4(Y/C/K) BKGDAC_B BSC7 ME_BKGDBA BKGDAC_B DDR2 BKGDAY_B BKGDAY_B BKGDBC_B ME_BKGDBB BKGDBC_B BKGDBY_B BKGDBY_B *1:REFER TO SCHEMATIC 7-17 XVS-9000-C/XVS-8000-C/XVS-7000-C/XVS-6000-C...
- Page 170 IC311 IC303 IC304 1.5V-A1 1.5V-A2 1.5V-A3 1.1V-A1 1.1V-A2 1.1V-A3 1.1V-A4 DC-DC DC-DC DC-DC DC-DC DC-DC DC-DC DC-DC 3.3V/1.5V 3.3V/1.5V 3.3V/1.5V 3.3V/1.1V 3.3V/1.1V 3.3V/1.1V 3.3V/1.1V To IC401,402 To IC201 To IC202,301,302 To IC401 To IC402 To IC201 To IC202,301,302 7-18 XVS-9000-C/XVS-8000-C/XVS-7000-C/XVS-6000-C...
- Page 171 : CPU Write Enable to FPGAs(CPUIF) CPU_Oen : CPU Open(Read)Enable CPU_BE[1:0] : CPU Byte Enable[1:0] IC8901 DA[31:0] : Data[31:0]/Address[25:0]Multiplex PCIe Gen1 4Lane IC8902 : Address Valid(Active Low) IC8601 DDR3 DDR3 to FPGA2_2 IC8602 IC9001 16bit x2 16bit x4 IC9002 7-19 XVS-9000-C/XVS-8000-C/XVS-7000-C/XVS-6000-C...
- Page 172 From CA-92 CTRL3 to CLK Gen for P1022 Serdes 25M_CLK Port1 JTAG CTRL JTAG Debug Debug 7SEG B-Con Status Dipsw 8bit 8bit 16bit 5bit CN1601 CN702 PCIe_CLK1 PCIe_CLK2 PCIe PERST PCIe SD/MMC FPGA2_2 PCI-Express Gen1 4Lane IC4 Only 7-20 XVS-9000-C/XVS-8000-C/XVS-7000-C/XVS-6000-C...
- Page 173 SDI 6G No Used BANK67 BANK66 BANK126 BANK233 BANK53 BANK232 BANK52 FPGA1_CPU_CLK[0] CPUIF RFCLK10P/N BANK231 SDI 6G BANK51 VID_CLK4P/N BANK230 BANK46 DDR3 BANK229 BANK45 32bit BANK228 SDI 6G BANK44 DDR3_SYSCLK4P/N BANK227 RFCLK11P/N BANK226 SDI 3G BANK225 BANK70 BANK224 BANK65 7-21 XVS-9000-C/XVS-8000-C/XVS-7000-C/XVS-6000-C...
- Page 174 FPGA3 RS MGTAVCC +1.0V-4B 1.2V>1.0V IC9705 FL9301 FPGA3 LN MGTAVCC FL9302 FPGA3 LS MGTAVCC 12V>1.4V 1.4V>1.2V FL9309 FPGA3 LN MGTAVTT/MGTRREF F9702 IC9702 IC9704 +1.2V-4 FL9310 FPGA3 LS MGTAVTT/MGTRREF FL9311 FL9312 FPGA3 RN MGTAVTT/MGTRREF FL9313 FL9314 FPGA3 RS MGTAVTT/MGTRREF 7-22 XVS-9000-C/XVS-8000-C/XVS-7000-C/XVS-6000-C...
- Page 175 CPU(Local Bus) 0.95V-3_PWR_EN IC7601 12V>1.8/1.2V D7803 FPGA2A_PG +1.8V-3 PG_1.2V-6 +0.95V-3 1.8V-3_PWR_EN IC7602 +1.2V-6 FPGA2B_PG FPGA2B_PG +12V-IB 1.2V>1.0V FPGA3_PG 12V>1.2V IC7703 1.0V-3_PWR_EN D7805 IC7701 PG_1.0V-3 1.2V>1.0V IC7705 +1.8V-3 1.2V-6_PWR_EN +1.0V-3A 12V>1.4V 1.4V>1.2V +1.0V-3B 1.2V-3_PWR_EN IC7702 IC7704 +1.2V-3 D7804 PG_1.2V-3 7-23 XVS-9000-C/XVS-8000-C/XVS-7000-C/XVS-6000-C...
- Page 176 XCVRCLK_CH1-4_P/N FPGA-A_VCLK148M P/N Matrix Cleaner VCLK 1 P/N REFCLK_CH5-8_P/N FPGA-A_VCLK27M P/N XCVRCLK_CH5-8_P/N FPGA-A_VCLK148.5M P/N IC2901 REFCLK_CH9-12_P/N IC5404 FPGA-B_VCLK74M P/N IC5402 FPGA Clock Clock Jitter XCVRCLK_CH9-12_P/N FPGA-B_VCLK148M P/N Matrix Cleaner VCLK 2 P/N REFCLK_CH13-16_P/N FPGA-B_VCLK27M P/N XCVRCLK_CH13-16_P/N FPGA-B_VCLK148.5M P/N 7-24 XVS-9000-C/XVS-8000-C/XVS-7000-C/XVS-6000-C...
- Page 177 +1.5V-N3 IC5306 IC5303 IC5301 +1.8V-N3 +1.2V-N3 DDcon +1.5V-N4 TEMP ADD:0x49 To IC3601 To IC3601 EXTBUS2 12V/1.5V 3.3V/1.8V 1.8V/1.2V To IC2901 AD[15:0] TEMP ADD:0x4A FPGA IC5304 IC5302 +1.8V-N4 +1.2V-N4 CA-92 BOARD To IC4401 To IC4401 3.3V/1.8V 1.8V/1.2V EEPROM ADD:0x57 7-25 XVS-9000-C/XVS-8000-C/XVS-7000-C/XVS-6000-C...
- Page 178 CFG FPP 16 IC4904 CN4601 IC4606 IC4607 IC4501 IC4601 Flash 232C EEPROM Flash DDR3 eMMC S2801 J5001 4bit VCO471/X4801/ IC4901 IC4401 VC4802/VC4801 PHY-D NEP2-B TG Block MDIO HIF[31:0] J5002 IC106 BD_EXT IC2617 HotSwap DC Enable IC26xx/IC27xx/IC52xx/IC53xx DDConv CN3403 7-26 XVS-9000-C/XVS-8000-C/XVS-7000-C/XVS-6000-C...
- Page 179 XAUI_CS User IF2[20:1] XCVR_CLK_148M User IF3[20:1] SDI 09-10-A SDI 09-10-B IC3701 User IF5[20:1] SDI 11-12-A NeptuneII-D RXAUI_DM XAUI_DM User IF6[20:1] SDI 11-12-B RXAUI_DS XAUI_DS User IF7[20:1] SDI 13-16-A User IF8[20:1] SDI 13-16-B X4001/VC4001/ 27M/74M 148M VC4002/VC4003 TG Block 7-27 XVS-9000-C/XVS-8000-C/XVS-7000-C/XVS-6000-C...
- Page 180 IC3904 IC3905 IC3801 IC3907 Avalon bus 32bit EEPROM Flash DDR3 eMMC NiosII Processor CN2903 S2301 232C 8bit X4001/VC4001/ IC3701 VC4002/VC4003 NEP2-D IC102 TG Block HIF[31:0] BD_EXT MDIO 232C +12V IC4902 HotSwap MDIO DC Enable IC46xx/IC47xx/IC48xx/IC49xx DDConv CN2901 CN3102 7-28 XVS-9000-C/XVS-8000-C/XVS-7000-C/XVS-6000-C...
- Page 181 +1.2V-NEP-CDRAM/(0.3A x4) IC5106 2.5A x1 Digital DD CON +1.8V-NEP-CDRAM/(0.5A x4) 2.5A x2 +1.0V-98X/(1.0A x2) Digital Digital 2.2W PG-PHY-1V1 +2.5V-FA IC5105 DD CON +1.1V-PHY-A IC5007 +1.5V-FA/(1.0A) 2.5A x2 +1.1V-PHY-B Linear Analog 1.5A Digital/Analog +2.5V-FB IC5006 +1.5V-FB/(1.0A) Linear Analog 1.5A 7-29 XVS-9000-C/XVS-8000-C/XVS-7000-C/XVS-6000-C...
- Page 182 25G Ether x 8ch SDI 11A-16B D1910 IC505 IC1902 CPU_I2C IC501 CNB1 IC201,203,204 RS485 DRIV IC003 FPGA CN1201 IC1201,1202 JTAG EPR2 IC001-IC004 IC5201,5205 VC5201 IC5207 PTP_DAC0_NXA 27MHz IC003 NEX A 27MHz IC003 NEX A 27MHz VCXO IC001 NEX B 7-30 XVS-9000-C/XVS-8000-C/XVS-7000-C/XVS-6000-C...
- Page 183 SDI 01A-10B IP(RTP) IP(RTP) Aurora SDIx32ch 6Gx16lane QSFP28 CNF1 LAN2-2 25G Ether x 8ch SDI 11A-16B D2010 IC505 IC2001 CPU_I2C IC501 IC5301,5305 VC5301 IC5307 PTP_DAC0_NXB 27MHz IC001 NEX B 27MHz IC001 NEX B 27MHz VCXO IC003 NEX A 7-31 XVS-9000-C/XVS-8000-C/XVS-7000-C/XVS-6000-C...
- Page 184 148.5/148.35MHz IC004 BIX A IC005 CADEC 27MHz IC004 BIX A CLOCK 156.25MHz CLOCK 156.25MHz IC002 BIX B DRIV DRIV CC I2C IC002 BIX B IC005 CADEC IC704 156.25MHz 156.25MHz CLOCK IC001 NEX B DRIV D5102 D5101 STS0 STS1 7-32 XVS-9000-C/XVS-8000-C/XVS-7000-C/XVS-6000-C...
- Page 185 NET-42A,NET-42B No-mount Q310,Q328,Q329,Q330 Q317,Q321,Q323,Q326 GP1_EN1 GP1_EN2 HotSwap PG EN_DET GP1_EN3 GP1_PG Q305,Q309,Q314,Q318,Q322,Q331 PG_GP1 GP2_EN1 GROUP1_ GP1_PG GP2_EN2 GP2_EN3 GP2_PG Q306,Q311,Q315,Q319,Q327,Q324 PG_GP2 GP3_EN1 GROUP2_ GP2_PG GP3_EN2 GP3_EN3 GP3_PG Q307,Q312,Q316,Q320,Q325 PG_GP3 GP4_EN1 GROUP3_ GP3_PG GP4_EN2 GP4_PG Q308,Q313 GROUP4_ GP4_PG PG_GP4 7-33 XVS-9000-C/XVS-8000-C/XVS-7000-C/XVS-6000-C...
- Page 186 +0.6V_VREF_NB3 (DDR4 VTT, VREF) TPS7A8500RGRR (DDR4 VTT, VREF) TPS51206DSQR TPS51206DSQR IC7704 +1.2V-NB-RN (FPGA MGTAVTT) IC7402 +1.8V-B GP3_PG +12V-I2 (FPGA VCCO18) TPS7A8500RGRR GP4_EN2 GP4_PG DC/DC +2.5V-B 2.5Ax2 IC7705 +1.2V-NB-RS (DDR4 VPP) (FPGA MGTAVTT) GP4_PG GP3_PG LTM4622 TPS7A8500RGRR NET-42A,NET-42B No-mount 7-34 XVS-9000-C/XVS-8000-C/XVS-7000-C/XVS-6000-C...
- Page 187 CNK1 CNK1 OUT01-04INA OUTTBC AUXMIX OUT13-16 CASMIX CNG1 CNG1 OUT05-08INA OUT17-20 OUTTBC AUXMIX IN TBC CURSOR CNE1 CNE1 OUT09-12INA OUT21-24 OUTTBC AUXMIX DMEUTIL CND1 CNP1 DSKIN_FILL/SRC1,3 DSK_OUT2,4 KEYER OUTTBC OUTTBC OUT-38 NoMount IC005 OUT-38A Mount IC4401 DDR2 SDRAM 7-35 XVS-9000-C/XVS-8000-C/XVS-7000-C/XVS-6000-C...
- Page 188 D302 D306 D308 TP103 TP106 TP108 IC103 IC106 IC108 TP202 TP205 F103 F106 F108 IC202 IC206 DC-DC DC-DC DC-DC LINEAR LINEAR CONV. CONV. CONV. REGULATOR REGULATOR +1.8V D303 1.1V-A TP104 IC104 F104 TP206 IC207 DC-DC CONV. LINEAR REGULATOR 7-36 XVS-9000-C/XVS-8000-C/XVS-7000-C/XVS-6000-C...
- Page 189 D2201 S2303 STATUS D2204 RESET/SLOT No. CADEC BECON D2202 IC2004 IC2001 CC_CTRL D2402 CLOCK 27M/74M CONF_ERR POWER CLEANER VCLK DIVIDER IC2005 S3301 D2203 CC_CTRL RESET GEN INIT_ERR CLOCK CLEANER RE_CONFIG D2002 D2001 CC UNLOCK CC UNLOCK to CPU(IC3) 7-37 XVS-9000-C/XVS-8000-C/XVS-7000-C/XVS-6000-C...
- Page 190 1.0V 1.0V_CPU_PG(to IC2) DC-DC F1603 1.5V 5.0V_PG (to IC2) 10A/125V IC1602 IC1403 DC-DC +3.3V-CPU/+3.3V_2 DC-DC +3.0V-F 3.3V 3.3V 3.3V_PG(to IC2) 3.0V_F_PG(to IC2) IC1702 IC1402 IC1701 DC-DC +3.3V-C DC-DC +3.3V-F DC-DC +1.2V-C 3.3V 3.3V 3.3V_F_PG(to IC2) 1.2V CADEC_PG(to IC2) 7-38 XVS-9000-C/XVS-8000-C/XVS-7000-C/XVS-6000-C...
- Page 191 EPR2 IC2303 D2201 S2303 STATUS D2204 RESET/SLOT No. CADEC BECON D2202 IC2004 IC2001 CC_CTRL D2402 CLOCK 27M/74M CONF_ERR POWER CLEANER VCLK DIVIDER IC2005 S3301 D2203 CC_CTRL RESET GEN INIT_ERR CLOCK CLEANER RE_CONFIG D2002 D2001 CC UNLOCK CC UNLOCK 7-39 XVS-9000-C/XVS-8000-C/XVS-7000-C/XVS-6000-C...
- Page 192 DC-DC +1.0V 2.5V FPGA +2.5V_PG(to IC2) 1.0V_PG(to IC2) F1603 10A/125V IC1602 IC1403 +3.3V-CPU/+3.3V_2 +3.0V-F DC-DC DC-DC 3.3V 3.3V 3.3V_PG(to IC2) 3.0V_F_PG(to IC2) IC1702 IC1402 IC1701 +3.3V-C +3.3V-F DC-DC DC-DC +1.2V-C DC-DC 3.3V 3.3V 3.3V_F_PG(to IC2) 1.2V CADEC_PG(to IC2) 7-40 XVS-9000-C/XVS-8000-C/XVS-7000-C/XVS-6000-C...
- Page 193 H Down V Down Memory Re Entry Input Multi Viewer In9-16 Sampling Sampling Multi Viewer Out5-8 Control CNT01-12 IC002(1/3) DDR3 290x290 IC3601,IC3602,IC3701,IC3702 Primary Input CNT01-12 Crosspoint IC Internal Video Source CNT01-12 CNOUT(FCOUT1-20) CNT01-12 No Use *1 REFER TO SCHEMATIC 7-41 XVS-9000-C/XVS-8000-C/XVS-7000-C/XVS-6000-C...
- Page 194 IC503 F402 F601 F701 TB501 DC-DC DC-DC DC-DC DC-DC CONV. CONV. CONV. CONV. +1.8V_XPT_IO +1.8V +1.2V TP403 D804 TP602 D805 TP702 D808 IC403 IC602 IC702 F403 F602 F702 DC-DC DC-DC DC-DC CONV. CONV. CONV. *1 REFER TO SCHEMATIC 7-42 XVS-9000-C/XVS-8000-C/XVS-7000-C/XVS-6000-C...
-
Page 195: Frame Wiring (Xvs-9000)
CNF125 CNG125 CNJ125 CNK125 CNM125 CNF125 CNP125 F001:5A/125V CNB225 CND225 CNL225 Rear Panel MVS LAN UTIL LAN REF IN A3,B3,C3,D3 A3,B3,C3,D3 A4,B4,C4,D4 A4,B4,C4,D4 FAN6_CTRL *1:No Fuse,because no Drive Circuits. *2:IC link FAN6_PULSE FAN-5 FAN5_CTRL CN002 FAN5_PULSE ERROR STATUS 7-43 XVS-9000-C/XVS-8000-C/XVS-7000-C/XVS-6000-C... - Page 196 POWER SUPPLY UNIT F FAN-6 APS-406 FRONT REAR AC6_N AC6_L AC6_FG P4-P6 P7-P9 CURRENTSHARE PS_I2C_SCL PS6_I2C_GA1 PS6_AC_OK SIGNAL_GND PS6_EXIST PS6_I2C_GA0 5V_STANDBY_RETURN PS6_DC_OK -SENSE Green LED(AC OK) I2C_GND Green LED(DC OK) PS1_5V_STANDBY PS6_INHIBIT Orange LED(FAULT) +SENSE PS6_ENABLE PS_I2C_SDA PS6_I2C_GA2 PS6_FAULT 7-44 XVS-9000-C/XVS-8000-C/XVS-7000-C/XVS-6000-C...
-
Page 197: Frame Wiring (Xvs-8000)
MVS LAN UTL LAN REF IN SIGNAL_GND PS2_EXIST ERROR STATUS PS2_I2C_GA0 5V_STANDBY_RETURN PS2_DC_OK -SENSE *1: No Fuse,because no Drive Circuits. *2: IC link I2C_GND PS2_5V_STANDBY PS2_INHIBIT Green LED(AC OK) Green LED(DC OK) +SENSE Orange LED(FAULT) PS2_ENABLE PS2_I2C_SDA PS2_I2C_GA2 PS2_FAULT 7-45 XVS-9000-C/XVS-8000-C/XVS-7000-C/XVS-6000-C... - Page 198 PS3_AC_OK PS4_DC_OK PS3_DC_OK PS3_INHIBIT -SENSE PS3_FAULT PS3_5V_STANDBY I2C_GND PS4_EXIST CN004 SW-4 PS4_ENABLE PS4_5V_STANDBY PS4_I2C_GA2 PS4_I2C_GA1 PS4_INHIBIT PS4_I2C_GA0 Green LED(AC OK) PS4_AC_OK Green LED(DC OK) +SENSE PS4_DC_OK PS4_INHIBIT Orange LED(FAULT) PS4_ENABLE PS4_FAULT PS4_5V_STANDBY CN006 PS4_I2C_SDA 1,2,3 5,7,9,10 PS4_I2C_GA2 PS4_FAULT 7-46 XVS-9000-C/XVS-8000-C/XVS-7000-C/XVS-6000-C...
-
Page 199: Frame Wiring (Xvs-7000)
MVS LAN UTL LAN REF IN SIGNAL_GND PS2_EXIST ERROR STATUS PS2_I2C_GA0 5V_STANDBY_RETURN PS2_DC_OK -SENSE *1: No Fuse,because no Drive Circuits. *2: IC link I2C_GND PS2_5V_STANDBY PS2_INHIBIT Green LED(AC OK) Green LED(DC OK) +SENSE Orange LED(FAULT) PS2_ENABLE PS2_I2C_SDA PS2_I2C_GA2 PS2_FAULT 7-47 XVS-9000-C/XVS-8000-C/XVS-7000-C/XVS-6000-C... - Page 200 PS3_AC_OK PS4_DC_OK PS3_DC_OK PS3_INHIBIT -SENSE PS3_FAULT PS3_5V_STANDBY I2C_GND PS4_EXIST CN004 SW-4 PS4_ENABLE PS4_5V_STANDBY PS4_I2C_GA2 PS4_I2C_GA1 PS4_INHIBIT PS4_I2C_GA0 Green LED(AC OK) PS4_AC_OK Green LED(DC OK) +SENSE PS4_DC_OK PS4_INHIBIT Orange LED(FAULT) PS4_ENABLE PS4_FAULT PS4_5V_STANDBY CN006 PS4_I2C_SDA 1,2,3 5,7,9,10 PS4_I2C_GA2 PS4_FAULT 7-48 XVS-9000-C/XVS-8000-C/XVS-7000-C/XVS-6000-C...
-
Page 201: Frame Wiring (Xvs-6000)
PS3_I2C_GA0 -SENSE PS3_AC_OK PS3_DC_OK I2C_GND PS3_INHIBIT PS3_FAULT PS2_5V_STANDBY PS3_5V_STANDBY PS4_EXIST CN004 SW-4 PS2_INHIBIT PS4_ENABLE Green LED(AC OK) PS4_I2C_GA2 Green LED(DC OK) +SENSE PS4_I2C_GA1 PS4_I2C_GA0 Orange LED(FAULT) PS2_ENABLE PS4_AC_OK PS4_DC_OK PS2_I2C_SDA PS4_INHIBIT PS4_FAULT PS2_I2C_GA2 PS4_5V_STANDBY CN006 1,2,3 PS2_FAULT 5,7,9,10 7-49 XVS-9000-C/XVS-8000-C/XVS-7000-C/XVS-6000-C... - Page 204 XVS-9000 (SY) XVS-9000 (CN) XVS-8000 (SY) XVS-8000 (CN) XVS-7000 (SY) XVS-7000 (CN) XVS-6000 (SY) Printed in Japan Sony Corporation 2020. 7 08 XVS-6000 (CN) J, E 9-878-693-06 © 2016...
Need help?
Do you have a question about the XVS-9000-C and is the answer not in the manual?
Questions and answers