Table of Contents
Advertisement
INSTALLATION
& SERVICING
When replacing any part on this appliance, use only spare parts that you can be assured conform to the safety and performance
specification that we require. Do not use reconditioned or copy parts that have not been clearly authorised by Ideal Heating.
For the very latest copy of literature for specification and maintenance practices visit our website idealheating.com
where you can download the relevant information in PDF format.
October 2022
UIN 228297 A05
LOGIC SYSTEM
S15 S18 S24 S30
2
Advertisement
Table of Contents

Related Manuals for Ideal Heating LOGIC SYSTEM 2 S15


Summary of Contents for Ideal Heating LOGIC SYSTEM 2 S15
- Page 1 When replacing any part on this appliance, use only spare parts that you can be assured conform to the safety and performance specification that we require. Do not use reconditioned or copy parts that have not been clearly authorised by Ideal Heating.
- Page 2 ERP DATA SYMBOL UNITS 15 kW 18 kW 24 kW 30 kW Condensing Boiler Low Temperature Boiler B1 Boiler Cogeneration Space Heater Equipped with a Supplementary Heater Combination Heater Nominal Heat Output for Space Heating Full Load 15.1 18.1 24.3 30.3 Part Load Auxiliary Electricity Consumption...
- Page 3 PRODUCT FICHE LOGIC SYSTEM S BOILER Ideal Heating ERP DATA SYMBOL UNITS MODEL 15 kW 18 kW 24 kW 30 kW Condensing boiler Seasonal Space heating efficiency class Rated heat output ƞ Seasonal space heating energy efficiency Annual energy consumption...
- Page 4 IE - Ireland LHS - Left Hand Side ETCI - Electro-Technical Council of Ireland PCB - Printed Circuit Board BS - British Standard WRAS - Water Regulations Advisory Scheme Ideal Heating reserve the right to vary specification without notice Installation and Servicing...
-
Page 5: Table Of Contents
CONTENTS Section 1 - General ..................6 Section 3 - Servicing ................. 35 Introduction ................... 8 Servicing Schedule ..............35 Operation ..................8 Removal / Replacement of Components ........36 Safe Handling ................8 Draining the Boiler ..............36 Optional Accessories ..............8 Boiler Front Panel Removal / Replacement ........ -
Page 6: Section 1 - General
Section 1 - General Table 1 General Data 15 kW 18 kW 24 kW 30 kW Gas Supply 2H - G20 - 20 mbar Gas Supply Connection 15 mm copper compression Injector Size 4.15 4.15 4.15 4.65 Flow Connection Central Heating 22 mm copper compression Return Connection Central Heating... - Page 7 Section 1 - General LOGIC SYSTEM Natural Gas Only BOILER SIZE G.C. Applicance No (Benchmark No.) 41-796-85 41-796-86 41-796-87 41-796-88 Destination Country: For UK, to comply with Building Regulations Part L1 (Part 6 in Scotland) the boiler should be fitted in accordance with the manufacturer’s instructions.
-
Page 8: Introduction
Section 1 - General INTRODUCTION • Grip the boiler at the base. • Be physically capable. • Use personal protective equipment as appropriate, The Logic System range of boilers are wall mounted, e.g. gloves, safety footwear. condensing, system gas boilers. During all manoeuvres and handling actions, every attempt Features: should be made to ensure the following unless unavoidable... -
Page 9: Safe Handling Of Substances
Do not connect external control devices directly to this appliance unless recommended in this manual or by Ideal Heating in writing. If in doubt, please enquire. Unapproved control devices could invalidate the warranty of this Bathroom Installations appliance and infringe the Gas Safety Regulations. -
Page 10: Water Circulation System
Section 1 - General 1.11 BOILER CONTROLS Whilst the principle of the 1:1 gas valve ensures the Logic range is able to deliver it is full output at inlet pressures as low as 14 mb, other gas appliances in the property may not be as Install CH controls to ensure that the boiler has no demand tolerant. -
Page 11: Boiler Dimensions, Services & Clearances
Section 1 - General 1.14 BOILER DIMENSIONS, SERVICES & CLEARANCES Refer to Section 2.17 Side and Rear Flue The boiler connections are made on the boiler connection tails. a. Provided that the flue hole is cut accurately, e.g. with a core The following minimum clearances must be maintained for drill, the flue can be installed from inside the building where operation and servicing. -
Page 12: System Requirements - Central Heating
Section 1 - General 1.15 SYSTEM REQUIREMENTS - CENTRAL HEATING a. The method of filling, refilling, topping up or flushing Table 3 Vessel Sizing sealed primary hot water circuits from the mains via a temporary hose connection is only allowed if acceptable PRV setting to the local water authority. -
Page 13: System Balancing
Fernox exchanger. www.fernox.com IMPORTANT The application of any other treatment Tel: +44 (0) 3301 007750 to this product may render the guarantee of Ideal Heating Sentinel Performance Solutions invalid. www.sentinelprotects.com Tel: +44 (0) 1928 704330 Ideal Heating recommend Water Treatment in accordance... -
Page 14: Section 2 - Installation
Section 2 - Installation BOILER ASSEMBLY - EXPLODED VIEW CLAMP RETAINING FLUE CH RETURN VALVE WATER PRESSURE IGNITION LEAD CONTROLS BOX LID CH FLOW VALVE SWITCH TURRET PUMP HEAD CONTROL BOX FRONT PRESSURE GAUGE HOSE CONDENSATE PUMP AUTO AIR VENT GAS COCK INTERNAL HEAT ENGINE... -
Page 15: Unpacking
Section 2 - Installation UNPACKING Unpack and check the contents The boiler is supplied fully assembled in Pack A. Pack A Contents Boiler Hardware Pack Box Wall Mounting Plate These Installation/Users Instructions Wall Mounting Template Boiler Warranty Hardware Pack Box Contents Valve CH x 22 mm* Gas Cock... -
Page 16: Wall Mounting Template
Section 2 - Installation WALL MOUNTING TEMPLATE Extended centre line “A” 1 5 5 (2 0 0 ) The wall mounting template is located on the internal protective packaging. The template shows the position of the fixing and rear flue centre holes for a standard installation Care MUST be taken to ensure the correct holes are drilled. -
Page 17: Flues And Locations
Section 2 - Installation FLUES AND LOCATIONS This installation & servicing manual must be read in conjunction with flue kit and fitting guide. Flue deflector Vertical flue Telescopic Horizontal flue Flue extension terminal and horizontal flue 0.6 or 0.8 m 0.5 m, 1 m or 2 m connector 0.5 or 0.7 m... -
Page 18: Flues And Locations - Continued
Section 2 - Installation FLUES AND LOCATIONS - CONT B = Top Clearance Flue systems that require extension kits must be installed with a 1.5° decline from the flue terminal back to the boiler. Top Clearance is measure from the top of the turret to the top of the hole where the flue terminates. -
Page 19: Horizontal Flue Positions
Section 2 - Installation HORIZONTAL FLUE POSITIONS Facing the boundary Opening in adjacent building Boundary a. < 1000 300 c. 600 d. 300 b. Parallel to the boundary At an angle to the boundary All measurements : mm Refer to Table 5 2.10 VERTICAL FLUE POSITIONS Height Difference ‘A’... -
Page 20: Flue System Dimensions
Section 2 - Installation 2.11 FLUE SYSTEM DIMENSIONS 2.12 FITTING THE TURRET 1. Ensure the condensate trap in filled with water Flue Design 2. Ensure the rubber seal is not damaged and fitted IMPORTANT: correctly on the appliance manifold. 1. Flue lengths may vary, always measure flue lengths 3. -
Page 21: Cutting The Flue
Section 2 - Installation 2.13 CUTTING THE FLUE 10 mm Adjust to Length = “A” + 44 mm from terminal lip +14 mm CUTTING HORIZONTAL FLUE TERMINAL (non-telescopic) +14 mm Wall Thickness 1. Measure the required cut flue length (A + 44 mm) 2. -
Page 22: Assembling The Vertical Flue
Section 2 - Installation For the full range of A video showing how to correctly SCAN SCAN measure and fit a flue can be FLUE AND ACCESSORIES for Flue Fitting for Flues and found by viewing the QR Code. please visit idealheating.com/ Video’s Accessories Guide flues... -
Page 23: Condensate Drain
Section 2 - Installation 2.15 CONDENSATE DRAIN External Drain Connections The use of an externally run condensate drainage pipe should only be considered after exhausting all internal termination options as described previously. An external system must terminate at a suitable foul water discharge point or purpose designed soakaway. -
Page 24: Condensate Drain - Continued
Section 2 - Installation 2.16 CONDENSATE DRAIN - CONTINUED Figure 2 - Connection of a Condensate Drainage Pipe Figure 1 - Connection of Condensate Drainage Pipe to Downstream of a Sink, Basin, Bath or Shower Water Trap to Internal Soil & Vent Stack Internal Soil Vent Stack Boiler Boiler... -
Page 25: Connections & Filling
Section 2 - Installation 2.17 CONNECTIONS & FILLING FILLING CAUTION: Heating the isolation valves may damage the fibre seals IMPORTANT - when filling: A. Ensure the dust cap on air vent located at the rear of the Remove all boss blanking plugs before connecting the pump chamber is slightly unscrewed. -
Page 26: Electrical Connections
Section 2 - Installation 2.18 ELECTRICAL CONNECTIONS Wiring should be 3 core PVC insulated cable, not less WARNING: This appliance must be earthed (24 x 0.2 mm), and to BS EN 50525-1:2011 than 0.75 mm Table 16. A mains supply of 230 V ~ 50 Hz is required. Connection must be made in a way that allows complete 3 A fuse required. -
Page 27: Installer Wiring - Cont
Section 2 - Installation 2.20 INSTALLER WIRING - CONTINUED LOGIC SYSTEM S BOILER WITH Y PLAN SYSTEM Y PLAN FUSED VALVE SPUR BOILER SL 2 SL 1 MAINS IN CH ON TIMER HW ON HW OFF LOGIC SYSTEM S BOILER WITH S PLAN SYSTEM S PLAN VALVE S PLAN... -
Page 28: Replacing Pre-Fitted Mains Cable
Section 2 - Installation 2.21 REPLACING PRE-FITTED MAINS CABLE If it is necessary to use an alternative mains cable to the one Strain Relief pre-fitted then use the following guide. 2.19 Replacement wiring should comply with notes in Section and be caried out by a qualified person. 1. -
Page 29: Wiring Diagram
Section 2 - Installation 2.23 WIRING DIAGRAM Installation and Servicing... -
Page 30: Commissioning And Testing
Section 2 - Installation 2.24 COMMISSIONING AND TESTING B. Gas Installation A. Electrical Installation WARNING: Electrical safety checks should be WARNING: Open windows, doors and extinguish carried out by a qualified person. flames before starting the next steps. Do not smoke. 1. -
Page 31: Initial Lighting
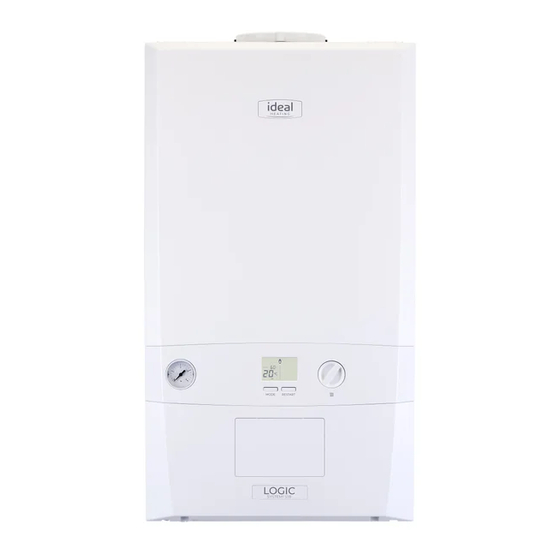
Section 2 - Installation 2.25 INITIAL LIGHTING Legend A. Temperature Knob B. Mode Button C. Boiler Status Display D. Burner On indicator E. Restart Button F. CH Flow Isolating Valve G. System Pressure Gauge H. Gas Inlet Pressure Test point J. -
Page 32: The Display
Section 2 - Installation 2.26 THE DISPLAY 2.27 GENERAL CHECKS Make the following checks for correct operation: The user control has one display to inform the user about the status of the boiler. The display shows the status of the CENTRAL HEATING (CH) flame. -
Page 33: General Checks - Water Circulation
Section 2 - Installation 2.28 GENERAL CHECKS - WATER CIRCULATION WATER CIRCULATION SYSTEM WATER TEMPERATURES 1. With the system cold, check that the initial pressure is Temperatures can be selected using the Temperature Knob correct to the system design requirements. For pre-pressurised systems, this should be 1.0 bar. -
Page 34: Accessing The Installer Mode
Section 2 - Installation 2.30 ACCESSING THE INSTALLER MODE To access Installer Mode, press the “MODE” and 8. “P7” will be shown. “RESTART” buttons together for more than 5s. To set the minimum CH pump speed to 70% press “RESTART”, otherwise press “MODE”. 1. -
Page 35: Section 3 - Servicing
Section 3 - Servicing SERVICING SCHEDULE WARNING: Servicing can only be carried out by Gas Safe Registered Engineers Always turn OFF the gas supply at the gas service cock, and switch OFF and disconnect the electricity supply to the appliance before servicing Combustion testing must be carried out by a competent person using a combustion analyser conforming to BS EN 50379-3 2012. -
Page 36: Removal / Replacement Of Components
Section 3 - Servicing REMOVAL / REPLACEMENT OF COMPONENTS 6. Ensure all water connections are tight. WARNING: Do not operate the boiler without a 7. Test the appliance for correct and safe operation. front panel fitted Refer to Section When replacing any component. (General) 1. -
Page 37: Flue Manifold Removal/Replacement
Section 3 - Servicing FLUE MANIFOLD REMOVAL/REPLACEMENT 1. Remove the two sump cover retaining screws. 2. Remove the sump cover. 3. Lift the manifold upwards to clear the sump. 4. Move the manifold to the left and pull down to remove. BURNER REMOVAL AND CLEANING SCAN for video... -
Page 38: Fan And Venturi Assembly Removal And Cleaning
Section 3 - Servicing FAN AND VENTURI ASSEMBLY REMOVAL AND CLEANING 1. Disconnect the electrical leads from the fan. 9. Inspect fan outlet sealing gasket and replace if necessary. 2. Remove the clip from the gas control valve outlet and ease the pipe upwards. -
Page 39: Cleaning The Heat Exchanger
Section 3 - Servicing CLEANING THE HEAT EXCHANGER 1. Ensure the condensate trap is fully drained before cleaning. 6. Inspect the ignition/detection electrode. Ensure that they are clean and in good condition - replace if necessary. Refer to Section 3.17 7. -
Page 40: Cleaning The Condensate Trap
Section 3 - Servicing 3.10 CLEANING THE CONDENSATE TRAP SCAN for video 3. Turn the trap clockwise to disengage CAUTION: Keep trap upright when removing and lift to remove. 4. Clean and fill trap with water. 1. Pull off the rubber pipe at the sump drain. 2. -
Page 41: Burner Replacement
Section 3 - Servicing 3.13 BURNER REPLACEMENT SCAN for video Refer to Section 3.2 & 3.6 3.14 SPARK GENERATOR REPLACEMENT Refer to Section 1. Disconnect the leads from the spark generator. 4. Fit the new spark generator and re-assemble ensuring that the the earth lead is replaced. -
Page 42: Condensate Trap Replacement / Cleaning
Section 3 - Servicing 3.17 CONDENSATE TRAP REPLACEMENT / CLEANING Refer to Section 3.10 3.16 PRIMARY PCB REPLACEMENT It is critical that the correct boiler size WARNING: and fuel type is entered in to the boiler. CAUTION: Fit the earth strap provided with the PCB to your wrist and secure to a suitable earth on the boiler chassis. -
Page 43: Pressure Gauge Replacement
Section 3 - Servicing 3.18 PRESSURE GAUGE REPLACEMENT Refer to Section 1. Drain the system. 4. Releasing the two retaining clips on the pressure gauge ease the pressure gauge through the front of the control panel. Refer to Section 5. Fit the new pressure gauge from the front of the lower control panel ensuring correct orientation. -
Page 44: Pump Automatic Air Vent Replacement
Section 3 - Servicing 3.20 PUMP AUTOMATIC AIR VENT REPLACEMENT 5. Reassemble. Ensure the air vent head ‘O’ ring seal is Refer to Section fitted. 6. Ensure the air vent cap is loose. 1. Drain the boiler. 7. Refill the boiler. Check for leaks around the new air vent Refer to Section joint. -
Page 45: Pump Head Replacement
Section 3 - Servicing 3.22 PUMP HEAD REPLACEMENT Refer to Section 1. Drain the boiler. Refer to Section 2. Disconnect the two electrical leads from the pump. 3. Remove the 4 allen screws retaining the pump head. 4. Remove the pump head. Be aware of water spillage. -
Page 46: Expansion Vessel Recharging & Replacement
Section 3 - Servicing 3.24 EXPANSION VESSEL RECHARGING & REPLACEMENT Refer to Section RECHARGING 1. Remove the charge point cover. 2. Recharge the tank pressure to 0.75 bar. 3. Re-assemble in reverse order. 4. Check that the boiler operates. REPLACEMENT 5. -
Page 47: Heat Engine Replacement
Section 3 - Servicing 3.25 HEAT ENGINE REPLACEMENT 18. Ensure the trap is filled with water. Refer to Section Refer to Section 3.10 CAUTION: Protect the gas and electrical controls with 19. Refill the boiler and check for leaks. a waterproof sheet. Refer to Section 2.17 Refer to Section... -
Page 48: Section 4 - Fault Finding
Section 4 - Fault Finding FAULT FINDING MAIN MENU ‘L 01’ Go to Section 4.2: Flow Temperature Overheat Lockout ‘L 02’ Go to Section 4.3: Ignition Lockout ‘L 0C’ 5 Restarts within 15 minutes: Turnpower off & on ‘L 06’ Go to Section 4.4: False Flame Lockout ‘F 01’... -
Page 49: L 01' - Overheat Lockout
Section 4 - Fault Finding ‘L 01’ - OVERHEAT LOCKOUT Is the Boiler and CH System filled with water and all Fill and vent the system and open all isolation, system filter and radiator valves open? isolation valves, then restart boiler Is the Flow/Return Differential across the Boiler in Check that the Pump is rotating freely. -
Page 50: L 06' - Flame On Before Gas Valve On
Section 4 - Fault Finding ‘L 06’ - FLAME ON BEFORE GAS VALVE ON Check routing and integrity of internal boiler wiring is OK. Restart the boiler, does Boiler Work OK? Check condition of Electrode and replace if deteriorated. Replace Electrode ‘F 01’... -
Page 51: F 03' - Fan Fault
Section 4 - Fault Finding ‘F 03’ - FAN FAULT Does the wiring from the Fan to the PCB have Rectify Wiring & secure connections at both ends and has not deteriorated? Does the wiring have continuity? connections Replace PCB Is there 230Vac at the Blue and Brown connections to the 3 way connection on the Fan? Replace Fan... -
Page 52: F 05 Or L 05' - Return Thermistor Fault
Section 4 - Fault Finding ‘F 05 OR L 05’ - RETURN THERMISTOR FAULT Pump Housing Check the resistance using a suitable multimeter connected across the thermistor’s terminal pins. Fit a new Thermistor Resistance kΩ Temperature Refer to Section 3.11 9.7 –... -
Page 53: No Ch Operation
Section 4 - Fault Finding 4.11 NO CH OPERATION Press Mode button (B) until “Off” not shown Is “Off” shown underneath the rad on the display? Are CH Timer and Room Thermostat switched on? Switch CH Timer and Room Thermostat On Are the Radiator Valves Open? Open the Radiator Valves No voltage from Timer/Room Stat. -
Page 54: No Display
Section 4 - Fault Finding 4.12 NO DISPLAY Is there 230Vac to the boiler at L and N? Supply power to the boiler Is the wiring from the terminal block to the PCB Connect the wiring from the terminal block to the connected securely? PCB securely. -
Page 55: Section 5 - Spare Parts
Section 5 - Spare Parts When replacing any part on this appliance use only spare parts that you can be assured conform to the safety LINK and performance specification that we require. Do not use reconditioned or copy parts that have not been clearly to spares authorised by Ideal. -
Page 56: Section 6 - Benchmark To Commissioning
Section 6 - Benchmark to Commissioning Installation and Servicing... - Page 57 Section 6 - Benchmark to Commissioning Benchmark Commissioning & Warranty Validation Service Record It is a requirement that the boiler is installed and commissioned to the manufacturers’ instructions and the data fields on the commissioning checklist completed in full. To instigate the boiler warranty the boiler needs to be registered with the manufacturer within one month of the installation.
- Page 58 Section 6 - Benchmark to Commissioning GAS BOILER SYSTEM COMMISSIONING CHECKLIST & WARRANTY VALIDATION RECORD Address: Boiler make and model: Boiler serial number: Commissioned by (PRINT NAME): Gas Safe registration number: Company name: Telephone number: Company email: Company address: Commissioning date: Heating and hot water system complies with the appropriate Building Regulations? Optional: Building Regulations Notification Number (if applicable): Time, temperature control and boiler interlock provided for central heating and hot water...
- Page 59 Section 6 - Benchmark to Commissioning SERVICE & INTERIM BOILER WORK RECORD It is recommended that your boiler and heating system are regularly serviced and maintained, in line with manufacturers’ instructions, and that the appropriate service / interim work record is completed. Service provider When completing a service record (as below), please ensure you have carried out the service as described in the manufacturers’...
- Page 60 Section 6 - Benchmark to Commissioning FLOWCHART FOR CO LEVEL AND COMBUSTION RATIO CHECK ON COMMISSIONING A CONDENSING BOILER Important Preliminary Information on Checks The air gas ratio valve is factory-set and must not be adjusted DURING COMMISSIONING. If the boiler requires conversion to operate with a different gas family (e.g. conversion from natural gas to LPG) separate guidance is provided with the conversion kit supplied and this must be followed.
- Page 61 Section 6 - Benchmark to Commissioning Start Set Boiler to Maximum Gas Rate. Carry Out Flue Integrity Check Using Analyser. Refer to In accordance with boiler instructions, set Insert analyser probe into air inlet test point (where page 60 boiler to operate at maximum rate (full load available) and allow readings to stabilise.
- Page 62 Notes Installation and Servicing...
- Page 63 Notes Installation and Servicing...
- Page 64 At Ideal Heating we take our environmental impact seriously, therefore when installing any Ideal Heating product please make sure to dispose of any previous appliance in an environmentally conscious manner. Households can contact their local authority to find out how.
Need help?
Do you have a question about the LOGIC SYSTEM 2 S15 and is the answer not in the manual?
Questions and answers
How do I fill the system with water
To fill the Ideal Heating SYSTEM 2 S15 with water:
1. Thoroughly flush the whole system with cold water.
2. Fill and vent the system until the pressure gauge shows 1 bar.
3. Examine the system for leaks.
4. If mains pressure is too high, use a pressure reducing valve for filling.
5. One of the following must be used to replace system water loss:
- A manually filled vessel with:
- Visible water level
- Mounted at least 150 mm above the system’s highest point
- Connected through a non-return valve to the return side of the radiators
- Positioned at least 150 mm below the makeup vessel
Check all components and connections after filling.
This answer is automatically generated