Table of Contents
Advertisement
Quick Links
HSAC9000E HSAC12000E
HSACW12000E HSACW14000E
All electrical appliances produced by the Company are guaranteed for two years against faulty
materials or workmanship.
accordance with the instructions provided and has not been connected to an unsuitable
electricity supply, or subject to misuse, neglect, damage or modified or repaired by any person
not authorised by us. This guarantee is offered to you as an extra benefit and does not affect your
legal rights.
The correct electricity supply voltage is shown on the rating label attached to the appliance.
Reasonable care has been taken to ensure that this guide is accurate at the time of printing.
In the interest of progress the Company reserve the right to vary specifications from time to time
without notice.
This applies only if the appliance has been used for purposes in
HSACW9000E
Advertisement
Table of Contents

Related Manuals for Heatstore HSAC9000E


Summary of Contents for Heatstore HSAC9000E
- Page 1 HSAC9000E HSAC12000E HSACW9000E HSACW12000E HSACW14000E All electrical appliances produced by the Company are guaranteed for two years against faulty materials or workmanship. This applies only if the appliance has been used for purposes in accordance with the instructions provided and has not been connected to an unsuitable electricity supply, or subject to misuse, neglect, damage or modified or repaired by any person not authorised by us.
- Page 2 6.3 Internal wiring of the heating element for 3 phase operation 6.4 Modification of internal wiring of the heating element for single phase operation 6.5 Modification for use on single phase (HSAC9000E only) 7 Installation Details 7.1 Screw location for grille removal 7.2 Mounting...
-
Page 3: Health And Safety
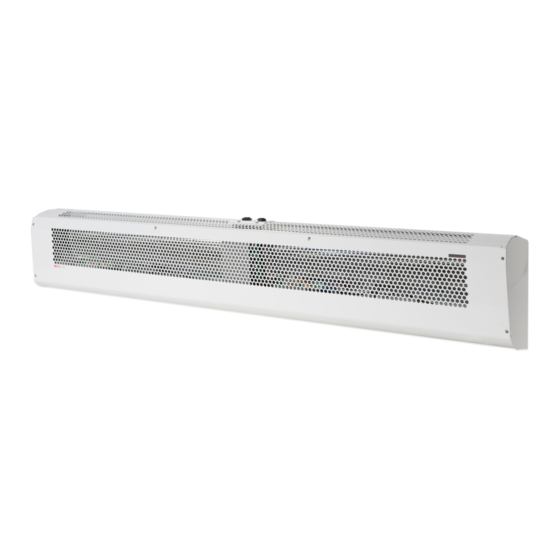
Care must be taken to allow complete free air Heatstore will void manufacturers movement into the inlet grilles of the unit to warranty and potentially create a ensure correct working operation of the air cur- hazard. - Page 4 2.2 Mechanical Switch Controller This instruction manual describes Each air curtain is supplied with HSRCU1 Heatstore Commercial range of air curtains. me-chanical switch. More details at Installer They are designed for discreet positioning wiring section. This controller will provide 2 fan above doorways retail speed and 3 heat setting options.
- Page 6 HSAC12000E HSACW9000E HSAC9000E @ 10...
- Page 7 HSACW12000E HSACW14000E @ 10...
- Page 8 Optional external temperature sensor...
- Page 10 CAT5 cable with RJ45 connectors can be used to network up to 7 air curtains in a daisy-chain configuration. The DIP switches 1, 2 and 3 are used to configure each air curtain with a unique address. DIP switch setting 000X is reserved for when a controller or BMS is not used.
- Page 11 The aircurtain can be also controlled by mechanical switches. In this configuration touchscreen controller or BMS controls will not work. To operate heater by mechanical switch- es, the DIP switches on the main pcb need to be set to 000X. The DIP switch 4 is used to select fan speed range.
- Page 12 (HSAC9000E Only) HSAC9000E is supplied as 3 phase only appliance. In order to use it with a single phase sup-ply, the internal wiring has to be modified. The appliance is supplied with a single phase conversion kit. The pictures below describe how to change the internal wiring.
- Page 13 (HSAC9000E Only)
- Page 14 (HSAC9000E Only) (HSAC9000E Only)
-
Page 15: Installation
Mounting All units should be installed horizontally directly over the door opening. It is recommended that the air curtain is installed on the inside of the building, within the open room space against a wall or ceil- ing. Care must be taken to allow complete free air Step 1 movement into the inlet grilles of the unit to ensure Carefully unpack the heater. - Page 16 The air curtain monitors the fan speed, power output and heatsink temperature. In the event of a fault the red LED on the sec- When the air curtains are powered up in ondary PCB flashes: standby mode, a green LED on the main Main PCB Secondary PCB board shows that the 12V power supply is...
-
Page 17: Bms Connection
9.1 BMS Connection RS485 serial half-duplex interface MODBUS RTU The heater is compatible with BMS systems using 9600 baud MODBUS protocol. 8 bits 1 start bit The connection to BMS system can be made using no parity + 2 stop bits one of the RJ45 connectors. - Page 18 The default Pin is set as 1234, but can be changed using the Change Pin button. If the PIN is forgotten contact Heatstore for technical help. 10.5 Timer All functions and settings are available from this menu.
-
Page 19: Operating Mode Selection
10.6 Timer - time schedule 10.8 Operating Mode selection There are 2 timer periods for each day available. One of four operating modes can be selected. Tapping the slider in the top right corner will Each mode uses a different method of select- change between 1 or 2 time periods. -
Page 20: Automatic Mode
10.12 Temperature Mode 2 10.10 Automatic Mode This operating mode is suitable for situations Automatic Mode is the best choice for easy to where the heater is used to maintain the room set-up efficiency and comfort. Set the height by temperature or where the requirement is to ad- moving slider to the required position. -
Page 21: Heater Status
10.13 Heater status 10.13 Heater status - cont. The Status screen provides an overview of values The general status screen shows details about from all connected heaters. The heaters need to the heater and all of the internal blower units. be run before some of the values can be calcu- The heater needs to be run before some of the lated. - Page 22 Contact details Heatstore Unit 12, Access 18, Bristol, BS11 8HT Telephone: 0117 923 5375 Email: enquiries@heatstore.co.uk http://www.heatstore.co.uk 01 08/03/2022...
Need help?
Do you have a question about the HSAC9000E and is the answer not in the manual?
Questions and answers