Table of Contents
Advertisement
Quick Links
Advertisement
Table of Contents

Related Manuals for TSL SAM-Q-SDI


Summary of Contents for TSL SAM-Q-SDI
- Page 1 SAM-Q-SDI Audio Monitor Installation and Operation Manual Version 2.0...
- Page 2 Version History Issue Date Change Details 12/06/19 Initial Release 14/04/20 Updated to include new functions found in SAM-Q software version 2.0 Page 2 of 110...
-
Page 3: Table Of Contents
SAM-Q Front Panel Display Elements ......................11 Selecting SAM-Q-SDI Operational Modes .....................12 Understanding SAM-Q-SDI Audio Sources ....................13 Overview of SAM-Q-SDI Operational Modes ....................15 Operational Mode - Meters (M) ........................17 Operational Mode - Meters (S) ........................19 Operational Mode - Video (M) ........................21 Operational Mode - Video (S) ........................23... - Page 4 The Network Settings Menu ........................78 System Restart ............................81 Using the SAM-Q-SDI with InfluxDB and Grafana ..................82 The SAM-Q-SDI Menu Trees .........................85 Updating the SAM-Q-SDI Software ......................106 SAM-Q-SDI Technical Specifications ......................108 Page 4 of 110...
-
Page 5: Introduction
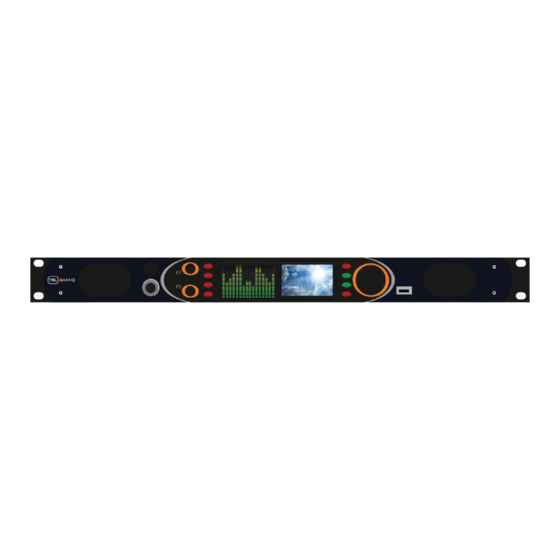
The SAM-Q-SDI Audio Monitor provides flexible, high quality audio monitoring in a compact 1RU design. At just 100mm deep and less than 4kg, the SAM-Q-SDI is ideally suited for environments where space and weight is a premium, such as OB Trucks and Flyaways. -
Page 6: Deploying The Sam-Q-Sdi
Mode Permissions The SAM-Q-SDI provides 10 Operational Modes to choose from, each of which offer a unique interface with which to view, select, measure and monitor audio sources. -
Page 7: Sam-Q-Sdi Installation
* SDI Inputs can also be configured to receive MADI streams when the optional SAM-Q-MADI-LIC license is installed (see page 74 for more information) ** Loudness data produced by the SAM-Q-SDI may be monitored over an Ethernet network when the optional SAM-Q-LOUD-LIC license is installed (see pages 79, 82, 83 and 84) -
Page 8: Sam-Q-Sdi Functional Schematic
SAM-Q-SDI Functional Schematic Page 8 of 110... -
Page 9: Sam-Q-Sdi General Operation
SAM-Q-SDI General Operation The SAM-Q-SDI has been designed to be both quick and easy to operate, regardless of which operational mode(s) you choose to work with. The four most frequent functions are described below: • Selecting an Audio Source (buttons 4 through to 11) •... -
Page 10: Sam-Q-Sdi Front Panel Controls
SAM-Q-SDI Front Panel Controls Item Name Normal Extended Functions Function Mix Selection Pan/Balance Control, Cursor selection in System Menus Small rotary encoder Function 1 button Switch to Press and Hold for 1 second to Enter and Exit Menus Previous Operational... -
Page 11: Sam-Q Front Panel Display Elements
SAM-Q Front Panel Display Elements The SAM-Q features two high quality front panel display screens to display multiple audio monitoring elements, video sources and menu selections. Item Display Element Description Audio Meter Scale Audio Meter scale (0 to -54 dBFS). Displayed on left-hand and right-hand side of audio level meters. -
Page 12: Selecting Sam-Q-Sdi Operational Modes
Selecting SAM-Q-SDI Operational Modes The SAM-Q-SDI provides multiple modes of operation, allowing you to choose the most suitable mode for your workflow, application or personal preference. Each operational mode determines what is displayed on the front panel displays as well as the behaviour... -
Page 13: Understanding Sam-Q-Sdi Audio Sources
The SAM-Q-SDI can display a maximum of 8 Audio Sources at any one time, with each Audio Source being assigned its own Source Select button, whether it be a single audio channel or pair of audio channels... - Page 14 German VO Line 2 The Friendly Name of any SAM-Q-SDI Audio Source can be revealed directly on the front panel of the SAM- Q-SDI simply by pushing and holding the corresponding Source Select button. The second Audio Source name, also referred to as its Engineering Name, is pre-defined and cannot be changed.
-
Page 15: Overview Of Sam-Q-Sdi Operational Modes
Overview of SAM-Q-SDI Operational Modes The SAM-Q-SDI comes complete with the following operational modes as standard. Mode Name Front Panel Display Description Meters (S) 16 Audio Level Meters Allows one audio source to be selected and monitored at a time... - Page 16 Mode Name Front Panel Display Description 8 Gain Bars Allows up to 8 audio sources to be selected and monitored simultaneously, whilst displaying relative mix levels for each pair Mode Name Front Panel Display Description Names 8 Source Names Allows up to 8 audio sources to be selected and monitored simultaneously, whilst displaying source names Mode Name Front Panel Display...
-
Page 17: Operational Mode - Meters (M)
Operational Mode - Meters (M) Meters (M) mode displays a maximum of 8 audio sources across both displays, using a maximum of 16 audio level meters. Meters (M) mode allows multiple audio sources to be selected and listened to simultaneously. The audio sources that are displayed and made available for selection are determined by the currently selected audio mix group (MIX A in the example above). - Page 18 Audio sources comprising a single audio channel may be panned so that they can be monitored in the Left, Right or Both SAM-Q-SDI outputs, whilst Audio Sources comprising two audio channels may have their Left, Right or Both channels selected and monitored in their respective outputs.
-
Page 19: Operational Mode - Meters (S)
Operational Mode - Meters (S) Meters (S) mode displays a maximum of 8 audio sources across both displays, using a maximum of 16 audio level meters. Meters (S) mode allows a single audio source to be selected for monitoring at a time. The audio sources that are displayed and made available for selection are determined by the currently selected audio mix group (MIX A in the example above). - Page 20 Audio sources comprising a single audio channel may be panned so that they can be monitored in the Left, Right or Both SAM-Q-SDI outputs, whilst Audio Sources comprising two audio channels may have their Left, Right or Both channels selected and monitored in their respective outputs.
-
Page 21: Operational Mode - Video (M)
Video (M) mode displays a maximum of 8 audio sources on the left-hand display, using a maximum of 16 audio level meters, whilst also showing a video source derived from either of the SAM-Q-SDI inputs. Video (M) mode allows multiple audio sources to be selected and listened to simultaneously. - Page 22 Audio sources comprising a single audio channel may be panned so that they can be monitored in the Left, Right or Both SAM-Q-SDI outputs, whilst Audio Sources comprising two audio channels may have their Left, Right or Both channels selected and monitored in their respective outputs.
-
Page 23: Operational Mode - Video (S)
Video (S) mode displays a maximum of 8 audio sources on the left-hand display, using a maximum of 16 audio level meters, whilst also showing a video source derived from either of the SAM-Q-SDI inputs. Video (S) mode allows a single audio source to be selected for monitoring at a time. - Page 24 Audio sources comprising a single audio channel may be panned so that they can be monitored in the Left, Right or Both SAM-Q-SDI outputs, whilst Audio Sources comprising two audio channels may have their Left, Right or Both channels selected and monitored in their respective outputs.
-
Page 25: Operational Mode - Mix
Operational Mode - Mix Mix mode displays a maximum of 8 audio sources, using 8 gain bars, akin to 8 fader positions on an audio console. Mix mode allows multiple audio sources to be selected and listened to simultaneously. The audio sources that are displayed and made available for selection are determined by the currently selected audio mix group (MIX A in the example above). - Page 26 Audio sources comprising a single audio channel may be panned so that they can be monitored in the Left, Right or Both SAM-Q-SDI outputs, whilst Audio Sources comprising two audio channels may have their Left, Right or Both channels selected and monitored in their respective outputs.
-
Page 27: Operational Mode - Names
Operational Mode - Names Names mode displays a maximum of 8 audio sources, using 8 source name labels using SAM-Q-SDI ‘Friendly Names’ and audio presence indicators. Names mode allows multiple audio sources to be selected and listened to simultaneously. The audio sources that are displayed and made available for selection are determined by the currently selected audio mix group (MIX A in the example above). - Page 28 Audio sources comprising a single audio channel may be panned so that they can be monitored in the Left, Right or Both SAM-Q-SDI outputs, whilst Audio Sources comprising two audio channels may have their Left, Right or Both channels selected and monitored in their respective outputs.
-
Page 29: Operational Mode - Phase Meter
Operational Mode – Phase Meter Phase Meter mode displays a maximum of 8 audio sources on the left-hand display, using a maximum of 16 audio level meters, whilst also showing an audio phase meter on the right-hand display. Phase Meter mode allows a single audio source to be selected for monitoring at a time. The audio sources that are displayed and made available for selection are determined by the currently selected audio mix group (MIX A in the example above). - Page 30 Audio sources comprising a single audio channel may be panned so that they can be monitored in the Left, Right or Both SAM-Q-SDI outputs, whilst Audio Sources comprising two audio channels may have their Left, Right or Both channels selected and monitored in their respective outputs.
-
Page 31: Operational Mode - Loudness Summary
In the example above, loudness probe # 2 has been selected for monitoring and a downmix will be presented to all SAM-Q-SDI audio outputs. In the example below, a Loudness Target of -23 LUFS has been set and is shown by a horizontal white line, whilst the current Integrated Loudness values of each Loudness Probe is indicated by a horizontal red line and numeric value. -
Page 32: Operational Mode - Probe Detail
Any one of the 8 available loudness probes can be selected as required, simply by rotating the small encoder on the left-hand side of the front-panel. When a loudness probe is selected for monitoring, a downmix will be presented to all SAM-Q-SDI audio outputs. -
Page 33: Operational Mode - Probe Contributors
Operational Mode – Probe Contributors Probe Contributors mode displays audio level meters for each audio source channel contributing to the currently selected loudness probe. Any one of the 8 available loudness probes can be selected as required, simply by rotating the small encoder on the left-hand side of the front-panel. -
Page 34: Configuring The Sam-Q-Sdi
(i.e. EDIT 1, MCR 2), or its owner (DAVE, FRED, BOB). Applying a unique name to your SAM-Q-SDI will help identify the unit to a) the user, b) over an Ethernet network (i.e. when using SAM-Q-ADMIN or when accessing Loudness Data), c) when using SAM- Q-EDIT and d) when contacting TSL Support. -
Page 35: Configuring The Sam-Q-Sdi
The System Setup Menu (pages 38 to 64) The System Setup Menu is only accessible to those users who have knowledge of the SAM-Q-SDI PIN Code. TSL recommends that the PIN Code is only shared with those responsible for the maintaining operations (typically System Administrators, Engineering and Support staff). -
Page 36: The User Menu
The User Menu The User Menu can be freely accessed from any Operational Mode simply by pushing and holding the F1 Function button for 1 second. Access to the User Menu is available to everyone and is not PIN protected. To change a setting, simply press the corresponding Source Select button, enter the new value by rotating the large encoder and then apply the change either by pressing the source select button or by pushing the large encoder to finish. - Page 37 • The status of the Ethernet port Please note that MADI functionality on the SAM-Q-SDI requires an optional license, details on licensing status as well as instructions on how to apply licenses can be found later in this manual. Page 37 of 110...
-
Page 38: The System Setup Menu
TSL recommends that you protect your SAM-Q-SDI configurations by setting your own PIN code (see page 76) and sharing it only with those responsible for managing and maintaining the SAM-Q-SDI. Upon successful entry of the SAM-Q-SDI PIN Code, access to the System Setup Menus will be granted. Page 38 of 110... - Page 39 Upon successful entry of the SAM-Q-SDI PIN Code, access to the System Setup Menu is granted, allowing full access to all possible SAM-Q-SDI settings and parameters. Source Menu Item Description Select Button Operator Permissions Accesses the Mode Permissions and Mix Permissions Sub-Menus...
-
Page 40: The Operator Permissions Menu
The Operator Permissions Menu The Operator Permissions Menu provides access to the Mode Permissions and Mix Permissions sub-menus. Source Menu Item Description Select Button Mode Permissions Accesses the Mode Permissions Sub-Menus Mix Permissions Accesses the Mix Permissions Sub-Menus Page 40 of 110... -
Page 41: The Mode Permissions Menu
Determines if Phase Meter Mode (see page 29) is available to the User More Modes Provides access to further Modes TSL recommends that the following be considered before deciding upon which Operational Modes should be Enabled or Disabled for the user: What is the application? - Page 42 Source Menu Item Description Select Button Loudness Accesses the Permissions Menu for the optional Loudness Modes Source Menu Item Description Select Button Summary Determines if Loudness Summary Mode (see page 31) is available to the User Detailed Determines if Probe Detail Mode (see page 32) is available to the User Contribution Determines if Probe Contributors Mode (see page 33) is available to the User Page 42 of 110...
-
Page 43: The Mix Permissions Menu
The Mix Permissions Menu The SAM-Q-SDI contains a total of 8 Mix Groups, each of which can be Disabled, or Enabled in the Mix Permissions menu as required. By default, all 8 Mix Groups are enabled at factory and have been given the following default names: MIX A, MIX B, MIX, C, MIX D, MIX E, MIX F, MIX G and MIX H. - Page 44 BNC 1 MADI + ENABLED ENABLED ENABLED ENABLED ENABLED ENABLED ENABLED ENABLED BNC 2 MADI TSL recommends that any unused Mix Groups be set to Disabled to help provide the best possible user experience and ease of use. Page 44 of 110...
- Page 45 Below are the factory default audio source assignments for each of the Mix Groups. Mix A Source Select Button Audio Pair when BNC 1 is set to SDI Channel # when BNC1 is set to MADI SDI Group 1 Pair 1 MADI Channels 1 and 2 SDI Group 1 Pair 2 MADI Channels 3 and 4...
- Page 46 Mix E Source Select Button Audio Pair when BNC 2 is set to SDI Channel # when BNC2 is set to MADI SDI Group 1 Pair 1 MADI Channels 1 and 2 SDI Group 1 Pair 2 MADI Channels 3 and 4 SDI Group 2 Pair 1 MADI Channels 5 and 6 SDI Group 2 Pair 2...
-
Page 47: The Mix Group Sources Menu
The Mix Group Sources Menu The Mix Group Sources menu allows any Mix Group to be selected for editing. Having selected a Mix Group for editing, any audio source can then be mapped to your preferred Source Select button. In the example below MADI, SDI, AES and Analog audio sources have been mapped to a single Mix Group. Select the Mix Group Sources Menu to reveal the 8 Mix Groups. - Page 48 The sources currently belonging to the chosen Mix Group are now shown, alongside the Source Select buttons to which they are currently assigned. (Please note that factory default source names are shown in this example) Select the Source Select button for which you wish to assign a new source. The audio source currently assigned to the Source Select button chosen above is now shown, along with other properties (see below) Item Menu Item...
- Page 49 For every audio source, the SAM-Q-SDI assigns a fixed Engineering name (see Items 1 and 2 above) which cannot be edited by the user. Each fixed name contains information about the physical input (i.e. BNC1, BNC 2, AES or Analog), the signal type (i.e.
- Page 50 To change the audio source assigned to the left-hand channel of an audio source, push button 1 (see below) and use the large encoder to scroll through a list of the available audio sources. Similarly, to change the audio source assigned to the right-hand channel of an audio source, push button 2 (see below) and use the large encoder to scroll through a list of the available audio sources.
- Page 51 Mono audio channel to be sent to the respective lousdspeaker, Headphone channel and Balanced Analogue Output of your choice. The SAM-Q-SDI confirms the user selection using on screen prompts as shown below: Please note that the ability to route audio channels to a specific Lousdspeaker Output, Headphone channel and Balanced Analogue Output is not available if the Mix L/R setting in the Front Panel Controls Menu is set to ‘Disabled’...
- Page 52 A total of 64 Source Select buttons are available for your chosen audio sources to be mapped to: Source Source Source Source Source Source Source Source Select Select Select Select Select Select Select Select Button Button Button Button Button Button Button Button Group...
-
Page 53: The Mix And Source Names Menu
The Mix and Source Names Menu The Mix and Source Names menu allows you to: • Rename any MIX Group • Create a friendly name for any audio source To change the name of a Mix Group, select Mix Names The current names of all 8 Mix Groups are then shown: Select the Mix Group you wish to rename Page 53 of 110... - Page 54 To change the name of an audio source, select Source Names. Please note that contents of the Source Names sub-menu shown below are dependent upon the current BNC Input settings (see page 70) The example below shows a SAM-Q-SDI whose BNC Inputs have been set as follows: BNC Input Setting...
- Page 55 Select a BNC Input containing the Sources you wish to change the Friendly Names of Select the SDI Group whose Source Friendly Names you wish to change: Select the Source you wish to rename. Please note that the default Friendly Names shown are derived from the Engineering names (see page 14 for more information).
- Page 56 You can now edit the existing Source Name as follows: Control Function Small rotary encoder Moves the red cursor left and right Large rotary encoder Edits the character currently highlighted by red cursor Small rotary encoder (push) Toggles currently highlighted character between uppercase and lower case Source Select button (Green) Exits and commits the name change...
-
Page 57: The Loudness Setup Menu
Please note that Loudness monitoring on the SAM-Q-SDI is a license option. The following instructions assume that the Loudness license is present in your SAM-Q-SDI. To check if your SAM-Q-SDI already has the Loudness license installed, please refer to page 74 of this manual. - Page 58 Select the Probe you wish to configure. Select button 1 to select the Probe Type and rotate the Large Encoder to select the program configuration you would like the Probe to measure. Below is a list of the available program configurations: 5.1 + 2 7.1 + 2 9.1 + 2...
- Page 59 Select the audio channel you wish to assign an audio source to and rotate the Large Encoder to select the Audio Source you wish to assign to the chosen channel. Please note that in this example, Friendly Names have not yet been assigned to the SAM-Q-SDI Audio Sources shown.
- Page 60 Below is a table showing the Audio Channels for each of the possible Audio Programs: 5.1 + 2 7.1 + 2 9.1 + 2 5.1 + 4 7.1 + 4 9.1 + 4 5.1+2 5.1+4 7.1+2 7.1+4 9.1+2 9.1+4 Program Input Left Right...
-
Page 61: The File Management Menu
The File Management Menu SAM-Q-SDI system configurations can be saved both internally and externally. Up to 8 internal configurations can be stored and recalled suing the internal store, whilst an unlimited number of SAM-Q- SDI system configurations can be saved to a USB thumb drive and then subsequently loaded into any one of the 8 internal stores. - Page 62 With the filename entered, use Source Select button 4 to Save the current SAM-Q-SDI configuration to a USB thumb drive. If for any reason the SAM-Q-SDI is unable to Save the existing configuration to the USB thumb drive, the following message will appear.
- Page 63 If you happen to enter a filename that already exists on the USB thumb drive, you will see the following message with the option to Overwrite the existing file. To save the current configuration to an Internal Memory Store, use Source Select button 8 The 8 Internal Memory Stores are then shown The example above shows two existing configuration files and 6 empty Memory Stores.
- Page 64 Selecting an occupied Memory Store will overwrite its existing contents with your new configuration. Please note that the SAM-Q-SDI requires that all configuration names be unique. If you attempt to save a configuration using an existing filename, you will be prompted to overwrite or change the filename.
-
Page 65: The Advanced Setup Menu
The Advanced Setup Menu The Advanced Setup Menu provides access to further settings and parameters required to configure the SAM-Q-SDI for a specific user, application or environment. Access to the Advanced Setup Menu is provided within the System Setup Menu The Advanced Setup Menu provides access to further settings and parameters, as shown on the following pages. -
Page 66: The Front Panel Controls Menu
The default function assigned to the F1 function button is ‘Previous Mode’. When the SAM-Q-SDI has been configured to provide more than one Operational Mode (see Operator Permissions page 40), the Previous Mode function allows Users of the SAM-Q-SDI to switch to the previously selected Operational Mode using the F1 button. - Page 67 When the SAM-Q-SDI has been configured to allow any of the following Operational Modes to be selected by the user (see Operator Permissions page 40), the Solo function allows Users of the SAM-Q-SDI to Solo any audio source whilst the corresponding Audio Select button is pushed and held.
- Page 68 The default function assigned when pushing the large rotary encoder is Dim/Cut. Pushing the large rotary encoder in any operational mode Dims all audio outputs on the SAM-Q-SDI. With the Dim applied, pushing the large rotary encoder will then cause all audio outputs to be cut (muted).
- Page 69 Alternative Functions that may be assigned to the Gain Control function Function Name Function Description Disabled Disables the Gain Control function from all modes except Mix Mode Loudness SSR Function The Loudness SSR function is activated when any the following Source Select buttons are pressed when using the Loudness Detail Mode as follows: Source Select Button 5 Starts Loudness Measurement...
-
Page 70: The Inputs/Outputs Menu
The Inputs/Outputs Menu The Inputs/Outputs Menu allows the properties of the physical Inputs and Outputs of the SAM-Q-SDI to be configured as required. The Inputs and Outputs Sub-Menus Selecting the Inputs Sub-Menu allows physical inputs BNC 1 and BNC 2 to be configured to work with either SDI or MADI Sources as required. - Page 71 Please note that the ability to support MADI audio sources requires the optional SAM-Q-MADI-LIC license. To determine if your SAM-Q-SDI already has this license installed, please refer to page 74. To install SAM-Q-SDI licenses, please refer to page 74. Selecting the Outputs Sub-Menu allows the physical outputs configured.
- Page 72 Selecting the Video Output Sub-Menu, determines which video signal appears on both the BNC Output and HDMI Outputs of the SAM-Q-SDI. Each Mix Group can be set to route any SDI video signal present at either BNC Input 1 or BNC Input 2 to the BNC SDI Output whenever the user selects that Mix Group.
-
Page 73: The Audio Meters Menu
The Audio Meters Menu The Audio Meters Menu allows the Alarm and Reference levels to be set on the SAM-Q-SDI. The default values are -10dBFS for Alarm and -18dBFS for Reference. To adjust either setting, simply push the corresponding Source Select button and use the large rotary encoder to enter the required value. -
Page 74: The Licenses Menu
TSL. When requesting a license option from TSL, you will be asked for the Device ID so that the license may be generated. The Device ID is unique to your SAM-Q-SDI and is based on its MAC address. - Page 75 Please note that all SAM-Q-SDI license options are unique to the SAM-Q-SDI for which they have been generated. It is also not possible to remove or transfer licenses. Page 75 of 110...
-
Page 76: The Pin Code Menu
The PIN Code Menu is used to change the current PIN code of your SAM-Q-SDI. The factory default PIN Code of all SAM-Q-SDI is 1 2 3 4 and TSL recommends that you change this to protect your SAM-Q-SDI configurations. - Page 77 Your new PIN Code will then be displayed, and you will be asked to Confirm or Cancel. Page 77 of 110...
-
Page 78: The Network Settings Menu
Push Source Select button 2 to enter a friendly name for your SAM-Q-SDI TSL recommends that you enter a friendly name for your SAM-Q-SDI to help identify it over a network. Push Source Select button 5 to enter an IP address for your SAM-Q-SDI... - Page 79 To apply the new IP address simply push the large encoder or the corresponding Source Select button. If your SAM-Q-SDI is equipped with the optional SAM-Q-LOUD-LIC Loudness license, you can enter the IP address and Port number of an InfluxDB server on your network.
- Page 80 Entering a Syslog server address is purely for system diagnostic purposes only and should only be entered upon clear instruction from TSL. Syslog data can help identify system issues. Page 80 of 110...
-
Page 81: System Restart
System Restart The SAM-Q-SDI can be restarted directly from the front panel when required. Pushing Source Select button 8 to Restart the System results in the following message: Push Source Select button 7 to Reboot the SAM-Q-SDI Page 81 of 110... -
Page 82: Using The Sam-Q-Sdi With Influxdb And Grafana
2. Make sure that UDP input is enabled in the influxdb.conf file. For further information on how to do this, search influxdata.com udp protocol support 3. The bind address value in influxdb.conf must match the Port setting as set on the SAM-Q-SDI (see below) Please note that the default Port setting for InfluxDB on the SAM-Q-SDI is 8089 (see page 79) 4. - Page 83 Grafana with InfluxDB 3. To use the Loudness data generated by the SAM-Q-SDI, Grafana must Query the InfluxDB database. To query the InfluxDB example shown above: (database = ‘’tsl’’) see below: 4. To display the Loudness data in Grafana, make sure to select Loudness measurement and then select the field or fields you wish to view.
- Page 84 Please note that Loudness data can be filtered using the unit_name tag where unit_name = the friendly name of the SAM-Q-SDI providing the Loudness data (see page 78 on how to set the friendly name). Page 84 of 110...
-
Page 85: The Sam-Q-Sdi Menu Trees
The SAM-Q-SDI Menu Trees User Menu User Menu Brightness Adjusts the brightness of the front panel displays Mode Allows all available operational modes to be selected About Displays System Information including IP Address, Software and Hardware Version numbers Status Displays System Status Information... - Page 86 System Setup Menu Tree System Setup Menu Operator Permissions Enters the Operator Permissions Menu Mix Group Sources Enters the Mix Group Sources Menu Mix and Source Names Enters the Mix and Source Names Menu Loudness Setup Enters the Loudness Setup Menu File Management Enters the File Management Menu Advanced Setup...
- Page 87 Advanced Setup Menu Tree Advanced Setup Front Panel Controls Enters the Front Panel Controls Menu Input/Outputs Enters the Inputs/Outputs Menu Audio Meters Enters the Audio Meters Menu Licenses Enters the Licenses Menu PIN Code Enters the PIN Code Menu Network Settings Enters the Network Settings Menu Restart System Restarts the System...
- Page 88 Operator Permissions Menu Tree Operator Permissions Menu Mode Permissions Enters the Mode Permissions Menu Mix Permissions Enters the Mix Permissions Menu Page 88 of 110...
- Page 89 Mode Permissions Menu Tree Mode Permissions Menu Meters (Multi) Allows the Meters (Multi) Mode to be Enabled/Disabled Meters (Single) Allows the Meters (Single) Mode to be Enabled/Disabled Video (Multi) Allows the Video (Multi) Mode to be Enabled/Disabled Video (Single) Allows the Video (Single) Mode to be Enabled/Disabled Allows the Mix Mode to be Enabled/Disabled Names Allows the Names Mode to be Enabled/Disabled...
- Page 90 Mix Permissions Menu Tree Mix Permissions Menu Mix A Allows Mix A to be Enabled/Disabled Mix B Allows Mix A to be Enabled/Disabled Mix C Allows Mix A to be Enabled/Disabled Mix D Allows Mix A to be Enabled/Disabled Mix E Allows Mix A to be Enabled/Disabled Mix F Allows Mix A to be Enabled/Disabled...
- Page 91 Mix Group Sources Menu Tree Mix Group Sources Menu Mix A Enters the Mix Group A Menu Mix B Enters the Mix Group B Menu Mix C Enters the Mix Group C Menu Mix D Enters the Mix Group D Menu Mix E Enters the Mix Group E Menu Mix F...
- Page 92 Mix Group Sources contd. (Mix Group A shown as an Example) Mix Group Sources contd. (Mix A shown) Source Select Button 1 - 8 Enters the Source Assignment View Source L Assigns any available audio channel to the selected Source Select Button Name Displays the Friendly Name of the currently selected audio channel Input Type...
- Page 93 Mix and Source Names Menu Tree Mix and Source Names Menu Mix Names Enters the Mix Names Menu Source Names Enters the Source Names Menu Page 93 of 110...
- Page 94 Mix Names Menu Tree Mix Names Menu Mix A Allows the name of Mix Group A to be edited Mix B Allows the name of Mix Group B to be edited Mix C Allows the name of Mix Group C to be edited Mix D Allows the name of Mix Group D to be edited Mix E...
- Page 95 Source Names Menu Tree Source Names Menu BNC1 (SDI) Reveals SDI Group 1-4 Sub-Menus SDI Group 1 Allows SDI Group 1 Source Names to be edited SDI Group 2 Allows SDI Group 2 Source Names to be edited SDI Group 3 Allows SDI Group 3 Source Names to be edited SDI Group 4 Allows SDI Group 4 Source Names to be edited...
- Page 96 Page 96 of 110...
- Page 97 Loudness Setup Menu Tree Loudness Setup Menu Probes Enters Sub-Menu for Loudness Probes 1-8 Probe 1 Enters Sub-Menu for Loudness Probe 1 Probe 2 Enters Sub-Menu for Loudness Probe 2 Probe 3 Enters Sub-Menu for Loudness Probe 3 Probe 4 Enters Sub-Menu for Loudness Probe 4 Probe 5 Enters Sub-Menu for Loudness Probe 5...
- Page 98 File Management Menu Tree Page 98 of 110...
- Page 99 File Management Menu Load Config Reveals the Load from USB and Load Internal Menus Load USB Loads configuration file form USB Load Internal Loads configuration file from selected store Save Config Reveals the Save to USB and Save Internal Menus Name Allows a filename for the configuration file to be entered Save USB...
- Page 100 The Front Panel Controls Menu Tree Front Panel Controls Menu F1 Function Allows preferred function to be mapped to the F1 button F2 Function Allows preferred function to be mapped to the F2 button Select Hold Enables or Disables the SOLO function from the Source Select buttons Mix L/R Enables or Disables the PAN/BALANCE function from the front panel Volume Push...
- Page 101 The Inputs/Outputs Menu Tree Inputs/Outputs Menu Inputs Reveals the BNC Input 1 and BNC Input 2 sub-menus. BNC Input 1 Allows BNC Input 1 to be configured for SDI or MADI BNC Input 2 Allows BNC Input 2 to be configured for SDI or MADI Outputs Reveals the Outputs sub-menus.
- Page 102 The Audio Meters Tree Audio Meters Menu Alarm Level Allows the Audio Meters Alarm Level to be set between -60dBFS and 0dBFS Reference Level Allows the Audio Meters Reference Level to be set between -60dBFS and 0dBFS Page 102 of 110...
- Page 103 Add License from USB Adds License from USB thumb drive Device ID Code No function (label for below) xxxxxxxxxxxxx Displays the Device ID of the SAM-Q-SDI MADI Displays the current MADI License Status LOUDNESS Displays the current LOUDNESS license Status...
- Page 104 The PIN Code Menu Tree PIN Code Menu Enters 1 into 4 Digit PIN Code Enters 2 into 4 Digit PIN Code Enters 3 into 4 Digit PIN Code Enters 4 into 4 Digit PIN Code Enters 5 into 4 Digit PIN Code Enters 6 into 4 Digit PIN Code Enters 7 into 4 Digit PIN Code Enters 8 into 4 Digit PIN Code...
- Page 105 The Network Settings Menu Tree Network Settings Menu Unit Name No function (label for below) xxxxxxxxxxxxx Friendly Name of SAM-Q-SDI IP Configuration Enters the IP Configuration sub-menus IP Address Displays and allows IP address to be edited Subnet Displays and allows Subnet Mask to be edited...
-
Page 106: Updating The Sam-Q-Sdi Software
Up to date manuals and release notes for the SAM-Q-SDI can also be found using the above link. Upgrading from SAM-Q-SDI v1.0x to 2.0x or later Place the SAM-Q-SDI software into the root of a USB thumb drive. - Page 107 2. Navigate to User Menu/System Setup/Advanced Setup/Restart System and select ‘Restart the box’ 3. Push and Hold the F1 button whilst the SAM-Q-SDI restarts until you see the following display. 4. Insert the USB thumb drive into the front panel of the SAM-Q 5.
-
Page 108: Sam-Q-Sdi Technical Specifications
SAM-Q-SDI Technical Specifications Description 1RU Agile Audio Monitoring System with: • 10 x Operational Modes • 8 x Independent Mix Groups • Configurable front panel controls • PIN secured system configuration • Store and Recall of separate system configurations. •... - Page 109 • 1 x 75 Ohm Input AES3-id • 2 x Balanced Analogue Inputs +4dBu • 2 x Balanced Analogue Outputs +4dBu fixed or variable level • 1 x 50 Ohm 1/4’’ Headphone Output Can be configured to Mute Internal Loudspeakers and/or Balanced Line Level Output if required.
- Page 110 Audio Specifications • Sampling Frequency 48kHz • Bit Depth 24 Bits • 220Hz – 20kHz • 80 dB SPL at 1 foot Weight and Dimensions • Height: 1RU • Width: 19’’ • Depth: 100mm • Weight: 4.3 lbs (1.95 kg) Page 110 of 110...
Need help?
Do you have a question about the SAM-Q-SDI and is the answer not in the manual?
Questions and answers