Table of Contents
Advertisement
Available languages
Available languages
Quick Links
Installations- und Bedienungsanleitung
Installation and operating manual
Notice d'installation et d'emploi
Manual de instalación y uso
Istruzioni per l'installazione e l'uso
Installatie- en bedieningshandleiding
DE
Universalaktor – 0-10 V
EN
Universal Actuator – 0-10 V
FR
Actionneur universel – 0-10 V
ES
Actuador universal – 0-10 V
IT
Attuatore universale – 0-10 V
NL
Universele actor – 0-10 V
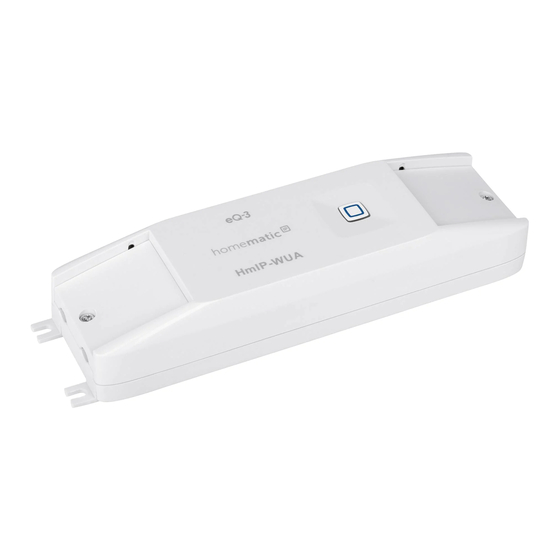
HmIP-WUA
S. 2
p. 26
p. 41
p. 58
pag. 74
pag. 91
Advertisement
Chapters
Table of Contents

Related Manuals for HomeMatic HmIP-WUA


Summary of Contents for HomeMatic HmIP-WUA
- Page 1 Universalaktor – 0-10 V S. 2 Universal Actuator – 0-10 V p. 26 Actionneur universel – 0-10 V p. 41 Actuador universal – 0-10 V p. 58 Attuatore universale – 0-10 V pag. 74 Universele actor – 0-10 V pag. 91 HmIP-WUA...
- Page 2 Lieferumfang Anzahl Bezeichnung Homematic IP Universalaktor – 0-10 V Bedienungsanleitung Dokumentation © 2022 eQ-3 AG, Deutschland Alle Rechte vorbehalten. Ohne schriftliche Zustimmung des Herausgebers darf diese Anleitung auch nicht auszugsweise in irgendeiner Form reproduziert werden oder unter Verwendung elektronischer, mechanischer oder chemischer Verfahren vervielfältigt oder verarbeitet werden.
- Page 3 OUT2 OUT1 1-10V 0-10V...
- Page 6 (GND) (1 - 10V) 1-10V 1-10V 0-10V HmIP-WUA 0-10V...
- Page 7 (GND) (0 - 10V) 1-10V 1-10V 0-10V HmIP-WUA 0-10V...
- Page 9 Homematic IP...
-
Page 11: Table Of Contents
Inhaltsverzeichnis Hinweise zur Anleitung ................12 Gefahrenhinweise ..................12 Funktion und Geräteübersicht ..............15 Allgemeine Systeminformationen ............16 Inbetriebnahme ..................16 Installationshinweise ................. 16 Montage und Installation ..............18 Anlernen ....................20 Fehlerbehebung ..................21 Fehlercodes und Blinkfolgen ............21 Befehl nicht bestätigt ................ 22 Duty Cycle ..................22 Wiederherstellung der Werkseinstellungen ........22 Wartung und Reinigung ................23 Allgemeine Hinweise zum Funkbetrieb ..........23... -
Page 12: Hinweise Zur Anleitung
Hinweise zur Anleitung Hinweise zur Anleitung Lesen Sie diese Anleitung sorgfältig, bevor Sie Ihr Homematic IP Gerät in Betrieb nehmen. Bewahren Sie die Anleitung zum späteren Nachschla- gen auf! Wenn Sie das Gerät anderen Personen zur Nutzung überlassen, überge- ben Sie auch diese Anleitung. - Page 13 Gefahrenhinweise Das Gerät ist kein Spielzeug! Erlauben Sie Kindern nicht damit zu spielen. Lassen Sie das Verpackungsmaterial nicht achtlos liegen. Plastikfolien/ -tüten, Styroporteile etc. können für Kinder zu einem gefährlichen Spielzeug werden. Bei Sach- oder Personenschäden, die durch unsachgemäße Hand- habung oder Nichtbeachten der Gefahrenhinweise verursacht wer- den, übernehmen wir keine Haftung.
- Page 14 Gefahrenhinweise Beachten Sie vor Anschluss eines Verbrauchers die technischen Daten, insbesondere die maximal zulässige Schaltleistung der Lastkreise und Art des anzuschließenden Verbrauchers. Belasten Sie den Aktor nur bis zur angegebenen Leistungsgrenze. Der Stromkreis, an dem das Gerät und die Last angeschlossen wer- den, muss mit einem Leitungsschutzschalter gemäß...
-
Page 15: Funktion Und Geräteübersicht
Dimmer sowie Heizungs- und Klimatechnikgeräte, über eine 0-10/1-10 V Schnittstelle. Geräte mit einer der beiden Schnittstellenvarianten lassen sich mit Hilfe des Universalaktors direkt per Funk in das Homematic IP System einbin- den. Über einen zusätzlichen Schaltausgang können Geräte (z. B. elekt- ronische Vorschaltgeräte EVG, Wohnraumlüfter) ein- und ausgeschaltet werden. -
Page 16: Allgemeine Systeminformationen
Smartphone über die Home- matic IP App konfiguriert werden. Alternativ haben Sie die Möglichkeit, Homematic IP Geräte über die Zentrale CCU3 oder in Verbindung mit vielen Partnerlösungen zu betreiben. Welcher Funktionsumfang sich innerhalb des Systems im Zusammenspiel mit weiteren Komponenten ergibt, entnehmen Sie bitte dem Homematic ... - Page 17 Inbetriebnahme Wenden Sie sich an einen Elektroinstallateur! *Erforderliche Fachkenntnisse für die Installation: Für die Installation sind insbesondere folgende Fachkenntnisse erforderlich: • Die anzuwendenden „5 Sicherheitsregeln“: Freischalten; gegen Wiedereinschalten sichern; Spannungsfreiheit feststellen; Erden und Kurzschließen; benachbarte, unter Spannung stehende Teile abdecken oder abschranken; •...
-
Page 18: Montage Und Installation
Inbetriebnahme Montage und Installation Bitte lesen Sie diesen Abschnitt erst vollständig, bevor Sie mit der Installation beginnen. Die Montage des Universalaktor hat ausschließlich durch einen Elek- torinstallateur zu erfolgen! Der Laststromkreis muss mit einem Leitungsschutzschalter gemäß EN60898-1 (Auslösecharakteristik B oder C, max. 16 A Nennstrom, min. - Page 19 Inbetriebnahme • Für eine Beleuchtung im Allgemeinen gilt die 1-10 V Schnittstelle (G). • Für weitere Bereiche wie z. B. eine Kühlung gilt die 0-10 V (F) Schnittstelle. Bei Unklarheit, wählen Sie zuerst die 1-10 V Schnittstelle des Univer- salaktors. Bei fälschlichem Anschluss wird das Gerät nicht reagieren und somit kein Schaden erzeugt! •...
-
Page 20: Anlernen
Homematic IP Anwenderhandbuch (zu finden im Downloadbereich unter www.homematic-ip.com). Damit das Gerät in Ihr System integriert und per kostenloser Homema- tic IP App gesteuert werden kann, muss es an den Homematic IP Access Point angelernt werden. Zum Anlernen des Geräts gehen Sie wie folgt vor: •... -
Page 21: Fehlerbehebung
Fehlerbehebung Gerätenummer (SGTIN) ein oder scannen Sie den QR-Code. Die Gerätenummer finden Sie auf dem Aufkleber im Lieferumfang oder direkt am Gerät. • Warten Sie, bis der Anlernvorgang abgeschlossen ist. • Zur Bestätigung eines erfolgreichen Anlernvorgangs leuchtet die LED (A) grün. Das Gerät ist nun einsatzbereit. •... -
Page 22: Befehl Nicht Bestätigt
Stunde). Die Geräte dürfen bei Erreichen des 1 %-Limits nicht mehr senden, bis diese zeitliche Begrenzung vorüber ist. Gemäß dieser Richt- linie, werden Homematic IP Geräte zu 100 % normenkonform entwickelt und produziert. Im normalen Betrieb wird der Duty Cycle in der Regel nicht erreicht. Dies kann jedoch in Einzelfällen bei der Inbetriebnahme oder Erstinstallation... -
Page 23: Wartung Und Reinigung
Wartung und Reinigung Um die Werkseinstellungen des Geräts wiederherzustellen, gehen Sie wie folgt vor: • Drücken Sie für 4 s auf die Systemtaste (A), bis die LED (A) schnell orange zu blinken beginnt (s. Abbildung 13). • Lassen Sie die Systemtaste wieder los. •... -
Page 24: Technische Daten
Technische Daten Hiermit erklärt die eQ-3 AG, Maiburger Str. 29, 26789 Leer, Deutsch- land, dass der Funkanlagentyp Homematic IP HmIP-WUA der Richt- linie 2014/53/EU entspricht. Der vollständige Text der EU-Konfor- mitätserklärung ist unter der folgenden Internetadresse verfügbar: www.homematic-ip.com Technische Daten Geräte-Kurzbezeichnung:... - Page 25 Technische Daten Schutzklasse: Verschmutzungsgrad: Technische Änderungen vorbehalten. Lastart Relais Ohmsche Last Glühlampenlast 750 W Lampen mit internem Vorschaltgerät (LED/Kompakt- 200 W leuchtstofflampe) HV-Halogenlampen 750 W Elektronische Transformatoren für NV-Halogenlam- 200 W Eisenkern Transformatoren für NV-Halogenlampen 750 W Leuchtstofflampen (unkompensiert) 750 W Entsorgungshinweis Gerät nicht im Hausmüll entsorgen! Elektronische Geräte sind ent- sprechend der Richtlinie über Elektro- und Elektronik-Altgeräte über...
- Page 26 Technische Daten Package contents Quantity Description Homematic IP universal actuator – 0–10 V Operating manual Documentation © 2022 eQ-3 AG, Germany. All rights reserved. This manual may not be reproduced in any format, either in whole or in part, nor may it be duplicated or edited by electronic, mechanical or chemical means, without the written consent of the publisher.
- Page 27 Table of contents Information about this manual ............28 Hazard information ................28 Function and device overview ............. 30 General system information ..............31 Operation ....................32 Installation instructions ..............32 Mounting and installation ..............33 Teaching-in ..................35 Troubleshooting ..................36 Error codes and flashing sequences ..........
-
Page 28: Information About This Manual
Information about this manual Please read this manual carefully before beginning operation with your Homematic IP device. Keep the manual so you can refer to it at a later date if you need to. If you hand over the device to other persons for use, please hand over this manual as well. - Page 29 Hazard information We accept no liability for damage to property or personal injury caused by improper use or the failure to observe the hazard warn- ings. In such cases, all warranty claims are void. We accept no liabil- ity for any consequential damage. The actuator is part of the building installation.
-
Page 30: Function And Device Overview
Function and device overview The mains-powered Homematic IP universal actuator controls analogue controllable dimmers, and heating and air-conditioning devices via a 0–10/1–10 V interface. -
Page 31: General System Information
(H) Connecting terminal for output 2 (OUT2, 1-10 V) General system information This device is part of the Homematic IP smart home system and works with the Homematic IP protocol. All devices of the system can be con- figured comfortably and individually with the user interface of the Central Control Unit CCU3 or flexibly via the Homematic IP smartphone app in connection with the Homematic IP cloud. -
Page 32: Operation
Operation Operation Installation instructions Before installation, please note the device number (SGTIN) labelled on the device as well as the exact application purpose in order to facilitate later allocation. You can also find the device number on the QR code sticker supplied. Due to the free mains voltage in the device, installation and opera- tion may only be carried out by trained electricians who are author- ised to do so based on their training. -
Page 33: Mounting And Installation
Operation • IP protection types; • Installation of electrical installation material; • Type of supply network (TN system, IT system, TT system) and the resulting connecting conditions (classical zero balancing, protective earthing, required additional measures etc.). Please observe the hazard information in section see „2 Hazard infor- mation“... - Page 34 Operation Proceed as follows to mount the universal actuator in a false ceiling or wall: • Position the universal actuator at the desired location. Mark the drilling points using the openings of the mounting lugs (B). • • Select the appropriate screws and dowels. •...
-
Page 35: Teaching-In
(see „5.3 Teaching-in“ on page 35). Teaching-in Please read this entire section before starting the teach-in procedu- First set up your Homematic IP Access Point via the Homematic IP app to enable operation of other Homematic IP devices within your system. -
Page 36: Troubleshooting
You can manually start the teach-in mode for another 3 minutes by pressing the system button (A) briefly (see fig. 12). • Your device will automatically appear in the Homematic IP app. • To confirm, enter the last four digits of the device number (SG- TIN) in your app or scan the QR code. -
Page 37: Command Not Confirmed
1% of an hour (i.e. 36 seconds in an hour). Devices must cease transmission when they reach the 1% limit until this time restriction comes to an end. Homematic IP devices are designed and produced with 100% conformity to this regulation. -
Page 38: Restoring Factory Settings
Restoring factory settings Restoring factory settings The device’s factory settings can be restored. If you do this, you will lose all your settings. To restore the factory settings of the device, please proceed as follows: • Press and hold down the system button (A) for 4 seconds until the LED (A) quickly starts flashing orange (see fig. -
Page 39: Technical Specifications
Hereby, eQ-3 AG, Maiburger Str. 29, 26789 Leer/Germany declares that the radio equipment type Homematic IP HmIP-WUA is in compliance with Directive 2014/53/EU. The full text of the EU declaration of conformity is available at the following internet address: www.homematic-ip.com... - Page 40 Technical specifications Max. radio transmission power 10 dBm Receiver category: SRD category 2 Typical radio free-field range: 240 m Duty cycle: < 1 % per h/< 10 % per h Protection class: Pollution degree: Subject to modifications. Load type Relay Ohmic load Incandescent lamp load 750 W...
- Page 41 Contenu de la livraison Nombre Désignation Actionneur universel Homematic IP – 0-10 V Mode d’emploi Documentation © 2022 eQ-3 AG, Allemagne Tous droits réservés. Le présent manuel ne peut être reproduit, en totalité ou sous forme d’extraits, de manière quelconque sans l’accord écrit de l’éditeur, ni copié ou modifié par procédés électroniques, mécaniques ou chimiques.
- Page 42 Table des matières Remarques sur la notice ................ 43 Mises en garde ..................43 Fonction et aperçu de l‘appareil ............46 Informations générales sur le système ..........47 Mise en service ..................47 Instructions d’installation ..............47 Montage et installation ..............49 Apprentissage ..................51 Élimination des défauts ................52 Codes d‘erreurs et séquences de clignotement ......
-
Page 43: Remarques Sur La Notice
Remarques sur la notice Remarques sur la notice Lisez attentivement la présente notice avant de mettre votre appareil Ho- mematic IP en service. Conservez la notice pour pouvoir vous y référer ultérieurement ! Si vous laissez d’autres personnes utiliser l’appareil, n’oubliez pas de leur remettre également cette notice d’utilisation. - Page 44 Mises en garde Cet appareil n’est pas un jouet ! Tenez-le hors de portée des enfants. Ne laissez pas traîner le matériel d’emballage. Les sachets/feuilles en plastique, éléments en polystyrène, etc. peuvent constituer des jouets dangereux pour les enfants. Notre responsabilité ne saurait être engagée en cas de dommages matériels ou de dommages corporels dus au maniement inappro- prié...
- Page 45 Mises en garde Avant de brancher un consommateur, respectez les caractéristiques techniques, y compris la puissance de commutation maximale des circuits de charge et le type de consommateur à brancher. Ne sollicitez l’actionneur que jusqu’à la limite de puissance indiquée. Le circuit auquel l’appareil et la charge sont raccordés doit être équipé...
-
Page 46: Fonction Et Aperçu De L'appareil
Fonction et aperçu de l‘appareil L’actionneur universel de Homematic IP alimenté par le secteur com- mande les variateurs, les appareils de chauffage et de climatisation régla- bles de manière analogique via une interface 0-10/1-10 V. -
Page 47: Informations Générales Sur Le Système
(H) Borne de raccordement pour la sortie 2 (OUT2, 1-10 V) Informations générales sur le système Cet appareil fait partie du système Smart Home de Homematic IP et com- munique par le biais du Homematic IP Protocole radio. Tous les appareils du système peuvent être configurés facilement et individuellement avec un... - Page 48 Mise en service Une installation non conforme peut également entraîner des dom- mages matériels lourds (par ex. par un incendie). Votre responsabilité risque d’être engagée en cas de dommages corporels et matériels. Adressez-vous à un professionnel de l’électricité ! *Connaissances spécialisées nécessaires pour l’installation : pour procéder à...
-
Page 49: Montage Et Installation
Mise en service Les sections de câble autorisées pour le raccordement à l’actionneur uni- versel pour les câbles de 0/1-10 V sont : Câble rigide [mm Câble flexible sans embouts [mm 0,25-1,5 0,25-1,5 Montage et installation Merci de lire attentivement cette section avant de procéder à l’installation. Confiez le montage de l’actionneur universel uniquement à... - Page 50 Mise en service • Recouvrez, le cas échéant, les parties sous tension (v. « 2 Mises en garde « à la page 43). • Choisissez la variante adaptée de la sortie analogique pour l’appareil à commander respectivement • Il faut normalement l’interface 1-10 V (H) pour un éclairage. •...
-
Page 51: Apprentissage
à l’apprentissage. Configurez d’abord votre Homematic IP Access Point avec l’application Homematic IP pour pouvoir utiliser d’autres appareils Homematic IP dans le système Homematic IP. Vous trouverez des informations détaillées à ce sujet dans le mode d’emploi de l’Access Point. -
Page 52: Élimination Des Défauts
Élimination des défauts Vous pouvez relancer manuellement le mode d’apprentissage pour 3 autres minutes en appuyant brièvement sur la touche système (A) (v. figure 12). • L’appareil apparaît automatiquement dans l’application Home- matic IP. • Pour confirmer, saisissez les quatre derniers chiffres de l’appareil (SGTIN) dans l’application ou scannez le code QR. -
Page 53: Commande Non Confirmée
36 secondes dans une heure). Les appareils ne peuvent plus émettre lorsque la limite de 1 % est atteinte jusqu’à ce que cette limite temporelle soit dépassée. Conformément à cette directive, les appareils Homematic IP sont développés et fabriqués à 100 % conformément à la norme. -
Page 54: Rétablissement Des Réglages D'usine
Rétablissement des réglages d‘usine de la première installation d’un système par des processus de program- mation multipliés et intensifs. Un dépassement de la limite Duty Cycle s’affiche par un long éclairage rouge de la LED (A) et peut s’exprimer par une fonction temporairement manquante de l’appareil. -
Page 55: Remarques Générales Sur Le Fonctionnement Radio
Par la présente, eQ-3 AG, basée à Maiburger Str. 29, 26789 Leer, en Allemagne, déclare que l’équipement radioélectrique Homematic IP HmIP-WUA est conforme à la directive 2014/53/EU. L’intégralité de la déclaration européenne de conformité est disponible à l’adresse suivante : www.homematic-ip.com Caractéristiques techniques... - Page 56 Caractéristiques techniques Bornes de 0-10 V de 0,25 à 1,5 mm² Diamètre extérieur Câbles de 230 V de 5,5 à 9 mm Câbles de 0-10 V de 3,3 à 6 mm Type de protection : IP20 Température ambiante : de 5 à 35 °C Dimensions (l x h x p) : 51 x 31 x 187 mm Poids :...
- Page 57 Caractéristiques techniques Informations de conformité Le sigle CE est un sigle de libre circulation destiné uniquement aux administrations ; il ne constitue pas une garantie de caractéristiques. Pour toute question technique concernant les appareils, veuillez vous adresser à votre revendeur.
- Page 58 Volumen de suministro Cantidad Componente Homematic IP Actuador universal – 0-10 V Instrucciones de uso Documentación © 2022 eQ-3 AG, Alemania Todos los derechos reservados. Queda prohibida la reproducción total o parcial de estas instrucciones en todas las formas posibles o utilizando procedimientos electrónicos, mecánicos o químicos, así...
- Page 59 Índice Advertencias sobre estas instrucciones ..........60 Advertencias de peligro ................. 60 Funciones y esquema del dispositivo ..........63 Información general del sistema ............63 Puesta en servicio ................... 64 Instrucciones de instalación ............64 Montaje e instalación ................ 65 Conexión .....................
-
Page 60: Advertencias Sobre Estas Instrucciones
Advertencias sobre estas instrucciones Lea atentamente estas instrucciones antes de poner en servicio su dispositi- vo Homematic IP. ¡Conserve estas instrucciones para consultas posteriores! Si cede este dispositivo para que lo utilicen otras personas, entregue tam- bién estas Instrucciones junto con el dispositivo. - Page 61 Advertencias de peligro Las láminas o bolsas de plástico, las piezas de corcho blanco, etc. pueden convertirse en un juguete peligroso para los niños. Se declina toda responsabilidad por daños personales o materiales causados por un uso indebido o por incumplimiento de las indicaciones de peligro.
- Page 62 Advertencias de peligro El circuito eléctrico, al que se conecte el dispositivo y la carga, tiene que estar protegido por un disyuntor que cumpla la norma EN60898- 1 (característica de disparo B o C, corriente nominal máxima 16 A, capacidad de ruptura mínima 6 kA, clase de limitación de energía 3). Es obligatorio cumplir las normas de instalación VDE 0100, HD384 o IEC 60364.
-
Page 63: Funciones Y Esquema Del Dispositivo
(H) Borne de conexión para salida 2 (OUT2, 1-10 V) Información general del sistema Este dispositivo es parte del sistema smart home Homematic IP y se co- munica por el protocolo de radio Homematic IP. Se puede configurar todos los dispositivos del sistema confortablemente e indivualmente a travès la aplicación Homematic IP. -
Page 64: Puesta En Servicio
Puesta en servicio chos soluciones de nuestros socios. Para más información sobre el los funciones del sistema en combinación con otros componentes, consulte el manual de usuario. Visite www.homematic-ip.com para consultar to- dos los documentos técnicos y actualizaciones. Puesta en servicio Instrucciones de instalación... -
Page 65: Montaje E Instalación
Puesta en servicio as que estén bajo tensión. • Elección de las herramientas, los dispositivos de medición y, dado el caso, el equipo de protección individual adecuados. • Evaluación los resultados de la medición. • Elección del material de instalación eléctrica para garantizar las condiciones de desconexión. - Page 66 Puesta en servicio El circuito de carga tiene que estar protegido por un disyuntor que cumpla la norma EN60898-1 (característica de disparo B o C, co- rriente nominal máxima 16 A, capacidad de ruptura mínima 6 kA, clase de limitación de energía 3). ¡Compruebe que no haya ninguna otra línea de suministro en el lu- gar de la instalación! Modo de proceder para efectuar el montaje del actuador universal en...
-
Page 67: Conexión
(v. „5.3 Conexión“ en página 67). Conexión Por favor, lea íntegramente este capítulo antes de realizar la cone- xión. En primer lugar tiene que configurar su Homematic IP Access Point desde la aplicación Homematic IP para poder utilizar otros disposi... - Page 68 También puede conectar el dispositivo a Access Point o a la CCU3 central. Para más información al respecto, por favor, consulte el ma- nual de usuario de Homematic IP (lo encontrará en la sección de des- cargas de www.homematic-ip.com). Para poder integrar el dispositivo en su sistema y realizar el control desde la aplicación gratuita Homematic IP es necesario conectarlo al Homema-...
-
Page 69: Reparación De Fallos
Reparación de fallos • Asigne una sala al dispositivo en la app e introduzca un nombre para el dispositivo. Reparación de fallos Códigos de errores y secuencias intermitentes Secuencia Significado Solución intermitente Luz naranja Transmisión inalámbrica, Espere hasta que finalice la intermitente intento de transmisión o transmisión. -
Page 70: Duty Cycle
36 segundos en una hora). Cuando se alcanza ese límite del 1% los dispo- sitivos no pueden seguir transmitiendo hasta que finaliza esa limitación temporal. Los dispositivos Homematic IP cumplen esa directiva al 100% en su desarrollo y fabricación. Utilizados de un modo normal en general no se alcanza el Duty Cycle. Sí... -
Page 71: Mantenimiento Y Limpieza
Mantenimiento y limpieza • Suelte de nuevo el botón del sistema para finalizar el restableci- miento de la configuración de fábrica. El dispositivo ejecuta un reinicio. Mantenimiento y limpieza El dispositivo no requiere mantenimiento. En caso de fallo, encargue su reparación a un técnico. ¡Antes de desmontar el dispositivo es indispensable cortar la tensión de red (desconectar el fusible de automático)! Los trabajos en redes de 230 V solo pueden ser ejecutados por técnicos electricistas (de... -
Page 72: Datos Técnicos
Datos técnicos eQ-3 AG, Maiburger Str. 29, 26789 Leer, Alemania, declara que la in- stalación inalámbrica, Homematic IP HmIP-WUA, cumple la Di- rectiva 2014/53/UE. El texto de la declaración de conformidad CE está disponible al completo en la siguiente dirección de Internet: www.homematic-ip.com... - Page 73 Datos técnicos Categoría de receptor: SRD category 2 Alcance típ. en campo abierto: 240 m Duty Cycle: < 1 % por h/< 10 % por h Clase de protección: Grado de suciedad: Salvo modificaciones técnicas. Clase de carga Relé Carga óhmica Carga de lámpara incandescente 750 W Lámparas con balasto interno (LED/fluorescente compacto)
- Page 74 Fornitura Quantità Definizione Homematic IP Attuatore universale – 0-10 V Istruzioni per l'uso Documentazione © 2022 eQ-3 AG, Germania Tutti i diritti riservati. Senza l’approvazione scritta del produttore è vietata la riproduzione di questo manuale o di sue parti in qualsiasi forma o la sua duplicazione o modifica con l’utilizzo di processi elettronici, meccanici o chimici.
- Page 75 Indice Note su queste istruzioni ...............76 Indicazioni di pericolo ................76 Funzioni e vista d'insieme dell'apparecchio ........79 Informazioni generali sul sistema ............80 Messa in funzione ................... 80 Avvertenze per l'installazione ............80 Montaggio e installazione ..............82 Inizializzazione ...................84 Risoluzione dei guasti ................85 Codici di errore e sequenze di spie lampeggianti ......
-
Page 76: Note Su Queste Istruzioni
Note su queste istruzioni Note su queste istruzioni Leggere attentamente queste istruzioni prima di mettere in funzione questo dispositivo Homematic IP. Conservare questo manuale per poter- lo consultare anche in futuro! Se si affida l’utilizzo dell’apparecchio ad altre persone consegnare anche queste istruzioni per l’uso. - Page 77 Indicazioni di pericolo Questo apparecchio non è un giocattolo! Non consentire ai bambi- ni di giocare con il kit. Non lasciare incustodito il materiale dell’im- ballaggio. Le pellicole o i sacchetti di plastica, le parti di polistirolo, ecc. possono diventare un giocattolo pericoloso. L’azienda declina qualsiasi responsabilità...
- Page 78 Indicazioni di pericolo Prima di collegare un’utenza fare attenzione ai dati tecnici, in particolare alla massima potenza di interruzione ammessa per i circuiti di carico e al tipo di utenza da collegare. Caricare l’attuatore solo fino al limite della capacità indicato. Il circuito elettrico previsto per l’allaccio del dispositivo e del carico deve essere messo in sicurezza con un interruttore magnetotermico conforme alla norma EN60898-1 (caratteristica di intervento di tipo...
-
Page 79: Funzioni E Vista D'insieme Dell'apparecchio
Funzioni e vista d'insieme dell'apparecchio Il dispositivo alimentato a corrente Homematic IP Attuatore universa- le comanda i dimmer regolabili con sistema analogico nonché gli ap- parecchi del sistema di riscaldamento e dell’aria condizionata tramite un’interfaccia 0-10/1-10 V. -
Page 80: Informazioni Generali Sul Sistema
Homematic IP. Tutti gli apparecchi del sistema possono essere configurati comodamente e singolarmen- te dallo smartphone tramite l’app Homematic IP. In alternativa gli appa- recchi Homematic IP possono essere gestiti tramite la centralina CCU3 oppure tramite un collegamento con numerosi sistemi di fornitori terzi. - Page 81 Messa in funzione Con un’installazione eseguita in modo non appropriato si rischiano gravi danni materiali, ad es. dovuti a un incendio. In caso di danni a persone o cose si rischia l’attribuzione di responsabilità personale. Rivolgersi a un elettrotecnico! *Conoscenze tecniche necessarie per l’installazione: Per l’installazione sono necessarie in particolare le conoscenze tecniche di seguito indicate: •...
-
Page 82: Montaggio E Installazione
Messa in funzione Misure ammesse per la sezione dei cavi di collegamento all’attuatore uni- versale per cavi da 0/1-10 V: cavo rigido [mm cavo flessibile senza guaina fili [mm 0,25-1,5 0,25-1,5 Montaggio e installazione Leggere interamente questo paragrafo prima di iniziare ad installare l’apparecchio. - Page 83 Messa in funzione Per installare l’attuatore universale in controsoffitti o pareti procedere nel modo seguente: • Disattivare il quadro di distribuzione elettrica. • Coprire eventuali parti conduttrici sotto tensione (v. “2 Indicazio- ni di pericolo“ a pag. 76). • Selezionare l’uscita analogica della versione adatta al rispettivo apparecchio da comandare.
-
Page 84: Inizializzazione
Leggere interamente questo paragrafo prima di cominciare l’inizializzazione. Per prima cosa configurare l'Homematic IP Access Point tramite l’app Homematic IP in modo da poter utilizzare nel sistema altri dis- positivi Homematic IP. Informazioni dettagliate sono riportate nelle istruzioni per l'uso dell'Access Point. -
Page 85: Risoluzione Dei Guasti
La modalità Inizializzazione può essere avviata per altri 3 minuti pre- mendo brevemente il tasto di sistema (A) (v. figura 12). • L'apparecchio compare automaticamente nell'app Homematic • Per confermare, digitare nell'app le ultime quattro cifre del nume- ro dell'apparecchio (SGTIN) oppure eseguire una scansione del codice QR. -
Page 86: Comando Non Confermato
Quando raggiungono il limite dell’1% gli apparecchi non possono più trasmettere finché non sarà scaduto questo limite di tempo. Conformemente a questa direttiva gli apparecchi Homematic IP vengono sviluppati e prodotti nell’assoluto rispetto delle norme. Nel normale funzionamento di solito non si raggiunge il duty cycle. Tut-... -
Page 87: Ripristino Delle Impostazioni Di Fabbrica
Ripristino delle impostazioni di fabbrica manifestarsi con l’assenza temporanea di funzionamento dell'apparec- chio. Trascorso un tempo breve (max. 1 ora) si ripristina il funzionamento dell’apparecchio. Ripristino delle impostazioni di fabbrica L’utente può ripristinare le impostazioni di fabbrica dell'apparecchio. In questo caso tutte le impostazioni andranno perdute. Per ripristinare le impostazioni di fabbrica dell’apparecchio procedere nel modo seguente: •... -
Page 88: Informazioni Generali Sul Funzionamento Via Radio
Con la presente la eQ-3 AG, Maiburger Str. 29, 26789 Leer, Germania, dichiara che l’apparecchio radio Homematic IP modello HmIP-WUA è conforme alla Direttiva 2014/53/UE. Il testo integrale della dichia- razione di conformità UE è disponibile al seguente indirizzo internet: www.homematic-ip.com... - Page 89 Dati tecnici Morsetti da 0-10 V 0,25-1,5 mm² Diametro esterno Cavi da 230 V 5,5-9 mm Cavi da 0-10 V 3,3-6 mm Grado di protezione: IP20 Temperatura ambiente: tra 5 e 35 °C Dimensioni (L x A x P): 51 x 31 x 187 mm Peso: 145 g Banda di frequenza radio:...
- Page 90 Dati tecnici Non smaltire l'apparecchio nei rifiuti domestici! Gli apparecchi elet- tronici devono essere smaltiti conformemente alla direttiva sui rifiu- ti di apparecchi elettrici ed elettronici ed essere consegnati presso un apposito centro di raccolta. Dichiarazione di conformità Il marchio CE è un contrassegno del mercato libero che si rivolge esclusivamente agli enti ufficiali e che non rappresenta una garanzia delle caratteristiche del prodotto.
- Page 91 Leveringsomvang Aantal Naam Homematic IP Universele actor – 0-10 V Handleiding Documentatie © 2022 eQ-3 AG, Duitsland Alle rechten voorbehouden. Zonder schriftelijke toestemming van de uitgever mogen deze handleiding of fragmenten ervan op geen enkele manier worden gereproduceerd of met behulp van elektronische, mechanische of chemische middelen worden verveel- voudigd of verwerkt.
- Page 92 Inhoudsopgave Instructies bij deze handleiding ............93 Gevarenaanduidingen ................93 Werking en overzicht van het apparaat ..........96 Algemene systeeminformatie ...............97 Inbedrijfstelling ..................97 Installatie-instructies ................. 97 Montage en installatie............... 99 Aanleren ..................... 101 Storingen oplossen ................102 Foutcodes en knipperreeksen ............102 Commando niet bevestigd ............
-
Page 93: Instructies Bij Deze Handleiding
Instructies bij deze handleiding Instructies bij deze handleiding Lees deze handleiding zorgvuldig door voordat u uw Homematic IP ap- paraat in gebruik neemt. Bewaar de handleiding, om ze ook later nog te kunnen raadplegen! Als u het apparaat door andere personen laat gebruiken, geef dan ook deze handleiding mee. - Page 94 Gevarenaanduidingen Het apparaat is geen speelgoed! Laat kinderen er niet mee spelen. Laat verpakkingsmateriaal niet rondslingeren. Plastic folies en zak- ken, vormstukken van styropor enz. kunnen door kinderen als ge- vaarlijk speelgoed worden gebruikt. Voor zaak- of personenschade die door een onjuist gebruik of niet-naleving van de gevarenaanduidingen veroorzaakt is, stellen wij ons niet aansprakelijk.
- Page 95 Gevarenaanduidingen Controleer voordat u een verbruiker aansluit, de technische gegevens en met name het maximaal toegestane schakelvermogen van de laststroomkringen en het type van de aan te sluiten verbruiker. Belast de actor uitsluitend tot de opgegeven vermogensgrens. De stroomkring waarop het apparaat en de last worden aangeslo- ten, moet beveiligd zijn met een installatieautomaat volgens EN 60898-1 (karakteristiek B of C, max.
-
Page 96: Werking En Overzicht Van Het Apparaat
0-10/1-10V-interface. Apparaten met één van de beide interfacevarianten kunnen met behulp van de universele actor direct draadloos in het Homematic IP systeem worden geïntegreerd. Via een extra schakeluitgang kunnen apparaten (bijv. elektronische voorschakelapparaten (EVA), ventilatiesystemen) in- en uitgeschakeld worden. -
Page 97: Algemene Systeeminformatie
Algemene systeeminformatie Algemene systeeminformatie Dit apparaat is een onderdeel van het Homematic IP Smart Home Sys- teem en communiceert via het Homematic IP zendprotocol. Alle ap- paraten van het systeem kunnen comfortabel en individueel via een smartphone met de Homematic IP App worden geconfigureerd. U hebt ook de mogelijkheid om de Homematic IP apparaten via de cen- trale CCU3 of in combinatie met vele partneroplossingen te gebruiken. - Page 98 Inbedrijfstelling *Vereiste vakkennis voor de installatie: Voor de installatie is met name de volgende vakkennis vereist: • de toe te passen ‘5 veiligheidsregels’: vrijschakelen; tegen opni- euw inschakelen beveiligen; spanningsvrijheid controleren; aar- den en kortsluiten; aangrenzende onderdelen die onder span- ning staan, afdekken of afsluiten;...
-
Page 99: Montage En Installatie
Inbedrijfstelling Montage en installatie Lees dit hoofdstuk volledig door, voordat u met de installatie begint. De montage van de universele actor dient uitsluitend te worden uit- gevoerd door een elektromonteur! De laststroomkring moet beveiligd zijn met een installatieautomaat volgens EN 60898-1 (karakteristiek B of C, max. 16 A nominale stroom, min. - Page 100 Inbedrijfstelling Kies in geval van twijfel eerst de 1-10V-interface van de universele actor. In geval van een verkeerde aansluiting zal het apparaat niet reageren en dus geen schade veroorzaken! • Draai de schroef aan de sluitkap (J) los met behulp van een schroevendraaier.
-
Page 101: Aanleren
Lees dit hoofdstuk volledig door, voordat u met het aanleren begint. Configureer eerst uw Homematic IP Access Point via de Homematic IP App om nog andere Homematic IP apparaten in het systeem te kunnen gebruiken. Uitgebreide informatie hierover vindt u in de handleiding van het Access Point. -
Page 102: Storingen Oplossen
Storingen oplossen Storingen oplossen Foutcodes en knipperreeksen Knippercode Betekenis Oplossing Kort oranje knip- Draadloze over- Wacht tot de overdracht peren dracht, zendpoging, beëindigd is. gegevensoverdracht 1x lang groen Proces bevestigd U kunt met de bediening oplichten doorgaan. Kort oranje knip- Aanleermodus actief Voer ter bevestiging de peren (om de 10 laatste vier cijfers van het... -
Page 103: Duty Cycle
De apparaten mogen bij het bereiken van de 1%-limiet niet meer zenden, tot deze tijdelijke begrenzing weer voorbij is. In overeenstem- ming met deze richtlijn worden Homematic IP apparaten 100 % conform de norm ontwikkeld en geproduceerd. In het normale bedrijf wordt de duty cycle doorgaans niet bereikt. In af-... -
Page 104: Onderhoud En Reiniging
Hierbij verklaart eQ-3 AG, Maiburger Str. 29, 26789 Leer, Duitsland, dat het draadloze apparaattype Homematic IP HmIP-WUA in overeenstemming is met de richtlijn 2014/53/EU. De volledige tekst van de EU- conformiteitsverklaring is beschikbaar onder het volgende internetadres:... -
Page 105: Technische Gegevens
Technische gegevens Technische gegevens Apparaatcode: HmIP-WUA Voedingsspanning: 230 V~/50 Hz Stroomopname: 8 A max./16 mA typ. Opgenomen vermogen bij stand-by: 200 mW Relais: maakcontact, 1-polig, µ-contact Schakelspanning: 230 V~ 0-10V-uitgang: 10 mA max. 1-10V-uitgang: 100 mA max. Kabeltype en -doorsnede:... - Page 106 Technische gegevens Lasttype Relais Ohmse last Gloeilampen 750 W Lampen met intern voorschakelapparaat (led / compacte tl- 200 W buis) HV-halogeenlampen 750 W Elektronische transformatoren voor LV-halogeenlampen 200 W Transformatoren met ijzeren kern voor LV-halogeenlampen 750 W Tl-buizen (niet gecompenseerd) 750 W Verwijdering Het apparaat hoort niet in de vuilnisbak! Elektronische apparaten...
- Page 107 Kostenloser Download der Homematic IP App! Free download of the Homematic IP app! Bevollmächtigter des Herstellers: Manufacturer’s authorised representative: eQ-3 AG Maiburger Straße 29 26789 Leer / GERMANY www.eQ-3.de...
Need help?
Do you have a question about the HmIP-WUA and is the answer not in the manual?
Questions and answers