
Related Manuals for HomeMatic HmIP-FBL


Summary of Contents for HomeMatic HmIP-FBL
- Page 1 Jalousieaktor – Unterputz Blind Actuator – flush-mount HmIP-FBL Installations- und Bedienungsanleitung Installation and operating manual...
-
Page 2: Table Of Contents
Installations- und Bedienungsanleitung Inhaltsverzeichnis Lieferumfang ....................3 Hinweise zur Anleitung ................3 Gefahrenhinweise ..................3 Homematic IP – Smart wohnen, einfach komfortabel......4 Funktion und Geräteübersicht ..............5 Inbetriebnahme .....................5 Installationshinweise ..................5 Installation ......................6 6.2.1 Installation in einer Unterputzdose ............6 6.2.2 Installation in einer Aufputzdose ............7 Anlernen ....................... -
Page 3: Lieferumfang
Verwenden Sie das Gerät nicht, wenn es von außen erkennbare Lesen Sie diese Anleitung sorgfältig, Schäden, z. B. am Gehäuse, an bevor Sie Ihre Homematic IP Geräte Bedienelementen oder an den in Betrieb nehmen. Bewahren Sie die Anschlussbuchsen ausweist. Las- Anleitung zum späteren Nachschlagen sen Sie das Gerät im Zweifelsfall... -
Page 4: Homematic Ip - Smart Wohnen, Einfach Komfortabel
Art des anzuschließenden HmfHrtaael Verbrauchers. Belasten Sie den Aktor nur bis zur angegebenen Dieses Gerät ist Teil des Homematic IP Leistungsgrenze. Smart-Home-Systems und kommuni- ziert über das Homematic IP Funkpro- Eine Überlastung kann zur Zerstö- tokoll. Alle Geräte des Systems können rung des Geräts, zu einem Brand... -
Page 5: Funktion Und Geräteübersicht
Fun tiHn und Geräteüaersicht Sie bitte dem Homematic IP Anwen- derhandbuch. Alle technischen Do- kumente und Updates finden Sie stets aktuell unter www.homematic-ip.com. 5 Fun tiHn und Geräteüaersicht Der Homematic IP Jalousieaktor eignet sich für die Montage in einer Unter- putz- oder Aufputzdose und ermög-... -
Page 6: Installation
Inaetrieanahme Durch eine unsachgemäße Installation Die Installation darf nur in han- gefährden Sie delsüblichen Schalterdosen (Gerä- tedosen) gemäß DIN 49073-1 • Ihr eigenes Leben; oder Aufputzdosen gemäß DIN • das Leben der Nutzer der elektri- 60670-1 (z. B. Abox 025 oder schen Anlage. -
Page 7: Installation In Einer Aufputzdose
Inaetrieanahme 6.2.2 Installation in einer sie- bzw. Rollladentaster wie folgt Aufputzdose an die Anschlussklemme S1 und S2 Für die Installation des Jalousieaktors in einer Aufputzdose gehen Sie wie - Anschlussklemme S1 (G): „Runter“ folgt vor (s. Abbildung 2): - Anschlussklemme S2 (H): „Hoch“ •... -
Page 8: Anlernen
Inaetrieanahme Zum Anlernen des Jalousieaktors ge- hen Sie wie folgt vor: • Öffnen Sie die Homematic IP App auf Ihrem Smartphone. • Wählen Sie den Menüpunkt „Gerät anlernen“ aus. • Nach der Installation ist der Anlern- modus für 3 Minuten aktiv. -
Page 9: Bedienung
Begrenzung • Kurzer Tastendruck Taste S1 oder vorüber ist. Gemäß dieser Richtlinie, S2: Der Motor für die Jalousien werden Homematic IP Geräte zu 100 % bzw. Rollläden oder die Markise normenkonform entwickelt und pro- fährt in die entsprechende Endpo- duziert. -
Page 10: Fehlercodes Und Blinkfolgen
Fehleraeheaung Fehlercodes und Blinkfolgen Blinkcode Bedeutung Lösung Funkübertragung/Sende- Warten Sie, bis die Über- Kurzes oranges Blinken versuch/Datenübertra- tragung beendet ist. gung Sie können mit der Bedie- 1x langes grünes Leuchten Vorgang bestätigt nung fort-fahren. Geben Sie die letzten vier Ziffern der Geräte-Serien- Kurzes oranges Blinken Anlernmodus aktiv nummer zur Bestätigung... -
Page 11: Wiederherstellung Der Werkseinstellungen
Das Gerät führt einen Neustart durch. stark von der im Freifeld abwei- chen. Außer der Sendeleistung Nach dem Neustart können Sie das und den Empfangseigenschaften Gerät wieder in Ihr Homematic IP Sys- der Empfänger spielen Umwelt- tem integrieren. einflüsse wie Luftfeuchtigkeit neben baulichen Gegebenheiten vor Ort eine wichtige Rolle. -
Page 12: Entsorgung
EntsHrgung 12 EntsHrgung Entsorgungshinweis Dieses Zeichen bedeutet, dass das Gerät nicht mit dem Hausmüll, der Restmülltonne oder der gelben Tonne bzw. dem gelben Sack entsorgt werden darf. Sie sind verpflichtet, zum Schutz der Gesundheit und der Umwelt das Produkt und alle im Lieferumfang enthaltenen Elektronikteile zur ord- nungsgemäßen Entsorgung bei einer kommunalen Sammelstelle für Elektro-... -
Page 13: Technische Daten
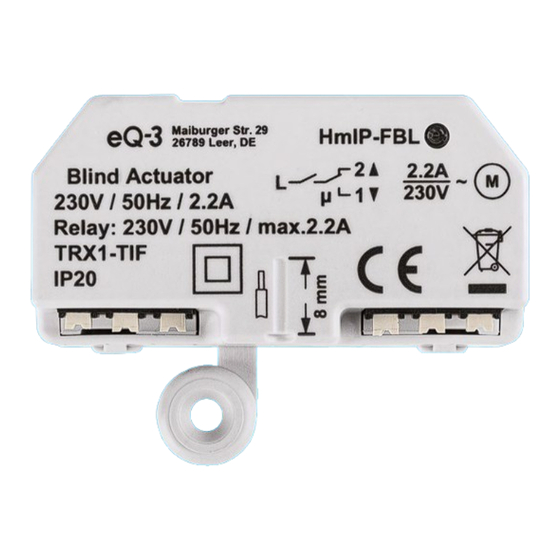
Technische Daten 13 Technische Daten Geräte-Kurzbezeichnung: HmIP-FBL Versorgungsspannung: 230 V/50 Hz Stromaufnahme: 2,2 A max. Leistungsaufnahme Ruhebetrieb: 0,2 W Max. Schaltleistung: 500 VA Lastart: Motorlast Relais: 1x Wechsler/1x Schließer Leitungsart und -querschnitt: starre und flexible Leitung, 0,75-1,5 mm² Installation: nur in Schalterdosen (Gerätedosen) gemäß... - Page 14 Installation and operating manual Taale Hf cHntents Package contents..................15 Information about this manual ..............15 Hazard information ..................15 Homematic IP – Smart living, simply comfortable.......16 Function and device overview ..............17 Start-up ......................17 Installation instructions ..................17 Installation ......................18 6.2.1 Flush-mounting box installation............18 6.2.2 Surface-mounting box installation ..........
-
Page 15: Package Contents
Homematic IP components. Keep the sockets, for example. If you have manual so you can refer to it at a later any doubts, have the device che- date if you need to. -
Page 16: Homematic Ip - Smart Living, Simply Comfortable
Please take the technical data (in particular the maximum permissi- This device is part of the Homematic IP ble switching capacity of the relay smart home system and works with and the type of load to be con- the Homematic IP radio protocol. -
Page 17: Function And Device Overview
FunctiHn and device Hverview 5 FunctiHn and device Hverview The Homematic IP Blind Actuator is suitable for installation with a flush- mounting or surface-mounting box and offers individual control of con- nected AC motors used with blinds, shutters and awnings. Thus, electrically operated window co-... -
Page 18: Installation
tart-um Incorrect installation can put Installation may only take place in • your own life at risk; normal commercial switch boxes (device boxes) in accordance with • and the lives of other users of the DIN 49073-1 or surface-mounting electrical system. boxes in accordance with DIN 60670-1 (e.g. -
Page 19: Surface-Mounting Box Installation
tart-um • Connect an external blind/shutter • Connect the switched phase con- push-button to connecting termi- ductors for connecting terminals 1 nal S1 and S2: and 2 to the motor as follows: - Connecting terminal S1 (G): - Connecting terminal 2 (C): “Up” “Down”... -
Page 20: Pairing
To pair the blind actuator, please pro- ceed as follows: • Open the Homematic IP app on your smartphone. • Select the menu item “Pair device”. • After installation, the pairing mode remains activated for 3 minutes. If the 3 minutes have expired,... -
Page 21: Troubleshooting
1% limit until operating functions via the external this time restriction comes to an end. blind/shutter push-button: Homematic IP devices are designed and produced with 100% conformity to • Short button press button S1 or S2: this regulation. -
Page 22: Error Codes And Flashing Sequences
TrHualeshHHting Error codes and flashing sequences Flashing code Meaning Solution Please wait shortly and Permanent orange ligh- Access Point is starting observe the subsequent ting flashing behaviour. Wait until the connection Connection to the server Fast blue flashing is established and the LED is being established lights permanently blue. -
Page 23: Restore Factory Settings
26789 Leer/Germany declares that the cuit-breaker). Only qualified elec- radio equipment type Homematic IP tricians (to VDE 0100) are permit- HmIP-FBL is in compliance with Direc- ted to carry out work on the 230 V tive 2014/53/EU. The full text of the EU mains. -
Page 24: Disposal
DismHsal 12 DismHsal Instructions for disposal This symbol means that the device must not be disposed of as household waste, general waste, or in a yellow bin or a yellow sack. For the protection of health and the environment, you must take the pro- duct and all electronic parts included in the scope of delivery to a municipal collection point for old electrical and... -
Page 25: Technical Specifications
Technical smecificatiHns 13 Technical smecificatiHns Device short name: HmIP-FBL Supply voltage Plug-in mains adapter (input): 100 V-240 V/50 Hz Power consumption plug-in mains adapter: 2.5 W max. Supply voltage: 5 VDC Current consumption: 500 mA max. Standby power consumption: 1.1 W... - Page 26 Kostenloser Download der Homematic IP App! Free download of the Homematic IP app! Bevollmächtigter des Herstellers: Manufacturer’s authorised representative: eQ-3 AG Maiburger Straße 29 26789 Leer / GERMANY www.eQ-3.de...
Need help?
Do you have a question about the HmIP-FBL and is the answer not in the manual?
Questions and answers