LXE MX1-IS Reference Manual
Intrinsically safe
Hide thumbs
Also See for MX1-IS:
- Reference manual (100 pages) ,
- User manual (54 pages) ,
- User manual (38 pages)
Table of Contents
Advertisement
Quick Links
Download this manual
See also:
User Manual
Advertisement
Table of Contents
Troubleshooting

Related Manuals for LXE MX1-IS


Summary of Contents for LXE MX1-IS
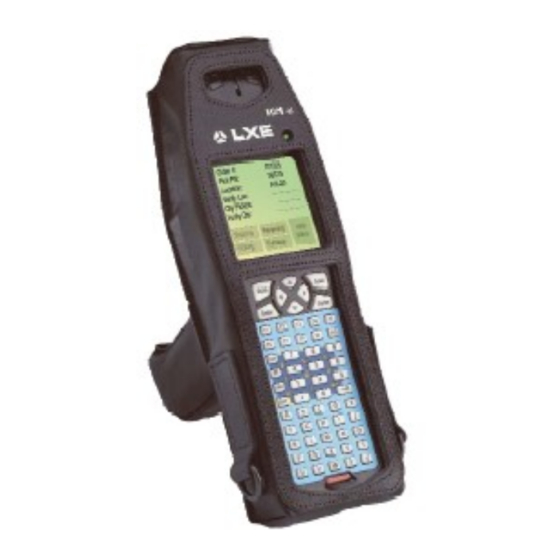
- Page 1 MX1 Intrinsically Safe Reference Guide I-safe rating is voided if the MX1-IS device is opened or modified in the field. Removing any leather covering in an I-safe environment also voids the I-safe rating. Copyright © December 2006 by LXE Inc.
-
Page 2: Revision Notice
While reasonable efforts have been made in the preparation of this document to assure its accuracy, LXE assumes no liability resulting from any errors or omissions in this document, or from the use of the information contained herein. Further, LXE Incorporated, reserves the right to revise this document and to make changes to it from time to time without any obligation to notify any person or organization of such revision or changes. -
Page 3: Table Of Contents
The Protective Case ...5 The Pistol Grip Handle ...5 Insert I-Safe Main Battery Pack ...6 Power On and Off...7 Turn On the MX1-IS ...7 Turn Off the MX1-IS ...7 Troubleshooting ...7 Adjust Display and Volume... 8 Set The Display Contrast ...8 Full Alpha-Numeric ...8... - Page 4 Scanner Endcaps...26 Scanner Endcap LEDs and Beeper...26 Miscellaneous Connectors... 27 Handle Contacts...27 HAPTER OWER UPPLY Introduction ... 29 LXE Docking Cradles and the MX1-IS ... 29 About Lithium-Ion Batteries... 29 Main Battery Pack ... 30 MX1 I-Safe Reference Guide E-EQ-MX1ISRG-F...
- Page 5 Sample CONFIG.SYS File ...42 Radio NET.CFG Files ...43 Lucent Radio NET.CFG File ...43 Proxim Radio NET.CFG File...43 Sample SOCKET.CFG File...44 LXE DOS Terminal Emulations ... 46 Introduction ...46 DOS Terminal Emulation User Defined Stored Forms ...47 Dual Terminal Emulation ...47 TE Selection Menu...47 Exiting Terminal Emulators ...47...
- Page 6 BIOS Setup ... 50 Accessing the BIOS Setup...50 BIOS Setup Default Values by Option...50 Using the Keypad ...51 Main Menu Options...52 Main Menu Parameters ...52 Parameter Changes ...52 Time ... 52 Date... 53 Boot... 53 Setup Msg ... 53 Post Msg ... 54 Summary ...
- Page 7 LXE Diagnostics... 66 Display Utility (DISP35.EXE) ...66 Keyboard Utility (KEY2335.EXE) ...66 Parameter Auto-Detect Utility (PARAM35.EXE) ...67 Set An API Function (SETAPI_4.EXE)...68 The NED ASCII Text Editor... 69 NED Default Hot Keys...70 6 RF N HAPTER ETWORK ONFIGURATION Introduction ... 71 SNMP DOS Agent...
- Page 8 SOCKETS TCP/IP Stack... 77 Introduction ...77 Bootp ...77 DHCP ...77 Setting SOCKETS.CFG Parameters...78 Set IP Address ...78 Set ARP INIT ...78 Set Interface...78 Set Router IP (Gateway only) ...78 Set Domain Name Server ...78 Display IP Address...78 Options ...79 SOCKET.CFG Parameters ...79 domain ...79 iface ...80 interface...80...
- Page 9 Regulatory Classifications ... 116 Environmental Specifications... 116 Display Specifications ... 117 Radio Specifications... 117 PCMCIA 900 MHz Type III (Obsolete)...117 PCMCIA 2.4 GHz Type II – LXE 6500 Series ...117 Revision History... 118 PPENDIX OMMANDS Introduction ... 119 REMDISK, REMSERV, PRINT, SYS.COM and the MX1-IS ... 119 ROM-DOS Commands ...
- Page 10 VER ...140 XCOPY.COM...141 ROM-DOS 6.22 Command Summary... 142 NDEX Illustrations Figure 1-1 The MX1-IS Hand Held Computer...1 Figure 1-2 Components...5 Figure 1-3 Open Battery Door ...6 Figure 1-4 Inserting Battery Pack ...6 Figure 1-5 Location of the Power Button ...7 Figure 1-6 Scanner Endcap...10...
-
Page 11: Chapter 1 Introduction
Terminal Emulator applications (ANSI Plus, LDS Plus, DOS 5250, DOS 3270, TN3270 and TN5250). The heart of the MX1-IS is an Intel® 486 processor that is PC compatible. It features a graphics screen with electroluminescent backlight. The keypad is constructed of a phosphorescent material that needs no backlighting. -
Page 12: When To Use This Guide
Use this reference guide as you would any other source book -- reading portions to learn about the MX1-IS, and then referring to it when you need more information about a particular subject. This guide takes you through all aspects of the installation and configuration of the hand held device. -
Page 13: Document Conventions
Document Conventions This reference guide uses the following document conventions: ALL CAPS Menu|Choice "Quotes" < > ATTENTION Note: CAUTION WARNING DANGER E-EQ-MX1ISRG-F All caps are used to represent disk directories, file names, and application names. Rather than use the phrase "choose the Save command from the File menu", this manual uses the convention "choose File|Save". -
Page 14: Getting Started
Important – LXE manufactures a device physically similar to the MX1 Intrinsically Safe Hand Held Computer (MX1-IS). Do not place MX1-IS Main Battery Packs in any battery charging device not specifically designed for the MX1-IS battery pack. Also, the MX1-IS device is not compatible with the LXE MX1 Main Battery Packs. -
Page 15: Mx1-Is Components
SCAN key on the keypad. With the handle installed the SCAN key on the keypad remains active. The trigger duplicates the operation. The handle is built of a durable and flexible plastic that may detach from the MX1-IS if the unit is dropped. The handle will not detach completely because the protective case is covering the handle. -
Page 16: Insert I-Safe Main Battery Pack
The MX1-IS must be powered off before opening the Battery Door. The MX1-IS battery compartment is located on the lower rear of the computer. Unfasten the protective leather cover. Open the Battery Compartment door by pressing down on the door latch slide tab at the top of the compartment. -
Page 17: Power On And Off
Troubleshooting If the MX1-IS will not turn off , force a Power Off by holding the Power key down for 15 seconds and the MX1-IS will power off. Locate and correct the problem before powering the MX1-IS back on – e.g. very low battery power, radio conflict, unexpected software application result, etc. -
Page 18: Adjust Display And Volume
Adjust Display and Volume Set The Display Contrast Adjusting screen contrast lightens or darkens the characters on the screen to make them visible at a comfortable level. The contrast is incremented or decremented one step each time the contrast key is pressed. Full Alpha-Numeric The full alpha-numeric keypad does not have a contrast key legend. -
Page 19: Set The Beeper Volume
Set The Beeper Volume Note: An application may override the control of the beeper volume. The audible alert or “beeper” volume can be adjusted to a comfortable level for the user. The volume is increased or decreased one step each time the volume key is pressed. Full Alpha-Numeric The full alpha-numeric keypad does not have a Volume key legend. -
Page 20: Intrinsically Safe Endcap
Intrinsically Safe Endcap The MX1-IS can be configured with several different laser scan-range endcaps. Endcaps are mounted on the top of the computer case and contain the beeper and scan engine. The endcap port is designated as COM 1. Read all cautions, warnings and labels before using the scanner. -
Page 21: Data Entry
Align the red beam so that the barcode is centered within the beam. The laser beam must cross the entire barcode. Move the MX1-IS towards or away from the barcode so that the barcode takes up approximately two-thirds the width of the beam. -
Page 22: Getting Help
ServicePass website only. You can get help from LXE by calling the telephone numbers listed on the LXE Manuals CD, in the file titled “Contacting LXE”. This information is also available on the LXE website. -
Page 23: Chapter 2 Physical Description And Layout
Note: The internal components of the MX1-IS are sealed after manufacturer and customer setup. With the exception of the Main Battery Pack, access to the inside of the MX1-IS cannot be accomplished by the user or field support personnel. E-EQ-MX1ISRG-F... -
Page 24: Central Processing Unit
Central Processing Unit The LXE MX1-IS CPU is an Intel AT Compatible Core Logic The LXE MX1-IS utilizes AT-compatible core logic. The MX1-IS supports the following I/O components of the core logic: • One PCMCIA slot (supporting Type I, II or III PCMCIA cards). -
Page 25: Com 1 Port
Note: The internal components of the MX1-IS are sealed after manufacturer and customer setup. With exception of the Main Battery Pack, access to the inside of the MX1-IS cannot be accomplished by the user or field support personnel. The MX1-IS features an internal PCMCIA slot that conforms electrically to PCMCIA 2.1 specifications. -
Page 26: Physical Controls
MX1-IS device, these capabilities are non-powered and non-functional. The Power button is used to turn the MX1-IS on and off or place it into the Suspend state. The button will beep when pressed and beep again every second while it is held down. -
Page 27: Power Status And The Status Led
Power Status and the Status LED The Status LED is located next to the LXE logo on the MX1-IS. The LED changes color and state depending on power status. Status LED Steady Green Blinking Green Steady Red Blinking Red Power Management and the Keypad Status LED is Steady Green. -
Page 28: Suspend State
In the standard MX1, this state allows the user to hot swap the Main Battery Pack (exchanging Main Battery packs without turning the MX1 off first). However, since the MX1-IS does not have a backup battery, hot swapping is not possible. Therefore, this state serves no purpose in the MX1-IS other than telling the software that a shutdown is imminent. -
Page 29: Display
Display The MX1-IS display is a transflective monochrome VGA LCD unit capable of supporting gray scales. The display measures three inches diagonally and provides .33mm dot pitch. It is a 160 x 160 pixel (20 columns by 20 rows) display area. -
Page 30: Display And Display Backlight Timer
Both values can be adjusted using the BIOS Setup. The Display Backlight parameter must be set to Timed to enable the Display Backlight Timer function. Any of the following will wake the display and display backlight: • Display update by host or currently running application on the MX1-IS • Trigger •... -
Page 31: Panning
The display window can only show parts of the virtual screen. The virtual screen is a 25 line x 80 column screen that the host sends to the MX1-IS. The display window is the part of the virtual screen viewed on the MX1-IS. Usually the window is either 10 lines x 20 columns or 20 lines x 20 columns. -
Page 32: Keypads
The keymaps (keypress sequences) are described in Appendix A “Key Maps.” The MX1-IS keypad is an elastomer device that is water and dust resistant and designed for long life in an industrial environment. All keypads are phosphorescent. A phosphorescent keypad does not require a backlight. -
Page 33: Key Functions
ANSI Full Alpha-Numeric Note: The 900MHz radio is obsolete. Terminal emulators requiring 900MHz radios are obsolete as of June 2005 (e.g. 3270 DOS TE, 5250 DOS TE). Key Functions Scan Key Function The Scan key activates the scanner when a scanner endcap is installed and either of the two Scan buttons are pressed. -
Page 34: Arrow / Cursor Key Function
Arrow / Cursor Key Function The arrow keys (also called the cursor movement keys) are used to scroll through the active display or to move the cursor around the screen. 2nd Key Function The 2nd key is used to activate the 2 are yellow characters that represent the 2 second key function. -
Page 35: Spc Key Function
SPC Key Function Note: Numeric-alpha keypad only. SPC is a 2nd function on the full alpha-numeric keypad. The Spc key adds a space to the line of data on the display. This function is similar to a regular keyboard’s Spacebar. Note that the SPC key only stays active for one keystroke. Mode Key Functions CAPS Mode This function is similar to a regular keyboard’s CapsLock key. -
Page 36: Endcaps
See “Integrated Scanner Programming Guide” when setting up scanner parameters for the scanner endcaps. COM1 / COM2 A MX1-IS scanner endcap is COM1. The MX1-IS’s IR Port is COM2 and is inoperable. The COM1 port uses Data Carrier Detect and Ring Indicator as computer wake-up events only. Scanner Endcaps Refer to the MX1-IS User’s Guide and the section titled “Important Safety Instructions... -
Page 37: Miscellaneous Connectors
To ensure proper operation, reboot the MX1-IS after programming Laser Scanner parameters. Miscellaneous Connectors Handle Contacts Two contacts are located on the back of the MX1-IS unit to interface with the handle. E-EQ-MX1ISRG-F Figure 2-8 Handle Contacts MX1 I-Safe Reference Guide... - Page 38 Miscellaneous Connectors MX1 I-Safe Reference Guide E-EQ-MX1ISRG-F...
-
Page 39: Chapter 3 Power Supply
LXE Docking Cradles and the MX1-IS There is no battery charging, IR support or RS-232 capability in the Docking Cradle for the MX1- IS device. MX1 docking cradles will not hold the MX1-IS securely when the MX1-IS is inside the protective leather case. -
Page 40: Main Battery Pack
The main battery pack has a rugged plastic enclosure that is designed to withstand the ordinary rigors of an industrial environment. Exercise care when transporting the battery pack making sure it does not come in contact with excessive heat or any power source other than the MX1-IS MULTI-charger unit. -
Page 41: Low Battery Warning
Battery Maintenance Publication The LXE publication “Getting the Most from Your Batteries” is available on the LXE Manuals CD and is a single-source guide to battery management. The document contains information about battery recharging, conditioning, and other pertinent issues. - Page 42 Handling Batteries Safely MX1 I-Safe Reference Guide E-EQ-MX1ISRG-F...
-
Page 43: Chapter 4 System Configuration
Chapter 4 System Configuration Introduction There are many different aspects to the setup and configuration of the MX1-IS. Many of the setup and configuration settings are dependent upon the optional features, such as hardware and software, installed on the unit. The examples found in this chapter are to be used as samples only, the configuration of your specific MX1-IS computer may vary. -
Page 44: Software Loaded On Drive C
PCMCIA ATA MTD Radio Drivers Only one radio is installed in the MX1-IS at any one time. The radio resident on the MX1-IS determines the radio card drivers (900 MHz or 2.4 GHz) installed in the MX1-IS. MX1 I-Safe Reference Guide... -
Page 45: Directory Listing
For information on enabling/disabling the SNMP Agent, please refer to the “DOS Autoconfigurator Instructions”. For details on Agent operation, please refer to the “SNMP Agent Reference Guide”. Both manuals are available in electronic format on the LXE Manuals CD. Avalanche Please refer to the following section titled “Avalanche”... -
Page 46: Agent
ROM-DOS SYS.COM XCOPY.EXE Note: Files that are loaded on the MX1-IS and NOT USED may be deleted at a later date to increase available disk space. MX1 I-Safe Reference Guide Diagnostic agent. Provides limited access to the LXE Private MIB. -
Page 47: Pcmcia Files
\PCMCIA Files Please refer to Appendix C “Commands” for complete instructions or troubleshooting when using these files. CISDUMP CNFIGNAM.EXE DPMS.EXE PCM.EXE PCM.INI PCMATA.SYS PCMCS95.EXE PCMFDISK.EXE PCMRMAN.SYS PCMSCD.EXE PCMSS.EXE REV.BAT E-EQ-MX1ISRG-F Permits user to list and interpret contents of a PC Card’s Card Information Structure (CIS) for debug use. -
Page 48: Utils
PARAM35.EXE SETAPI_4.EXE REV.BAT Note: Files that are loaded on the MX1-IS and NOT USED may be deleted at a later date to increase available disk space. MX1 I-Safe Reference Guide NOT USED. Battery Discharge Utility. Condition the 50 mAh NiCd Backup Battery mounted on the system board. -
Page 49: Terminal Emulation Directories
Please refer to the specific Terminal Emulation’s reference guide for complete instructions. Batch MX1-IS’s do not have terminal emulation (TE) files and do not have a radio card. When a need exists to convert a batch MX1-IS to a TE unit or a different radio card, contact LXE Customer Services for assistance. -
Page 50: Radio-Specific Subdirectory
Radio-Specific Subdirectory \PCTCP (2.4GHz Radio Specific Files) The PCTCP files are included with MX1-IS’s that have a 2.4 GHz radio installed. DRIVER.1ST IPSTAT.EXE LSL.COM NET.CFG ODIPKT.COM PDTEST.EXE SETHOST.EXE SOCKET.CFG SOCKETP.EXE TCP.EXE WVLAN43.* XPING.EXE LXE 900MHz Radio Files The LXE 900MHz radio files are installed in the Terminal Emulation subdirectories. -
Page 51: Sample Autoexec.bat File
*/ When the computer starts up, the operating system will look in these directories for the files it needs Move DOS pointer to the C drive Move DOS pointer to the LXE Terminal Emulation (e.g. ANSI Plus) subdirectory Load the radio driver... -
Page 52: Sample Config.sys File
Sample CONFIG.SYS File Note: Do not use these examples for your operation as each computer configuration is different. DEVICE=C:\DOS\HIMEM.SYS /TESTMEM:OFF FILES=45 STACKS=9,256 DOS=HIGH,UMB LASTDRIVE=Z Rem Card and Card Socket Services DEVICE=C:\PCMCIA\DPMS.EXE DEVICEHIGH=C:\PCMCIA\CNFIGNAM.EXE /DEFAULT DEVICEHIGH=C:\PCMCIA\PCMSS.EXE DEVICEHIGH=C:\PCMCIA\PCMCS95.EXE DEVICEHIGH=C:\PCMCIA\PCMRMAN.SYS DEVICEHIGH=C:\PCMCIA\PCMSCD.EXE DEVICEHIGH=C:\PCMCIA\PCMATA.SYS NEWFILE=C:\RADIO.SYS MX1 I-Safe Reference Guide Please refer to commercially available ROM-DOS User’s Guides for complete instructions or troubleshooting when using these DOS files. -
Page 53: Radio Net.cfg Files
Radio NET.CFG Files Note: Hex values are indicated with a leading 0x. NET.CFG values do not use the 0x. Note: If the unit is configured to use Avalanche for network settings, manual changes made to NET.CFG and SOCKET.CFG may be overwritten. See Chapter 6 "RF Network Configuration"... -
Page 54: Sample Socket.cfg File
Sample SOCKET.CFG File See Chapter 6, “RF Network Configuration”, for explanations of SOCKET.CFG parameters. Note: If the unit is configured to use Avalanche for network settings, manual changes made to NET.CFG and SOCKET.CFG may be overwritten. Note: The values for some parameters are dependent on the type of radio card installed. Please refer to Chapter 6, “RF Network Configuration”... - Page 55 Installed Software # domain suffix # example lxe.com # Redisplay IP information IP address # options, refer to documentation to change ip ttl 15 tcp mss 1360 tcp window 2920 tcp retry 8 tcp irtt 500ms E-EQ-MX1ISRG-F MX1 I-Safe Reference Guide...
-
Page 56: Lxe Dos Terminal Emulations
Please refer to the system specific terminal emulation reference guide for instruction when using an MX1-IS in a specific TE environment. A list of LXE reference guides is located at the end of Chapter 1 "Introduction" in the section titled “Manuals.” The manuals are in electronic format and contained on the LXE Manuals CD. -
Page 57: Dos Terminal Emulation User Defined Stored Forms
Dual Terminal Emulation Dual TE capabilities requires client devices with at least 8Meg Flash. For more information on items in this section, please refer to the LXE electronic manual titled "DOS Autoconfigurator Instructions" on the LXE Manuals CD. TE Selection Menu The user is presented with the TE Selection Menu listing the available terminal emulators. -
Page 58: Avalanche
Lucent Radio Driver ...L802GD01.01P Upgrading the MX1-IS If an LXE computer does not meet the minimum baselines specified above, it must be manually upgraded to the baseline before it can be used with Avalanche. The older G-Number software should be manually deleted from the LXE computer before the new G-Number is installed. -
Page 59: Agent
\AVA directory. \APPS This directory is used by Avalanche to track the revisions of software on the LXE DOS computer. \APPS\AVAF This directory is used to load updated versions of the enabler. If an updated enabler is located in this directory, it is loaded instead of the original enabler in \AVA. -
Page 60: Bios Setup
Make sure there is a fully charged battery in the MX1-IS before accessing BIOS Setup. Accessing the BIOS Setup When you turn the MX1-IS on the unit will start to boot programs from the Internal Flash Array (IFA). If the Main Menu Setup Msg parameter is toggled On, watch the bootup sequence and when the following is displayed: Press the [F2] key. -
Page 61: Using The Keypad
RAM when Exit With Save is selected and the BIOS setup program closes. Changed parameter values will take effect when the MX1-IS reboots upon exiting BIOS Setup. If the MX1-IS does not automatically reboot upon exit, please reboot the MX1-IS. -
Page 62: Main Menu Options
Settings are saved temporarily as each parameter activity screen is closed. Changes are saved to CMOS RAM when “Save and Exit” is selected and the BIOS Setup program closes. Changed and saved parameter values take effect after the MX1-IS is rebooted. Time Specifies the current system time. -
Page 63: Date
Values: Default: Note: The A: drive is read only when an SRAM card is inserted. The MX1-IS does not recognize a radio card as an SRAM card. When there is no SRAM card installed, drive A: is ignored. Setup Msg Use this option to allow or disallow the display of the message “Press F2 to enter Setup”... -
Page 64: Post Msg
Post Msg Set this parameter to On to stop the boot process if the Power On Self Test (POST) procedure encounters errors. Otherwise, the system continues to attempt to boot despite many startup error messages that display. See “System Testing” for more information on POST messages. Values: Default: A parameter setting of On only affects the following error conditions (messages are displayed) -
Page 65: Summary
Summary This option is used to enable or disable a summary of the system configuration which displays before the operating system starts to load. To speed up booting, this parameter can be set to Off. Values: Default: E-EQ-MX1ISRG-F On, Off MX1 I-Safe Reference Guide... -
Page 66: Advanced Menu Options
Settings are saved temporarily as each parameter activity screen is closed. Changes are saved to CMOS RAM when “Save and Exit” is selected and the BIOS Setup program closes. Changed and saved parameter values take effect after the MX1-IS is rebooted. MX1 I-Safe Reference Guide... -
Page 67: Power Management
This time, by default, is 5 seconds and is the lowest possible value. During this 5 seconds, the radio is polled which is detected by the MX1-IS BIOS as “activity.” As a result, the MX1-IS's Power Management keeps resetting the CPU and Suspend timers. -
Page 68: Custom Setting
When the display timer expires and the display turns off, the Status LED turns steady green. When the display is off, the MX1-IS is still powered on. Trigger presses will initiate activity. Communications through the radio or serial ports will still continue. However, the keypad clears all sticky key modes and icons and a key press functions only as a wakeup event (does not send to the operating system or application). -
Page 69: Suspend
Pressing the Power key once also places the MX1-IS in Suspend Mode. Once in the Suspend state, the Status LED blinks green. Use the Power key to wake the MX1-IS from suspend mode or a touch on an installed touch screen. -
Page 70: Off Timer
Values: Default: The backup battery will continue to operate the MX1-IS, in very low power mode, for the number of minutes set in the Off Timer parameter. When the MX1-IS is in critical suspend mode the main battery icon appears on the screen, all peripherals shut down, the CPU clock is stopped, power is removed from the PCMCIA cards, and the Status LED is blinking red. -
Page 71: Docked Pm
When No Susp is selected and the user presses the Power key, nothing will happen unless the user holds the key down for 4 beeps. In other words, the user cannot suspend the MX1-IS. The user can only turn the MX1-IS off. -
Page 72: Troubleshooting
Troubleshooting The MX1-IS will not turn off -- force the MX1-IS to power off by holding the Power key down for 15 seconds -- the MX1-IS will power off. Locate and correct the problem before powering the MX1-IS back on – e.g. IRQ conflict, very low battery power, radio conflict, unexpected software application result, etc. -
Page 73: Rpt Rate
The MX1-IS does not have an RS-232 port, therefore this parameter setting should always be set to RI. This option is used to configure the serial port COM1. The MX1-IS COM1 port is the endcap port – scanner, and plain. -
Page 74: Exit Menu Options
Press the ESC key or key sequence to go directly to the Exit Menu. As changes are made to Setup values and the values saved, the next time the MX1-IS is turned on or rebooted, those saved values will be in effect. -
Page 75: Chapter 5 Utilities
Introduction Note: Make sure there is a fully charged battery in the MX1-IS before beginning a process described in this chapter. This chapter contains descriptions and instructions for the following MX1-IS resident utilities: LXE Diagnostics Use the utility programs to verify, test and program the MX1-IS: •... -
Page 76: Lxe Diagnostics
LXE Diagnostics Note: Make sure there is a fully charged battery in the MX1-IS before beginning a diagnostic process. The MX1-IS comes equipped with several utility programs. These programs can be run to make adjustments as indicated. DISP35.EXE KEY2335.EXE PARAM35.EXE SETAPI_4.EXE... -
Page 77: Parameter Auto-Detect Utility (Param35.Exe)
PARAM.DAT. The PARAM.DAT file may be renamed and the next time PARAM35.EXE is run, a new PARAM.DAT file will be created. The combined file size is approximately 50K and both files may be deleted from the MX1-IS if more disk space is needed in the unit. Run Parameter Auto-Detect Utility The file must be run from the DOS command line. -
Page 78: Set An Api Function (Setapi_4.Exe)
- (DX) = 16 Bit Register Value (where appropriate) INT 15 Example: Sound Beeper Please refer to the “LXE DOS API Programming Guide” on the LXE Manuals CD or the LXE website for complete information about the MX1-IS Application Programming Interfaces. -
Page 79: The Ned Ascii Text Editor
The NED ASCII Text Editor NED uses the standard Windows interface for cut, copy, and paste operations. Del and Shift+Del both move the selected block to the clipboard. There is no true undo command, but Ctrl+V or Shift+Ins may be used to paste the clipboard contents to the current cursor position. The next section lists all the default shortcut keys. -
Page 80: Ned Default Hot Keys
keystrokes that can be repeated repetitively. Select Record Macro (ALT=), enter the keystrokes, then press ALT= again. The macro sequence can be played by selecting Play Macro or by pressing ALT-. Keyboard bindings are saved in NED.CFG in the same directory as NED.EXE. -
Page 81: Chapter 6 Rf Network Configuration
Introduction Note: The information and programs in this section only pertain to LXE’s 2.4GHz system radios. They do not work with LXE’s 900MHz system radios. Change the 2.4GHz radio parameters by editing the NET.CFG file in the PCTCP directory. This can be done with any ASCII text editor or NED. -
Page 82: Protocol
Protocol Instructs TCP/IP stack to bind to radio driver. WaveLAN_Network_Name Identifies the WaveLAN network the station will connect to. Valid: Default: ANY Note: Setting this value to ANY will enable the station to connect to any IEEE 802.11 network. Note: The string for WaveLAN_Network_Name is case-sensitive. -
Page 83: Transmit_Rate
Transmit_Rate Controls the data rate the WaveLAN card will use. Supported rates depend on the card. If the card does not support the selected rate, the default value of 3 is selected automatically. Valid: Default: 3 Medium_Reservation Enables RTS/CTS communications. Sets the frame length threshold that determines when the station should start using RTS/CTS. -
Page 84: Enable_Encryption
Enable_Encryption Configures whether this station will receive/send encrypted data traffic. When "Y" is chosen, the unit will be able to receive both non-encrypted data and messages encrypted with one of the listed WEP encryption key values (see Transmit_Key_ID). If encryption is enabled (Y) while the card does not support WEP, an error is reported. Valid: Default: N Transmit_Key_ID... -
Page 85: Proxim Parameters
Parameter used to define resources for the LSL.COM file. Any modifications may cause resource conflicts. Protocol Instructs TCP/IP stack to bind to radio driver. Sets the interrupt (IRQ) line to be used. The MX1-IS specific setting is int 5. Default: 5 Port Sets the I/O port address. Use 270 for the MX1-IS. -
Page 86: Inactivity_Min
Inactivity_min Sets the number of minutes of inactivity before the PC card goes to sleep. To minimize draw on the vehicle battery, set this to 0. Valid: Default: 0 Inactivity_sec Sets the number of seconds of inactivity before the PC card goes to sleep. Valid settings are 0 through 55 (values above 5 are rounded to the nearest multiple of 5). -
Page 87: Sockets Tcp/Ip Stack
SOCKETS TCP/IP Stack Introduction SOCKETS.CFG sets the options for SOCKETP.EXE. The section XXX.XXX.XXX.XXX is for this machines IP. The net mask is specified as part of the ip address. In the ip address command an optional /net_bits can be used to indicate the number of bits in the network ID. Bits The network can be subdivided by two for every net bit added. -
Page 88: Setting Sockets.cfg Parameters
Setting SOCKETS.CFG Parameters Set IP Address To enable DHCP set the IP address to 0.0.0.1 IP address XXX.XXX.XXX.XXX/16 where XXX.XXX.XXX.XXX is the IP address 16 indicates the number of bits in the network ID Set ARP INIT Controls whether a DHCP ARP is sent when booting up. ARP INIT GRAT Using this option makes the stack behave the same as before. -
Page 89: Options
Options Refer to documentation to change. ip ttl 15 tcp mss 1460 tcp window 2920 tcp retry 8 tcp irtt 500ms SOCKET.CFG Parameters domain If a host name is not a decimal (dotted) address and it is not found in the HOSTS file and at least one Domain Name Server has been defined, an attempt is made to obtain the address from the defined DNS server(s). -
Page 90: Iface
iface iface is a synonym for the interface command. interface interface informs Sockets of the hardware or software communications interface(s) to be used at the network interface level. At least one network interface is required, and two or more are used in gateway (router) applications. - Page 91 class class specifies how IP datagrams are to be encapsulated in the link level protocol of the interface. Some interfaces offer a choice between classes while others use a fixed class. The following classes are available and are listed with their associated types. Type Class Token...
- Page 92 buflim buflim specifies the maximum number of outgoing datagrams or packets to queue before starting to discard datagrams. This mechanism is used to prevent the memory from filling up when a serial link goes down. bufsize bufsize specifies the size of the ring buffer in bytes to be allocated to the receiver in raw mode. intvec intvec specifies the software interrupt number (vector) in hexadecimal to use for resident packet drivers.
- Page 93 ip displays or sets the values of the options selected when defining the IP (internet protocol) host address of the next interface to be defined. Syntax ip address [hostid [/net_bits] ] ip status ip ttl [number] ip address sets the IP host address of the next interface to be defined. A route is automatically added to each interface for the default or specified net mask for its address.
-
Page 94: Param
If you want to subdivide your network, you can divide it by two for every net bit added. The following table provides information on converting between net bits and net mask. The number of net bits to add when changing a 0 in the net mask to: Net Bits number When number is omitted, ip ttl displays the current value of the time to live parameter. - Page 95 state. If an up-time has never been specified or a value of 0 is specified, the interface will stay in the up state whether valid input is received or not. An interface enters the up state by a Sockets command or when valid input is received on that interface when in the down or query states.
-
Page 96: Route
route route creates an entry in the IP routing table for Sockets to determine where to send data. The Alternative Routing mechanism allows more than one route to be specified to a particular host or network. Failure of one route causes an automatic switch to the next route. Refer also to the ip address command for specifying the net mask, because a route is automatically added to each interface for the default or specified net mask for that address. - Page 97 ifname ifname defines the name used in the interface command for the immediate network on which the data for the designated host must be sent. This is the network level interface to be used by the local host to reach the remote host. gateid gateid parameter specifies the IP address of a host, on the same physical network as the local host, which is used as a gateway or router to a different network.
-
Page 98: Tcp
tcp commands display or set various TCP operating parameters. The TCP configuration commands are put into SOCKET.CFG. Syntax tcp irtt [time] tcp lport [port_number] tcp mss [size] tcp retry [number] tcp rtt [time] tcp smss [size] tcp timemax [time] tcp window [size] Parameters time time is the new time value in seconds, or milliseconds if “ms”... - Page 99 To affect incoming connections, tcp irtt should be executed before the servers are started. Example tcp irtt 120 Sample Output TCP: IRTT 5 ms Retry 6 MSS 1460 SMSS 1460 Window 2920 tcp lport Sub-command tcp lport specifies the local port starting number. When specified without a number the current value of the next free local port number is displayed.
- Page 100 tcp smss sub-command tcp mss displays or sets the TCP send maximum segment size in bytes. When size is not current values of the TCP parameters, including the SMSS, are displayed. A small SMSS causes the remote to reduce its segment size. tcp mss can reduce the MSS and S on bad network connections with high loss rates or where large packets get lost.
-
Page 101: Chapter 7 Troubleshooting
Use the troubleshooting procedures that follow these tips and, if necessary, perform any diagnostic procedures that may apply. LXE technical help telephone numbers and contact information are located in the "Contacting LXE" file on the LXE Manuals CD and on the internet at www.lxe.com "Customer Support". - Page 102 Based on the answers to the previous questions and suggestions, try to narrow the problem down to one of the following areas: • Startup Problems • Hardware Problems - (i.e. power source, battery pack, keypad, display, hard drive, PCMCIA cards, etc.) •...
-
Page 103: Startup Problems
This section lists some of the configuration error messages that may appear at system startup and their possible solutions. Note: If you press the Power key and the MX1-IS remains off, refer to the “Power Source” section of this chapter. Problem MX1-IS computer stops working and locks up each time you start it. -
Page 104: Missing Command.com
COMMAND.COM was copied over the COMMAND.COM version supplied with the MX1-IS. Typically, to recover from this problem, the MX1-IS would be booted from an SRAM DOS boot card. As the internal components are sealed in the MX1-IS, consult LXE Technical Support at this time. -
Page 105: Hardware Problems
The MX1-IS receives power from an internal battery pack. Problem The computer won't start. Power key will not turn the unit If you cannot find the source of the problem, consult LXE Technical Support. Keypad The following table provides solutions to common keypad problems: Problem Get an unexpected character or function when pressing some keys. -
Page 106: Display
Display The Display has Turned Dark or Very Light Full Alpha-Numeric Keypad The full alphanumeric keypad does not have a contrast key legend. Adjust the display contrast by pressing the: • key, then the Shft key then the <C> key to enter Contrast change mode. •... -
Page 107: Hard Disk Drive
If you have problems with the hard disk drive, run the DOS CHKDSK utility. CHKDSK analyzes the directories, files and File Allocation Table (FAT) on the flash disk. If CHKDSK does not report any errors and the hard disk still has problems, contact LXE Technical Support. -
Page 108: Radio Problems
Radio Problems Problem: Solution The 2.4GHz Radios Problem: Solution: The 900MHz Radios Problem: Solution: Note: The 900MHz radio is obsolete. Terminal emulators requiring 900MHz radios are obsolete as of June 2005 (e.g. 3270 DOS TE, 5250 DOS TE). MX1 I-Safe Reference Guide The radio is on, configured properly and still won't transmit or receive data. -
Page 109: Software Related Problems
Some software may require more time than the Video Timer parameter maximum value (15 minutes) to install. In this case, press an arrow key or the spacebar to keep the MX1-IS “awake” until the software installation is complete. • Be sure you have enough memory and hard disk space to handle the software being installed. -
Page 110: Memory
To determine the memory needs of the program and the availability of memory in the MX1-IS, follow these steps: 1. Check the software documentation to see what kind of memory the program can use (conventional, extended or expanded). -
Page 111: System Testing
System Testing Power On Self Test (POST) Each time the MX1-IS is turned on (or is rebooted using <Ctrl> + <Alt> + <Del>), a series of comprehensive hardware tests are performed. These tests are called the Power On Self Test, or POST. -
Page 112: Post Beep Codes
Action Turn the power off, then back on again. If the problem persists, contact LXE Customer Support for repair instruction. POST Beep Codes The system speaker emits a coded beep to alert the user that the system failed the Power On Self Test. -
Page 113: Appendixa Key Maps
The manuals can be viewed on the LXE Manuals CD. Note: LXE offers IBM specific keypads to be used with the LXE 3270 / TN3270 / 5250 / TN5250 terminal emulation software (a graphic description of the keypads is contained in this appendix). - Page 114 To get this result Pause Up Arrow Down Arrow Right Arrow Left Arrow Pan Up Pan Down Pan Right Pan Left Pan Home Insert Delete Home Page Up Page Down NumLock (Toggle) CapsLock (Toggle) Right Shift Right Alt Right Ctrl ScrollLock PrintScrn SysReq...
- Page 115 To get this result E-EQ-MX1ISRG-F Press These Keys and Then Shift Ctrl NumLock Press this key CapsLock off MX1 I-Safe Reference Guide...
- Page 116 To get this result 1 (alpha) 2 (alpha) 3 (alpha) 4 (alpha) 5 (alpha) 6 (alpha) 7 (alpha) 8 (alpha) 9 (alpha) 0 (alpha) DOT (alpha) 1 (numeric) 2 (numeric) 3 (numeric) 4 (numeric) 5 (numeric) 6 (numeric) 7 (numeric) 8 (numeric) 9 (numeric) 0 (numeric)
- Page 117 To get this result Lt Arrow (numeric) Rt Arrow (numeric) Up Arrow (numeric) Dn Arrow (numeric) Insert (numeric) Del (numeric) < > : (colon) ; (semicolon) - (minus sign) _ (underscore) , (comma) ‘ (apostrophe) ~ (tilde) “ & * (asterisk) E-EQ-MX1ISRG-F Press These Keys and Then Shift...
-
Page 118: Ibm 3270 And Tn3270 Terminal Emulator Keypad
IBM 3270 and TN3270 Terminal Emulator Keypad This keypad is designed to allow the user to enter terminal emulator commands when running LXE's IBM 3270 and TN3270 Terminal Emulation (TE) programs. When running these programs on the MX1-IS, please refer to the following terminal emulation reference guides for... -
Page 119: Numeric-Alpha Key Map (41 Key)
TN5250 Terminal Reference Guide Note: The manuals can be viewed on the LXE Manuals CD. Numeric-Alpha Key Map 101-Key Equivalencies for Batch Units When using a sequence of keys that include the A/# key, first press the A/#. When CAPS is On, the CAPS icon is displayed on the screen and alphabetic characters are toggled to uppercase. - Page 120 To get this result A / # Back Tab Space Break Pause Up Arrow Down Arrow Right Arrow Left Arrow Pan Up Pan Down Pan Right Pan Left Pan Home Insert Delete Home Page Up Page Down NumLock CapsLock Right Shift Right Alt Right Ctrl ScrollLock...
- Page 121 To get this result A / # 1 (numeric) 2 (numeric) 3 (numeric) 4 (numeric) 5 (numeric) 6 (numeric) 7 (numeric) 8 (numeric) 9 (numeric) 0 (numeric) 1 (alpha) 2 (alpha) 3 (alpha) 4 (alpha) 5 (alpha) 6 (alpha) 7 (alpha) 8 (alpha) 9 (alpha) 0 (alpha)
- Page 122 To get this result A / # To use lower case letters, both the Alpha icon and the CAPS icon must NOT be displayed on the screen. MX1 I-Safe Reference Guide Press These Keys and then Shift Ctrl NumLock Press this key Minus Sign (alpha) E-EQ-MX1ISRG-F...
- Page 123 To get this result A / # & * (asterisk) + (numeric) - (numeric) * (numeric) / (numeric) DOT (alpha) E-EQ-MX1ISRG-F Press These Keys and then Shift Ctrl NumLock Press this key MX1 I-Safe Reference Guide...
- Page 124 Numeric-Alpha Key Map (41 Key) MX1 I-Safe Reference Guide E-EQ-MX1ISRG-F...
-
Page 125: Appendixb Technical Specifications
157g 1.0 oz 1.6 oz 2.6 oz 3.7 oz 105g Non-Functional. Supports 115k baud (IrDA software restricts to 18.2k baud) Provide electrical contact between the MX1-IS unit and the handle. Installed in every endcap option. Non-Functional. External Battery Charger Contacts... -
Page 126: Regulatory Classifications
Features Dimensions w/Scanner Endcap Batteries Main Regulatory Classifications US Approval Per the Class / Division Classification System, this unit is rated for safe use in the following classified locations: US Approval Per the Class / Zones Classification System, this unit is rated for safe use in the following classified locations: European Approval Australian Approval... -
Page 127: Display Specifications
Radio Frequencies: RF Data Rates: RF Power Output: Channel Spacing: Operating Temperature MX1-IS Storage Temperature MX1-IS Connectivity: PCMCIA 2.4 GHz Type II – LXE 6500 Series Bus Interface: Radio Frequencies: RF Data Rates: RF Power Level: Channels Operating Temperature Storage Temperature... -
Page 128: Revision History
Sockets workstations can be configured in a similar way using the SETHOST utility.” Appendix B – MX1-IS API : Removed. Replaced by standalone user guide : “LXE DOS API Programmer’s Guide” E-SW-DOSAPIPG available on the LXE Manuals CD and the LXE website. -
Page 129: Appendixc Commands
Introduction This appendix describes the Datalight ROM-DOS commands that are loaded in the MX1-IS by LXE. The information in this chapter is taken from Datalight’s “ROM-DOS 6.22 User’s Guide” and is used by permission. Refer to Chapter 4 “System Configuration”, section titled “Directory Listing”, subsections titled “C:\ROOT”... -
Page 130: Ansi.sys
ANSI.SYS Type Installable Device Driver Purpose ANSI.SYS is a console device driver that allows support for ANSI codes on the local display. Syntax Device=ANSI.SYS [options] Remarks ANSI.SYS supports standard ANSI escape sequences. ANSI.SYS writes directly the screen when using text video mode. Options The /K option forces use of the extended keyboard BIOS calls which sense F11 and F12. -
Page 131: Attrib.exe
ATTRIB.EXE Type External Purpose The ATTRIB command either displays or modifies the attribute of a file. Syntax ATTRIB [+ ¦ -][option][filespec] Remarks The file attributes define the characteristics of a file. They determine if a file may be deleted or modified, or if it is archived. -
Page 132: Chkdsk.exe
CHKDSK.EXE Type External Purpose The CHKDSK command checks the disk directories and File Allocation Table (FAT) and displays a disk and memory report. Syntax CHKDSK [d:][path][filespec][/C] [/F] [/V] Remarks CHKDSK examines a disk and determines if the disk has any errors in the File Allocation Table (FAT) and will optionally fix errors. -
Page 133: Command.com
CHKDSK does not wait for a disk to be inserted before the checking is initiated nor does it repair any errors. Examples CHKDSK will check the integrity of drive A. The report will be printed to the console. CHKDSK a: CHKDSK will check the integrity of RAM disk D. -
Page 134: Deltree.exe
recommended only for diskette based systems. ROM-DOS keeps many of its error messages in the resident part of COMMAND.COM rather than using valuable memory to store them. If an error message is needed and you have loaded ROM-DOS from a diskette, the message will only be available if the boot disk is still in the drive. -
Page 135: Format.com
The /4 switch causes the floppy disk to be formatted as a 360KB disk even if the drive is a 1.44MB, 2.88MB, or 1.2MB drive. Note: The MX1-IS does not contain a floppy disk drive. The /7 switch causes the floppy disk to be formatted as a 720KB disk even if the drive is a 1.44MB or 2.88MB drive. - Page 136 If FORMAT encounters an error, the exit code returned to DOS indicates the type of error. The error codes are listed in the following table. Error Level MX1 I-Safe Reference Guide Type of Error No error encountered Invalid drive Unsupported drive format Attempted hard drive format (unsupported) Write-protect error E-EQ-MX1ISRG-F...
-
Page 137: Himem.sys
HIMEM.SYS Installable Device Driver The HIMEM.SYS device driver manages extended memory and the High Memory Area (HMA) in a 286, 386 or greater, or PS/2 systems. HIMEM prevents programs from simultaneously using the same area of memory for two different purposes. HIMEM supports the Extended Memory Specification (XMS) 2.0. -
Page 138: Mem.exe
Note also that some older programs assume that the machine is a 1MB 8086 and so require that the A20 line to be disabled (OFF) while they run. Current programs typically do not require that the A20 line be disabled. Examples Device = HIMEM.SYS Installs the XMS device driver. -
Page 139: Mode.com
MODE.COM External Command The MODE command modifies the operation of the printer, serial port, and active video display. Note: The MX1-IS does not have RS-232 serial port capability. Syntax MODE LPT#[:]=COM#[:] MODE COM#:baud[,parity[,databits[,stopbits[,P]]]] MODE <video mode> MODE <display lines> Remarks The first syntax above redirects line printer output to the serial port. -
Page 140: More.com
Examples MODE COM1:9600,n,8,1 Modifies the settings for the COM1 device to a baud rate of 9600, no parity, eight data bits, and one stop bit. MODE LPT2:=COM2 Redirects the output from LPT2 to the COM2 serial port. All following output to LPT2 actually goes to the COM2 device. -
Page 141: Ned.exe And Ned.cfg
NED.EXE and NED.CFG External Command ASCII text Editor Program The NED editor is a menu-based text editor available for use with ROM-DOS. This editor is similar to other desktop editors but has special functions designed for use in editing C-source and assembly code. - Page 142 ROM-DOS Commands File/Print prints the current block if there is one, otherwise it prints the current file. NED prompts for a device to print to, which may be a filename. Tabs are expanded to spaces. The Options/Do Command is intended primarily for debugging. This command allows you to execute any editor command by choosing it from a menu list.
-
Page 143: Ned Default Hot Keys
NED Default Hot Keys Many of the editor commands can be accessed directly by pressing key combinations. For example, press Alt-X to exit the editor and save any open files. The following table lists the default hot keys. Function Alt-Q Quit without saving Alt-X Exit, saving as needed... -
Page 144: Print.com
PRINT.COM This command will not function on the MX1-IS. External Command The PRINT command prints a single file or a list of files. Syntax PRINT [/drive:] [filename] [/options] Remarks PRINT allows you to enter between one and 32 files for spooling to the printer. The files are output to the device in a spooled manner (while you perform other operations). -
Page 145: Remdisk.exe
Remote Disk Program See Also: REMSERV.EXE REMSERV is usually run on the MX1-IS (host). REMDISK is usually run on the client (e.g. a desktop PC). The remote disk program allows you to access a disk drive on a remote system via a serial cable and standard PC-style (8250UART) serial port. - Page 146 The default is : /B115K+ /COM1 /T3 Option Description Unloads REMDISK from memory, thereby disabling the drive letter and freeing the memory occupied by REMDISK. This option can only be used when REMDISK is installed from the DOS command line. A remote disk installed via CONFIG.SYS cannot be unloaded.
-
Page 147: Remserv.exe
Remote Disk Program See Also: REMDISK.EXE REMSERV is usually run on the MX1-IS (host). REMDISK is usually run on the client (e.g. a desktop PC). The remote disk program allows you to access a disk drive on a remote system via a serial cable and standard PC-style (8250UART) serial port. - Page 148 The default is /B115+ /COM1 /T2 Option Description /Bnnnn Selects the baud rate for transmission. Available baud rates are 300, 1200, 2400, 4800, 9600, 19200, 38400, 57600, and 115000. The default baud rate is 115000. The plus sign (+) after the BAUD specifies packet-style transmission and is recommended for any baud rate over 19200.
-
Page 149: Sys.com
SYS.COM This command will not function on the MX1-IS. External Command The SYS command copies the ROM-DOS system files ROM-DOS.SYS and COMMAND.COM from the disk in the default drive to the disk in the specified drive. The file ROM-DOS.SYS is renamed and stored on the disk as files IBMBIO.COM and IBMDOS.COM, which are stored as... -
Page 150: Ver
Type Internal Purpose Displays the version number of ROM-DOS in use. Allows revision of this version number. Syntax VER [n.nn] [/R] Remarks If a new version number is specified, two digits after the decimal are required. Note that this command revises only the record of the DOS version number; it does not change the actual operating system loaded in the computer. -
Page 151: Xcopy.com
XCOPY.COM External Command The XCOPY command copies multiple files and, optionally, subdirectories from one disk to another. Syntax XCOPY [source] [target] [/options] Remarks Use the XCOPY command to copy multiple files and subdirectories, if they exist. The source and the target parameter are complete drive-path and file-specification descriptions. If you do not specify a path, XCOPY assumes the default path. -
Page 152: Rom-Dos 6.22 Command Summary
International keyboards and code pages require COUNTRY.SYS, DISPLAY.SYS and KEYB.COM. See Chapter 5 "Utilities", section titled "International Language Support." These files are placed on the computer when needed. They are not part of the LXE installed file load. MX1 I-Safe Reference Guide For information on ROM-DOS commands, please refer to a commercially available ROM-DOS user guide. - Page 153 ROM-DOS Command DATE DELTREE.EXE* DEVICE DEVICEHIGH DISPLAY.SYS DOS (ROM-DOS) ECHO EGA/EGA3.CPI ERASE EXIT FCBS FILES FORMAT.COM* GOTO HELP HIMEM.SYS* INCLUDE INSTALL E-EQ-MX1ISRG-F Command Description Type Displays the date from the system’s internal Internal calendar. Allows revision. Internal Deletes specified files. Deletes one or more directory trees or individual External files.
- Page 154 ROM-DOS Command KEYB.COM KEYBOARD/ KEYBRD2.SYS LASTDRIVE LOADHIGH MEM.EXE* MENUCOLOR MENUDEFAULT MENUITEM MKDIR MODE.COM* MORE.COM* MOVE.EXE NED.CFG* NED.EXE* NEWFILE NUMLOCK PATH PAUSE PRINT.COM* PROMPT REMDISK.EXE* MX1 I-Safe Reference Guide Command Description Type Allows altering of the keyboard layout for a External different language or nationality.
- Page 155 ROM-DOS Command REMSERV.EXE* RMDIR (also RM) SHELL SHIFT STACKDEV.SYS STACKS SUBMENU SWITCHES SYS.COM* TIME TYPE UMBLINK.SYS UMBLINK.EXE VER* VERIFY VERSION.SYS XCOPY.COM* E-EQ-MX1ISRG-F Command Description Type A remote disk management program. Usually run Installable on the host. Internal Renames files. Internal Deletes a specified subdirectory.
- Page 156 ROM-DOS 6.22 Command Summary MX1 I-Safe Reference Guide E-EQ-MX1ISRG-F...
-
Page 157: Index
; @ ? ...142 Backup Battery indicator ...19 About Lithium-Ion Batteries...29 Access BIOS Setup...50 AGENT.EXE...49 Aggressive CPU Setting ...57 Allocation units, lost and CHKDSK ...122 Allow Caps Function ...62 Alpha-Numeric Keypad and NumLock...62 ANSI Plus TE ...46 ANSI.SYS ...36, 120 AP_Distance NET.CFG parameter ...72 API Function Utility ...68... - Page 158 Boot Order Verifying...93 BOOTP ...77 BREAK, Internal File ...142 BUFFERS, Internal File ...142 Bypass Configuration Files...93 CALL, Internal File ...142 Caps ...62 CAPS ...19 CFGAGENT.EXE ...49 Channel NET.CFG parameter ...76 Charger Battery Analyzer ...30 CHDIR, Internal File ...142 CHKDSK.EXE ...36, 122 CISDUMP ...37 Clean Scanner Endcap...27...
- Page 159 DOS Menu Internal MENUCOLOR ...144 MENUDEFAULT...144 MENUITEM ...144 SUBMENU ...145 DOS non-functional commands ...119 DOS TE Programs ...46 DPMS.EXE...37 DRIVER.1ST...40 Dual Terminal Emulations...47 ECHO, Internal File...143 EGA/EGA3.CPI, Internal Files ...143 Enable_Encryption NET.CFG parameter ...74 Endcap Scanner...10 Endcaps...10, 26 Enter Data, How To...11 Environmental Specifications ...116 ERASE, Internal File ...143 Error Messages ...93...
- Page 160 Load Previous ...64 LOADHIGH, Internal File ...144 Lost chains...122 Low Battery Warning ...31 Low Main Battery...17 Low Main Battery indicator...19 LSL.COM ...40 LXE and ROM-DOS commands ...119 LXE Customer Support ...102 LXE900SS.EXE ...40 LXE900SS.HEX...40 LXEF.EXE ...35, 38 Mac_optimize NET.CFG parameter ...76 Main Battery is depleted ...17...
- Page 161 NED editor...69, 131 NED.CFG ...36, 144 NED.EXE ...36, 144 NET.CFG...40, 71 NET.CFG Files...43 New Battery...4 NEWFILE, Internal File ...144 Nickel Metal Hydride (NiMH) ...29 Non-System disk or disk error...93 Numeric-Alpha Keypad and NumLock...62 NumLock Alpha-Numeric Keypad ...62 Numeric-Alpha Keypad ...62 NUMLOCK, DOS Command...144 NUMLOCK, Internal File ...144 ODIPKT.COM ...40...
- Page 162 Radio Specifications ...117 RADIO.BAT...35 RADIO.SYS ...35 Range, scanner...10 Real time clock failure...93 Reboot...25 Reboot permission ...63 Receive_All_Multicasts NET.CFG parameter ...73 Regulatory Classifications ...116 REM, Internal File ...144 REMDISK ...135 REMDISK.EXE ...36, 135, 144 REMSERV.EXE...36, 137, 145 REN, Internal File...145 Repair Display ...21 Reset Key Sequence ...25 Restore ...64 Restore BIOS from Flash...64...
- Page 163 Touch ...61 Suspend State...16, 18 Suspend Timer...16 Suspend Timers and CPU and RF Communication...57 SWITCHES, Internal File...145 SYS.COM...36, 139 SYSGROUP.DAT ...35 System Configuration ...33 System Hardware Configuration ...13 System Suspend Timer ...59 Socket parameter...88 TCP.EXE ...40 TE Directories...39 Technical Specifications...115 TELAUNCH.BAT...35 Terminal Emulation Programs...1 Terminal Emulations ...46...
- Page 164 Index MX1 I-Safe Reference Guide E-EQ-MX1ISRG-F...
Need help?
Do you have a question about the MX1-IS and is the answer not in the manual?
Questions and answers