
Related Manuals for NOBOCOOL NTL4S 07


Summary of Contents for NOBOCOOL NTL4S 07
- Page 1 INSTRUCTION MANUAL Nobo NTL Heater with Thermostat Models: NTL4S 07 | NTL4S 10 | NTL4S 12 NTL4S 15 | NTL4S 20 | NTL4S 24 For domestic household use only. 300002200 Issue 2...
-
Page 2: Suitable Applications
IMPORTANT SAFETY ADVICE THESE INSTRUCTIONS SHOULD BE READ CAREFULLY AND RETAINED FOR FUTURE REFERENCE. Note also the information presented on the appliance CAUTION: FAILURE TO FOLLOW THESE INSTRUCTIONS MAY CAUSE INJURY AND/OR DAMAGE AND MAY INVALIDATE YOUR WARRANTY Please read the operating instructions carefully before using your panel heater for the first time and keep them in a safe place. -
Page 3: Child Safety
WARNING - THE SURFACES ON THIS HEATER CAN BE HOT. The heater carries a warning symbol to alert the user to the risk of fire that exists if the heater is accidentally covered. CAUTION - Some parts of this product can become very hot and cause burns. -
Page 4: Operating Warnings
OPERATING WARNINGS IMPORTANT: Remember to observe all safety warnings and precautions when operating the heater on the automatic or timer modes, either attended or unattended since a fire risk exists when the heater is accidentally covered or displaced. CAUTION: Do not use if the heater’s main power lead is damaged. If the supply cord is damaged it must be replaced by the installer or an approved Nobo service partner. -
Page 5: Important Safety Advice
IMPORTANT SAFETY ADVICE Exposed to the Near water If the power cable weather outdoors wires are frayed or cut Where small children No extension leads Where the power may be left or power boards cable may be unattended damaged On a slope or Where there is risk Where it may be uneven surface... - Page 6 Sizing Options WATTAGE PRODUCT CODE DIMENSIONS (MM) WEIGHT (KW) NTL4S 07 0.75 625W x 400H x 55D 3.9kg NTL4S 10 725W x 400H x 55D 4.7kg NTL4S 12 925W x 400H x 55D 5.3kg NTL4S 15 1025W x 400H x 55D 5.8kg...
- Page 7 Installation Parts WARNING - Minimum clearances and IP zone requirements must be adhered to. Do not locate the appliance immediately below or in front of a fixed socket outlet or connection box. WARNING: This heater must not be connected to the electricity supply via an external switching device (such as a timer) or circuit that is regularly switched on and off by the utility supplier.
-
Page 8: Wall Mounted Installation
Wall Mounted Installation MINIMUM CLEARANCE: WALL BRACKET INSTALLATION STEPS: The wall bracket can be used as a Mark the location for the two bottom measuring device for placing the screws (A-A) and fasten the two screws heater on the wall. in the wall. - Page 9 Place the wall bracket onto the bottom Place the heater on the wall screws (A-A). Then fasten the wall bracket bracket (1), secure the tilt strap with the top screws. (2) and click the heater onto the top catches (3). To secure the heater safely Plug the product.
-
Page 10: Portable Installation
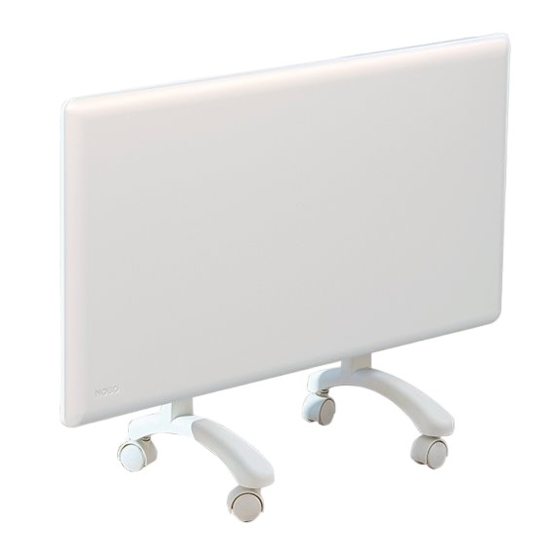
Portable Installation CAUTION: Castors/portable installation is only suited for well insulated spaces or occasional use. A: Ensure the enclosed screw (M3.5x10) is in place on the power supply as shown. Assemble foot onto the frame hole. Align the product with reference to slots provided on frame. -
Page 11: Operation
Operation TURN THE UNIT ON: • Press the On/Off switch to the 'I' position to turn ON. • Press the switch to the '0' position to turn the unit OFF. SET THE TEMPERATURE: Slide the toggle to the desired temparature - see Fig. 1 The yellow indicator light will illuminate - see Fig. -
Page 12: Cleaning And Storage
Cleaning & Storage Over time, dust can accumulate on the heater which can effect performance. It is recommended to clean the unit at least once a month. Turn the unit OFF and disconnect the appliance from the power supply. Remove any dust build up with a soft brush. Wipe the surface of the unit with a soft damp cloth. - Page 14 Customer Care : 1300 556 816 customer.care@glendimplex.com.au www.nobo.com.au Supplied by Glen Dimplex Australia 8 Lakeview Drive, Scoresby, Victoria, 3179 ©Nobo Australia. All rights reserved. Material contained in this publication may not be reproduced in whole or in part, without prior permission in writing of Nobo Australia.
Need help?
Do you have a question about the NTL4S 07 and is the answer not in the manual?
Questions and answers