Advertisement
Table of Contents
- 1 Table of Contents
- 2 Before Installation
- 3 Product Introduction
- 4 Sample Connection
- 5 Installation Tips
- 6 Installation Steps
- 7 First Time Usage
- 8 User Interface
- 9 Replacement of Filter Cartridge
- 10 Filter Replacement Instruction
- 11 Maintenance
- 12 Trouble Shooting
- 13 Frequently Asked Questions
- 14 Limited Product Warranty
- Download this manual
Advertisement
Table of Contents

Subscribe to Our Youtube Channel
Related Manuals for Frizzlife PD800-TAM4


Summary of Contents for Frizzlife PD800-TAM4
- Page 1 OWNER'S MANUAL Model: PD800-TAM4...
-
Page 2: Table Of Contents
CONTENT 1. BEFORE INSTALLATION 2. PRODUCT INTRODUCTION 3. SAMPLE CONNECTION 4. INSTALLATION TIPS 5. INSTALLATION STEPS 6. FIRST TIME USAGE 7. USER INTERFACE 8. REPLACEMENT OF FILTER CARTRIDGE 9. FILTER REPLACEMENT INSTRUCTION 10. MAINTENANCE 11. TROUBLE SHOOTING 12. FREQUENTLY ASKED QUESTIONS 13. -
Page 3: Before Installation
Model: PD800-TAM4 Thank you for purchasing Frizzlife PD800-TAM4 reverse osmosis undersink filter system with 800G RO membrane. If you have any questions or need any assistance, please contact: support@frizzlife.com Find the installation video Scan the QR code to direct to video page Search "Frizzlife PD800-TAM4 installation"... -
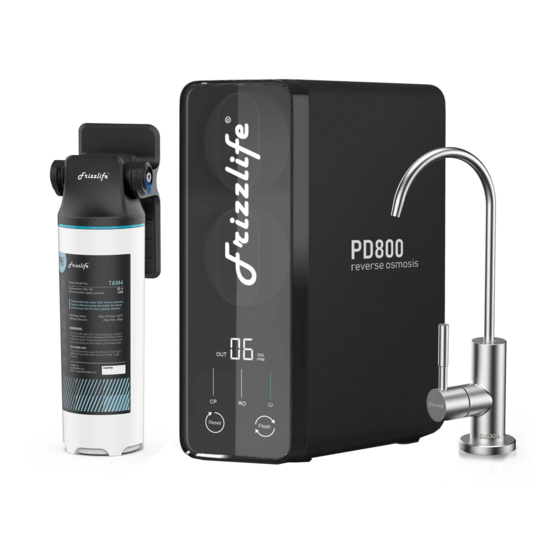
Page 4: Product Introduction
Model: PD800-TAM4 2. Product Introduction Front Back ASR211 (CP filter) PD800-TAM3 ASR212 (RO filter) Power supply OUT TDS Filter life Connect to water supply Flush button Connect to drain pipe Filter life reset Connect to drinking faucet TAM4 Do not use this plug... -
Page 5: Installation Tips
Model: PD800-TAM4 4. Installation Tips How to cut the tubing? Please cut the tubing into two sections in proper length, make sure cut them squarely and cleanly. How to connect/disconnect the tubing? To connect: please push the tubing into the fitting and make sure it is fully inserted. - Page 6 Model: PD800-TAM4 Step 1: Cut and Soften the 3/8" tubing Please cut the 3/8" tubing in proper length, make sure cut them squarely and cleanly. (Fig.1) Put one end of the tubing into boiled water for 5 seconds to soften itself.(Fig.2) Fig.1...
- Page 7 Model: PD800-TAM4 Step 3: Connect the water supply (COLD WATER ONLY) Shut off the water supply. (Fig.7) Disconnect the cold water pipe from angle valve. Twist the feed water valve onto the angle valve and make sure the O ring is loaded.
- Page 8 Model: PD800-TAM4 Step 5: Install the drain saddle Disassemble the drain saddle, and peal off the black sticker and stick to saddle valve (Fig.13) Choose a spot on the drain pipe that is convenient for installing the drain saddle. It is recommended to install the drain saddle on the vertical drain pipe.
- Page 9 Model: PD800-TAM4 Step 7: Connect the "FILTERED" water tubing Cut another 1/4" tubing in proper length. Insert one end into the "Filtered" port on the back of the system and connect the other end to the TAM4 filter.(Fig.20) Fig.20 Note: Please make sure the tubings are fully inserted, otherwise may result in water leakage.
- Page 10 Model: PD800-TAM4 Fig.24 Fig.25 Fig.26 Fig.27 Fig.28 Fig.31 Fig.32 Fig.29 Fig.30 Step 10: Connect the power cord Turn on the angle valve and 3-way feed water valve. Check for leaks. (Fig.33) Insert the DC head of the power adapter into the "POWER" port on the back of the system.
-
Page 11: First Time Usage
Model: PD800-TAM4 6. First time usage The system will automatically flush for 30 seconds after the power supply is plugged Note: For the first time usage,TDS result will not show up until the system has kept producing water for 1 minute. - Page 12 Model: PD800-TAM4 Power-on When the system is powered on, you will hear a beep. All indicators will be on for 3 seconds, and then the system will automatically flush for 30 seconds. After flushing, if there is no water production, it will turn into standby status.
-
Page 13: Replacement Of Filter Cartridge
Model: PD800-TAM4 C. Flushing when constant water production: if the system constantly keeps producing water for 10 minutes, it will be automatically flushed for 15 seconds. Manual flushing When the system is in standby status, press the "Flush" button, the system will start flushing. -
Page 14: Filter Replacement Instruction
Model: PD800-TAM4 9. Filter Replacement Instruction Step 1: Cut off the power and turn on the water faucet to release water pressure Cut off the water supply and power when start to replace the filter. (Fig.38, Fig.39) Remove the front cover (Fig.40) Unscrew the cartridge needs to be replaced counter clockwise.(Fig.41)... -
Page 15: Maintenance
Model: PD800-TAM4 Fig.42 Fig.43 Fig.44 Step 2: Reset the filter lifetime Long press the "Reset" button for 3 seconds, the buzzer will beep and you can start to select the filter you want to change. Press "Reset"button to change between the filters and the selected filter lifetime indicator will flash. -
Page 16: Trouble Shooting
Model: PD800-TAM4 11. Trouble Shooting Possible Cause Fault Solution The system is not connected Please check if the adapter is connected to the power adapter or the properly. connection is loose. No water out Cold water valve, 3-way feed Please open the valves. - Page 17 Model: PD800-TAM4 11. Trouble Shooting Please replace the filter according to the Lifetime of the filter instruction. cartridge is expired. The system has been off Please discharge water for 5 minutes Filtered water work for more than 2 days. before usage.
-
Page 18: Frequently Asked Questions
Model: PD800-TAM4 The system is not connected Please check if the adapter is connected tothe power adapter or the Indicators on properly. connection is loose. user interface disappear The panel is damaged or it’ s Please contact customer service team. -
Page 19: Limited Product Warranty
To be free of defects in material and workmanship by Frizzlife INC, Frizzlife will replace or repair components of the unit that Frizzlife has deemed to be broken within the limits of the warranty without charge. The customer is not responsible for any freight involved with shipping the item back for inspection and shipment of replacement items. - Page 20 Model: PD800-TAM4 1. Frizzlife is not liable for anything that we deem as abuse of the units, including but not limited to, misuse of product outside of intended use, equipment modifications, unauthorized repairs, improper installation, damage from freezing, hot water, fire or other acts of God outside of Frizzlife control.
Need help?
Do you have a question about the PD800-TAM4 and is the answer not in the manual?
Questions and answers