Table of Contents
Advertisement
Quick Links
Advertisement
Table of Contents

Subscribe to Our Youtube Channel
Related Manuals for Endress+Hauser analytikjena multi N/C pharma HT


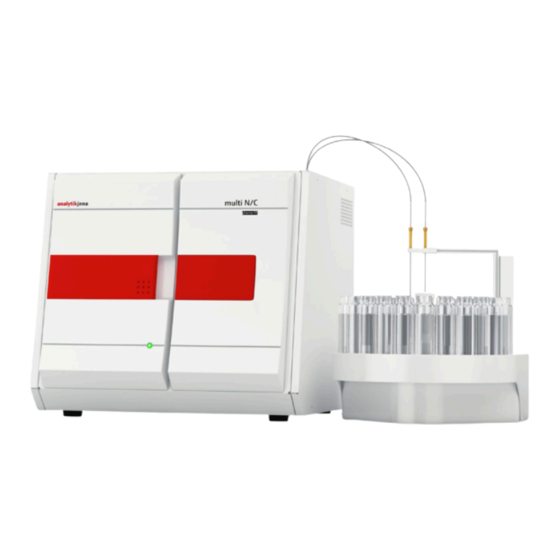
Summary of Contents for Endress+Hauser analytikjena multi N/C pharma HT
- Page 1 Operating Manual multi N/C pharma HT TOC/TN Analyzer...
- Page 2 Analytik Jena AG Manufacturer Konrad-Zuse-Str.1 07745 Jena Germany Phone + 49 3641 / 77 70 + 49 3641 / 77 92 79 Email info@analytik-jena.de Analytik Jena AG Service Konrad-Zuse-Str. 1 07745 Jena Germany Phone + 49 3641 / 77-7407 (Hotline) Email service@analytik-jena.de http://www.analytik-jena.com...
-
Page 3: Table Of Contents
Contents Table of Contents 4.1.5.1 NDIR detector ..........22 Basic Information........1 4.1.5.2 Chemiluminescence detector CLD (optional)23 User manual notes ........1 4.1.6 Indicator and control elements, connections 23 Analyzer area of application ......1 4.1.7 Accessories ..........24 Intended use ..........2 4.1.8 Extension options for the analyzer .... - Page 4 Contents First commissioning ........ 38 Replacing the water traps ......85 Site requirements ........38 Replacing the halogen trap ......86 5.1.1 Installation conditions ........38 Exchanging the catalyst ....... 87 5.1.2 Space requirement ........38 8.5.1 Lifetime of the catalyst ......... 87 5.1.3 Energy supply ..........
- Page 5 Figures Index of Figures Fig. 1 Front view (doors open) ......14 Fig. 29 Electrical connections on the rear of the EPA sampler ..........50 Fig. 2 Lateral view left (side wall removed) ..15 Fig. 30 Transport lock .......... 50 Fig.
-
Page 7: Basic Information
Basic Information Basic Information User manual notes The analyzer multi N/C pharma HT is intended for operation by qualified specialist personnel observing this user manual. The user manual informs about the design and operation of the analyzer and provides per- sonnel familiar with TC/TN analysis the necessary know-how for the safe handling of the equipment and its components. -
Page 8: Intended Use
Basic Information Pharmacy, medicine and biotechnology Water for injection purposes (WFI), aqua purificata water for pharamaceutical purposes must not exceed a TOC limit of 500 µg/l, therefore the TOC content of this water must be con- trolled accordingly. The TOC devices used for this purpose must have a lower detection limit of at least 50 µg/l. - Page 9 Basic Information unauthorized intervention in the equipment operation of the device with faulty safety equipment or improperly fitted safety and protection equipment inadequate monitoring of the equipment components subject to wear use of other than original spare parts, wearing parts or consumables improper repairs ...
-
Page 10: Technical Data
Technical data Technical data General characteristics Designation/type analyzer multi N/C pharma HT Basic device dimensions (W x H x D) 513 x 464 x 550 mm Mass approx. 28 kg Procedural data Digestion principle Thermocatalytic oxidation Digestion temperature up to 950 °C, depending on the catalyst Catalyst −... - Page 11 Technical data Temperature during storage 5 – 55 °C Temperature during operation 10 – 35 °C Humidity during operation max. 90 % at +30 °C Humidity during storage (10 – 30) % (use desiccant) Air pressure 0.7 - 1.06 bar Minimum equipment for the control and analysis unit Operating system: Windows 7 Professional or better...
-
Page 12: Safety Instructions
Safety instructions Safety instructions For your own safety and to ensure error-free and safe operation of the analyzer multi N/C pharma HT, please read this chapter carefully before using the appliance. Observe all safety notes listed in this user manual and all messages and displayed by the control and analysis software on the monitor. -
Page 13: Symbols And Signal Words Used
Safety instructions Chinese directives The analyzer contains regulated substances (according to directive SJ / T 11363-2011). Analytik Jena AG guarantees that these substances will not leak out during the next 25 years if the analyzer is used in accordance with its intended use and thus do not pose a threat to the environment or health within this period. -
Page 14: Technical Condition
Safety instructions Fire, naked flame and smok- Warning against dangerous Warning against hazardous ing prohibited! electrical voltage substances Warning against hot surface Warning against corrosive substances For China: The device contains regulated substances (according to directive SJ / T 11363-2011). Analytik Jena AG guarantees that these substances will not leak out during the next 25 years if the analyzer is used in accordance with its intended use and thus do not pose a threat to the environment or... -
Page 15: Safety Instructions, Transport And Installation
Safety instructions The analyzer may pose dangers if it is not used by trained personnel, improperly or other than intended. Therefore, every person tasked with the operation of the analyzer must have read and un- derstood this user manual and the user manuals of any additional equipment before carrying out the respective tasks. -
Page 16: Safety Instructions - Operation
Safety instructions − The guide values and statutory limits for lifting and carrying loads without auxiliary equipment must be observed and adhered to. Safety instructions - operation 3.7.1 General The operator of the analyzer must make sure before each commissioning that the condition of the analyzers including the safety equipment is sound. -
Page 17: Safety Instructions For Compressed Gas Containers And Systems
Safety instructions Any work on the right-hand side component of the analyzer may only be carried out by the customer service of Analytik Jena AG and specially authorized technicians. The electrical components must be checked regularly by a qualified electrician. Any defects, such as loose connections, faulty or damaged cables, must be repaired without delay. -
Page 18: Safety Instructions - Service And Repair
Safety instructions Auxiliary and operation materials may never be placed in containers or vessels for food. The approved containers for the relevant material are to be used and these have to be labeled accordingly. The notes on the labels have to be observed! ... -
Page 19: Behavior During Emergencies
Safety instructions Behavior during emergencies The analyzer must be switched off from the power switch (on the equipment backplate) and the power supply has to be disconnected from the mains in case of dangerous situations or accidents. Because a rapid response can save lives during an emergency, the following has to be en- sured: The operating staff must be familiar with the location of safety equipment, accident ... -
Page 20: Technical Description
Technical description Technical description System design The analyzer multi N/C pharma HT is a compact laboratory device with permanently installed main components. The complete measuring design further includes accessory parts and reagents which must be connected to the analyzer or made ready prior to a measurement. The control of the analyzer and the analysis of the measurements takes place via the control and analysis software multiWin installed on an external PC. -
Page 21: Components For Sample Preparation
Technical description Gas box Combustion system Condensation coil Fig. 2 Lateral view left (side wall removed) 4.1.1 Components for sample preparation Sample feeding in the analyzer N/C pharma HT takes place via flow injection over a syringe pump with 2-port valve. The injection volume is 50 - 3000 μl. The hose connections are attached to the 2 port valve using Fingertight screw connections. -
Page 22: Hose System
Technical description 4.1.2 Hose system 4.1.2.1 Hose diagram The connection between the individual components is made with labeled hoses. The encir- cled numbers and letters in the hose diagram correspond to the labels on the hoses in the analyzer. Fig. 4 Hose diagram Edition 02.17 multi N/C pharma HT... -
Page 23: 4.1.2.2 Connection Method
Technical description 4.1.2.2 Connection method Within the device most gas connections have been implemented via a FAST connector (FAST – Fast, Save, Tight). These connectors provide a tight transition between the hoses and connections with different diameters. The soft sleeves prevent the risk of glass fractures compared to rigid screw connections. -
Page 24: 4.1.2.4 Hose Pumps
Technical description Fig. 7 Needle valve to adjust the NPOC purging flow (see arrow) 4.1.2.4 Hose pumps Condensate pump Via the condensate pump the condensate or the waste solution from TIC detection are au- tomatically pumped off after each measurement. The condensate pump is located behind the right door next to the halogen trap. -
Page 25: Combustion System
Technical description Fig. 9 Phosphoric acid pump 4.1.3 Combustion system The combustion system is on the rear left side wall of the analyzer. The combustion furnace is a resistance-heated vertical furnace for digestion temperatures up to 950 °C. Optionally a combined combustion furnace for vertical and horizontal operation can be installed (for operation with the swab test module). -
Page 26: Components For Measuring Gas Drying And Cleaning
Technical description 4.1.4 Components for measuring gas drying and cleaning 4.1.4.1 Condensation coil The glass condensation coil is located to the right of the furnace and is attached to the outlet of the combustion tube. The analyte gas is cooled down quickly in the condensation coil and the water vapor con- denses. -
Page 27: 4.1.4.3 Water Traps
Technical description TIC condensate container Connection hose no. 1 / measuring gas supply from the condensa- tion coil Cooling block Connection at the water traps Water traps Connection hose no. AD / phosphoric acid supply Connection hose no. BB / direct sample supply for TIC detection Connection at the condensate pump (waste hose no. -
Page 28: 4.1.4.4 Halogen Trap
Technical description 4.1.4.4 Halogen trap The analyzer multi N/C pharma HT contains a halogen trap (U tube) after the TIC conden- sate container and the water traps for the greatest possible removal of interfering compo- nents in the measuring gas and to protect the detector. The U-tube is filled with special cop- per wool and brass wool. -
Page 29: Chemiluminescence Detector Cld (Optional)23
Technical description 4.1.5.2 Chemiluminescence detector CLD (optional) The extension of the analyzer multi N/C pharma HT with a Chemiluminescence detector enables the TN detection. The CLD must be positioned as an external device adjacent to the multi N/C pharma HT. The measuring gas formed by the thermal oxidation of the sample is dried and then enters the reaction chamber of the Chemiluminescence detector for the TN detection. -
Page 30: Accessories
Technical description Main switch, interfaces, gas connections at the back of the equipment Main switch, mains connection, equipment fuse, media connections (gases and waste) and the interfaces for connecting the PC and the accessories are at the back of the mul- ti N/C pharma HT. -
Page 31: Extension Options For The Analyzer
Technical description 4.1.8 Extension options for the analyzer 4.1.8.1 Sampler Four different autosamplers are available for the analyzer: AS vario with various tray sizes AS 21 for 21 samples AS 10 for 10 samples EPA sampler with piercing function The AS vario and the EPA sampler must be positioned on the right-hand side of the basic device. -
Page 32: Principle Of Operation
Technical description Principle of operation The analyzer multi N/C pharma HT is a compact and powerful device to determine the total carbon content and/or total nitrogen content in aqueous samples. Fig. 19 Principle of operation The digestion is performed in the multi N/C pharma HT by thermocatalytic high-temperature oxidation in the presence of special catalysts. -
Page 33: Measuring Method
Technical description Inorganic carbon is detected by injecting a sample aliquot into the acidic TIC reactor and driving out the formed CO via the NDIR detector. The CO or NO concentration is detected several times every second. An integer over time is calculated from this signal sequence. -
Page 34: Tic Analysis
Technical description The TOC analysis should be used when the sample contains easily purgeable organic sub- stances as benzene, cyclohexane, chloroform, etc. The TOC analysis should not be used when the TIC content of the sample is significantly higher than the TOC content. Parallel to the TOC detection the TN detection is possible. -
Page 35: Tn B -Analysis
Technical description 4.3.6 -Analysis Parallel to all analyses via high temperature incineration, the detection of the total bound nitrogen is possible in the TN analysis. The thermocatalytic oxidation results in nitrogen oxides which can be detected alternatively using an external Chemiluminescence detector (CLD). -
Page 36: 4.5.1.3 Multiple Point Calibration With Constant Sample Volume
Technical description For measurements in the range of low concentrations (< 10 mg/l) the blank value of the preparation water must be taken into account. Especially for measurements in the lower concentration range (< 1 mg/l) a multiple point calibration with variable metering volumes and constant concentration can be used. The syringe pump is highly linear. -
Page 37: 4.5.3.1 Tc/Npoc
Technical description The net integer is the raw integer corrected by the preparation water. The regression type (linear or quadratic) can be defined by the user. It is possible to select individual measuring points or measured values for the calculation of the current calibration (manual outlier selection). -
Page 38: 4.5.3.4 Npoc Plus
Technical description The calibration takes place parallel by default, usually with mixed standards (e.g. car- bonate/hydrocarbonate and potassium hydrogen phthalate or saccharose). The calibration of the TIC and TC channel can also be carried out consecutively with sepa- rate standards. This is often useful if different ranges are to be calibrated for TC and TIC. 4.5.3.4 NPOC plus The method NPOC plus is calibrated the same way as the method TOC(Diff). -
Page 39: Other Calculations
Technical description Standard deviation of the method The standard deviation of the method describes in a unique and general way the quality of the calibration. For the unique evaluation of the quality the standard deviation of the method must be used. Method variation coefficient The variation coefficient of the method (relative standard deviation of the method) should be used for the comparison of different calibrations with different calibration ranges. -
Page 40: System Suitability Test (Sst)
Technical description Outlier selection The control and analysis software multiWin offers the option for an automatic outlier selec- tion. In the method a maximum limit for a variation coefficient or also for a standard deviation can be entered. The minimum number of measurements agreed in the method will be carried out. If the dis- tribution of the measured values is then above the agreed value (SD or VC) additional injec- tions are carried out from the same sample until the specified maximum number of meas- urements has been reached. -
Page 41: Blank Values
Technical description The percentage effectiveness of the system is calculated using the following formula: × 100 (12) E... System efficiency in % TOC of the reference solution (saccharose) TOC of the system suitability solution (p-benzoquinone) TOC the TOC water used (preparation water) The system is suitable if the value derived from the formula above is >... -
Page 42: 4.7.1.3 Eluate Blank Value
Technical description × − × (14) − (15) Dilution blank value … sample volumes Sample … Effective integer … raw integer … Dilution water integer Definition of the dilution: Parts of the primary sample: in the total parts (e. g. 10 parts in 100 parts), i.e. e.g. 10 ml primary sample are diluted with dilution water to a total volume of 100 ml. -
Page 43: Boat Blank Value
Technical description − (18) … Effective integer … raw integer … Eluate blank value 4.7.2 Boat blank value The boat blank value is determined by introducing an empty boat or a boat with additives for the sample into the combustion furnace and analyzing it. The boat blank value can be determined separately and entered in the control and analysis software multiWin. -
Page 44: First Commissioning
First commissioning First commissioning Site requirements 5.1.1 Installation conditions The following requirements are placed on the climatic conditions in the operating room of the analyzer: Temperature range: +10 °C to +35 °C Max. humidity: 90% at 30 °C Air pressure: 0.7 bar to 1.06 bar ... -
Page 45: Energy Supply
First commissioning 5.1.3 Energy supply CAUTION The analyzer multi N/C pharma HT must only be connected to a properly grounded mains outlet in accordance with the voltage specifications on the type plate! The multi N/C pharma HT is operated from the single phase alternating current mains. The installation of the electrical equipment of the laboratory must comply with the standard DIN VDE 0100. -
Page 46: Connecting Add-On Devices
Connecting add-on devices Connecting add-on devices CAUTION Before connecting add-on devices switch off the analyzer. Always connect the add-on devices to the multi N/C pharma HT when it is switched off! Sampler 6.1.1 AS vario autosampler DANGER OF ELECTRIC SHOCK IF TOUCHED! Make sure that no liquid reaches the cable connections or the inside of the equipment or the power supply. -
Page 47: Fig
Connecting add-on devices Connection hose to the analyzer (purging hose for NPOC measurements) Connection hose to the analyzer (sample aspira- tion hose) Cannula holder Autosampler arm Sample tubes Sample tray Sleeve Cannula Fig. 20 Layout of the AS vario autosampler Removing the transport lock The autosampler AS vario has been fitted with a transport safety lock on the bottom of the autosampler. -
Page 48: Fig
Connecting add-on devices Place the autosampler on the side as shown in Fig. 21. Unscrew the screw (2 in Fig. 21) with the Allen wrench (included in the scope of deliv- ery) and remove the red transport lock. For commissioning replace the autosampler on the baseplate. Commissioning the autosampler Switch off the analyzer! Plug cable on the low voltage side of the table power supply included in the delivery into... -
Page 49: As 21 Autosampler
Connecting add-on devices Conical nipple Banjo bolt Hose Fig. 23 Hose in Fingertight connection 11. Attach the sample cover (if present) so that it is positioned in the guide rail. 12. Connect the power supply to the grid. 13. Check the configuration in the multiWin program via the Instrument / System infor- mation menu command in the set-up info window. -
Page 50: Fig. 24 Layout Of The Sampler As 21
Connecting add-on devices Power consumption 30 W Dimensions (WxDxH) 260 mm x 350 mm x 310 mm Mains voltage of external 100 – 240 V, 50 – 60 Hz auto-sensing power supply The sampler is installed on the right side of the analyzer in a holder. The sampler can be populated with 2 cannulas. - Page 51 Connecting add-on devices Plug the grounding conductor into the connection on the rear of the analyzer (6 in Fig. 17 p. 24). Plug cable on the low voltage side of the table power supply included in the delivery into the connection at the bottom of the sampler. Do not yet connect the power supply to the mains.
-
Page 52: As 10 Autosampler
Connecting add-on devices Aspirating cannula Purging cannula Fixing screw on the spacer Spacer Clamping of the aspi- rating cannula Clamping of the purg- ing cannula Cannula holder for "parallel purging" Screw connection of the cannula holder Clip for the attachment of the hoses Screw the cannula holder (7) to the autosampler arm. -
Page 53: Fig. 26 Layout Of The As 10 Autosampler
Connecting add-on devices Technical data Number of samples max. 10 Sample tubes 50 ml Operating voltage 24 V DC via external power supply Power consumption 30 W Grid voltage of external power 100 – 240 V, 50 – 60 Hz auto-sensing supply Dimensions (WxDxH) 160 mm x 130 mm x 300 mm... -
Page 54: Epa Sampler
Connecting add-on devices Secure the cannulas by slightly tightening the screw. Switch on the AS 10 at the On/Off switch. Check the configuration in the multiWin program via the Instrument / System infor- mation menu command in the set-up info window. If necessary, modify the configura- tion: −... -
Page 55: Fig. 27 Epa Sampler
Connecting add-on devices Technical data Number of samples max. 64 Sample tubes 40 ml Operating voltage 24 V DC via external power supply Power consumption 30 W Grid voltage of external power 100 – 240 V, 50 – 60 Hz auto-sensing supply Dimensions (WxDxH) 500 mm x 550 mm x 470 mm... -
Page 56: Fig. 28 Rear Of The Epa Sampler
Connecting add-on devices Stirring arm Autosampler arm Type plate Electrical connections Fig. 28 Rear of the EPA sampler Connection to power supply unit Equipment switch Connection to the analyzer Not used Stirrer connection Fig. 29 Electrical connections on the rear of the EPA sampler Setting up the EPA sampler Remove the transport lock! −... -
Page 57: Fitting The Stirring Arm To The Autosampler
Connecting add-on devices Fit the stirring arm. − Fit the arm to the bracket at the rear end of the sampler arm. − Screw on the arm with the countersunk screws supplied (DIN 7991-M4x10) using the A/F2.5 hexagon head wrench. −... -
Page 58: Hose In Fingertight Connection
Connecting add-on devices For NPOC measurements with parallel For NPOC measurements with non-parallel purging: purging: Insert 1 cannula into each of the two posi- Insert both cannulas into the left position in tions in the cannula holder the cannula holder 11. -
Page 59: Chemiluminescence Detector (Cld)
Connecting add-on devices − Exit multiWin. − In the Windows user interface, start the set-up tool under Start / Program Files / multiWin / multiWin set-up tool. − Select the sampler type in the Sampler list. − Exit the set-up tool with [Create]. −... - Page 60 Connecting add-on devices Technical data Detection principle Chemiluminescence detector Parameter (Total bound nitrogen) Measuring range 0 – 200 mg/l TN Detection limit 0.05 mg/l TN Analysis time 3 – 5 min Gas for ozone generation Oxygen (recommended) or synthetic air, 60 ml/min, 4 – 6 bar Dimensions W x H x D ca.
-
Page 61: Swab Test Module
Connecting add-on devices − In the Detector list select the option CLD. − Exit the set-up tool with [Create]. − Start the multiWin program and select the Configuration / Edit options menu command to open the Options window on the Analyzer components tab. In the Sensors group, activate N-measurement. -
Page 62: Installing The Swab Test Module
Connecting add-on devices Components for sample preparation The furnace lock is mounted on the side opening of the combustion tube. In the integrated swab test module the sample feed is via sample boats. The sample volume is max. 500 mg (dependent on the sample material). - Page 63 Connecting add-on devices To fill rotate the adapter (4) of the combus- tion tube upwards. Insert the quartz wool into the combustion tube, carefully push it down with a glass rod and compact it (2). Carefully fill approx. 60 g CeO (special catalyst multi N/C ) via the adapter into the sleeve of the combustion tube (1).
- Page 64 Connecting add-on devices Installing the swab test module Remove the combustion tube for vertical operation (see section "Removing the com- bustion tube" p. 87). Remove the sealing plug from the horizontal opening of the combustion furnace and place it onto the vertical opening of the com- bustion furnace.
-
Page 65: Operation Of The Swab Test Module
Connecting add-on devices Attach the gas inlet hose to the carrier gas outlet of the gas box by way of FAST con- nectors. 10. Screw the other end of the hose to the end of the swab test module using the Finger- tight connection. - Page 66 Connecting add-on devices Tempering the sample boats IMPORTANT The sample boats might be contaminated. Temper the sample boats prior to analyzing standards and samples. Tempering is performed by an "empty measurement" After tempering do not touch the sample boat by hand any more. Use e.g. a clean petri dish to store the sample boats and a clean pair of tweezers to transport them.
-
Page 67: Maintenance Of The Swab Test Module
Connecting add-on devices 12. After a prompt by the information window insert the sample (in the sample boat) into the furnace lock. − Open the furnace lock. − Insert the sample boats into the furnace lock and hang the eye of the sample boat into the hook of the feeder. -
Page 68: Removal Of The Swab Test Module
Connecting add-on devices Furnace lock Maintenance task Maintenance interval Check for leaks 3 months Replace the sealing ring of the lock as required 6.3.6 Removal of the swab test module CAUTION There is a risk of burning on the combustion furnace! Only remove the combustion tube when the device is cold or allow the device to cool down sufficiently! Before switching off set the furnace temperature in multiWin to 20 °C and exit multiWin. - Page 69 Connecting add-on devices Remove the fork clamp at the spherical joint between the gas transfer hose and the con- densation coil inlet. Release the four knurled head screws at the holding plate and pull the swab test module out of the opening of the combustion fur- nace.
-
Page 70: Operation
Operation Operation General information for the analysis work Observe the following during analysis: To acidify samples only use hydrochloric acid (HCl) p. A. c = 2 mol/l, made from HCl p. A. (conc.) and TOC water. For the TIC determination only 10 % orthophosphoric acid (H ), created from or- ... - Page 71 Operation Position a sample within reach and switch the analyzer on as follows: Open the valve at the pressure reducer of the gas supply. Switch on the PC (PC version only). If applicable, switch on any additional components (see user manual of the respective component): −...
-
Page 72: Carrying Out The Calibration
Operation Carrying out the calibration 7.3.1 Preparing and starting the calibration The control and analysis software multiWin provides the option to adjust the analysis individ- ually to the measuring task by selecting the methods. An ideal measurement with its corre- sponding method requires its own calibration for each analysis parameter and each measur- ing channel. - Page 73 Operation In the input field Number of standards enter the number of calibration points. Select the Analysis parameters of the loaded method to be calibrated. Note: Not all parameters need necessarily be calibrated. For the calibration of the parameter NPOC plus and concentrations > 0.5 mg/l the parameters IC and TC must be activated individually.
-
Page 74: Displaying Calibration Results
Operation Fig. 37 Window Current sample data (with sampler operation) 12. Release the calibration standards in the window Current sample data with and exit the window with the button 13. After opening the window Measurement click on the button [Start F2]. ... -
Page 75: Calibration Window - Data Of New Calibration
Operation Fig. 38 Calibration window - Data of new calibration Tab Calibration results Result table The following are displayed: − number of detections − target concentration used for constant sample volume or sample volume used for constant concentration − average value of the area integers −... -
Page 76: Editing An Existing Calibration
Operation Method characteris- Linearity test: tics The linearity test is carried out if at least four calibration meas- urement points are used for the analysis. An adjustment test according to MANDEL is carried out with a significance level of P = 99 %. The result of the linearity test (OK = correct, FALSE = incorrect) serves as a recommendation for the selection of the regression type;... -
Page 77: Transferring Calibration Parameters To A Method
Operation Fig. 39 Disabling individual measured values of a calibration Enabling/disabling measured values for preparation water The individual values determined for the preparation water can be viewed by clicking on the button [Edit ] and enabled/disabled for the calibration. ... -
Page 78: Window Link To Method
Operation Answer the subsequent query "Link to calibrated method?" − [YES] the link is made with the calibrated method (default) − [NO] the calibration parameters are linked to the selected method Note: The method parameters of the calibration and the selected method are not checked! The user must always decide whether such a procedure can be applied to the concrete analytic objective in hand. -
Page 79: Managing Calibration Data
Operation Three calibra- A maximum of three calibration ranges can be stored for each pa- tion ranges ex- rameter in a method. In this case the ranges can only be replaced. − Delete the range to be replaced in the right-hand columns using the button [Delete]. -
Page 80: Window Calibration Report Selection
Operation − Print calibration graph and/or − print individual integers for each calibrated channel Start the printout with the menu command CalibrationReport / Print. Exporting calibration files Calibration data are exported via the menu Data export in the window Calibration – Cali- bration settings. -
Page 81: Performing Measurements
Operation Performing measurements 7.4.1 Measurement with manual sample supply Carry out a measurement with manual sample supply as follows: Insert the sample intake cannula and the purging cannula into the sample. Using the menu command Method / New create a new method or load an existing method. - Page 82 Operation In the window System state select sample supply with sampler by clicking the button [Sampler]. This is followed by the initialization of the analyzer. In the window System state check the following entries: − Visual bank - OK −...
-
Page 83: Maintenance And Care
Maintenance and care Maintenance and care Maintenance intervals Analyzer Maintenance task Maintenance interval Clean and maintain the device weekly Clean drip tray and reagent bottle weekly and after filling Inspect all hose connections for tight fit weekly Inspect the fastening screws for tight fit monthly Water traps Maintenance task... - Page 84 Maintenance and care Phosphoric acid pump Maintenance task Maintenance interval Check for leaks 3 months Replace porous pump hose as required, but no later than after 12 months Syringe pump Maintenance task Maintenance interval Check for leaks 3 months Clean the dosing syringe as required, but no later than after 12 months IMPORTANT...
-
Page 85: Adjustment And Setup Tasks
Maintenan nce and care Adju ustmen nt and setup t tasks 8.2.1 Gene eral notes s for adju usting th he autos ampler During a adjustment, t the cannulas s to the samp ple tray are a adjusted so t that they are optimally immerse... -
Page 86: Adjustment Points On The Sample Tray
Maintenanc ce and care Increa ase or decrea ase the z val ues until the cannulas ar re positioned d approx. 2 c m above the ad djustment poi ints and click k the [needle e adjust] but tton. Align t the cannulas s with the two o adjustment... -
Page 87: Adjust The Npoc Purge Flow
Maintenance and care Click [Save]. The adjustment values will be taken over. 10. Open the Alignment sampler window again and click the corresponding button to move to the rinse position/position 1 again to check the alignment. Note: Any position on the sample tray can be moved to for checking. 8.2.3 Adjust the NPOC purge flow CAUTION... -
Page 88: Adjusting The Epa Sampler
Maintenance and care For manual sample supply: − Select the purging time in the field Time between 1 and 900 seconds. − Insert the purging hose into the cup filled with ultrapure water for which the purging flow is to be adjusted. Click on the button [Start F2]. - Page 89 Maintenan nce and care For sam mple tubes w ith septum c caps, special sample asp iration purgin ng cannulas with a pierc- ing func ction are requ uired (piercin ng needles w with ventilatio on slot). Install th e holding-do own clamps a and sample aspiratio...
- Page 90 Maintenance and care Adjust position 1. − To adjust the x and y positions, remove the sample tube and move to the posi- tion. Place the stirrer onto the sample tray in this position. If it is at the center of the position, the position is correctly adjusted.
-
Page 91: Replacing The Water Traps
Maintenance and care Replacing the water traps IMPORTANT The water traps (TC Pre-filter and disposable retention filter) can be replaced in the switched-on state but not during a measurement. Always replace both water traps! The water traps only serve their function if they are inserted in the order and installation direction specified! Replace the water traps dependent on the sample matrix, but no later than after 6 months, as follows:... -
Page 92: Replacing The Halogen Trap
Maintenance and care Replacing the halogen trap CAUTION Damage to optical and electronic components (detectors, flow sensors) from aggressive combustion products if the copper wool in the halogen trap is used up! Replace the complete filling of the halogen trap as soon as half of the copper wool is dis- colored black or the brass wool is discolored! The analyzer can remain switched on to replace the used copper and brass wool. -
Page 93: Exchanging The Catalyst
Maintenance and care Exchanging the catalyst 8.5.1 Lifetime of the catalyst If the effectiveness of the catalyst decreases, the combustion tube has to be filled again. A check has to be performed after expiry of the service interval (maximum 1500 injections). The expiry of the maintenance interval is displayed in multiWin by a message. -
Page 94: Filling The Combustion Tube
Maintenance and care Undo the knurled head screw at the holder of the change-over valve. Slide the change-over valve to the right. This pulls the furnace cannula out of the change-over valve. Remove the fork clamp below the combus- tion furnace that connects the outlet of the combustion tube to the condensation coil. - Page 95 Maintenan nce and care Filling g the comb bustion tu ube for con nventiona al samples You can n fixate the co ombustion tu ube on a tripo od for fill- ing. Fill the combust tion tube in a accordance w with the following g instruction...
-
Page 96: Inserting The Combustion Tube
Maintenance and care 8.5.4 Inserting the combustion tube CAUTION Alkaline salts (hand perspiration) cause crystallizations in the quartz glass when heating the combustion furnace which reduce the service life of the combustion tube. Where possible do not touch the cleaned combustions tube with your hands. Wear protec- tive gloves to install the lock on the combustion tube. - Page 97 Maintenance and care Position the ceramic holder in the top open- ing of the combustion furnace. Insert the combustion tube with the furnace head into the combustion furnace. Attach the bottom end of the combustion tube and the inlet of the condensation coil (spherical joint (1)).
-
Page 98: Cleaning The Tic Condensate Vessel
Maintenance and care 13. Replace the top cover. 14. Close the side wall. Connect the grounding conductor connec- tion to the left side wall. First screw the screws into the bottom and then the top side. Tighten the screws in turn. - Page 99 Maintenance and care Remove connection hose to the water cas- cades (1) from TIC condensate container. Remove hose No. 1 AD, BB including the quick release connection from the TIC con- densate vessel. Disconnect the waste hose no. 11 to from the bottom connection on the TIC condensate vessel.
-
Page 100: Removing And Installing The Condensation Coil94
Maintenance and care Removing and installing the condensation coil 8.7.1 Removing and cleaning the condensation coil Remove the condensation coil as follows: Switch the analyzer off on the main switch, pull the mains plug from the mains outlet and disconnect the gas supply. Open the left side wall of the analyzer. -
Page 101: Inserting The Condensation Coil
Maintenance and care 8.7.2 Inserting the condensation coil Insert the condensation coil as follows: Insert the holder for the condensation coil into the clamps on the right-hand side of the furnace (1). Push the FAST connector onto the adapter of the condensation coil. Push hose 1 into the FAST connector. -
Page 102: Cleaning And Replacing The Metering Syringe96
Maintenance and care Close the side wall. Connect the grounding conductor connec- tion to the left side wall. First screw the screws into the bottom and then the top side. Tighten the screws in turn. Switch on the gas supply, insert the mains plug into the power socket and switch on the analyzer on the main switch. -
Page 103: Removing And Replacing The Pump Hose
Maintenance and care Removing and replacing the pump hose CAUTION The pump hose contains phosphoric acid! Phosphoric acid is irritating for eyes, skin and the mucous membrane! Always wear goggles and protective gloves when handling concentrated phosphoric acid! Rinse the affected skin with water immediately. Inspect the pump hoses of the condensate pump and the phosphoric acid pump every 3 months or after every catalyst replacement for leaks. - Page 104 Maintenance and care Position the conveyor belt around the pump body. 10. Press the conveyor belt upwards with one hand and rotate the bracket with the other hand to the right until it engages. 11. Push hose no. 10 and hose no. 11 back onto their adapters.
-
Page 105: Replacing The Hose Connections
Maintenance and care 8.10 Replacing the hose connections Check the hose connections regularly for leaks. Remove and replace faulty hoses and hose connections. Check the system for leaks (see section "Checking the system for tightness" p. 103). The analyzer uses mainly FAST connectors to connect the hoses to the glass components. Use the threading aid to feed think hoses into the FAST connectors. -
Page 106: Removing And Installing The Combustion Furnace
Maintenance and care angled FAST connector hose connection adapter Fig.44 Angled FAST connector with connected hose Fingertight screw connections are e.g. found at the cannula and the syringe pump. When replacing damaged Fingertight screw connections only use straight cut, round and unpinched hose ends for the connection. - Page 107 Maintenance and care Remove the combustion furnace as follows: Switch the analyzer off on the main switch, pull the mains plug from the mains outlet and disconnect the gas supply. Remove the top cover. Open the left side wall of the analyzer. Un- screw the four fastening screws;...
-
Page 108: Installing The Combustion Furnace
Maintenance and care 8.11.2 Installing the combustion furnace Install the combustion furnace as follows: Remove the top cover. Open the left side wall of the analyzer. Un- screw the four fastening screws; the screws are undetachable and remain in the wall. Disconnect the grounding conductor con- nection and put the side wall safely aside. -
Page 109: Checking The System For Tightness
Maintenance and care Push the sample intake hose and the purg- ing hose through the top aperture. Attach the cover. 10. Close the side wall. Connect the grounding conductor connec- tion to the left side wall. First screw the screws into the bottom and then the top side. -
Page 110: Fault Removal
Fault removal Fault removal General information The following chapter describes a number of possible problems that the user can partially remedy independently. If such problems occur frequently, the Service department of Analytik Jena AG must always be informed. As soon as the multi N/C pharma HT is switched on, system monitoring takes place. Any errors occurring are displayed in a window after start-up. -
Page 111: Error Messages In Multiwin
Fault removal Error messages in multiWin Error Error message code VERS Communication error - incorrect command set between PC and device! Cause Remedy − − the internal and external update the internal and external pro- program versions do not gram match VERS1 Communication error - analyzer... - Page 112 Fault removal COM 2 not found COM 3 not found COM 4 not found Cause Remedy − − problems with internal switch analyzer off/on hardware Gas pressure error Cause Remedy − − Counterpressure in the search for and replace component analysis system too great: causing the gas pressure error carrier gas supply is auto-...
- Page 113 Fault removal no connection to optics (NDIR) CRC error optics status error optics optics error; incorrect command return Cause Remedy − − communication error initialize analyzer − − NDIR detector faulty inform Service Optics error, analog values outside of range Cause Remedy −...
- Page 114 Fault removal Wrong rack Cause Remedy − − Wrong sample tray set in Check settings in the software the software (see section 6.1); if necessary, set a different sample tray Unknown sampler command Cause Remedy − − Communication error Contact Service Restart computer in the analysis device Cause Remedy...
- Page 115 Fault removal Syringe pump: valve sluggish Cause Remedy − − syringe pump faulty inform Service − valve broken Syringe pump: pump step not permitted Syringe pump: Invalid command Cause Remedy − − communication error initialize analyzer − − syringe pump faulty inform Service MESSx Analyzer error: MESSx measurement is canceled...
-
Page 116: Status Errors - Indications In The Window System State
Fault removal Status errors – indications in the window System state Note: Status errors are shown in the window System state in red or yellow. Error indication Flow indication MFC: 120 ml/min Flow indication MFM: < 110 ml/min Cause Remedy −... - Page 117 Fault removal − pressure switch in the analyzer has − see gas pressure error (error code 10) tripped - simultaneous error message in on page 106 multiWin "gas pressure error − − MFC faulty inform Service Flow indication MFC: 120 ml/min Flow indication MFM 1: >...
-
Page 118: Equipment Faults And Analytical Problems
Fault removal Equipment faults and analytical problems Other problems not detected by the system monitoring can also occur. Starting a measure- ment is possible. Such errors are usually detected on the basis of implausible measuring results (analytical problems) or are clearly visible in the equipment technology. If the suggested solutions are not successful, inform Service. - Page 119 Fault removal change-over valve – injection cannula change-over valve – TIC condensate vessel Carry-over Cause Remedy − insufficient syringe rinse − rinse the metering syringe with sample before the next injection: under Method / Edit in the tab Method enter 3 for rinse cycles for the first measurement, for all other measurements rinsing is generally not required, enter 0...
- Page 120 Fault removal Unusual peak form (TC and TN -Measurement) Cause Remedy − − Catalyst depleted if low results simultaneously, replace catalyst − unfavorable integration criteria selected − check integration criteria − exceeding the measuring range for TN − Dilute samples measurement with CLD (peak height >...
-
Page 121: Transport And Storage
Transport and storage Transport and storage 10.1 Transport 10.1.1 Preparing the analyzer for transport CAUTION! RISK OF BURNING AT THE HOT FURNACE! There is a risk of burning on the combustion furnace! Only remove the combustion furnace when the device is cold or allow the device to cool down sufficiently! CAUTION! RISK OF INJURY FROM GLASS BREAKAGE! When removing the glass components there is a risk of injury from glass breakage! Re- move all glass components carefully from the analyzer! -
Page 122: Fig.46
Transport and storage Fig.46 Components behind the front door secured for transport Open the left side wall, − Unscrew the four fastening screws; the screws are undetachable and remain in the wall. − Disconnect the grounding conductor connection and put the side wall safely aside. 10. -
Page 123: Transport Notes
Transport and storage − Connect the grounding conductor connection to the side wall. − First screw in the screws at the bottom and then the top side. Tighten the screws in turn. 16. Close the doors of the analyzer. 17. Attach the top cover and secure it with adhesive tape. 18. -
Page 124: Moving The Analyzer In The Laboratory
Transport and storage 10.1.4 Moving the analyzer in the laboratory CAUTION Unintentional dropping of the analyzer poses a risk of injury and the analyzer will be dam- aged! Move the analyzer with great care! 2 persons are required to lift and carry the analyzer! Observe the following when moving the analyzer within the laboratory: ... -
Page 125: Recommissioning After Transport Or Storage119
Transport and storage 10.3 Recommissioning after transport or storage 10.3.1 Assembling the analyzer after transport or storage When positioning the analyzer observe the notes in section "Site requirements" p. 38. Assemble the components of the analyzer as follows: Carefully remove the basic device, accessories and any add-on devices from the transport packaging. -
Page 126: Connecting The Analyzer
Transport and storage 10.3.2 Connecting the analyzer The mains connection and media connections are on the analyzer backplate: Main switch to switch the analyzer on and off Connection of the neutral conductor at the sam- "power switch" pler Holder for mains fuse "FUSE" Waste "waste"... - Page 127 Transport and storage Connecting the gas supply IMPORTANT The operator is responsible for providing the necessary gas connection. Make sure that the preliminary pressure at the pressure reducer is set to between 4 and 6 bar. Make the carrier gas connection as follows: Connect the connection hose supplied to the pressure reducer of the gas supply and the gas connection "O "...
-
Page 128: Disposal
Disposal Disposal 11.1 Waste water ENVIRONMENTAL PROTECTION The neutralized waste must be brought to the appropriate waste disposal center for correct disposal according to the appropriate legal guidelines. Waste water arises during the ongoing analysis operation of the multi N/C pharma HT. This water contains hydrochloric acid, diluted phosphoric acid and sample, depending on the measurement mode.
Need help?
Do you have a question about the analytikjena multi N/C pharma HT and is the answer not in the manual?
Questions and answers