Table of Contents
Advertisement
Available languages
Available languages
Quick Links
Advertisement
Table of Contents

Related Manuals for STIEBEL ELTRON AWG 315 GL


Summary of Contents for STIEBEL ELTRON AWG 315 GL
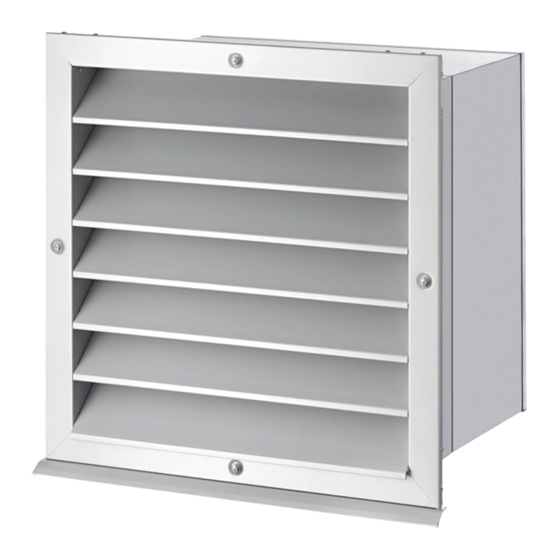
- Page 1 INSTALLATION INSTALLAZIONE Wanddurchführung | Wall outlet | Traversée murale | Passaggio nella parete | Væggennemføring » AWG 315 GL » AWG 315 SR » AWG 315 L » AWG 560 H-GL » AWG 560 H-SR » AWG 560 V-GL » AWG 560 V-SR » AWG 560 L » AWG 600 L...
-
Page 2: Allgemeine Hinweise
Tieren verhindern soll. f Dieses Symbol zeigt Ihnen, dass Sie etwas tun müssen. Die erforderlichen Handlungen werden Schritt für Schritt Lieferumfang beschrieben. AWG 315 GL / AWG 315 SR Zugehöriges Produkt Dieses Dokument beschreibt die montage folgender Wand- durchführungen: Wanddurchführung... -
Page 3: Installation
- vier Schrauben (m5 x 10) zur Befestigung des Wetter- schutzgitters am einschub - Wärmedämmband - Bauschutzdeckel (in der Wanddurchführung eingesetzt) - zwei Tropfschutzkappen (nicht für AWG L) AWG 315 GL, AWG 315 SR, AWG 315 L, AWG 600 L: - zweiteilige montagehilfe AWG 560 H-GL, AWG 560 H-SR, AWG 560 V-GL, AWG 560 V-SR, AWG 560 L: - dreiteilige montagehilfe 3.2 Zubehör... - Page 4 4.2 Wanddurchführung einbauen f Stellen Sie eine Öffnung in der Wand her (siehe „Techni- sche Daten“). AWG 315 GL / AWG 315 SR / AWG 315 L / AWG 600 L 4.3 Isolierung kürzen AWG 560 H-GL / AWG 560 H-SR / AWG 560 V-GL / Je nach Dicke der Gebäudehülle müssen die in der Wanddurch- AWG 560 V-SR / AWG 560 L...
- Page 5 INSTALLATION mONTAGe 4.4.1 AWG 315 GL / AWG 315 SR / AWG 315 L : Isoliermat- AWG 315 L / AWG 560 L / AWG 600 L te einkleben 1 Rückseite der Wanddurchführung 1 Schraube 4,2 x 32 2 Isoliermatte, die Sie auf den Boden der Wanddurchfüh- 2 Schraube m5 x 10...
-
Page 6: Luftschlauch Anschließen
INSTALLATION mONTAGe 4.6 Luftschlauch anschließen f AWG 560 H-GL, AWG 560 H-SR, AWG 560 V-GL, AWG 560 V-SR, AWG 560 L: Passen Sie die Form des Schlauches an den ovalen Anschluss-Stutzen der Wand- durchführung an. f Das Schlauchschellen-Schloss ist auf dem Schlauchschel- len-Band vormontiert. f Schieben Sie das freie ende des Schlauchschellen-Bandes in das Schlauchschellen-Schloss. -
Page 7: Technische Daten
Spannen Sie die Schlauchschelle, indem Sie mit einem Schraubendreher die Schraube des Schlauchschel- len-Schlosses im Uhrzeigersinn drehen. 5. Technische Daten 5.1.6 AWG 600 L Maße 5.1.1 AWG 315 GL/ AWG 315 SR 5.1.2 AWG 560 H-GL / AWG 560 H-SR 5.1.3 AWG 560 V-GL / AWG 560 V-SR AWG 315-600... - Page 8 INSTALLATION TecHNIScHe DATeN 5.2 Datentabelle 5.3 AWG L: Mindestmaße des Kellerschachtes AWG 315 GL AWG 560 AWG 560 V-GL H-GL 232955 232956 232957 Höhe Breite Tiefe Gewicht Wandstärke 280 - 500 280 - 500 280 - 500 Druckverlust Fortluft bei 1000 m³/h Druckverlust Außen-...
-
Page 9: General Information
This symbol indicates that you have to do something. The action you need to take is described step by step. Standard delivery Relevant product AWG 315 GL / AWG 315 SR This document describes the installation of the following wall outlets: Wall outlet... - Page 10 - Four screws (m5 x 10) for securing the weather grille to the insert - Installation aid: Two sections for AWG 315 GL, AWG 315 SR, AWG 315 L and AWG 600 L; three sections for AWG 560 H-GL, AWG 560 H-SR, AWG 560 V-GL, AWG 560 V-SR and AWG 560 L...
- Page 11 4.2 Fitting the wall outlet f make an opening in the wall (see "Specification") AWG 315 GL / AWG 315 SR / AWG 315 L / AWG 600 L 4.3 Trimming the insulation AWG 560 H-GL / AWG 560 H-SR / AWG 560 V-GL / Depending on the thickness of the building envelope, the in- AWG 560 V-SR / AWG 560 L...
- Page 12 INSTALLATION mounting 4.4.1 AWG 315 GL / AWG 315 SR / AWG 315 L: Affixing the AWG 315 L / AWG 560 L / AWG 600 L insulating mat 1 Screw 4.2 x 32 1 Rear of the wall outlet 2 Screw m5 x 10...
- Page 13 INSTALLATION mounting f The hose clip closure is pre-fitted to the hose clip band. f Push the free end of the hose clip band into the hose clip closure. f For the sound optimised hoses (LSWP 315-4 S, LSWP 560-4 S), use the self adhesive thermal insulation pro- vided to seal the transition from the hose sleeve to the connection.
-
Page 14: Specification
INSTALLATION Specification 5. Specification 5.1.6 AWG 600 L Dimensions 5.1.1 AWG 315 GL/ AWG 315 SR 5.2 Data table AWG 315 GL AWG 560 AWG 560 5.1.2 AWG 560 H-GL / AWG 560 H-SR H-GL V-GL 232955 232956 232957 Height Width Depth... - Page 15 INSTALLATION Specification 5.3 Minimum dimensions of the cellar duct (only for AWG L) AWG 315 L AWG 560 L AWG 600 L Width 1000 Depth Note In exceptional cases, the wall outlet can also be in- stalled in light wells with a depth of 400 mm. f Please note that the smaller the light well, the greater the noise emissions will be.
-
Page 16: Remarques Générales
à empêcher aux animaux d'y rentrer. nécessaires sont décrites étape par étape. Fourniture Produit correspondant ce document décrit la pose des traversées murales suivantes : AWG 315 GL / AWG 315 SR Traversée murale Réf. commande AWG 315 L 231039... - Page 17 - quatre vis (m5 x 10) pour fixer la grille de protection contre les intempéries sur l’élément à insérer - auxiliaire de montage : en deux parties pour AWG 315 GL, AWG 315 SR, AWG 315 L et AWG 600 L, en trois parties pour AWG 560 H-GL, AWG 560 H-SR, AWG 560 V-GL, AWG 560 V-SR et AWG 560 L...
- Page 18 Les étapes de travail suivantes sont effectuées une fois techniques «). que le mur extérieur du bâtiment est terminé, crépi appliqué et clins posés. AWG 315 GL / AWG 315 SR / AWG 315 L / AWG 600 L AWG 560 H-GL / AWG 560 H-SR / AWG 560 V-GL / AWG 560 V-SR / AWG 560 L 4.3 Raccourcissement de l'isolant en fonction de l'épaisseur de l'enveloppe du bâtiment, il peut...
- Page 19 INSTALLATION mONTAGe 4.4.1 AWG 315 GL / AWG 315 SR / AWG 315 L: Collage du AWG 315 L / AWG 560 L / AWG 600 L tapis isolant 1 Face arrière de la traversée murale 1 Vis 4,2 x 32 2 Tapis isolant à coller sur le fond de la traversée murale 2 Vis m5 x 10...
- Page 20 INSTALLATION mONTAGe 4.6 Raccordement de la gaine d’air f AWG 560 H-GL, AWG 560 H-SR, AWG 560 V-GL, AWG 560 V-SR, AWG 560 L: ajustez la forme du flexible au manchon de raccordement ovale de la traversée murale. f La fermeture du collier de serrage est prémontée sur le ruban de collier de serrage.
-
Page 21: Caractéristiques Techniques
à l’aide d’un tournevis. 5. Caractéristiques techniques Cotes 5.1.1 AWG 315 GL / AWG 315 SR 5.1.5 AWG 560 L 5.1.2 AWG 560 H-GL / AWG 560 H-SR 5.1.6 AWG 600 L AWG 315-600... - Page 22 INSTALLATION cARAcTéRISTIqUeS TecHNIqUeS 5.2 Tableau de données 5.3 Cotes minimales du soupirail (uniquement pour AWG L) AWG 315 GL AWG 560 H-GL AWG 560 V-GL 232955 232956 232957 Hauteur Largeur Profondeur Poids épaisseur de paroi mm 280 - 500 280 - 500...
-
Page 23: Installazione
AWG 315 L 231039 AWG 560 L 231041 Contenuto della fornitura AWG 600 L 231044 AWG 315 GL 232955 AWG 315 GL / AWG 315 SR AWG 560 H-GL 232956 AWG 560 V-GL 232957 AWG 315 SR 233836 AWG 560 H-SR 233837... - Page 24 INSTALLAZIONe montaggio AWG 560 V-GL / AWG 560 V-SR AWG 600 L 1 Griglia per la protezione da piccoli animali 1 Griglia di protezione meteo 2 Inserto 2 Inserto 3 Passaggio nella parete 3 Passaggio nella parete 4 Fascetta con morsetto serramanicotto 4 Fascetta con morsetto serramanicotto Inoltre sono contenuti nella fornitura: AWG 315 L...
- Page 25 4.2 Montaggio del passante per parete f creare un'apertura nella parete (vedere "Dati tecnici"). AWG 315 GL / AWG 315 SR / AWG 315 L / AWG 600 L 4.3 Accorciare l'isolamento AWG 560 H-GL / AWG 560 H-SR / AWG 560 V-GL / AWG 560 V-SR / AWG 560 L...
- Page 26 INSTALLAZIONe montaggio 4.4.1 AWG 315 GL / AWG 315 SR / AWG 315 L: Incollaggio AWG 315 L / AWG 560 L / AWG 600 L del feltro isolante 1 Vite 4,2 x 32 2 Vite m5 x 10 1 Retro del passante nella parete...
- Page 27 INSTALLAZIONe montaggio 4.6 Attacco del tubo flessibile dell'aria f AWG 560 H-GL, AWG 560 H-SR, AWG 560 V-GL, AWG 560 V-SR, AWG 560 L: Adattare la forma del tubo al raccordo ovale del passante per parete. f Il morsetto serramanicotto è già montato sulla fascetta. f Spingere l‘estremità libera della fascetta stringitubo nel morsetto serramanicotto.
-
Page 28: Dati Tecnici
Stringere la fascetta girando con un cacciavite la vite del morsetto serramanicotto in senso orario. 5. Dati tecnici Misure 5.1.6 AWG 600 L 5.1.1 AWG 315 GL/ AWG 315 SR 5.1.2 AWG 560 H-GL / AWG 560 H-SR 5.1.3 AWG 560 V-GL / AWG 560 V-SR 28 | AWG 315-600... - Page 29 INSTALLAZIONe Dati tecnici 5.2 Tabella dati 5.3 Misure minime dello scantinato (solo per AWG L) AWG 315 GL AWG 560 H-GL AWG 560 V-GL 232955 232956 232957 Altezza Larghezza Profondità Peso Spessore della pa- 280 - 500 280 - 500...
-
Page 30: Generel Vejledning
Dette symbol gør opmærksom på, at du skal gøre noget. Leveringsomfang De nødvendige handlinger beskrives trin for trin. Tilhørende produkt AWG 315 GL / AWG 315 SR Dette dokument beskriver montagen af følgende væggen- nemføringer: Væggennemføring Bestillingsnummer... - Page 31 - fire skruer (m5 x 10) til fastgørelse af vejrgitteret på indskuddet - montagehjælp: todelt ved AWG 315 GL, AWG 315 SR, AWG 315 L og AWG 600 L, tredelt ved AWG 560 H-GL, AWG 560 H-SR, AWG 560 V-GL, AWG 560 V-SR og AWG 560 L - Varmeisoleringsbånd - Bygningsbeskyttelsesdæksel (indsat i væggennemføringen)
- Page 32 AWG 315 og 600) skal være afpasset efter bygningens in- derside. Vi anbefaler, at væggennemføringen indbygges såle- 4.4.1 AWG 315 GL / AWG 315 SR / AWG 315 L: Fastlimning des, at den slutter i niveau med bygningens inderside.
- Page 33 Fugen mellem indskubbet og den fastlimede isolerings- måtte tætnes, fx med silikone. 4.4.2 Indskubbet fastgøres AWG 315 GL / AWG 315 SR / AWG 560 H-GL / AWG 560 H-SR / AWG 560 V-GL / AWG 560 V-SR f Tætn spalten mellem bygningens væg og vejrbeskyttel- sesgitteret hele vejen rundt.
-
Page 34: Tekniske Data
Træk ved lydoptimerede slanger (LSWP 315-4 S, LSWP 560-4 S) folien over tilslutningen. Mål 5.1.1 AWG 315 GL/ AWG 315 SR 5.1.2 AWG 560 H-GL / AWG 560 H-SR f Ved de lydoptimerede slanger (LSWP 315-4 S, LSWP 560-4 S) tætner man med den medfølgende selvklæ- bende varmeisoleringstape overgangen mellem folien og tilslutningen. - Page 35 INSTALLATION Tekniske data 5.1.3 AWG 560 V-GL / AWG 560 V-SR AWG 315 AWG 560 AWG 560 H-GL V-GL Gennemgangsåbning min 450x450 830x430 430x830 max luftmængde m³/t 1300 3500 3500 Farve RAL 9006 RAL 9006 RAL 9006 AWG 315 AWG 560 AWG 560 H-SR V-SR...
- Page 36 STIEBEL ELTRON GmbH & Co. KG tecalor GmbH Dr.-Stiebel-Str. 33 | 37603 Holzminden Lüchtringer Weg 3 | 37603 Holzminden Tel. 05531 702-0 | Fax 05531 702-480 Tel. 05531 99068-95700 | Fax 05531 99068-95712 info@stiebel-eltron.de info@tecalor.de www.stiebel-eltron.de www.tecalor.de 4 < A M H C M N = j b c e b g >...
Need help?
Do you have a question about the AWG 315 GL and is the answer not in the manual?
Questions and answers