Table of Contents
Advertisement
Advertisement
Table of Contents

Related Manuals for Thermo Scientific Evolution 300


Summary of Contents for Thermo Scientific Evolution 300
- Page 1 Evolution™ 300 and Evolution 600 User Guide...
- Page 2 The information in this publication is provided for reference only. All information contained in this publication is believed to be correct and complete. Thermo Fisher Scientific shall not be liable for errors contained herein nor for incidental or consequential damages in connection with the furnishing, performance or use of this material. All product specifications, as well as the information contained in this publication, are subject to change without notice.
-
Page 3: Table Of Contents
Text entry .................... 37 Editing numeric fields................38 Pop-up menus..................39 File operation..................39 Scan application................... 41 Fixed application.................. 45 Quantitation application..............48 Kinetics application................50 Multicomponent application ............... 54 Thermo Fisher Scientific Evolution 300 and Evolution 600 User Guide... - Page 4 Routine maintenance ................75 Cleaning instrument exterior..............75 Internal printer..................76 Light sources (Evolution 600 only) ............78 Deuterium lamp ..................80 Tungsten-halogen lamp ...............81 Mercury lamp (Evolution 300 and Evolution 600) ......82 Evolution 300 and Evolution 600 User Guide Thermo Fisher Scientific...
-
Page 5: Introduction
Congratulations on your purchase of an Evolution™ 300 or Evolution 600 spectrophotometer! Our spectrophotometers integrate advanced hardware features with the power and flexibility of a wide range of Smart Accessories™. Thermo Fisher Scientific Evolution 300 and Evolution 600 User Guide... -
Page 6: Conventions Used In This Manual
Indicates a hazardous situation which, if not avoided, could result in death or serious injury. Danger Indicates a hazardous situation which, if not avoided, will result in death or serious injury. Evolution 300 and Evolution 600 User Guide Thermo Fisher Scientific... -
Page 7: Questions Or Concerns
Thermo Fisher Scientific Evolution 300 and Evolution 600 User Guide... -
Page 8: Spectrophotometer Basics
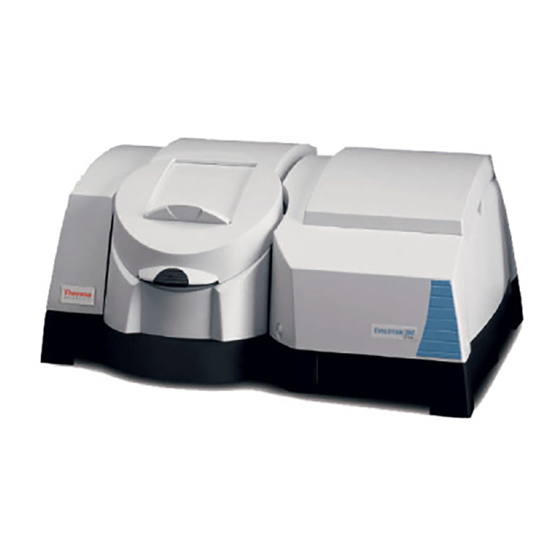
Evolution spectrophotometer. (Some components may not be present on your spectrophotometer.) Contrast LCD screen Optional printer Keypad Floppy disk drive Sliding door Port for optional power supply Sample compartment Evolution 300 and Evolution 600 User Guide Thermo Fisher Scientific... -
Page 9: Connectors
Use to connect an external TTL (or contact closure) trigger. Accy Use to connect an external accessory. RS232 Use to connect a computer with an RS232 interface. Ext Display Use to connect to a computer monitor. Thermo Fisher Scientific Evolution 300 and Evolution 600 User Guide... - Page 10 Inside sample compartment The following illustrations show the locations of the connectors inside the sample compartment. Evolution 300 Reference connector Sample connector Evolution 300 and Evolution 600 User Guide Thermo Fisher Scientific...
- Page 11 Evolution 600 Reference connector Accessory/detector connector Sample connector Accessory/detector connector Thermo Fisher Scientific Evolution 300 and Evolution 600 User Guide...
-
Page 12: Accessories
Complete descriptions and operating instructions are included with the accessories. Manual accessories The Evolution 300 and the Evolution 600 are supplied with two standard rectangular cell holders. All manual accessories are installed and removed as follows: Manual accessories are mounted on a common baseplate. -
Page 13: Installation
For removal of the accessory: • Grip the accessory through the finger hole in the accessory and pull it upwards. • For accessories with no finger hole, grip the accessory using the handles. Thermo Fisher Scientific Evolution 300 and Evolution 600 User Guide... -
Page 14: Standard Rectangular Cell Holder
2. Access the white light function in the operating software. Local Control– From the Main Menu page, select Utilities, then press the White Light function key on the Utilities page. VISION – Select Command > White Light. Evolution 300 and Evolution 600 User Guide Thermo Fisher Scientific... - Page 15 When you have finished aligning the accessory in the beam, exit White Light mode by pressing White Light Off. This returns the monochromator to its normal position ready to continue taking measurements. Thermo Fisher Scientific Evolution 300 and Evolution 600 User Guide...
-
Page 16: Long Pathlength Rectangular Cell Holder
Turn the knob until the space is longer than the pathlength required, insert the cell and reduce the space until the cell is held securely. Notice Do not overtighten. Evolution 300 and Evolution 600 User Guide Thermo Fisher Scientific... -
Page 17: Cylindrical Cell Holder
A tubing kit for Evolution thermostatted accessories is available for use with the recirculator, which includes the necessary connection kit for the circulator. Thermo Fisher Scientific Evolution 300 and Evolution 600 User Guide... - Page 18 Ensure that the tubes do not obstruct the light beam. If necessary, secure the tubes using the self adhesive tubing clips supplied. Evolution 300 and Evolution 600 User Guide Thermo Fisher Scientific...
-
Page 19: Test Tube/Vial Holder
Exceeding the recommended diameter may cause the retaining bar to clip the light beam. Rectangular cell holder This cell holder allows the use of 15 mm beam height filters and flow cells in the instrument. Thermo Fisher Scientific Evolution 300 and Evolution 600 User Guide... -
Page 20: Fiber Optic Sampling Accessory
Fiber optic sampling accessory This accessory enables samples to be measured outside of the sample compartment. Evolution 300 and Evolution 600 User Guide Thermo Fisher Scientific... - Page 21 If contamination is an issue in the laboratory, replacement tips are available. The tip of the probe is manufactured to the same tolerances of a standard cuvette and are available in 5, 10 and 20 mm pathlengths. Thermo Fisher Scientific Evolution 300 and Evolution 600 User Guide...
-
Page 22: Dra-Ev-600 Diffuse Reflectance Accessory
A double-beam Spectralon® integrating sphere ensures high energy throughput and accuracy. A transmittance port is also included for making diffuse transmittance measurements. This DRA is fully CIE compliant for making color. Evolution 300 and Evolution 600 User Guide Thermo Fisher Scientific... -
Page 23: Solid Sample Holder
% Transmittance mode. A variety of sample holders are available allowing round, square, and odd-shaped samples to be measured. The industry standard 2" x 3" sample slides allow other accessories to be used with the Solid Sample Holder. Thermo Fisher Scientific Evolution 300 and Evolution 600 User Guide... -
Page 24: Smart Accessories
5° to 110°C with ramping at 0.1° to 6°C per minute for a single 8.5 mm cell and low head space micro cells There is also a socket for connecting a temperature probe accessory, when purchased. Evolution 300 and Evolution 600 User Guide Thermo Fisher Scientific... -
Page 25: System Accessories
Some system accessories are installed at Thermo Fisher Scientific. Internal printer — Located directly behind the LCD screen and is either factory or installed in the field by our service engineer. Thermo Fisher Scientific Evolution 300 and Evolution 600 User Guide... -
Page 26: Installing Smart Accessories
Do not press down to completely seat the accessory. 4. Position the accessory so that alignment holes A and B are aligned with pins A and B on the instrument and press down gently. Evolution 300 and Evolution 600 User Guide Thermo Fisher Scientific... - Page 27 5. Press down on the front of the unit to complete the connection between the accessory and the D connector. 6. Replace the front wall of the sample compartment. Thermo Fisher Scientific Evolution 300 and Evolution 600 User Guide...
- Page 28 • Grasp the handles of the accessory and pull it upwards. The software will display a message confirming that the accessory has been removed. Press Clear to remove this message. Evolution 300 and Evolution 600 User Guide Thermo Fisher Scientific...
-
Page 29: Using The Instrument
The topics that are discussed include: • Local Control software. • VISIONsecurity and VISIONpro Local Control Function keys are operational in the context for each screen and are shown at the bottom of the display. Thermo Fisher Scientific Evolution 300 and Evolution 600 User Guide... - Page 30 Confirm highlighted choices in menus and Enter Enter text entry boxes. Select menu items and characters in text Arrow keys entry screens. Enter numbers, decimal point and minus Numeric sign. keypad Evolution 300 and Evolution 600 User Guide Thermo Fisher Scientific...
-
Page 31: Main Menu Page
The major functions of the software are accessed from the Main Menu page. Use the up and down arrow keys to highlight the required menu item and press Enter to confirm your selection. Thermo Fisher Scientific Evolution 300 and Evolution 600 User Guide... - Page 32 The menu enables you to move between the six major applications and to view the contents of the Library or the contents of the disk currently in the drive. Here is an example of a live status display: Evolution 300 and Evolution 600 User Guide Thermo Fisher Scientific...
- Page 33 This file type can be used only by the Local Control security or the VISION /VISION software. The comma separated values (CSV) format enables data to be exported to computer third-party applications (e.g., spreadsheet). Thermo Fisher Scientific Evolution 300 and Evolution 600 User Guide...
- Page 34 Toggled On – allows the user to create a bitmap of the current screen contents to be saved to a disk when the Print button is pressed. Toggled Off – printing function is directed to the installed printer. Evolution 300 and Evolution 600 User Guide Thermo Fisher Scientific...
- Page 35 Allows the user to select the colors used in the display. Utilities window To access the Utilities window, press the Utilities function key. Highlight and press Enter to select a menu item. Thermo Fisher Scientific Evolution 300 and Evolution 600 User Guide...
- Page 36 Upgrade Software Upgrades instrument software from disk. Initialize all Accessories Initializes installed accessories White Light Causes a beam of white light to pass through the sample compartment. (Used to align accessory.) Evolution 300 and Evolution 600 User Guide Thermo Fisher Scientific...
- Page 37 Highlight the required accessory and press Enter to open the setup page. When accessories are installed, additional items related to the control of the accessories are added to the method parameter pages. Thermo Fisher Scientific Evolution 300 and Evolution 600 User Guide...
- Page 38 Select files to be included in the SmartStart menu: 1. Press Library. 2. Highlight a file to be included in the SmartStart menu. 3. Press the SmartStart function key. Evolution 300 and Evolution 600 User Guide Thermo Fisher Scientific...
- Page 39 Continue in this way until all required files have been chosen for the SmartStart menu. 4. Press Home. All of the selected items appear on the SmartStart Menu page. Thermo Fisher Scientific Evolution 300 and Evolution 600 User Guide...
- Page 40 To remove a file from the SmartStart menu: • Highlight the checked file(s) in the Library. • Press SmartStart. Evolution 300 and Evolution 600 User Guide Thermo Fisher Scientific...
-
Page 41: Text Entry
2. Press the Accept function key. Note Pressing the Cancel function key will close the text entry screen without making any changes. Note The backspace function key may be used to erase mistakes. Thermo Fisher Scientific Evolution 300 and Evolution 600 User Guide... -
Page 42: Editing Numeric Fields
When setting up a page requiring multiple numeric entries (e.g., a Standards page), press the Accept function key when the page is complete or C to close the page without making any changes. Evolution 300 and Evolution 600 User Guide Thermo Fisher Scientific... -
Page 43: Pop-Up Menus
Access the Library or disk from the Main Menu: 1. Highlight the required field using the up/down arrow keys and press Enter. 2. Choose the required operation from the menu. Thermo Fisher Scientific Evolution 300 and Evolution 600 User Guide... - Page 44 4. Press the Disk/Library function key to display the contents of the disk, if required. 5. Highlight the required file by using the up/down arrow keys and then press Load File function key. Evolution 300 and Evolution 600 User Guide Thermo Fisher Scientific...
-
Page 45: Scan Application
The Scan method page will open. The menu may contain more items than are shown in the example, depending on the way the software is configured and which accessories are installed. Thermo Fisher Scientific Evolution 300 and Evolution 600 User Guide... - Page 46 Refer to “Using UVcalc” Alternatively, these operations are all available as post run manipulations. 3. Set up any Accessory Methods required (only when a Smart Accessory is installed). Evolution 300 and Evolution 600 User Guide Thermo Fisher Scientific...
- Page 47 10. Press Run. The Scan Graph page will appear. 11. Press the Manipulate function key to open the Manipulate menu and choose the post run manipulation required. Thermo Fisher Scientific Evolution 300 and Evolution 600 User Guide...
- Page 48 For example, press the View Results function key to see the results of Peak Table operations or post run manipulations. Evolution 300 and Evolution 600 User Guide Thermo Fisher Scientific...
-
Page 49: Fixed Application
The Fixed Method page will open. The menu may contain more items than are shown in the example, depending on the way the software is configured and which accessories are installed. Thermo Fisher Scientific Evolution 300 and Evolution 600 User Guide... - Page 50 Multi Wavelength Measure each sample at up to 20 wavelengths (the same for each sample). Serial Wavelength Measure up to 9 samples at one wavelength (different for each sample). Evolution 300 and Evolution 600 User Guide Thermo Fisher Scientific...
- Page 51 8. Press the View Results function key to see the Fixed Results Table. From this page, it is possible to save the results to the instrument Library or to disk. Thermo Fisher Scientific Evolution 300 and Evolution 600 User Guide...
-
Page 52: Quantitation Application
• Seven different data modes are available. • The number of wavelengths required will depend on the Data Mode. Evolution 300 and Evolution 600 User Guide Thermo Fisher Scientific... - Page 53 6. Press the Calibrate function key. Follow the on screen instructions, which will depend on whether a cell programmer is in use and on the number of standards and replicates. Thermo Fisher Scientific Evolution 300 and Evolution 600 User Guide...
-
Page 54: Kinetics Application
Kinetics application Follow these steps to run a Kinetics application: 1. Start the Kinetics application and press Enter. The Kinetics Method page will open. Evolution 300 and Evolution 600 User Guide Thermo Fisher Scientific... - Page 55 Interval Time(s) Integration Time(s) Evolution 300 0.02 (min) 0.01 (min) 999.99 (max) 999.99 (max) Evolution 600 0.13 (min) 0.03 (min) 999.99 (max) 999.99 (max) Thermo Fisher Scientific Evolution 300 and Evolution 600 User Guide...
- Page 56 Smoothing may be specified at run time or applied post run. • Save the new method into the instrument Library or to disk. Press the Save Method function key and complete the save dialog as required. Evolution 300 and Evolution 600 User Guide Thermo Fisher Scientific...
- Page 57 Section allows up to 5 markers to be placed on the graph defining up to 4 contiguous time intervals over which the rate statistics will be calculated. When the markers have been placed, press the function key to exit from the Section Mode. Thermo Fisher Scientific Evolution 300 and Evolution 600 User Guide...
-
Page 58: Multicomponent Application
The MCA method page will open. The menu may contain more items than are shown in the example, depending on the way the software is configured and which accessories are installed. Evolution 300 and Evolution 600 User Guide Thermo Fisher Scientific... - Page 59 At least one wavelength must be entered for each standard. Choose wavelengths at which there are significant differences between standards. 3. Clear the beams or insert suitable blank(s) and close the lid of the sample compartment. 4. Press Zero. Thermo Fisher Scientific Evolution 300 and Evolution 600 User Guide...
-
Page 60: Biological Tests
Follow these steps to run Biological tests: The menu enables you to move between the four major applications. To run any of the biological tests available, highlight Biological Tests on the Main Menu and press Enter. Evolution 300 and Evolution 600 User Guide Thermo Fisher Scientific... - Page 61 Choose the required test from the Nucleic Acid Tests sub-menu. The relevant test page opens. The content and layout of the page will depend on the test selected, the way the software is configured and which accessories are installed. Thermo Fisher Scientific Evolution 300 and Evolution 600 User Guide...
- Page 62 When Yes, the protein factors are displayed. 6. Edit the Dilution Multiplier, if required. 7. Edit the Units, if required. 8. When using a DNA method with scan, press the Setup Scan function key. Evolution 300 and Evolution 600 User Guide Thermo Fisher Scientific...
- Page 63 Quartz cells MUST be used for all DNA measurements. Glass or plastic cells are not suitable because they do not transmit at the wavelengths used. The results page contains the results of the calculations and the Scan when applicable. Thermo Fisher Scientific Evolution 300 and Evolution 600 User Guide...
- Page 64 The method parameters are documented values published in the literature. Parameters may be edited, if required. Evolution 300 and Evolution 600 User Guide Thermo Fisher Scientific...
- Page 65 10. Once the calibrated method is present, place the sample in the cell holder and close the lid of the sample compartment. 11. Press Run. The results will be seen on the results page. Thermo Fisher Scientific Evolution 300 and Evolution 600 User Guide...
- Page 66 The instrument does not perform any calculations or graph the data. 1. Highlight Biological Tests on the Main Menu page. The Biological Tests sub menu will open. 2. Choose Cell Growth and press Enter. Evolution 300 and Evolution 600 User Guide Thermo Fisher Scientific...
- Page 67 5. Place the unknown(s) in the correct cell position(s) and close the lid of the sample compartment. 6. Press Run. The sample number and absorbance are displayed on the Results page. Thermo Fisher Scientific Evolution 300 and Evolution 600 User Guide...
- Page 68 20-mers, DNA, DNA hybrids and RNA hybrids. 1. Highlight Biological Tests on the Main Menu page. The Biological Tests sub-menu will open. 2. Choose Oligo Calculator and press Enter. Evolution 300 and Evolution 600 User Guide Thermo Fisher Scientific...
- Page 69 You will need to enter a base sequence before you can run the oligonucleotide calculations. With the base sequence screen displayed, press the right/left arrow keys to select the required base. Thermo Fisher Scientific Evolution 300 and Evolution 600 User Guide...
- Page 70 Weight, DNA absorptivity (extinction coefficient), and factor will be updated as each new base is added to the sequence. 5. Press the T Calculation function key to view the melting point calculator. Evolution 300 and Evolution 600 User Guide Thermo Fisher Scientific...
- Page 71 6. Highlight parameter to be changed and press Enter. A pop-up menu will appear. Here is an example: Once all parameters have been set appropriately, the relevant set of melting point predictions will be displayed. Thermo Fisher Scientific Evolution 300 and Evolution 600 User Guide...
-
Page 72: Using Uvcalc
UVcalc enables customized calculations to be incorporated into Scan, Fixed and Quant methods. 1. Highlight UVcalc on the selected application page and press Enter. The equation selection page opens. Evolution 300 and Evolution 600 User Guide Thermo Fisher Scientific... - Page 73 UVcalc calculation) and press Enter. The equation entry page for the selected equation opens, with the Formula line highlighted. 3. Press Enter to edit the formula. The formula page opens. Thermo Fisher Scientific Evolution 300 and Evolution 600 User Guide...
- Page 74 5. When the equation is set up, press the Accept function key. The Cancel button enables you to exit without changing. Evolution 300 and Evolution 600 User Guide Thermo Fisher Scientific...
-
Page 75: Instrument Verification Tests
Turn on the instrument at least an hour before starting performance qualification tests. 1. From the Main Menu page, press the Utilities function key. 2. Highlight Instrument Verification and press Enter. Thermo Fisher Scientific Evolution 300 and Evolution 600 User Guide... - Page 76 3. Highlight the test(s) required and press the Select/Deselect function key to select it. Here is an example: 4. Press Run after selection(s) has been made. Note The drift test will take at least an hour. Evolution 300 and Evolution 600 User Guide Thermo Fisher Scientific...
- Page 77 Library or disk menu items on the Main Menu page. Further tests will become available when an instrument verification accessory (CVC or Mercury lamp) is installed. Refer to the appropriate accessory manual. Thermo Fisher Scientific Evolution 300 and Evolution 600 User Guide...
-
Page 78: Visionsecurity And Visionpro
Double-click on the VISION icon on the Windows desktop • Select Start > Programs > VISIONpro > VISIONpro • Start > Programs > VISIONsecurity > VISIONsecurity By default, VISION uses the Com 1 port on the computer. Evolution 300 and Evolution 600 User Guide Thermo Fisher Scientific... -
Page 79: Maintenance
2. Using a lint free cloth dampened with a weak solution of detergent and water, wipe the exterior surface of the instrument as necessary. 3. Wipe over with a cloth dampened with plain water. 4. Dry the surface with another cloth. Thermo Fisher Scientific Evolution 300 and Evolution 600 User Guide... -
Page 80: Internal Printer
3. Feed the paper, shiny side down, into the input slot. Ensure that the paper emerges correctly through the printer and approximately 10 cm (4 in) has been pulled clear. Evolution 300 and Evolution 600 User Guide Thermo Fisher Scientific... - Page 81 Lift paper release 4. Push the paper release lever back into place. 5. Replace the printer housing. Thermo Fisher Scientific Evolution 300 and Evolution 600 User Guide...
-
Page 82: Light Sources (Evolution 600 Only)
The tungsten-halogen and deuterium lamps get very hot while the instrument is operating. Before removing either lamp, turn off the instrument and allow it to cool for 15 minutes. CAUTION Evolution 300 and Evolution 600 User Guide Thermo Fisher Scientific... - Page 83 All personnel in the area must wear protective UV absorbing safety glasses. Thermo Fisher Scientific Evolution 300 and Evolution 600 User Guide...
-
Page 84: Deuterium Lamp
5. Replace rear cover. 6. Plug in the spectrophotometer to the AC outlet and turn on the power switch. Note Lamp hours and energy (if applicable) must be reset from the controlling software. Evolution 300 and Evolution 600 User Guide Thermo Fisher Scientific... -
Page 85: Tungsten-Halogen Lamp
Replace the copper spring clip. c. Replace the lamp socket ensuring the orientation is correct. d. Align the securing screws and tighten with hex driver. 5. Replace rear cover. Thermo Fisher Scientific Evolution 300 and Evolution 600 User Guide... -
Page 86: Mercury Lamp (Evolution 300 And Evolution 600)
Note Lamp hours and energy (if applicable) must be reset from the controlling software. Mercury lamp (Evolution 300 and Evolution 600) Refer to the Mercury Lamp Accessory user’s guide for directions on replacing the mercury lamp. Evolution 300 and Evolution 600 User Guide...
Need help?
Do you have a question about the Evolution 300 and is the answer not in the manual?
Questions and answers