
Related Manuals for Rockler 59032


Summary of Contents for Rockler 59032
- Page 1 Router Table Box Joint Jig Instructions Effective May 2022 Review full manual instructions prior to use for important safety information. Always check Rockler.com to confirm that you are using the most recent manual version for your product.
-
Page 2: General Safety Warnings
Instructions and safety warnings for your product (see the • Keep children and bystanders away from the tool Instructions link on the product page at Rockler.com). operating area; • Do NOT use power tools in explosive environments, or in >... - Page 3 > Use only with wood and MDF no more than 1" thick. > Maintain control of the Sled and workpiece at all times. Rockler recommends securing the workpiece with clamps to > Platform (1) MUST be secured in the router table miter the Sacrificial Fence/Sled’s flat clamping areas.
-
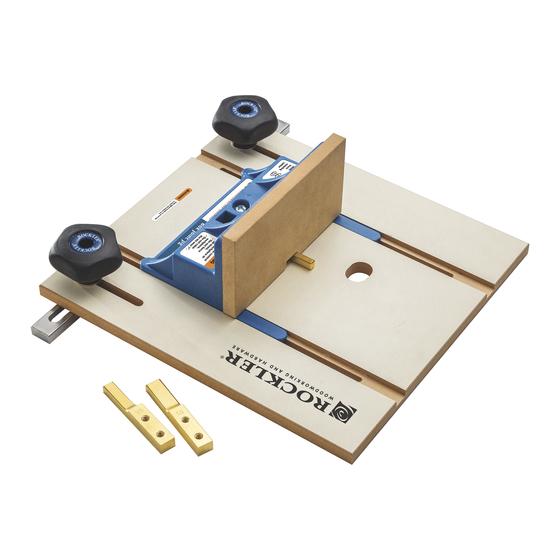
Page 4: Parts List
PARTS LIST Quantity Quantity Platform 1/4" Indexing Key Five-Star Knob 3/8" Indexing Key Washer 1/2" Indexing Key Expandable Miter Bar 10 MDF Sacrificial Fence Miter Bar Bolt 11 1/4"-20 Machine Screws Sled 12 1" Panhead Screws... - Page 5 > Sled (6) MUST be able to slide smoothly in Platform (1) slots. > Maintain control of the Sled and workpiece at all times. Rockler recommends securing the workpiece with clamps to the Sacrificial Fence/Sled’s flat clamping areas. Holding the piece securely with your hands is possible, but maintain awareness of your fingers, hands and the bit, as serious injury could occur.
- Page 6 To avoid risk of serious injury and damage to the jig, never set the bit cutting height more than 1" above the surface of the jig Platform (1). If you have a router lift on your table, you might need to drill a hole in the Platform (1) to be able to access the adjustment mechanism.
- Page 7 > Maintain control of the Sled and workpiece at all for use in cutting end-grain joints like those shown. Joints times. Rockler recommends securing the workpiece cut across the grain could result in significant tear-out with clamps to the Sacrificial Fence/Sled’s flat unless an additional sacrificial backer is used.
- Page 8 Fig. 8 6. To make the cuts in workpieces C and D, follow the process outlined in Steps 2-5. Check Rockler.com for updates. If you have further questions, please contact our Technical Support Department at 1-800-260-9663 or support@rockler.com Fig. 9 Fig.
Need help?
Do you have a question about the 59032 and is the answer not in the manual?
Questions and answers