Advertisement
Quick Links
OLED-DISPLAY MODULE
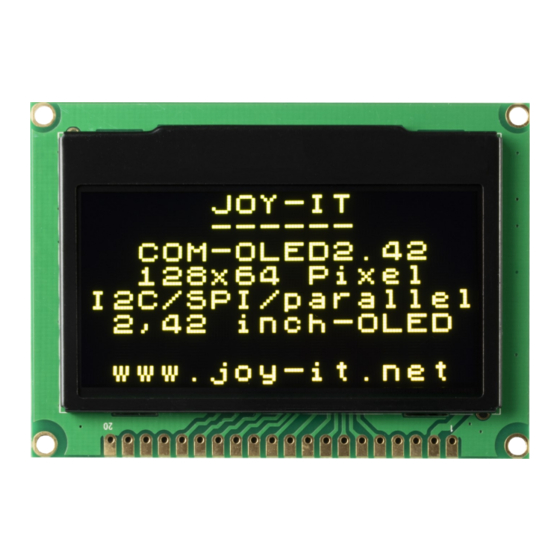
COM-OLED2.42
1. GENERAL INFORMATION
Dear customer,
thank you very much for choosing our product.
In following, we will introduce you to what to observe while starting up
and using this product.
Should you encounter any unexpected problems during use, please do
not hesitate to contact us.
www.joy-it.net
Pascalstr. 8 47506 Neukirchen-Vluyn
Advertisement

Summary of Contents for Joy-it COM-OLED2.42
- Page 1 OLED-DISPLAY MODULE COM-OLED2.42 1. GENERAL INFORMATION Dear customer, thank you very much for choosing our product. In following, we will introduce you to what to observe while starting up and using this product. Should you encounter any unexpected problems during use, please do not hesitate to contact us.
- Page 2 5V to 3.3V with a logic level converter. First you need to install the required library in your Arduino IDE. To do this, go to Tools -> Manage Libraries... Search for u8g2 and install the library U8g2 by oliver www.joy-it.net Pascalstr. 8 47506 Neukirchen-Vluyn...
- Page 3 SPI-Interface Wiring Display Pin Arduino Pro 3,3V Mini Pin (VCC) www.joy-it.net Pascalstr. 8 47506 Neukirchen-Vluyn...
- Page 4 File -> Examples -> U8g2 -> u8x8-> GraphicTest Now insert the following constructor for the display into the programme, as shown in the picture below: U8X8_SSD1309_128X64_NONAME2_4W_SW_SPI u8x8(13, 11, 10, 9, 8); Now you can upload the example to your Arduino. www.joy-it.net Pascalstr. 8 47506 Neukirchen-Vluyn...
- Page 5 I2C-Interface Wiring Display Pin Arduino Pro 3,3V GND A5 Mini Pin (VCC) www.joy-it.net Pascalstr. 8 47506 Neukirchen-Vluyn...
- Page 6 File -> Examples -> U8g2 -> u8x8-> GraphicTest Now insert the following constructor for the display into the programme, as shown in the picture below: U8X8_SSD1309_128X64_NONAME2_HW_I2C u8x8(9, A4, A5); Now you can upload the example to your Arduino. www.joy-it.net Pascalstr. 8 47506 Neukirchen-Vluyn...
- Page 7 8 bit Parallel 6800-Interface Wiring Display Pin Arduino Pro 3,3V Mini Pin (VCC) www.joy-it.net Pascalstr. 8 47506 Neukirchen-Vluyn...
- Page 8 Now insert the following constructor for the display into the programme, as shown in the picture below: U8X8_SSD1309_128X64_NONAME0_6800 u8x8(13, 11, 2, 3, 4, 5, 6, A3, 7, 10, 9, 8); Now you can upload the example to your Arduino. www.joy-it.net Pascalstr. 8 47506 Neukirchen-Vluyn...
- Page 9 8 bit Parallel 8080-Interface Wiring Display Pin Arduino Pro GND 3,3V 3,3V www.joy-it.net Pascalstr. 8 47506 Neukirchen-Vluyn...
- Page 10 File -> Examples -> U8g2 -> u8x8-> GraphicTest Now insert the following constructor for the display into the programme, U8X8_SSD1309_128X64_NONAME0_8080 u8x8(13, 11, 2, 3, 4, 5, 6, A3, 7, 10, 9, 8); Now you can upload the example to your Arduino. www.joy-it.net Pascalstr. 8 47506 Neukirchen-Vluyn...
- Page 11 Then restart your Raspberry Pi with the following command: sudo reboot After the reboot, enter following command into the terminal: sudo raspi-config There you can now activate SPI and I2C under 3 Interface Options so that you can use both interfaces. www.joy-it.net Pascalstr. 8 47506 Neukirchen-Vluyn...
- Page 12 Raspberry Pin Pin 18 Pin 23 Pin 19 Pin 24 Pin 22 After you have connected the display, you can execute a sample programme with the following two commands: cd ~/luma.examples/examples/ sudo python3 demo.py -i spi www.joy-it.net Pascalstr. 8 47506 Neukirchen-Vluyn...
- Page 13 Display Pin Raspberry Pin GND Pin 5 Pin 3 Pin 3 3,3V After you have connected the display, you can execute a sample pro- gramme with the following two commands: cd ~/luma.examples/examples/ sudo python3 demo.py www.joy-it.net Pascalstr. 8 47506 Neukirchen-Vluyn...
- Page 14 SIMAC Electronics GmbH, Pascalstr. 8, D-47506 Neukirchen-Vluyn, Germa- Possibility of return in your area: We will send you a parcel stamp with which you can return the device to us free of charge. Please contact us by email at Service@joy-it.net or by telephone. Information on packaging: If you do not have suitable packaging material or do not wish to use your own, please contact us and we will send you suitable packaging.


Need help?
Do you have a question about the COM-OLED2.42 and is the answer not in the manual?
Questions and answers