Table of Contents
Advertisement
Advertisement
Table of Contents

Related Manuals for Topcon RL-HV Series


Summary of Contents for Topcon RL-HV Series
- Page 1 INSTRUCTION MANUAL ROTATING LASER RL-HV series 111111 1051731-01-A...
- Page 2 [Menu mode] etc. : Indicates operation keys and selection items on the screen. Notes regarding manual style • Except where stated, "RL-HV" means RL-HV series (RL-HV 1S / RL-HV 2S) in this manual. • Except where stated, screens and illustrations appearing in this manual are of RL-HV 2S.
-
Page 3: Table Of Contents
CONTENTS 1. PRECAUTIONS FOR SAFE OPERATION ..............1 2. PRECAUTIONS ......................4 3. LASER SAFETY INFORMATION .................. 8 4. PRODUCT OUTLINE ....................9 RL-HV ........................9 Level Sensor LS-80X ..................12 5. USING THE BATTERY ....................15 Battery Charging ....................15 Installing/Removing the Battery ................ -
Page 4: Precautions For Safe Operation
1. PRECAUTIONS FOR SAFE OPERATION For the safe use of the product and prevention of injury to operators and other persons as well as prevention of property damage, items which should be observed are indicated by an exclamation point within a triangle used with WARNING and CAUTION statements in this instruction manual. - Page 5 1. PRECAUTIONS FOR SAFE OPERATION Do not use voltage other than the specified power supply voltage. Fire or electrical shock could result. Do not use batteries other than those designated. An explosion could occur, or abnormal heat generated, leading to fire. ...
- Page 6 1. PRECAUTIONS FOR SAFE OPERATION Do not use onboard aircraft. The aircraft instrumentation may malfunction as a result. Do not use within the vicinity of automatic doors, fire alarms and other devices with automatic controls as the electromagnetic waves produced may adversely affect operation resulting in an accident.
-
Page 7: Precautions
2. PRECAUTIONS Charging Battery • Be sure to charge the battery within the charging temperature range. Charging temperature range: 10 to 40°C • Use only the specified battery and the battery charger. Failures caused by using other batteries and battery chargers are out of warranty including the main unit. - Page 8 Contact your local dealer in advance. "12. REGULATIONS" • TOPCON CORPORATION is not liable for the content of any transmission nor any content related thereto. When communicating important data, run tests beforehand to ascertain that communication is operating normally.
- Page 9 Moreover, as wireless devices lose signal strength when close to the ground, perform communication at as high a position as possible. • TOPCON CORPORATION cannot guarantee full compatibility with all Bluetooth products on the market.
- Page 10 In consideration for its purchase of commodities, technology or software from Topcon, Purchaser agrees that it will determine any license requirements to export the items and, as applicable, to reexport or transfer the items, obtain any license or other official authorization, and carry out any customs formalities for the export or reexport of the items.
-
Page 11: Laser Safety Information
3. LASER SAFETY INFORMATION The instrument is classified as a class 1 Laser Product according to IEC Standard Publication 60825-1 Ed.3.0: 2014 and United States Government Code of Federal Regulation FDA CDRH 21CFR Part 1040.10 and 1040.11 (Complies with FDA performance standards for laser products except for deviations pursuant to Laser Notice No.56, dated May 8, 2019.) ... -
Page 12: Product Outline
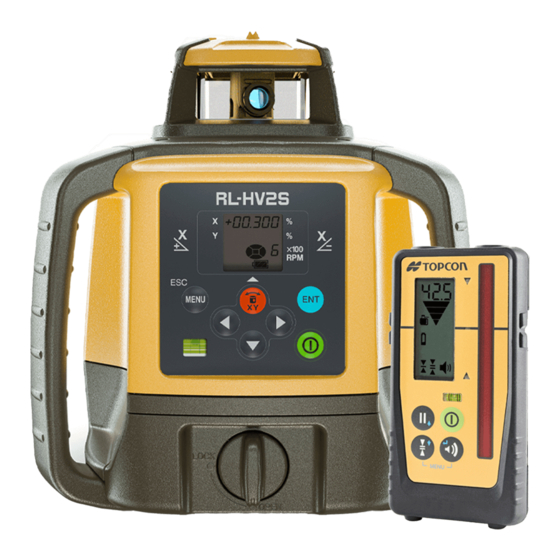
4. PRODUCT OUTLINE RL-HV Parts of the instrument Rotary head Sight Beam aperture Handle Control panel Battery holder Battery holder knob... - Page 13 4. PRODUCT OUTLINE Control panel X/Y axis selection key / Display Alignment key / Up key Enter key Menu key / Escape key Power switch X axis selection key / Alignment key / Up key Level vial For Vertical Rotation Arrow keys RL-HV 1S Nomenclature...
- Page 14 4. PRODUCT OUTLINE Display X axis grade Mask Mode display (Blinks one digit at a time during self- level- ing) Rotation speed 6: 600 rpm Y axis grade (2S only) 3: 300 rpm (Blinks one digit at a time during self- level- ing) Manual Mode display Battery remaining...
-
Page 15: Level Sensor Ls-80X
4. PRODUCT OUTLINE Level Sensor LS-80X Parts of the instrument Indicator LS-80X Display Power switch The power switch turns ON or Locate the datum position "---" OFF by pressing. by moving the LS-80X up and down. Directional arrows and Detective precision switch audio signals assist in locating Two detective precision options the datum position as the laser... - Page 16 4. PRODUCT OUTLINE Display High precision mode Height alert warning of rotating laser*1 A blink and a buzzer sound signifies that the height alert function of the RL- Normal precision mode HV is operating. Higher than datum position (Buzzer sound: High frequent beep sound) Move the sensor downward.
- Page 17 4. PRODUCT OUTLINE Detective Range...
-
Page 18: Using The Battery
5. USING THE BATTERY Be sure to charge the battery fully before using it for the first time or after not using it for long periods. • The charger will become rather hot during use. This is normal. • Do not use or charge batteries other than those designated. (Battery pack: BT-79Q AC/DC converter: AD-15E) •... -
Page 19: Installing/Removing The Battery
5. USING THE BATTERY • Charging time: BT-79Q: about 13 hours (at 20°C) (Charging can take longer than the times stated above when temperatures are either especially high or low.) • Charging lamp: Description Red lamp lit On charge Fully charged Red lamp blinking Ni-MH battery pack protection feature is working automatically. -
Page 20: Using The Dry Batteries
5. USING THE BATTERY Using the Dry Batteries ■ RL-HV • Replace all 4 dry batteries with new ones at the same time. • Do not mix used and new dry batteries, and do not mix different types of dry batteries together. •... - Page 21 5. USING THE BATTERY ■ LS-80X • When attaching the battery cover, make sure that the rubber packing inside the battery box is in the right place. • Do not use a low dry battery. Switches or displays may not work correctly. •...
-
Page 22: Basic Operation
6. BASIC OPERATION • It may take some time for the laser to be emitted after the rotary head rotates, but this is not a malfunction of the instrument. Setting up the instrument ■ Horizontal Rotation 1. Set the instrument to the tripod or smooth surface. 2. -
Page 23: Example Operational
6. BASIC OPERATION 6. Mark the position of index. Top of the level sensor is 40mm [1 9/16”] from index for offset marking. ■ Example Operational Install the LS-80X on a staff in the manner shown below. 1 5 4 1 5 3 1 5 2 1 5 1... - Page 24 6. BASIC OPERATION 1. Install the RL-HV on to the tripod and set so that the bubble is at the center of the vertical rotation circular level vial. 2. Press power switch. When self-leveling is complete, the laser beam will emit vertically.
-
Page 25: Height Alert Function
6. BASIC OPERATION Height Alert Function When the instrument system detects a shock, this function informs the operator of it. • When the instrument’s installation status (height) is sharply changed by the contact of the operator or the like, this function stops self- leveling to keep the operation accuracy and informs the operator of the situation. •... -
Page 26: Bluetooth Connection
6. BASIC OPERATION Bluetooth Connection Using Bluetooth communication, RL-HV can be remotely controlled by devices such as iPhone and Android. The control application "Laser Manager" would be better installed on your device in advance. • Bluetooth function may not be built in depending on telecommunications regulations of the country or the area where the instrument is purchased. -
Page 27: Applied Operationon
7. APPLIED OPERATIONON It is possible to set grades for the laser beam and various functions from the menu screen. • It may take some time for the laser to be emitted after the rotary head rotates, but this is not a malfunction of the instrument. -
Page 28: How To Set Grades (In Case Of 1S)
7. APPLIED OPERATIONON ■ How to set grades (In case of 1S) 1. When pressing the key, the sign of X axis will start blinking. 2. Press the keys and select the sign (plus or minus). 3. Press the keys to change the digit position. 4. -
Page 29: How To Set Grades (In Case Of 2S)
7. APPLIED OPERATIONON ■ How to set grades (In case of 2S) 1. Press the key and the X axis display will start blinking. It is possible to enter the grade. (Pressing the key will toggle between the X axis and Y axis.) 2. -
Page 30: Example Of How To Set Up
7. APPLIED OPERATIONON ■ Example of how to set up When setting grade, it is necessary to accurately set the RL-HV to the direction of grade setting. Below is an example of how to set grades to the accurate grade setting direction. (To work at X+3% (1S) / Y- 3% (2S) grade surface to the base line) LS-80X In case of 1S... - Page 31 7. APPLIED OPERATIONON 3. Horizontally rotate the laser beam of the RL-HV. (1S: X+0.000% / 2S: X+0.000%, Y+0.000%) 4. At Point B adjust the height of the LS-80X installed on a pole, align the standard position of the LS-80X with the laser beam and fix. 5.
-
Page 32: Matching Mode (Manual Slope)
7. APPLIED OPERATIONON ■ Matching Mode (Manual Slope) This mode is used to align the grades of the laser calibration to the worked grade. 1. Horizontally rotate the laser beam of the RL-HV set up at the standard height. (1S: X+0.000% / 2S: X+0.000%, Y+0.000%) LS-80X 2. - Page 33 7. APPLIED OPERATIONON 9. Press key to adjust the grade of the laser beam and align with the datum position for the LS-80X. The length of time the arrow key is pressed will change the speed at which the laser beam grades. (The speed will change from low to high speed.) For Y-axis grading, follow steps 7 to 9 using keys.
- Page 34 7. APPLIED OPERATIONON Display during Matching Mode blinking : During matching mode. It is possible to adjust the grade of the laser beam with arrow keys. When a certain amount of time has passed after the arrow key operation, the light that was blinking will remain lit.
-
Page 35: Line Control (Manual Vertical Beam Alignment)
7. APPLIED OPERATIONON Line Control (manual vertical beam alignment) The laser beam can be moved to the direction of the key during vertical rotation. • Only the X axis can be moved. • Allowable alignment range: ±5° (when the instrument is set up on the 0° surface) 1. - Page 36 7. APPLIED OPERATIONON 5. Confirm that self-leveling is complete and that the laser beam is emitting. Press either of key once and the laser beam will move in the direction of the key to begin search. key cannot be used until self-leveling is complete and the laser beam starts emitting.
-
Page 37: Changing The Settings
8. CHANGING THE SETTINGS After pressing the key, pressing the key will change the menu items and setting can be performed for the functions listed below. Safety lock ON/OFF setting Matching Mode Masking setting Manual Mode ON/OFF setting Speed setting ... -
Page 38: Speed Setting
8. CHANGING THE SETTINGS 4. When desired masking is displayed, press the key to finish. Speed setting The rotary head speed can be set to 600 or 300 R.P.M. 1. Press key to display the menu screen. 2. Use the key to select the rotary head speed (SPEEd) and press the key. -
Page 39: Manual Mode On/Off Setting
8. CHANGING THE SETTINGS Manual Mode ON/OFF setting Self-leveling function can be canceled and switched to Manual Mode. Self-leveling OFF (LEVEL OFF) : After self-leveling is complete, the self-leveling function will stop. (Manual Mode) Self-leveling ON (LEVEL ON) : Self-leveling function will be effective at all times. 1. -
Page 40: Height Alert On/Off
8. CHANGING THE SETTINGS Height Alert ON/OFF "6.2 Height Alert Function" 1. Press key. 2. Press the key and select Safety Lock ON/OFF (Hl.ALr), and press the key. 3. Press the key and select ON or OFF, and press the key. -
Page 41: Error Displays
9. ERROR DISPLAYS If an error is displayed, follow the procedures shown below. Error Display Description/Countermeasure The Height Alert Function is working. "6.2 Height Alert Function" RL-HV setting exceeds the leveling range. Reset tilting to the direction to raise the X+ side. Reset tilting to the direction to raise the X- side. -
Page 42: Check And Adjustments
10. CHECK AND ADJUSTMENTS Please perform check and adjusting regularly. First check, and then make adjustments accordingly. 10.1 Check and Adjust Horizontal Rotation ■ Horizontal Rotation Grade Error PROCEDURE Checking 1. Set up tripod approximately 50 meters away from a wall, and set the instrument on level with the X- facing the wall. - Page 43 10. CHECK AND ADJUSTMENTS 5. Detect the center of the laser beam on the wall with the LS-80X and mark it. (X1) 6. Press the key. 7. Loosen the centering screw and rotate the RL-HV 180°, and tighten the screw to secure. The RL-HV X+ surface will face the wall. When rotating the RL-HV, ensure that the instrument height is not misaligned.
- Page 44 10. CHECK AND ADJUSTMENTS PROCEDURE Adjusting 1. According to step 8 of the horizontal rotation check, press the keys* to move the laser beam between X1 and X2. When adjusting the Y axis direction, press the keys. *Display during arrow key operation 2.
-
Page 45: Horizontal Rotation Cone Error
10. CHECK AND ADJUSTMENTS ■ Horizontal Rotation Cone Error • Perform the following check after completing the check for "■ Horizontal Rotation Grade Error". Approx. 50m Cone Error Standard Wall A location Wall B Wall A Wall B 1. Set up the laser centered between two walls approximately 50 m (164 ft) apart. -
Page 46: Grade Setting Error
10. CHECK AND ADJUSTMENTS ■ Grade Setting Error • Perform the following check only after completing "■ Horizontal Rotation Grade Error" and "■ Horizontal Rotation Cone Error". PROCEDURE Checking 1. Setup the X- side facing the staff as shown in the figure. Securely position Nail 1 and Nail 2 exactly 30m apart. -
Page 47: Vertical Calibration
10. CHECK AND ADJUSTMENTS 10.2 Vertical Calibration ■ Checking Calibration 1. Turn on the power for the LS-80X and move into high precision Beam mode. 2. Install the LS-80X on a beam 10 meters or higher above the floor, as shown in the diagram. Level sensor 3. - Page 48 10. CHECK AND ADJUSTMENTS 4. Press the key. The RL-HV is calculating the correction value. Do not touch the RL-HV until [End] is displayed. (If you touch it, you will need to readjust.) When the screen on the right is displayed, the adjustment is complete.
-
Page 49: Specifications
Bluetooth 5.0 (Bluetooth Classic / Bluetooth Low Energy) Transmission method FHSS Modulation GFSK Frequency band 2.402 to 2.480GHz Bluetooth profile SPP, GATT(TOPCON Transfer Service) Power class Class 1.5 Usable range Horizontal: 100m / Vertical: 20m (when placed vertically) 2、3 (good communication condition)* Authentication... - Page 50 11. SPECIFICATIONS Charging time at 20°C (68°F)* BT-79Q about 13 hours Charging temperature range 10 to 40°C (50 to 104°F) Storage temperature range -20 to 70°C (-4 to 158°F) Size (excluding cable) 74(W) x 43.5(D) x 35.3(H) mm Weight 141 g Dust and water resistance IP66 (IEC 60529:2001) Operating temperature range...
-
Page 51: Regulations
12. REGULATIONS Region/ Directives/ Labels/Declarations Country Regulations FCC Compliance U.S.A. FCC-Class B WARNING: Changes or modifications to this unit not expressly approved by the party responsible for compliance could void the user's authority to operate the equipment. NOTE: This equipment has been tested and found to comply with limits for a Class B digital device, pursuant to Part 15 of the FCC Rules. - Page 52 12. REGULATIONS Region/ Directives/ Labels/Declarations Country Regulations California, Recycling and NY, Batteries U.S.A. This class B digital apparatus meets all requirements of Canadian interference- Canada ICES-Class B Causing Equipment Regulations. Cet appareil numérique de la class B respecte toutes les exigences du Réglement sur le matérique brouilleur du Canada.
- Page 53 Under such conditions, please test the instrument performance before use. Hereby, TOPCON CORPORATION declares that the radio equipment type of this product is in compliance with Directive 2014/53/EU. The full text of the EU declaration of conformity is available at the following internet address: https://mytopconnow.topconpositioning.com...
- Page 54 12. REGULATIONS Region/ Directives/ Labels/Declarations Country Regulations China Chinese Environmental Directive...
- Page 55 Please see the following website for contact addresses. GLOBAL GATEWAY https://global.topcon.com © 2022 TOPCON CORPORATION ALL RIGHTS RESERVED...
Need help?
Do you have a question about the RL-HV Series and is the answer not in the manual?
Questions and answers
Does THE RL-HV work with LS-B10?