
Related Manuals for Stryker IsoAir


Summary of Contents for Stryker IsoAir
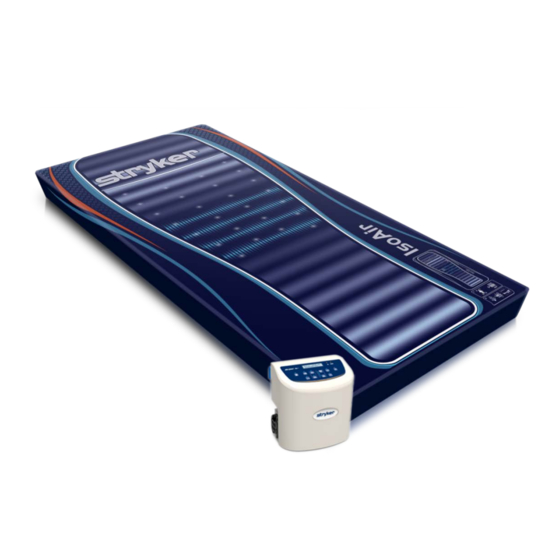
- Page 1 ™ IsoAir 2940 Operation/Maintenance Manual For Parts or Technical Assistance: USA: 1-800-327-0770 2015/04 AO-SM-70 REV 3.0...
-
Page 2: Table Of Contents
CPR……………………………………………………………………………………………………….……………. 26 Pressure Adjustment………………………………………………………….………………………………………. 27 Patient Handling: - Transferring a Patient from one Support Platform to Another……………………………..….………….. 28 - Transporting a Patient on the IsoAir™ System………………………………………………………..….… 28 - Managing Incontinence / Drainage …………………………………………….………………………….… 28 Troubleshooting…………………………………………………………………………………………………………… 29-30 Alarm and Alert Indications………………………………………………………………………………………………. 31-32 Power Failure……..……………………………………………………………………………………………………….. -
Page 3: Symbols And Definitions
Symbols and Definitions SYMBOLS Warning Caution Electrical Safety Mark Refer to Instruction Manual Type BF Applied Part; Applied Part is the Mattress Safe Working Load (SWL) Do Not Iron Machine Wash Tumble Dry Do Not Bleach Chlorinated Bleach Allowed (See Page 34) Do Not Tumble Dry Do Not Dry Clean Do Not Wash... - Page 4 Symbols and Definitions SYMBOLS Alternating Currrent Double Insulated Product Weight Power (ON/STANDBY) Lock Alarm Silence Pressure Alarm Indicator Alarm Indicator Moisture Management (MM) Pressure Redistribution (Static) Mode Alternating Low Pressure (ALP) Mode Increase Pressure Decrease Pressure Active Sensor Technology (AST) MAX Inflate AST Contact Indicator Battery Alert...
-
Page 5: Warnings / Cautions / Acronyms
Symbols and Definitions WARNING / CAUTION The words WARNING and CAUTION carry special meanings and should be carefully reviewed. WARNING Alerts the reader about a situation which, if not avoided, could result in death or serious injury. It may also describe potential serious adverse reactions and safety hazards. -
Page 6: Introduction
PRODUCT & THERAPY OVERVIEW The IsoAir™ helps to prevent and treat pressure ulcers. The air cells in the support surface are positioned every 4 inches (10 cm) from the head to the foot. Two types of therapy are available, Pressure Redistribution and ALP. -
Page 7: Specifications
Introduction SPECIFICATIONS The table below lists the specifications for the IsoAir™ System: PUMP Dimensions Height: 8.5 in / 21.6 cm Width: 8 in / 20.3 cm Depth: 5 in/ 12.7 cm Input Voltage AC Model 2940-001-100 – 120 Volts +10%/-15% Input Frequency Model 2940-001-100 –... - Page 8 Home Healthcare, IEC 60601-1-11 Usability, IEC 60601-1-6 Alarms, IEC 60601-1-8 Expected Life: IsoAir™ Support Surface Coverlet 2 Years Support Surface without Coverlet 5 years Stryker reserves the right to change specifications without notice. 2015/04 AO-SM-70 REV 3.0 Page 8 of 49...
-
Page 9: Contact Information & Serial Number Location
Introduction CONTACT INFORMATION Contact Stryker Customer Service or Technical Support at (800) 327-0770 or (269) 324-6500 for assistance in setting up, using or maintaining the IsoAir™ System, or if you encounter any expected events/operation. Stryker Medical 3800 E. Centre Avenue... - Page 10 Introduction SUPPORT SURFACE SERIAL NUMBER LOCATION The serial number is located inside the support surface on the patient right side at the foot end near the corner. COVERLET SERIAL NUMBER LOCATION The serial number is located on the patient right side at the foot end of the coverlet. 2015/04 AO-SM-70 REV 3.0 Page 10 of 49...
-
Page 11: Summary Of Safety Precautions
Summary of Safety Precautions Before operating this medical equipment, carefully read and strictly follow the Warnings and Cautions presented in the following sections. General − Read this manual to understand the operating instructions and safety precautions. Failure to do this could result in patient injury and/or damage to the product. - Page 12 − AC mains power must be connected to provide therapy. If power is lost, therapy provided will be discontinued. − Good filter maintenance is critical in keeping your IsoAir™ Pump in optimal operating condition. Failure to clean the filter may cause damage to the Pump. A damaged Pump may not provide proper support pressures resulting in patient injury.
- Page 13 − The power cord to the Pump should be positioned to avoid a tripping and strangulation hazard and/or damage to the cord. Stryker recommends placing the cord under the bed frame and plugging it into an electrical outlet by the head end of the bed, or the integral electric outlet on the bed frame using the shorter cord provided.
- Page 14 Customer Service to obtain authorization. Pump − Do not leave children and pets unattended while the IsoAir™ System is in use. They may damage the system that may cause bodily harm to themselves and/or the patient.
-
Page 15: Support Surface Assembly
Support Surface Assembly The location of features and connections on the are presented below. Please refer to these during Support Surface installation, set up and operation of the Support Surface. COVERLET STRAP HANDLES (FOOT END SHOWN) CPR CONNECTOR AST CABLE TIE DOWN STRAPS The Mattress includes straps at the bottom center (not shown) that are intended for storage use. - Page 16 Support Surface Assembly 7.0”AIR CELL (AIR/FOAM) SUPPORT SURFACE Unzip Coverlet Starting here. COVERLET ASSEMBLY MM HOSE ASSEMBLY HEAD BOLSTER NON-AST AIR CELLS MANIFOLD LOOP ASSEMBLY SHELL ASSEMBLY CPR ASSEMBLY FOOT BOLSTER AST AIR CELL PACK BOLSTER HOSE ASSEMBLY MANIFOLD HOSE ASSEMBLY 2015/04 AO-SM-70 REV 3.0 Page 16 of 49...
-
Page 17: Pump Assembly
Pump Assembly The location of features and connections on the are presented below. Please refer to these during installation, Pump set up and operation of the Pump. Control FRONT VIEW Panel CPR Socket Hanger Brackets BACK VIEW AST Socket Manufacturer and Serial Number Label Power Cord CPR Socket... -
Page 18: Pump Controls & Indicators
Pump Controls & Indicators CONTROL PANEL The Control Panel of the is shown in the picture below. Pump Battery Alert Pressure Up (Increase) AST Contact Indicator Pressure Down (Decrease) Alarm Signal Indicator Pressure Redistribution (Static) Mode Pressure Alarm Indicator ALP Mode Power MM Mode MAX Inflate... - Page 19 Pump Controls & Indicators KEY FUNCTIONS The control panel has ten (10) keys as shown in the picture above: Each key will light up the associated LED indicator(s) when activated. 5. POWER Turns Pump ON or to STANDBY. When Unit is plugged in and in STANDBY, the LED indicator is white. When the Unit is ON, the LED indicator is green.
- Page 20 Pump Controls & Indicators PUMP FUNCTIONS: ALARM FUNCTION The Pump is equipped with a flashing/audible alarm to alert the user that the actual pressure is out of the specified range. This typically indicates a leak or a kinked hose and requires resolution before continuing use (See Page 29), Troubleshooting Guide and Alarm Priority Table).
- Page 21 Pump Controls & Indicators ALP FUNCTION Pressing the ALP Key activates the ALP therapy mode, which alternately inflates and deflates cells to relieve pressure and allows for manual adjustment of cell pressure (PRESSURE UP and PRESSURE DOWN Keys will function normally while this mode is active). Activating MAX INFLATE or Pressure Redistribution (Static) mode (via their respective Keys) will disable ALP therapy mode.
-
Page 22: Installation And Operation Procedures
Installation & Operation Procedures Follow the procedures below for the installation and operation of the Pump and Support Surface: INSTALLATION OF SUPPORT SURFACE: Procedure Cautions & Warnings 1. Ensure that the support surface properly fits the bed frame on which it is being placed. - Page 23 Use the long (15ft) power cord provided. allow the Pump to equilibrate for at least one (1) hour 6. If you are installing the support surface on a Stryker bed frame before operating. equipped with an outlet, use the optional power outlet located under the foot end of the frame and the short (3ft) power cord provided.
-
Page 24: Pump
− The power cord to the Pump should be positioned to avoid a tripping and strangulation hazard and/or damage to the cord. Stryker recommends placing the cord under the bed frame and plugging it into an electrical outlet by the head end of the bed, or the integral electric outlet on the bed. -
Page 25: Operation
− The MAX INFLATE function is intended to be used when the mattress should the IsoAir™ System is in use. They may damage not be moving, such as when the patient is entering or leaving the bed, or a the system that may cause bodily harm to procedure is being performed on the patient. -
Page 26: Cpr
Installation & Operation Procedures CPR ACTIVATION: Procedure Cautions & Warnings Disconnect hose from the Pump by pushing in the TABS on the CPR Connector and pulling the connector away from the Pump. − Initiate deflation of the Support Surface before starting CPR. -
Page 27: Pressure Adjustment
Installation & Operation Procedures PRESSURE ADJUSTMENT CHECK: Procedure Cautions & Warnings 1. To ensure the patient is getting the proper therapy, periodically use HAND CHECKS to check for proper inflation. 2. When the mattress is in the Manual Mode a HAND CHECK should be performed to −... -
Page 28: Patient Handling
Raise the bed side rail located opposite the patient transfer. positioning. Move ONLY the patient. DO NOT attempt to move the IsoAir™ surface with a − To avoid the risk of patient injury, ensure the opposite side rail is raised when placing a patient on patient on it. -
Page 29: Troubleshooting
Press and release the key with the flashing LED − The ALARM LED is blinking to clear the stuck key. The LED for one of the Keys is flashing If condition persists contact Stryker Customer − (identifying the Stuck Key) Technical Support Page 9, or authorized service personnel. - Page 30 Make sure the power cord is plugged in, AC power is ON and the − AC power outage Power LED is lit (white for standby, green for unit turned on). disconnected power cord If condition persists contact Stryker Customer Technical Support − blown fuse Page 9, or authorized service personnel. internal damage...
- Page 31 Alarm and Alert Indicators All alarms are indicated by a flashing LED and accompanied by an audible alarm. Only the highest priority alarm is sounded. ALARM & ALERTS LEDs Alarm Pressure Power Lock Manual Pressure Level Battery Alert Icon...
-
Page 32: Alarm And Alert Indications
Alarm and Alert Indicators ALARM and ALERT INDICATIONS TABLE Control Panel Indicator Pressure Alarm/ Alert Alarm Signal Power Display Indicator AST LED Lock LED MM LED Power Fail Blinking Blinking Hardware Failure Blinking Blinking Stuck Key Blinking Flashes the LED for the Stuck Key AST Connection Blinking Blinking... -
Page 33: Power Failure
Power Failure POWER FAIL CONDITIONS A power fail condition can occur under three cases: Plug detached from the power outlet Power outage has occurred Fuse has blown OPERATION DURING POWER FAILURE During a power fail condition, the LCD is off, the Alarm and Power LEDs are blinking, and the air cells will not inflate/deflate (no therapy will be delivered). -
Page 34: Cleaning And Disinfection
Cleaning and Disinfection CLEANING / DISINFECTION OF THE PUMP The exterior of the and Hosing Assembly should be wiped down between patients. Always inspect Pump Pump components during Preventive Maintenance (Page 40) and replace as necessary. − Disinfect the and Surface between patient installations and when servicing, utilizing standard hospital Pump protocol and disinfectants. -
Page 35: Cleaning/Disinfection Of Support Surface
Cleaning and Disinfection CLEANING / DISINFECTION OF THE SUPPORT SURFACE The useful life of the support surface components (shell, air cells & coverlet) may be shortened by the number of times it is cleaned/disinfected. The number of cleanings/disinfections is “patient-dependent” and it is the responsibility of the caregiver to ensure the support surface is clean and sanitary for the patient, including determining the frequency of cleaning/disinfection. -
Page 36: Service Information
Service Information For service and/or technical information other than specified in this manual, including fuse replacement, circuit diagrams and isolation of mains, see IsoAir Service Manual AO-SM-70-SR. − There are no “user-serviceable” parts inside the Pump. Service should only be performed by authorized maintenance personnel only. - Page 37 Service Information AIR CELL REPLACEMENT (Continued) 5. Unbutton both sides of the air cell. 6. Slide the air cell out of the restraining loops. 7. Insert the new air cell through the loops. 8. Button both sides of the new cell. 9.
- Page 38 Service Information CLEANING PUMP FILTER Good filter maintenance is critical in keeping your IsoAir™ Pump in optimal operating condition. Failure to clean the filter may cause damage to the Pump. The damaged Pump may not provide proper support pressures resulting in patient injury.
-
Page 39: Preventive Maintenance
DO NOT service or perform maintenance while the product is in use. May result in patient injury. At a minimum, check all items listed during annual preventive maintenance for all Stryker Medical products. You may need to perform preventive maintenance checks more frequently based on the level of patient usage and the number of times the Surface is cleaned/disinfected. - Page 40 Contact Stryker Customer Service for information, see Page 9. Preventive maintenance should be performed annually, at a minimum. A preventive maintenance program should be established for all Stryker Medical equipment. Preventive maintenance may need to be performed more frequently based on the level of usage and the number of times the Pump is cleaned/disinfected.
-
Page 41: Product Labeling
Product Labeling Support Surface Labels Labels attached to the Support Surface are shown below are: 1) Care Label 2) Law Label 3) Flammability Label 4) Coverlet Label 5) Shell Label 5) Shell Pocket - Choking Hazard Label: 2015/04 AO-SM-70 REV 3.0 Page 41 of 49... - Page 42 Product Labeling Pump Labels Labels attached to the Pump are shown below are: Manufacturer Label: Part & Serial Number Label: 12SM-SRXX-XX Control Data Label: 4) Fuse & Voltage Label: Stryker Name Label: 2015/04 AO-SM-70 REV 3.0 Page 42 of 49...
- Page 43 Product Labeling Hosing/Tubing Assembly and Power Cord Labeling Labels attached to the hosing/tubing assembly & the power cords are shown below: CPR Hose Label: Power Cord Label: 2015/04 AO-SM-70 REV 3.0 Page 43 of 49...
-
Page 44: Quick Reference Replacement Parts List
The parts and accessories listed on this page are currently available for purchase. Some of the parts identified on the assembly drawing in this manual may not be individually available for purchase. Please call Stryker Customer Service USA at 1-800-327-0770 for availability and pricing. -
Page 45: Product Compliance Declarations
Product Compliance Declarations GUIDANCE AND MANUFACTURER’S DECLARATION – EMISSIONS Guidance and Manufacturer’s Declaration – Emissions The IsoAir™ 2940 (“ Pump”) is intended for use in the electromagnetic environment specified below. The customer or the user of the Pump should assure that it is used in such an environment. - Page 46 Product Compliance Declarations GUIDANCE AND MANUFACTURER’S DECLARATION – IMMUNITY - NON LIFE SUPPORTING Guidance and Manufacturer’s Declaration – Immunity – Non-Life Supporting Pump is intended for use in the electromagnetic environment specified below. The customer or the user of the Pump should assure that it is used in such an environment.
-
Page 47: Warranty
Normal wear and tear; or − Damage or product failure due to causes beyond Stryker’s control such as, but not limited to abuse, theft, fire, flood, wind, lightning, freezing, clogging of support surface pores due to tobacco smoke, unusual atmosphere conditions, material degradation due to exposure to moisture;... -
Page 48: Quick Reference Guide
ISOAIR™ QUICK REFERENCE GUIDE Air Cell Pressures – Max Inflate Timer – Pressure Contact Alarm Displays A and B cell Counts down from 15 mins Indicator – Indicator – Signal LED pressures in mmHg when Max Inflate is active Blinks when a Displayed when –... - Page 49 1 - All alarms are classified as Medium Priority per IEC 60601-1-8 2 - Blinking = every 2 seconds 3 - Flashing = 10 times per second 4 - If alarm condition persists, contact Stryker Customer Technical Support Stryker Customer Technical Support - (800) 327-0770 or (269) 324-6500 2015/04 AO-SM-70 REV 3.0...
- Page 50 Distributed By: Stryker Medical 3800 E. Centre Ave. Portage, Michigan 49002 2015/04 AO-SM-70 REV 3.0 Page 50 of 49...
Need help?
Do you have a question about the IsoAir and is the answer not in the manual?
Questions and answers