Table of Contents
Advertisement
Advertisement
Table of Contents

Related Manuals for Myson iVector S2


Summary of Contents for Myson iVector S2
- Page 1 Installation manual iVector S2 | 2022-07-01...
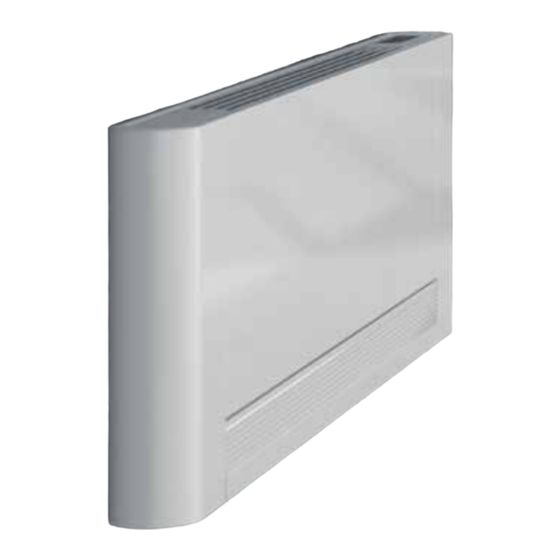
- Page 3 The iVector S2 is available with casing (VS model) or without casing (VSI model), in 5 different lengths. VS models can be mounted vertically on the wall or...
-
Page 4: Table Of Contents
Connection of multiple units using remote-mounted thermostat LED Indications (A) 2 pipe & 4 pipe models with remote-mounted thermostat Remote-control panel mounting Wiring connection to remote-mounted control 5.10 Presence detection sensor input connection – units with remote-mounted control iVector S2 • 2022-07-01... - Page 5 Stand-by Temperature selection Automactic operation Silent operation 8.10 Night-time operation 8.11 Operation at maximum fan speed 8.12 Key lock 8.13 Reduce brightness to minimum 8.14 Room temperature probe regulation offset 8.15 Switching off for longer periods iVector S2 • 2022-07-01...
-
Page 6: Safety And General Information
The imbedded iVector S2 VSI series do lack of experience and knowledge not have a grille or covering plate. The if they have been given supervision... -
Page 7: General Information
Frost prevention measures must be taken including use of anti-freeze if appropiate. 1.3 Product range The iVector S2 is available with casing (VS model) or are supplied with pre-fitted valves. without casing (VSI model), in 5 different lengths. VS models can be mounted vertically on the wall or... -
Page 8: Technical Data
1335 1535 mm (inch) 378 (14-7/8) 578 (22-3/4) 778 (30-5/8) 978 (38-1/2) 1178 (46-3/8) 126 (4-15/16) iVector S2 / Vido S2 79.5 (3-1/8) 73.5 (2-9/16) 73.5 (2-9/16) 37.5 (1-1/2) 18.5 (3/4) ∅ 14 (1/2) 83.5 (3-9/32) 83.2 (3-9/32) 116 (4-9/16) 2-pipe inset unit shown without factory-fitted valves. - Page 9 VSI 9-4P VSI 11-4P VSI 13-4P VSI 15-4P mm (inch) 378 (14-7/8) 578 (22-3/4) 778 (30-5/8) 978 (38-1/2) 1178 (46-3/8) iVector S2 / Vido S2 73,5 (2-7/8) 73,5 (2-7/8) 126 (3-15/16) 98,5 30 (1-3/16) 30 (1-3/16) (3-7/8) 76 (3) 41 (1-5/8)
-
Page 10: Installation
2.2 Installation clearances The figure below indicates the minimum clearance between the surface-mounted unit and any adjacent furniture. 20 mm (7/8“) 20 mm (7/8“) 400 mm (15-3/4“) iVector S2 • 2022-07-01... -
Page 11: Side Opening
Drill the holes, insert the mounting plugs or other suitable fixing and secure the 2 brackets. NOTE: take care to ensure correct orientation of the mounting brackets. These should be fixed with small tabs pointing towards the fixing surface. Mounting plugs Brackets iVector S2 • 2022-07-01... -
Page 12: Horizontal Or Ceiling Installation (Vs, Vsi)
• Fix one end of each tie to the chassis using the replacement. spring-loaded fixing screws. • Fix the other end of each tie to the grille using the supplied screws. • Refit the grille. Ties Screw fixing Spring-loaded screws iVector S2 • 2022-07-01... -
Page 13: Air Intake Grille Fixing
A suitable thread sealant should be used. The use of After making the water connections check for leaks Teflon thread sealant is advised when there is anti- and cover the connections with insulating material. freeze in the hydraulic circuit. iVector S2 • 2022-07-01... -
Page 14: Condensate Discharge
• Fully close the side checking that the pipe remains to pre vent any drops of condensate falling outside the tight in the special groove on the side. drip tray. • Insulate the condensate discharge pipe (B) along its complete length. ø14 mm / 1/2" iVector S2 • 2022-07-01... -
Page 15: Filling And Venting The System
Venting of the heat exchange Warning: Commissioning instructions – opening the valve actuator (where used) Remove the 'red plastic' clip from the valve actuator before starting the system. Valve actuator Red plastic clip Valve iVector S2 • 2022-07-01... -
Page 16: Electrical Connections
Wait until the parts have cooled down to avoid the risk of burns. When necessary, clean the outer surfaces of the iVector S2 with a soft damp cloth. 2.14 Cleaning the air filter To maintain air flow levels through the unit, air filters concentration of impurities in the local environment and duration of operation. - Page 17 • Limit where possible the effect of direct sun rays in keep the doors and windows closed in the room being the rooms being conditioned (use curtains, shutters conditioned when the unit is in use. etc.) iVector S2 • 2022-07-01...
-
Page 18: Faults And Troubleshooting
An unbalanced fan can cause excessive The appliance makes a strange noise. The fan is unbalanced. vibrations in the unit; replace the fan. Check if the filters are clogged and clean Clean the filters. them if necessary. iVector S2 • 2022-07-01... -
Page 19: Instructions 2-Way Valve
Return valve connection 53 mm 27 mm 2” 1” PLEASE NOTE: valves are factory fitted but not tightened. For floor connections extension piece D (or similar) must be used to clear outside edge of condensate tray. iVector S2 • 2022-07-01... - Page 20 2-way valve 90° elbow fitting (optional – supplied as Return valve connection accessory) 69 (2-3/4) 21 (13/16) PLEASE NOTE: valves are factory fitted but not tightened. For through-the-wall connections 90° elbow C or similar should be used. iVector S2 • 2022-07-01...
- Page 21 Pressure drop diagram Pressure drop figures based on the 2 way valve fully open position. Flow rate in US gallons per minute / gpm Cv = 4.17 gpm Kv & 14.5 13.1 10.2 qm = kg/h = 3.60 iVector S2 • 2022-07-01...
-
Page 22: Return Valve Pre-Setting Screw Adjustment
• The pre-setting is now done and does not change pin inside the central hexagonal recess. when opening and closing the adjustment screw with • Use a 5mm Allen key to close the adjustment screw the Allen key. Replace the cap. (A). Top Cap iVector S2 • 2022-07-01... - Page 23 2.75 3.06 3.23 3.31 3.35 Turns 1.25 1.75 2.25 2.75 0.09 0.38 0.58 0.69 1.07 1.37 1.72 2.13 2.75 3.06 3.23 3.31 3.35 0.10 0.44 0.67 0.80 1.24 1.59 1.99 2.47 3.18 3.54 3.74 3.84 3.88 iVector S2 • 2022-07-01...
-
Page 24: Valve Insulation
Water pipes and joints must be thermally insulated. Avoid partial insulation of the pipework. Check that the insulation is sufficiently tight to avoid condensation and dripping, but not too tight in case of damage to pipework. iVector S2 • 2022-07-01... -
Page 25: Control Panel Connection And Setup
C is off). In the ON position, the fan will always be off and Night time heating can be selected by pressing heating is by radiation and natural convection only. the control panel iVector S2 • 2022-07-01... -
Page 26: Pipe & 4 Pipe Models With Integrated Control
(115V/60Hz Canada/US) heating or cooling, the fan will only operate 230V/50Hz electrical power supply when the water temperature reaches 30°C (115V/60Hz Canada/US) (86 °F) in heating, or falls below 20°C (68 °F) in cooling. UV lamp connection iVector S2 • 2022-07-01... -
Page 27: Pipe & 4 Pipe Models With Remote-Mounted Control
Electrical connection of the cable from the remote wall-mounted control should be made to the 4-way screw terminal block (A) on the unit control board. Use suitable cables as detailed in sections 6.2 and 6.3. 0.2-1mm iVector S2 • 2022-07-01... -
Page 28: Connection Of Multiple Units Using Remote-Mounted Thermostat
The circuit board in each unit has a green LED that indicates operational status and any fault conditions. Green LED: Indicates that the unit is operational. LED off: unit is off or has no power. Flashing indicates a fault. iVector S2 • 2022-07-01... -
Page 29: Remote-Control Panel Mounting
• fix the base of the controller to the wall using suitable walls and around 1.5m (60 inches) from the floor. screws and mounting plugs. • make the electrical connections then close the controller taking care not to trap any of the wires. iVector S2 • 2022-07-01... -
Page 30: Wiring Connection To Remote-Mounted Control
When the CP input contacts close, the units are placed into stand-by. If the contact is open the units are active. If the contact is closed, the units are Remote control terminal block Auxiliary relay Contact CP Contact iVector S2 • 2022-07-01... -
Page 31: Onboard And Remote Control Setup Menu
Adjust buzzer volume To change the volume: Display Operation • the volume setting range is from 00 (min) to 03 (max) • increase or decrease the volume with the icons The volume changes after you confirm the modification. iVector S2 • 2022-07-01... - Page 32 Adjust the value in a range of - 9 °C to + 12 °C (16 °F - 54 °F), at variations of 0.1 °C/°F. After 30 seconds from the last action, the control goes off and the settings is memorised. Scale To change the temperature unit: Display Operation • select °C or °F iVector S2 • 2022-07-01...
-
Page 33: 0-10V Models
The speed curve shows linear regulation from the (1,400 rpm) for voltage values ≥ 1.1V to 10 V DC. The minimum value (400 rpm) to the maximum value motor is off when values are lower than 1V DC. iVector S2 • 2022-07-01... -
Page 34: User Instructions
Heating / Cooling: for changing between ON/Stand-By: for activating the device or for heating and cooling modes putting it in stand-by Sets the fan speed automatically Silent: limits fan speed to a lower value iVector S2 • 2022-07-01... -
Page 35: Activation
5°C (41 °F) to 40°C according to the actual room temperature detected. (104 °F) (unless in auto mode). Only set these values for brief periods, and then set an intermediate value. iVector S2 • 2022-07-01... -
Page 36: Automactic Operation
With the display off, press and hold the + key for 5 seconds until "01" is displayed. Use the - key to change the value to 00 and wait 20 seconds to check the setting has been accepted. iVector S2 • 2022-07-01... -
Page 37: Room Temperature Probe Regulation Offset
The antifreeze function is not active if the electrical supply to the unit is isolated. Care must be taken to prevent damage from freezing if the unit is switched off for a season or for holidays. iVector S2 • 2022-07-01... - Page 38 S2 Installation manual iVector S2 • 2022-07-01...
- Page 40 MYSON is one of the oldest and most respected names in the heating industry. We have been manufacturing fan convectors for over 50 years. As one of the UK’s leading brands, with a reputation for maximising the role of innovation...
Need help?
Do you have a question about the iVector S2 and is the answer not in the manual?
Questions and answers