Subscribe to Our Youtube Channel
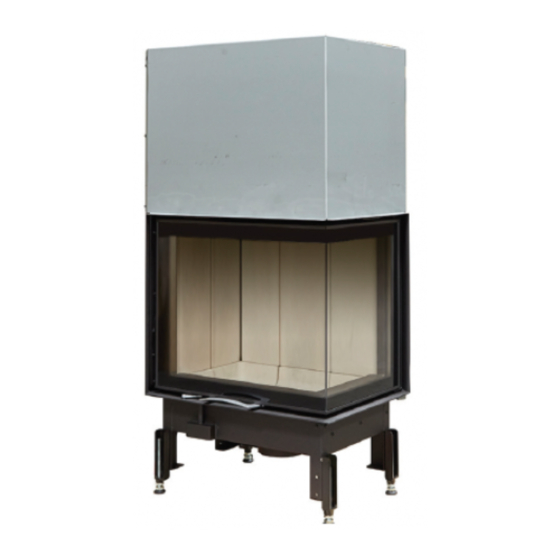
Summary of Contents for Austro Flamm 89x49x S Series
- Page 1 45x.. / 55x.. / 65x.. / 75x.. 80x64 S SII / 97x.. S / 120x45 S 71x.. S3 / 55x.. S3 38x38x57 K / 55x55x.. / 63x40x42 69x49x57 S / 89x49x.. S User instructions Austroflamm inserts...
-
Page 3: Table Of Contents
Contents Foreword ................... 1 Insert types ..................2 Operating elements ................8 Operating symbols/operation ............8 Fuel wood ..................8 Special advice ................... 9 Air supply in the installation room ..........9 Initial start-up .................. 10 10. Lighting a fire .................. 10 11. -
Page 4: Insert Types
2. Insert types This manual describes the following inserts and their function: 45x51/57/68 2.0 – flat hinged door x51 K x57 K x68 K 45x51/57 – round hinged door x51 Kr x57 Kr Width (installation frame) 450 mm 450 mm 450 mm Height door frame (mm) Door version... - Page 5 38x38x57 2.0 – hinged door Width (installation frame) 380 mm Height door frame (mm) Door version corner 90° Width [mm] Depth [mm] Height [mm] 1093-1293 Weight [kg] Nominal heat output acc. EN 5 kW Flue exit [mm] ∅150 55x55x51/57/68 – hinged/sliding door 2.0 x51 K/S x57 K/S x68 K...
- Page 6 80x64 SII 2.0 – Sliding door – tunnel version Width (installation frame) 800 mm Height door frame (mm) 639/637,5 Door version flat both sides Width [mm] Depth [mm] Height [mm] 1329-1529 Weight [kg] Nominal heat output acc. EN 10 kW Flue exit [mm] ∅180 80x64 S 2.0 - Sliding door...
- Page 7 63x40x42 2.0 left/right – Hinged/sliding door Width (installation frame) 630/400 mm 630/400 mm Height door frame (mm) Door version two sided two sided Width [mm] Depth [mm] Height [mm] 947-1147 1093-1293 Weight [kg] Nominal heat output acc. EN 6,5 kW 6,5 kW Flue exit [mm] ∅150...
- Page 8 3. Technical data *) certification in progress - **) Inserts marked like this are suitable for an installation in closed systems. 75x39KII type 45x.. 55x55x 45x51KII 75x51SII* 38x38x 75x39SII certification acc. to DIN EN 13229 nominal heat output max. heat output max.
- Page 9 80x64S/ 55x51 89x49x45 55x51 type 80x64S 97x..S 120x45S* 69x49x57 71x51/57S3 63x40x42* 89x49x57 compact certification acc. to DIN EN 13229 nominal heat output max. heat output 16/15 max. log length allowed fuel quantity 3,4/3,2 fuel consumption kg/h 2,13 2,56 2,56 1,92 2,34/2,13 2,34 2,13...
-
Page 10: Operating Elements
4. Operating elements The Austroflamm inserts stand out because of their simple operation. convection air outlet combustion/convection air inlet operation of the combustion air control door lock 5. Operating symbols/operation operation lever for combustion air + = maximum air supply for fast burning I = average heat output –... -
Page 11: Special Advice
7. Special advice Please mind that all surfaces of the insert heat up extremely during operation. Please • use the heat-proof glove, which comes with the insert. Please also make your children aware of this danger and keep them away from the fireplace during operation. •... -
Page 12: Initial Start-Up
9. Initial start-up Remove all enclosed documents and accessory parts from the combustion chamber. • • Carefully read this user manual. • The first operation of your fireplace should take place at the earliest 4 weeks after the completion of its surroundings, so that all parts can dry out well. -
Page 13: Putting More Wood On The Fire
12. Putting more wood on the fire • open door slowly, so no turbulences can occur which might cause escaping flue gases. The right moment for putting more wood into the combustion chamber has come, when all fuel has burnt down to embers. - Page 14 cleaning the door glass (flat sliding door 2.0): 1 and 2: block door lift swing open the door 3: unlock door at the top and bottom cleaning the door glass (corner sliding doors 2.0): 1 and 2: block door lift swing open the door 3: unlock door at the top and bottom cleaning the door glass of 71x51 S3, 71x57 S3 and 55x51 S3:...
-
Page 15: Behaviour In Case Of A Chimney Fire
Now you can clean the door through the gaps. After cleaning proceed in reversed order to get the door locked again. • Spray glass with glass cleaning liquid and leave to react. ATTENTION: avoid contact between door and glass gaskets with water or cleanser, as these may harden and thus cannot fulfil their function! Remove dissolved soot with an absorbent cloth or kitchen roll. -
Page 16: What To Do If
20. What to do if, ...? ... if the fire smoulders or goes out by itself? Is the throttle valve open? • • Is the deflection damper of the heat exchanger in the right position? • Is the combustion air flap open (+)? •... -
Page 17: Warranty And Guarantee
Warranty and guarantee Precondition for a valid guarantee claim is that your AUSTROFLAMM insert was installed and handed over by a certified professional stove fitter and is operated in accordance with the operator’s manual and the local regulations and laws. We guarantee full functionality of the Austroflamm insert carcass for 6 years and all stove components made of steel or cast iron for a full two years from the date of purchase.


Need help?
Do you have a question about the 89x49x S Series and is the answer not in the manual?
Questions and answers