Advertisement
Table of Contents
- 1 Table of Contents
- 2 Need Help with Your Camera or more Information about the Advanced Photo System
- 3 Camera Identification
- 4 Batteries
- 5 Battery Tips
- 6 Loading the Film
- 7 Taking Pictures
- 8 Tips for Better Pictures
- 9 Taking Flash Pictures
- 10 Unloading the Film
- 11 Troubleshooting
- 12 Specifications
- Download this manual
Advertisement
Table of Contents

Related Manuals for Kodak 1600


Summary of Contents for Kodak 1600
- Page 1 Kodak 1600 AUTO 1700 AUTO Camera...
- Page 2 Film Status Indicator (FSI) A highlighted indicator advances from one symbol to another to identify the status of the film inside the cassette. Processed Negatives Unexposed Partially Exposed Fully Exposed...
- Page 3 This device complies with part 15 of the FCC Rules. Operation is subject to the following two conditions: (1) This device may not cause harmful interference, and (2) this device must accept any interference received, including interference that may cause undesired operation. NOTE: Your model camera has been tested and found to comply with the limits for a Class B digital device, pursuant to Part 15 of the FCC Rules.
- Page 4 Look for this logo to be sure that the film you buy is made for this camera. Look for this logo to select a certified photofinisher for developing your film and to assure that you get all the features of the Advanced Photo System.
- Page 5 (3) (4) (11) (12) (13) (16) (10) (15) (14)
-
Page 8: Table Of Contents
Contents Need Help with Your Camera or More Information About the Advanced Photo System? ... 7 Camera Identification ... 10 Batteries ... 11 Loading the Film ... 14 Taking Pictures ... 15 Taking Flash Pictures ... 18 Unloading the Film ... 20 Troubleshooting ... -
Page 9: Need Help With Your Camera Or More Information About The Advanced Photo System
More Information About the Advanced Photo System? Call: Kodak (United States only) toll free from 9:00 a.m. to 7:00 p.m. (Eastern time ) Monday through Friday at 1 (800) 242-2424. Kodak (Canada only) from 8:30 a.m. to 5:00 p.m. (Eastern time) Monday through Friday at 1 (800) 465-6325, ext. -
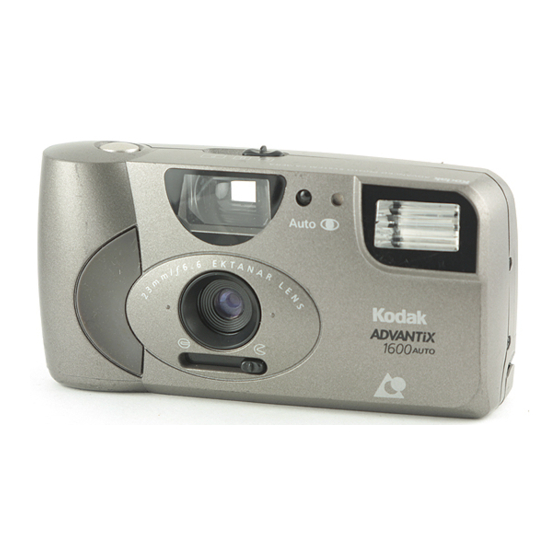
Page 10: Camera Identification
Camera Identification (1) Shutter Button (2) Print-Size Selector (3) Viewfinder (4) Red-Eye-Reduction Indicator (5) Flash Sensor (6) Flash (7) Lens (8) Lens-Cover Switch (9) Film-Door Lever (see inside cover flaps of manual for camera diagrams) (10) Camera Strap (11) LCD Panel (12) Camera- /Flash-Ready Indicator (13) Viewfinder Eyepiece... -
Page 11: Batteries
Batteries This camera uses 2 AAA-size alkaline batteries that supply power for all camera operations. 1. Turn camera upside down. 2. Pull out and lift open the Battery Door (16) located on the side of the camera. 3. Load the batteries in the battery chamber with the + and - ends in the positions shown inside the battery door NOTE: Insert the batteries into the camera before you load the film. - Page 12 Low-Batteries Warning It’s time to replace the batteries when — • the Camera- /Flash-Ready Indicator (12) takes longer than 30 seconds to turn off, • the LCD panel displays “LO,” • the film doesn’t rewind, or • the camera will not operate. NOTE: If you “replace”...
-
Page 13: Battery Tips
Battery Tips: • Remember to keep spare batteries with you at all times. • Read and follow all warnings and instructions supplied by the battery manufacturer. • Keep batteries away from children. • Do not attempt to disassemble, recharge or short circuit the batteries, or subject them to high temperature or fire. -
Page 14: Loading The Film
Loading the Film For excellent all-around results for indoor and outdoor picture-taking, use KODAK ADVANTIX 200-speed Film. 1. Turn the Film-Door Lever (9) to the “open” position and insert the film cassette completely into the Film Chamber (14) 2. Close the Film Door (15). The film will automatically advance to the first picture and the LCD Panel (11) will display “1.”... -
Page 15: Taking Pictures
Taking Pictures You can take Classic (C), HDTV (H), and Panoramic (P) pictures on the same film cassette. Your photo-processing cost will be based on the format size(s) that you use to expose the film. 1. Slide the Lens-Cover Switch (8) to the “open” position to uncover the Lens (7), 2. - Page 16 Typical Print Sizes (Formats) Classic Group (HDTV) Panoramic 3 1/2 x 5" or 4 x 6" 3 1/2 x 6" or 4 x 7" 3 1/2 x 8 1/2" to 4 x 11 1/2" (88.9 x 127 mm (88.9 x 152 mm (88.9 x 216 mm thru 102 x 152 mm)
-
Page 17: Tips For Better Pictures
Tips for Better Pictures • Hold the camera steady when taking pictures. • Keep your pictures simple. Move close enough to your subject so it fills the viewfinder but not closer than 4 ft (1.2 m). • Take pictures at the subject’s level. Kneel down to take pictures of children and pets. -
Page 18: Taking Flash Pictures
Taking Flash Pictures In dim light, such as indoors or outdoors in heavy shade or on dark overcast days, you need flash. Your camera has a built-in flash with automatic red-eye reduction which fires when needed. When the Camera- /Flash-Ready Indicator (12) turns off, the camera is fully charged and ready for picture-taking. - Page 19 Flash Tips • Turn on room lights and have the subject face the lights to minimize red eyes in pictures. • Stand at an angle to shiny surfaces like windows or mirrors to avoid flash reflection and bright spots in your pictures. •...
-
Page 20: Unloading The Film
Unloading the Film After you take the last picture on the film cassette, the film automatically starts to rewind. When the film is fully rewound, the LCD Panel (11) will display “0” and “E” will appear when you remove the film from the camera. -
Page 21: Troubleshooting
Troubleshooting What happened Camera will not operate Film does not advance or rewind Probable cause There are no more pictures remaining Batteries weak, dead, missing, or im- properly inserted Film inserted before the batteries Batteries weak, dead, missing, or im- properly inserted Solution Remove the film... - Page 22 What happened Shutter button will not depress Film cassette does not fit completely into film chamber; film door does not close LCD displays “0” after loading batteries Probable cause Lens cover closed Loaded exposed, partially exposed, or processed film into the camera Film loaded before batteries Solution...
-
Page 23: Specifications
Shutter: Power Source: Dimensions: Weight: Kodak, Ektanar, Advantix, and the Advanced Photo System symbol and logotype are trademarks. KODAK ADVANTIX Film for color prints; slide, chrome, or color reversal film not for use in this camera 23 mm, 3-element all-glass KODAK EKTANAR Lens with protective lens cover Reverse Galilean with C, H, &... - Page 24 Consumer Imaging EASTMAN KODAK COMPANY Rochester, NY 14650 © Eastman Kodak Company, 1997 5-97 Printed in U.S.A. Pt. No. 916 3502...
Need help?
Do you have a question about the 1600 and is the answer not in the manual?
Questions and answers