Table of Contents
Advertisement
Advertisement
Table of Contents

Related Manuals for Kodak Digital Science DC50 Zoom


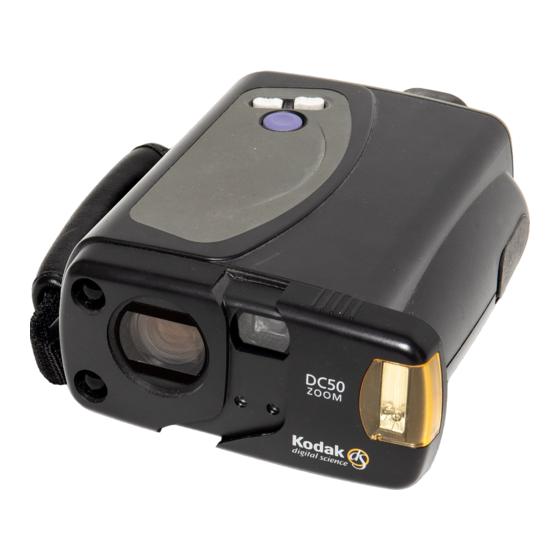
Summary of Contents for Kodak Digital Science DC50 Zoom
- Page 1 Kodak Digital Science (TM) DC50 zoom camera User’s Guide...
-
Page 2: Table Of Contents
Contents Introduction ........... Features . - Page 3 EJECT Button MODE Button SELECT Button ERASE Button DC50 zoom camera LCD Icons Auto Focus Exposure Compensation Flash ..........
- Page 4 Batteries ............Battery Life .
-
Page 5: Introduction
Introduction The Kodak Digital Science (TM) DC50 zoom camera (DC50 zoom camera) allows you to take pictures and transfer them to your computer where you can save them, manipulate them using image editing software, or print them on your printer. -
Page 6: Checking Package Contents
Checking Package Contents The following items are included with your new DC50 zoom camera: – DC50 zoom camera – four (4) lithium batteries – serial cable for use with Macintosh systems – serial cable for use with Windows systems – 9-pin adapter for a 25-pin serial port –... -
Page 7: Using The Camera
For more information about focus modes, refer to the Camera Features section. The DC50 zoom camera can store 7 to 22 pictures in its internal memory, depending on the features you select. The Images Remaining Counter in the Liquid Crystal Display (LCD) on the back of the camera shows you the number of pictures that you can take before the camera is full. -
Page 8: Installing The Batteries
Installing the Batteries Four lithium batteries are included with your DC50 zoom camera. You can also use rechargeable NiCad (nickel-cadmium) or AA alkaline batteries. Refer to the Batteries section for more information about batteries. WARNING: Mixing battery types in the camera may cause a fire or explosion. - Page 9 2. Remove the external battery compartment cover from the camera and set it aside. The internal battery compartment door is exposed. 3. Turn the camera over so the top of the camera is on your left and the front of the camera faces up. 4.
- Page 10 The door slides along its track and is released from its latch. 6. Lift up the door. The battery compartment is exposed. top of camera battery compartment door NOTE: The proper battery positions are indicated on the internal battery compartment door, as well as inside the battery compartment. 7.
- Page 11 8. Close the internal battery compartment door. 9. Push firmly on the door and slide the door until it locks into place. top of camera 10. Position the external battery compartment cover in its track. top of camera 11. Slide the external battery compartment cover up until it locks into place. January 1996 internal battery compartment door external battery compartment cover...
-
Page 12: Turning The Camera On And Off
Turning the Camera On and Off The camera is either on, off, or in the battery-saving power save mode. For more information about the on, off, and power save modes, refer to the Camera Features section. Camera On Pull the sliding cover gently away from the camera to turn on the camera. -
Page 13: Camera Off
You can specify a number between 60 and 255 seconds at a host computer to change the number of seconds before the camera goes into the power save mode. Flashing Indicator Lights and Icons The lights and icons on the DC50 zoom camera flash at varying speeds for different purposes. January 1996... -
Page 14: Taking Pictures
Taking Pictures Following are steps for taking a picture with your DC50 zoom camera using the camera’s default values. For detailed information about the DC50 zoom camera’s features and settings, refer to the Camera Features section. IMPORTANT: When you take pictures, make sure that your Turning On and Positioning the Camera 1. - Page 15 3. Slide your right hand fingers under the handstrap on the right side of the camera and allow the camera to rest on your right thumb. Your index finger should rest on the shutter button. NOTE: If you want to frame the picture like a portrait, turn the camera so it is vertically oriented (with the flash at the top).
-
Page 16: Framing Your Subject In The Viewfinder
Framing Your Subject in the Viewfinder 1. Look through the viewfinder on the back of the camera. 2. Position the Auto Focus (AF) target marks in the viewfinder frame on your subject. NOTE: The Auto Focus (AF) target marks are the solid and dotted circles in the viewfinder frame. -
Page 17: Capturing The Image
Capturing the Image Hold the camera as steady as possible when you press the shutter button. Moving the camera while pressing the shutter button will cause your pictures to be blurry. 1. Press the shutter button halfway down. NOTE: The shutter button is the purple button on the top of the camera. The camera measures the ambient lighting and sets the exposure and white balance, and automatically focuses the lens. -
Page 18: Camera Features
– front indicator light – exposure sensor – focus sensors – flash unit Camera Top—describes the buttons on top of the DC50 zoom camera. – shutter button – zoom buttons Telephoto (T) Wide Angle (W) January 1996... - Page 19 – selection buttons MODE SELECT ERASE – EJECT button DC50 zoom camera LCD Icons—describes the icons in the Liquid Crystal Display (LCD) on the back of the DC50 zoom camera. – LCD icons and settings: Auto Focus Exposure Compensation Flash Image Quality...
-
Page 20: Camera Front
Camera Front sliding cover/power switch front indicator light (red light) flash unit focus sensors light sensor NOTE: A standard tripod mount (not shown) is located on the bottom of the camera. January 1996... -
Page 21: Sliding Cover/Power Switch
Flash—auto flash Image Quality—image quality selection previously selected Timer—off NOTE: These features and their settings are discussed in the DC50 zoom camera LCD Icons section. Camera Off When the sliding cover is closed or power is not supplied from an AC adapter or the batteries, the camera is off. -
Page 22: Front Indicator Light
Power Save Mode The DC50 zoom camera power save mode is a battery-saving feature that automatically turns off the camera after 60 seconds without use, even if you are using an AC adapter. No icons appear in the LCD and the flash is not kept charged. -
Page 23: Camera Top
Camera Top Telephoto zoom button (T) Wide Angle zoom button (W) shutter button (purple button) January 1996... -
Page 24: Shutter Button
The shutter button is the purple button on top of the camera. You take a picture by pressing the shutter button that is on top of the DC50 zoom camera. When you lightly press the shutter button halfway down, the exposure and focus are measured automatically (AE/AF). -
Page 25: Zoom Buttons
Zoom Buttons The DC50 zoom camera allows you to zoom in on your subject. There are two zoom buttons: Telephoto and Wide Angle. Telephoto (T) Button When you press the Telephoto (T) button, the zoom lens moves from its current position up to the maximum zoom range in the telephoto position. -
Page 26: Camera Back
Camera Back viewfinder light viewfinder Liquid Crystal Display (LCD) MODE button SELECT button EJECT button ERASE button January 1996... -
Page 27: Viewfinder
Viewfinder The viewfinder on the back of the camera contains a green light which indicates the camera status. When you lightly press the shutter button halfway down, the green light on the viewfinder illuminates. You can then press the shutter button all the way down to take a picture. -
Page 28: Viewfinder Frame
Viewfinder Frame When you look through the viewfinder, you see the viewfinder frame. The viewfinder frame indicates frames and target marks for several focus modes. border for distances to infinity border for distances to 2.3 feet or 70 cm Consider the relationship of frames and focusing before you take a picture. -
Page 29: Mode Button
Each time you press the MODE button, a feature icon flashes to indicate that it is currently selected and active. NOTE: The icons in the LCD are described in the DC50 zoom camera LCD Icons section. The camera is at the “home” position before you press the MODE button. -
Page 30: Select Button
The ERASE button can be used only when the Erase Images icon is selected. NOTE: Refer to “Erasing Pictures” in the DC50 zoom camera LCD Icons section for step-by-step instructions for erasing pictures from the camera or the memory card. -
Page 31: Dc50 Zoom Camera Lcd Icons
DC50 zoom camera LCD Icons The DC50 zoom camera features appear as icons in the Liquid Crystal Display (LCD) and are manipulated using the buttons on the back of the camera. All features except Image Quality revert to their default settings when the camera is turned off and on again. -
Page 32: Auto Focus
Auto Focus The Auto Focus icon allows you to select from three focus settings: multi-spot auto focus, single-spot auto focus, and close-up focus. When you use the MODE button to select the Auto Focus icon, the current setting appears. The green light on the viewfinder flashes in the following cases: –... - Page 33 Close-up Focus When the close-up setting is selected, the focus is adjusted to approximately 1.6 feet (50 cm) from the front of the camera to the subject. The zoom lens moves to the close-up position. Any zoom button presses are ignored. When you take a close-up picture, center your subject in the small viewfinder frame (the one with the flower on the right side).
-
Page 34: Exposure Compensation
Exposure Compensation The Exposure Compensation icon allows you to change the exposure to adjust the camera for too dim or too bright lighting. For example, if the primary source of light is behind your subject, you may want to change the exposure to the highest setting. The exposure value is automatically measured by the camera (auto exposure). -
Page 35: Flash
Flash The Flash icon allows you to select from three flash settings: automatic flash, flash off, and flash on (fill flash). When you use the MODE button to select the Flash icon, the current setting appears. The effective range for the flash in telephoto mode is between 2.3 and 9 feet (70 and 270 cm). - Page 36 Flash Off The flash is not used even if the existing light is dim. To turn off the flash: 1. Press the MODE button until the Flash icon flashes. 2. Press the SELECT button until the Flash Off icon appears in the LCD. Flash On (Fill Flash) The flash is used for all pictures, even if the existing light is bright.
-
Page 37: Image Quality
Image Quality The Image Quality icon allows you to select from three image quality settings that are used to capture images. Best Use the SELECT button to specify an image quality setting. The selected image quality setting remains in effect even if you turn the camera off. -
Page 38: Timer
Timer The Timer icon allows you to specify the period of time that the camera waits to take a picture after you press the shutter button. This allows you to set the timer and then move in front of the camera so you can be in the picture. - Page 39 No Wait To take pictures immediately, do not make any changes to the timer feature. The camera takes the picture as soon as the shutter button is pressed. “No wait” is the default timer setting. Ten Seconds With this timer setting, the camera waits ten seconds after the shutter button is pressed before it takes the picture.
-
Page 40: Battery
Battery The Battery icon indicates the battery level as Full, Low, or Empty. The Battery icon does not appear in the LCD if the camera is connected to an AC adapter which is plugged into an electrical outlet. – When the icon appears full, the batteries are fully charged. –... -
Page 41: Image Counters
Image Counters Images Remaining Counter The larger number that appears near the center of the LCD is the Images Remaining Counter. This number is the approximate number of pictures that you can still take at the current image quality in the camera’s internal memory or on the memory card. - Page 42 When Erase Images is selected, the Images Remaining Counter changes after all of the images are erased, and the maximum number of pictures that are available at the current image quality for the camera’s internal memory or a memory card appears in the LCD. When Copy Images is selected, the Images Remaining Counter indicates how many additional images the memory card can hold.
-
Page 43: Erase Images
Erase Images The Erase Images icon appears only when pictures are in the camera’s internal memory or on the memory card in the camera. After you have transferred the camera pictures to your computer, you should erase the pictures in the camera to make room for new pictures. When you erase pictures, all pictures are deleted from the camera memory. -
Page 44: Memory Card
Memory Card When an optional memory card is inserted in the camera, the Memory Card icon appears in the LCD. The Images Remaining Counter shows the number of pictures that you can still take at the current image quality on the memory card. The Images Taken Counter shows the number of the last picture that was taken for storage on the memory card. -
Page 45: Copy Images
Copy Images The Copy Images icon allows you to copy pictures from the camera’s internal memory to a memory card that is inserted in the camera. NOTE: When no memory card is in the camera, the Copy Images icon does not appear in the LCD. When images in the camera’s internal memory are copied, the file names for these images are changed to meet the file name convention for the PCMCIA–ATA memory card. - Page 46 Copying Images to a Memory Card 1. Insert a memory card in the camera. The Memory Card and Copy Images icons appear on the LCD. 2. Press the MODE button until the Copy Images icon flashes. NOTE: The Images Remaining and Images Taken Counters also flash. The Images Taken Counter indicates the number of images taken in the internal memory.
- Page 47 Continuing the Copy Operation During a copy operation, if the memory card becomes full, “FUL” appears and flashes in the Images Remaining Counter. You can continue copying after you insert another memory card or cancel the rest of the copy operation. If you specify any other operation, an error code may appear in the LCD.
- Page 48 Canceling the Copy Operation If the memory card to which you are copying images is full and you do not have another card or you do not want to copy the rest of the images to another card, you can stop the copy operation. NOTE: You can only stop a copy operation after it has paused to allow you to insert another memory card.
-
Page 49: Using Removable Memory Cards
You can save pictures you take with your DC50 zoom camera on optional removable “Flash” or PCMCIA–ATA memory cards. Using a memory card in the DC50 zoom camera allows you to take and save many more pictures. You can insert a PCMCIA–ATA memory card in a PCMCIA–ATA card reader slot (if there is one) on your... -
Page 50: Inserting A Memory Card
LCD and the pictures that you take are recorded directly on the card. No pictures are saved to the camera’s internal memory. You can insert a memory card in the DC50 zoom camera while the camera is on (called hot insertion). However, when possible, you should turn off the camera before you insert a memory card. - Page 51 NOTE: If you try to use a memory card that is not compatible with the DC50 zoom camera, “Er 1” appears in the LCD. 5. Pull the sliding cover gently away from the camera.
-
Page 52: Removing A Memory Card
You also must remove the memory card when you want to save your pictures on the camera’s internal memory. You can remove a memory card from the DC50 zoom camera while the camera is on. However, when possible, you should turn off the camera before you remove a memory card. -
Page 53: Copying Pictures From The Camera To A Memory Card
Copying Pictures from the Camera to a Memory Card You can copy pictures that are stored in the camera’s internal memory onto a memory card. The Copy Images icon appears in the LCD only when a memory card is inserted in the camera and pictures are saved in the camera’s internal memory. -
Page 54: Erasing A Memory Card
You cannot specify individual pictures to delete. NOTE: Erase pictures from the memory card only when the card is in the DC50 zoom camera. If you delete pictures from a memory card when it is in a PCMCIA–ATA card reader, the camera will not be able to track the numbers of any pictures remaining on the memory card. - Page 55 4. Press the ERASE button and hold it down for two seconds. The Erase Images and Memory Card icons flash, indicating that the pictures are being erased from the memory card. 5. Release the ERASE button. When the pictures have been deleted, the Erase Images icon disappears, the Images Remaining Counter indicates the maximum number of pictures available in the memory card at the current image quality for the memory, and the Images Taken Counter returns to “0.”...
-
Page 56: File Name
L = best image quality Image files for the PCMCIA–ATA memory card will be written in the DC50IMG directory. This directory is written automatically by the DC50 zoom camera when the memory card is inserted in the camera. File Name DCI nnn s.KDC DC nnnn s.KDC... -
Page 57: Batteries
Batteries The DC50 zoom camera comes with four AA lithium batteries. You can also use rechargeable NiCad (nickel-cadmium) or AA alkaline batteries. NiCad or lithium batteries perform better than alkaline batteries. Battery Life Using the flash and transferring pictures to the computer both require more of the battery charge. -
Page 58: Storing The Camera
Storing the Camera Remove the batteries from the DC50 zoom camera if it will not be used for an extended period of time. This prevents possible damage to the camera from battery leaks or corrosion. Battery Charge Level The level of charge remaining in the batteries is shown by the Battery icon in the LCD. -
Page 59: Improving Battery Performance
Improving Battery Performance Follow these guidelines to extend battery life. – Replace all four batteries at the same time. Mixing new or fully charged batteries with those that have been in use for some time weakens the new ones. – Clean the contacts in the battery compartment periodically by rubbing them gently with a clean pencil eraser or a cloth. -
Page 60: About Nicad Batteries
About NiCad Batteries NiCad batteries can be used and recharged over and over again. When you purchase a charger for NiCad batteries, look for one that discharges the batteries completely before it recharges them. “Conditioning” batteries this way helps them hold their charge longer. If your battery charger does not “condition”... -
Page 61: Using A Power Adapter
You can purchase a custom universal adapter for your DC50 zoom camera. If your retailer does not stock the adapter, call the technical support telephone number that is listed in the Troubleshooting section. -
Page 62: Connecting A Power Adapter To The Camera
Connecting a Power Adapter to the Camera 1. Push the sliding cover closed. The camera is off. 2. Lift the rubber tab located on the left side of the camera. The camera’s serial and AC power adapter ports are exposed. 3. -
Page 63: Connecting To A Computer
You can then use the pictures or save them on your hard drive. Use the RS232C/RS422 serial cables that are included with the DC50 zoom camera to connect the camera to a Macintosh computer or an IBM-PC or compatible computer running Windows software. -
Page 64: Macintosh Systems
MACINTOSH Systems You can connect the DC50 zoom camera to a serial port on your Macintosh computer. IMPORTANT: Use only the cable that is provided with the 1. Push the sliding cover closed. The camera is off. 2. Plug one end of the Macintosh cable into the modem port or printer port on the back of your Macintosh computer. - Page 65 4. Plug the other end of the Macintosh cable into the camera’s serial port. You are now ready to transfer the DC50 zoom camera pictures to your computer using the software provided with the camera. NOTE: Before you run the software provided with the camera, turn off AppleTalk and specify an external modem if your system has an internal modem.
-
Page 66: Systems Running Windows Software
Systems Running WINDOWS Software Your IBM-PC or compatible computer has either a 9-pin or a 25-pin serial port. The cable supplied with the DC50 zoom camera uses a 9-pin connector. If you are using a 25-pin serial port, you must use the adapter provided with the camera. - Page 67 The camera’s serial and AC power adapter ports are exposed. 6. Plug the other end of the cable into the camera’s serial port. You are now ready to transfer the DC50 zoom camera pictures to your computer using the software provided with the camera.
-
Page 68: Maintenance
Maintenance General Guidelines – Keep the DC50 zoom camera away from moisture and high temperatures. – If the outside of the camera needs to be cleaned, wipe it with a clean, dry cloth. Never use harsh or abrasive cleaners or organic solvents on the camera or any of its parts. -
Page 69: Cleaning The Light Sensor And Focus Sensors
Cleaning the Light Sensor and Focus Sensors The light sensor is located below the viewfinder window on the front of the camera. The auto focus sensors are also on the front of the camera. focus sensors Clean the light sensors and focus sensors by rubbing them gently with a soft, dry cloth. -
Page 70: Troubleshooting
Troubleshooting This section should help you resolve any problems which you may encounter when using your DC50 zoom camera. If you still have trouble with your camera after reading this information, refer to the “Getting Help” section. Problems and Solutions... - Page 71 Nothing Happens when the Shutter Button Is Pressed Cause The flash is recharging. The camera does not have room for another picture. The camera is saving a captured image to memory. The camera is copying an image to the memory card. The camera is erasing images.
- Page 72 Picture Is Not Clear Cause The lens is dirty. The subject or the camera moved before the picture was taken. The subject is too close. The subject is too far away for the flash to be effective. The flash should have been used but it did not go off.
- Page 73 Flash Does Not Work Cause The flash is off. The batteries are low. The flash tube has burned out. Picture Is Too Dark Cause The flash is not on. The subject is too far away for the flash to have an effect. The exposure is not appropriate for the lighting.
- Page 74 Picture Is Too Light Cause The flash is not needed. The subject is too close when the flash was used. The exposure setting needs to be adjusted. The light sensors are dirty. The light sensors are covered. Solution Change to automatic flash by following the instructions in the Camera Features section.
- Page 75 Code Er 1 The memory card is not compatible with the DC50 zoom camera. Use a compatible card. Take the camera to your dealer for service. Take the camera to your dealer for service. Take the camera to your dealer for service.
- Page 76 Reseat the memory card. Replace the memory card with a known good card. Take the camera to your dealer for service. Confirm that the memory card is one that is compatible with the camera. Take the camera to your dealer for service. Confirm that the memory card is one that is compatible with the camera.
- Page 77 Getting Help If you have questions about the DC50 zoom camera, the retailer from whom you purchased the camera may be able to answer them. Eastman Kodak Company provides technical information to retailers. In the U.S., you can also call 1–800–235–6325 for technical support on regular business days between 9:00 a.m.
-
Page 78: Camera Specifications
Camera Specifications Technical Type: CCD still frame camera Image size: 756 x 504 high resolution Bit depth: 24-bit color Speed: With flash—pictures can be taken every 8 seconds Without flash—pictures can be taken every 5 seconds Flash: Color temperature—5,200 K Guide number—10.4 (ISO 84) Zoom Lens 7 to 21 mm... -
Page 79: Power Sources
Power Sources Batteries: Power adapter: Power Consumption Standby: Image capture: Image processing/flash charging: Removable Memory PCMCIA–ATA removable memory card Type I and II with DOS file format. Serial Cable RS232C/RS422 cable with Mini-DIN 8-pin connector. Asynchronous serial rates up to 57K bits per second on Macintosh systems and 115K bits per second on Windows systems. -
Page 80: Regulatory Information
Regulatory Information FCC Compliance and Advisory Statement This device complies with Part 15 of the FCC Rules. Operation is subject to the following two conditions: 1) this device may not cause harmful interference, and 2) this device must accept any interference received, including interference that may cause undesired operation. -
Page 81: Canadian Doc Statement
Canadian DOC Statement DOC Class B Compliance—This Class B digital apparatus meets all requirements of the Canadian Interference-Causing Equipment Regulations. Observation des normes-Class B—Cet appareil numérique de la classe B respecte toutes les exigences du Réglement sur le matériel brouilleur du Canada. January 1996... -
Page 82: Index
Index AC adapter, 53, 54 connecting to camera, 58 connector, 57, 59 using, 57–58 Acrobat (TM) Reader software, 2 Adapter, 9-pin, 2 ADOBE Acrobat (TM) Reader software, 2 Alkaline batteries, 4 Auto Focus icon, 15, 28 multi-spot, 17 target mark, 12 Auto focus sensors, 18 Automatic flash mode, 17, 31 Automatic shutoff, camera, 9, 18... - Page 83 Batteries, 2, 20, 36, 53–56 alkaline, 4 charge level, 54 charging, 56 conditioning, 56 extending life of, 55 improving performance of, 55 installing in camera, 4–7 life, 53 and number of images, 53 lithium, 4 disposal of, 53 mixing types, 4, 6, 53 NiCad, 4, 56 charging, 56 pictures in memory when batteries are empty, 36, 54...
- Page 84 Camera automatic shutoff, 9, 18 specifying time for, 9, 18 erasing pictures from, 26 features, 14–44 holding, 10 indicator lights, 9, 18 flashing, 9, 18 installing batteries in, 4–7 maintenance, 64–65 positioning, 10 power save mode, 9, 18 specifying time for, 9, 18 service, 71 “sleep”...
- Page 85 12 positioning camera, 10–11 Charging batteries, 56 Cleaning DC50 zoom camera focus sensors, 65 DC50 zoom camera lens, 64 DC50 zoom camera light sensor, 65 Close-up focus mode, 3, 29 Closing external battery compartment cover, 7–8 Computer, connecting DC50 camera to, 59–63...
- Page 86 DC50 zoom camera, 2 connecting to computer, 59–63 Macintosh systems, 60–61 Windows systems, 62–63 features, 1 maintenance, 64–65 cleaning focus sensors, 65 cleaning lens, 64 cleaning light sensor, 65 package contents, 2 service, 71 storing, 54, 65 Default value exposure compensation, 30...
- Page 87 EJECT button, 15, 24 Ejecting memory card from camera, 24 ERASE button, 15, 25, 26 Erase Images icon, 15, 26, 39 Erasing images from camera’s internal memory, 26, 39 from memory card, 26, 39, 50–51, 90–91 Erasing pictures from camera’s internal memory, 26, 39 from memory card, 26, 39, 50–51, 90–91 Error codes, 71–72 Exposure...
- Page 88 FCC compliance and advisory statement, 76 Features, 1 camera, 14–44 back, 15, 22–26 front, 14, 16–18 icons in LCD, 15, 27–44 power switch, 17 top, 14, 19–21 selecting with MODE button, 25 specifying with SELECT button, 25, 26 File name, memory card, 52 Fill flash flash mode, 32 Flash, 14, 17, 20 automatic, 31...
- Page 89 29 multi-spot auto, 28 single-spot auto, 28 multi-spot auto, 28 sensors, 14, 18 DC50 zoom camera, cleaning, 65 single-spot auto, 28 Framing subject in viewfinder, 12 Front indicator light, 14 FUL, in Images Remaining Counter, 20 Holding camera, 10–11...
- Page 90 Icons, 10, 17 flashing, 9 in LCD, 8, 9, 25, 27–44 default values, 27 Image counters, 37–38 quality, 17 selecting, 33 resolution, 33 selecting, 33 Image Quality Best, 33 Better, 33 Good, 33 icon, 15, 33 selecting, 33 Images capturing, 10–13 framing subject in viewfinder, 12 positioning camera, 10–11 transferring to computer, 59–63...
- Page 91 Indicator lights flashing, 9, 18 front of camera, 14, 18 Information, additional, 73 Inserting memory card, 46–47 Installing batteries in camera, 4–7 Internal battery compartment door closing, 7–8 opening, 5–6 Introduction, 1–2 January 1996...
- Page 92 Image Quality, 15, 33 selecting, 33 Images Remaining Counter, 15, 37–38 Images Taken Counter, 15, 38 Memory Card, 15, 40 Timer, 15, 34–35 Lens, DC50 zoom camera, cleaning, 64 Light sensor, DC50 zoom camera, cleaning, 65 Lithium batteries, 4, 53 January 1996...
- Page 93 Macintosh systems serial cable, 2 Maintenance, for DC50 zoom camera, 64–65 cleaning focus sensors, 65 cleaning lens, 64 cleaning light sensor, 65 Memory image storage, 37 cards, 37. see also PCMCIA–ATA cards canceling copy when full, 44 continuing copy when full, 43 copying images to, 42–43, 49...
- Page 94 NiCad batteries, 4 Number of pictures available, 37 Opening external battery compartment cover, 4–5 internal battery compartment door, 5–6 January 1996...
- Page 95 Package contents, 2 PCMCIA–ATA cards, 37. see also Memory cards canceling copy when full, 44 continuing copy when full, 43 copying images to, 42–43, 49 ejecting from camera, 24 erasing pictures from, 26, 50–51 image capacity, 45 incompatible, 43, 45, 47, 71 inserting in camera, 46–47 Memory Card icon, 15, 40 removing from camera, 48...
- Page 96 Positioning camera, 10–11 Power adapter, 53, 54 connecting to camera, 58 using, 57–58 consumption, 75 sources, 75 switch, 14, 17 Power save mode, 9, 14, 18, 43, 44 specifying time for, 9, 18 Problems with DC50 zoom camera, 66–73 January 1996...
- Page 97 Quick Reference Guide, 2 Registration card, 2 Regulatory information, 76–77 Removable memory cards, 45–52, 75 image capacity, 45 inserting in camera, 46–47 removing card from camera, 24, 48 size, 45 Removing memory card from camera, 24, 48 Resolution, 33 selecting, 33 January 1996...
- Page 98 Single-spot auto focus mode, 28 “Sleep” mode, camera, 9, 18 specifying time for, 9, 18 Sliding cover, 8, 9, 10, 14, 17 Software ADOBE Acrobat (TM) Reader, 2 camera application, 2 Specifications, camera, 74–75 Storing DC50 zoom camera, 54, 65 January 1996...
- Page 99 T button, 14, 21 no action when pressed, 21 Taking pictures, 10–13 framing subject in viewfinder, 12 positioning camera, 10–11 Technical support, 73 Telephoto zoom button, 14, 21 no action when pressed, 21 Time, specifying power save, 9, 18 Timer, 17 icon, 15, 34–35 setting, 35 Transferring pictures to computer, 59–63...
- Page 100 User’s Guide, 2 Using DC50 zoom camera, 3–13 removable memory, 45–52 inserting card in camera, 46–47 removing card from camera, 48 Viewfinder, 12, 15, 23 frame, 24 W button, 14, 21 no action when pressed, 21 “Waking” camera, 9, 18...
- Page 101 Zoom buttons, 14, 21 Telephoto, 14, 21 Wide Angle, 14, 21 Zoom lens field of view telephoto lens, 21 wide angle lens, 21 maximum zoom range telephoto lens, 21 wide angle lens, 21 January 1996...
- Page 102 Copyright Eastman Kodak Company, 1996 Printed in U.S.A. EASTMAN KODAK COMPANY Rochester, New York 14653 KODAK CANADA INC. Toronto, Ontario M6M 1V3 CANADA KODAK PATHE 8–26 rue Villiot 75594 Paris Cedex 12 FRANCE KODAK AG Hedelfinger Strasse 7000 Stuttgart, 60 GERMANY KODAK S.A.
Need help?
Do you have a question about the Digital Science DC50 Zoom and is the answer not in the manual?
Questions and answers