
Related Manuals for Kodak DC290


Summary of Contents for Kodak DC290
- Page 1 KODAK DC290 Zoom Digital Camera User’s Guide Visit Kodak on the World Wide Web at www.kodak.com...
- Page 2 Kodak, and Photolife are trademarks of Eastman Kodak Company. Digita is a trademark of FlashPoint Technology, Incorporated.
-
Page 3: Table Of Contents
1 Getting Started ......... . 1 Introduction . - Page 4 2 Taking Pictures ........19 Turning the Camera On or Off .
- Page 5 Connecting Your Camera ........65 Starting the KODAK Software ....... . . 66 Opening KODAK Software for Windows-Based Computers .
- Page 6 KODAK Digital Camera (Control Panel) ....67 KODAK Pictures Now ....... . . 67 Folder and File Naming Conventions .
-
Page 7: Getting Started
This chapter presents an overview of the camera buttons, displays, and hardware features. Introduction The KODAK DC290 Zoom Digital Camera (DC290) takes great pictures without using film. Here are some of the things that you can do: Take pictures and immediately view them on the color camera display, your TV, or your computer. -
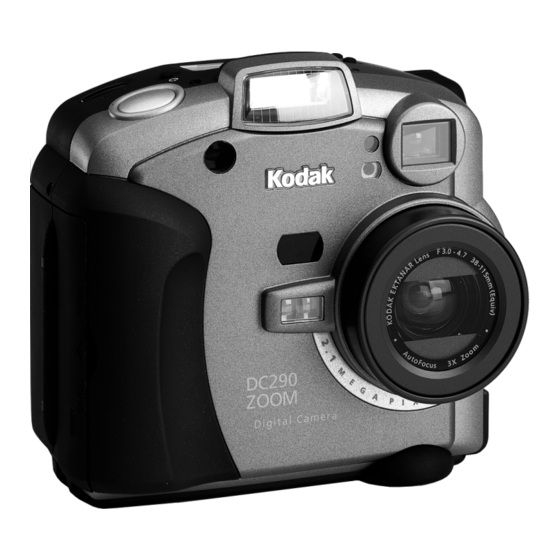
Page 8: Camera Front
Camera Front Shutter Self-timer light IrDA (Infrared) transceiver Battery door Memory card door Camera Top Scroll Select Flash Light sensor Auto Focus sensor Shutter Status LCD Viewfinder Flash sensor Lens Self-timer Power... -
Page 9: Camera Back
Camera Back Ready light Viewfinder Display button Microphone Menu button Audio LED Audio volume Audio Record External flash Video and Audio Out AC adapter Camera Bottom Product information data plate Color LCD screen Mode dial Four-way controller Tripod socket Zoom Softkeys... -
Page 10: Camera Specifications
Wide/TelePhoto: 1.0 ft (0.3 m) to infinity Wide/TelePhoto: 1.6 ft (0.5 m) to infinity AA size 1.5-volt alkaline, or AA size 1.2-volt Ni-MH rechargeable AC Adapter for KODAK DC200 Series Digital Cameras .25 in. (.006 m) threaded NTSC or PAL 4.6 in. -
Page 11: Softkeys
Softkeys Your camera has three “softkeys.” A softkey is a button whose function changes according to what is displayed above it. For example, in the Capture mode, the following screen can be displayed: In this case, pressing the left softkey enters the Advanced Focus Modes. When presented with a different screen display, pressing this softkey can perform an entirely different function. -
Page 12: Your Status Lcd
Your Status LCD A display on the top of the camera shows the current settings. The following subsections briefly describe each entry. For information on how to define settings through the Capture mode, see page 24. The camera must be turned on and in the Capture mode to view and interact with this display. -
Page 13: Exposure Compensation
Exposure Compensation In very large rooms, under low light, you may achieve better results by turning the flash off entirely, or by utilizing the flash sync capability with an external flash unit. While in Capture mode, the camera exposure can be adjusted from -2.0 to +2.0 exposure value (EV) in 0.5 EV increments. -
Page 14: Pictures Remaining
Pictures Remaining The Pictures Remaining icon changes automatically to indicate the remaining number of pictures that can be stored at the current quality and resolution setting. This is a display-only icon. You cannot select or change it. The pictures remaining number does not always change when a picture is taken if the picture content is easily compressed. -
Page 15: Irda (Infrared) Communication
IrDA (Infrared) Communication In a camera-to-camera connection in the Review mode, two cameras can communicate with each other through an IrDA connection. The IrDA Communication icon appears and changes to indicate the state of the communication with its IrDA partner camera. For details see “Copying Marked Pictures from Camera to Camera”... -
Page 16: Batteries
Batteries The battery power icon changes automatically. It is a display-only icon, you cannot select or change it. Full—indicates the batteries are fully charged. Low—indicates the batteries need to be replaced. Blinking—indicates the batteries are insufficient to run the camera and need to be replaced. -
Page 17: Installing The Batteries
You should allow sufficient time for the camera to cool before turning it on again. Consider using an AC Adapter for KODAK DC200 Series Digital Cameras when using Preview mode for extended periods. Always follow your battery manufacturer directions fully. -
Page 18: Quality
Quality You can set your camera to take pictures with a Good, Better, Best, and Uncompressed Quality setting. The Quality setting indicates how much the picture is compressed to save space on the memory card. The pictures are captured in a JPEG file format, except for the Uncompressed Quality setting, which captures the picture in an uncompressed TIFF file format. -
Page 19: Understanding Quality And Resolution
Understanding Quality and Resolution Keep in mind that with your camera you are generally going to get beautiful digital pictures. But based on two factors, resolution and compression, some pictures will be of a higher quality than others. Instead of film, the camera places your pictures on a memory card. These pictures are made up of pixels. -
Page 20: Removable Memory Card
The KODAK Picture Card is furnished with your camera. Additional memory cards are available from dealers of KODAK products or from our Website at http://www.kodak.com/go/accessories. Any standard CompactFlash card that is “CF” certified will function properly. -
Page 21: Power Management
Power Management You can use batteries or an AC Adapter for KODAK DC200 Series Digital Cameras to power your camera. To conserve power, the camera has a sleep mode. Understanding Sleep Mode After a specified period of inactivity, the camera enters sleep mode by turning the color LCD off. -
Page 22: Using The Battery Charger
You can purchase additional KODAK Ni-MH Rechargeable Batteries as an accessory. For details about available accessories, ask a dealer of KODAK products, or visit our Website at http://www.kodak.com/go/accessories. -
Page 23: Battery Guidelines
Battery Guidelines Kodak recommends KODAK PHOTOLIFE AA Alkaline Batteries, or KODAK PHOTOLIFE AA Ni-MH Rechargeable Batteries for use in the camera. Remove the batteries when the camera is stored for extended periods of time. Always follow your battery manufacturer’s directions fully. Do not attempt to disassemble, short circuit, or subject the battery to high temperature or fire. - Page 24 When disposing of batteries, follow the manufacturer’s instructions and all federal, state, and local regulations. Kodak suggests customers take advantage of any community battery recycling programs that may exist in your area. Contact your local waste remover or recycler for details.
-
Page 25: Taking Pictures
2 Taking Pictures This chapter provides information to help you take great pictures. You can simply turn on the camera, position the Mode dial to Capture, and start taking pictures. However, you may want to change some of the default settings. This chapter also provides the instructions for defining these settings. -
Page 26: Setting The Camera To Capture Mode
Setting the Camera to Capture Mode Previewing a Picture If you want to see what a picture looks like before you take it, you can preview the image on the color LCD. Turn the Mode dial to Capture. The lens extends to the default picture-taking position. -
Page 27: Capturing Pictures
Capturing Pictures Taking any kind of picture, Still, Burst, or Time-lapse is basically the same. The only difference is the amount of time you hold down the Shutter button. For fast camera response and to ensure sharp pictures without blurring due to camera motion, press and hold the Shutter button halfway down until the green Ready light illuminates. -
Page 28: Setting Flash, Exposure Compensation, Picture Type, And Quality
Setting Flash, Exposure Compensation, Picture Type, and Quality You set the Flash, Exposure Compensation, Picture Type, and Quality settings using the Scroll and Select buttons located on top of the camera. Flash—see page 6. Exposure Compensation—see page 7. Setting the Self-Timer Picture Type—see page 7. -
Page 29: Using Zoom
Using Zoom There are two types of zooming. Optical zooming uses the lens to produce quality pictures. Digital zooming continues the zooming process but reduces the quality of the picture. The camera is equipped with an optical zoom lens that lets you zoom in from Wide Angle (38 mm) to TelePhoto (115 mm). -
Page 30: Defining The Capture Settings
Defining the Capture Settings You can use the default settings or you can define settings using the Capture mode menus. Capture mode settings affect only future pictures, they cannot be used to alter pictures you have already taken. The Capture mode preferences are divided into the following categories: Picture Type—see page 25. -
Page 31: Picture Type Settings
Picture Type Settings There are three Picture Type settings which allow you to select the type of picture and then define the picture characteristics. The Picture Type setting is where you select the camera resolution for pictures. Picture Type settings can also be set through the Status LCD. -
Page 32: Album Settings
Album Settings Album settings let you specify the album in which pictures will be stored on the memory card. All future pictures are stored in the selected album until you change the setting or turn off the camera. Press to highlight one of the following: No Album—does not store your pictures in an album. -
Page 33: White Balance Settings
White Balance Settings White Balance settings adjust the color balance to remove the color cast that the current lighting conditions add. Press to highlight the type of white balance you want to use. Automatic—takes pictures under a variety of lighting conditions. This is the default. -
Page 34: Watermark Settings
Watermark Settings Watermark settings allow you to place a date, time, text, or logo watermark on the pictures you take. Watermarks will only appear on future pictures, and you can see them on pictures in the Review mode when the full resolution picture appears. -
Page 35: Advanced Exposure Modes Settings
Advanced Exposure Modes Settings Advanced Exposure Modes settings allow you to select four exposure modes: Programmed AE—uses the programmed automatic exposure setting which selects the appropriate flash and aperture setting. Long-Time Exposure—disables the flash as it is assumed that a long-time exposure is necessary to obtain a proper exposure within the current ambient lighting environment. -
Page 36: Advanced Focus Mode Settings
Advanced Focus Mode Settings The Advanced Focus Mode settings allow you to select one of the following: Multi-Spot Auto Focus Single-Spot Auto Focus Manual Focus Press to highlight the type of advanced focus mode you want to use. Multi-Spot Auto Focus—the camera uses a multi-spot focus algorithm which determines the focus position using three positions in the field of view. -
Page 37: Preferences Settings
Remote Shutter—takes pictures using a shutter release cable connected to the camera USB port. The shutter release cable is available as an accessory. For details see a dealer of KODAK products, or visit our Website at http://www.kodak.com/go/accessories. Press to change each setting. -
Page 38: Date And Time
Date and Time Camera Name When you name the camera, it is included in the header of each picture file. Press to change the value for the highlighted field. Press to move from one field to another. Press Format to select a date/time format. The Date and Time Format screen appears. -
Page 39: Using Scripts
It is possible for multiple script icons to appear. You should copy the scripts to all the cards you plan to use in the DC290 camera. WARNING: If you reformat a card, everything is deleted, including the scripts and protected pictures. -
Page 40: Choosing A Script On The Camera
Choosing a Script on the Camera Press to choose the script you want to execute. The Kodak Script screen may display a different list of scripts, depending on what is loaded on the memory card. Press Start. Any steps that follow depend on the chosen script. -
Page 41: Adding Sound To A Picture In Quickview
Adding Sound to a Picture in Quickview After taking a picture with Quickview turned on, you can attach up to two minutes of recorded sound to the picture. Once the picture disappears from Quickview, you must enter the Review mode to record sound. While the color LCD displays the picture you have taken, press and release Record or press and hold Record. -
Page 43: Reviewing Your Pictures
3 Reviewing Your Pictures Did you have your thumb over the lens? Did someone have their eyes closed? Should you take one more picture before you let your kids take those ties off? With film, you’ll know as soon as you get your pictures processed. With the camera in the Review mode, you’ll know instantly. -
Page 44: Setting The Camera To Review Mode
Setting the Camera to Review Mode Filmstrip of pictures stored on memory card Memory bar displaying space left on card and current picture position. Picture information Turn the Mode dial to Review. The last picture taken appears on the color LCD in a full screen view. -
Page 45: Reviewing Pictures
Reviewing Pictures You can view your pictures one at a time on a full screen, or you can view them one at a time in a continuous scroll, or in a fast scroll on a filmstrip screen. Viewing the Remaining Memory The Review screen displays the amount of memory remaining on the card. -
Page 46: Setting Review Mode Preferences
Print order—setup printing instructions for pictures on the memory card. Select print quantities, and create an index print (thumbnails of the pictures on the memory card) for printing to a KODAK Picture Maker System. Certain printers that accept memory cards can also use the Print Order feature. -
Page 47: Overlay Preferences
Overlay Preferences Use the Overlay preferences to turn the overlay on or off. The overlay appears on the color LCD and displays the softkey labels. Slide Show Preferences A slide show displays each selected picture for a specified interval. Through the Slide show preferences you can specify the duration each picture is displayed, turn sound on or off, and choose to continuously loop the pictures in the slide show. -
Page 48: Playback Preferences
Playback Preferences Use Playback preferences to specify how quickly Burst, Time-lapse, and Album pictures are displayed during full-screen playback. Format Card Preferences If your camera does not recognize the format of the memory card, or for some other reason you want to reformat a memory card, you can do so from this camera menu option. -
Page 49: Print Order Preferences
Print Order Preferences Pictures on the memory card need to be marked on the camera before the Print Order feature can be used. See “Marking Pictures” on page 44. Press to select the option you want. Done—allows you to save, cancel, or continue the print order. -
Page 50: Marking Pictures
Marking Pictures When you want to select a number of pictures and carry out an action on them, you must first mark each picture. Marked pictures can be deleted, copied from camera to camera, protected, or transferred from album to album. Placing Marked Pictures in an Album You can place marked pictures in an existing album or a new one. -
Page 51: Creating A New Album In Review Mode
Creating a New Album in Review Mode In order to place a marked picture in an album, you first need to create one. Albums can be created in either Review mode or in Capture mode. See “Album Settings” on page 26. Display the Album screen as described in the “Placing Marked Pictures in an Album”... -
Page 52: Protecting Your Pictures
Protecting Your Pictures You can safeguard your pictures from being deleted accidentally from the camera memory card. This feature is very useful if the camera and memory card are used by more than one person. Set the Mode dial to Review. Mark the pictures to be protected. -
Page 53: Copying Marked Pictures From Camera To Camera
Review mode. There are sample application files preloaded on the memory card or on the CD that came with your camera. Additional applications and detailed information are available on our Website at http://www.kodak.com/go/dc290. Applications on your memory card or on the CD are identified with a .CAM file name extension. -
Page 54: Loading On-Camera Applications Onto A Memory Card
On-camera applications must be loaded into the System folder of your memory card to be accessible. Use KODAK Digital Camera Software (Mounter) / for DC290 or a CF card reader to copy the on-camera applications to the System folder on the memory card. -
Page 55: Opening Albums
Opening Albums The Review screen shows you when pictures are grouped in an album and allows you to open the album to view the pictures. If the highlighted picture resides in an album, an album icon appears and the left softkey is labelled Open. The album name is displayed next to the picture number. -
Page 56: Expanding And Collapsing Pictures
Expanding and Collapsing Pictures It is important to note that your camera treats Burst and Time-lapse pictures as folders containing a series of individual pictures, but displays them as a single picture until you press Expand. In the Review mode, you can expand the displayed Burst or Time-lapse picture to view all the pictures in the series. -
Page 57: Adding Sound To Pictures
Adding Sound to Pictures You can attach up to two minutes of recorded sound to a selected picture at any time while reviewing your pictures. With Burst and Time-lapse pictures, recorded sound can only be added and played when the series is collapsed. If the camera volume control is turned down, you will not be able to hear the sound you have recorded. -
Page 58: Deleting A Picture
Deleting a Picture Deleting Multiple Pictures Scroll until the picture you want to delete is highlighted in the center of the filmstrip. Press Delete. Press one of the following softkeys: Delete—deletes the picture and any attached sound. Sound Only—deletes only the attached sound. -
Page 59: Playing Sound, Bursts, And Time-Lapse Sequences
Playing Sound, Bursts, and Time-lapse Sequences To play sound, Burst and Time-lapse, and Album sequences you have to be viewing the picture on a full screen. Burst and Time-lapse sequences need to be collapsed in the filmstrip before playing. Album sequences need to be closed in the filmstrip before playing. -
Page 60: Magnifying Pictures
Magnifying Pictures The magnify feature lets you view a section of the current picture at two and four times the normal LCD size. Scroll to view the picture you want to magnify. Use any of the three methods for scrolling described in the “Viewing pictures”... -
Page 61: Viewing Pictures On Your Television
Viewing Pictures on Your Television The camera video-out feature lets you show the pictures from the memory card on your television. With video-out, the color LCD is disabled when the camera is attached to the video cable. Turn off your television and camera. Insert the video output cable into the video-out connection on the side of your camera. -
Page 63: Installing The Software
4 Installing the Software The KODAK DC290 Installer Software (Installer) included with your camera contains software for Windows-based computers and Macintosh computers. These applications provide a variety of features that let you access and use the pictures stored on the memory card. Detailed information on using the software can be found in the online help. -
Page 64: Kodak Software For Windows-Based Computers
Utility is best suited to create movies from Burst and Time-lapse pictures. KODAK Watermark Conversion Utility—converts Portable Network Graphic files (PNG) into the watermark file format (LGO) needed by the DC290 camera. This utility can also be used to modify the text entry of existing LGO files. -
Page 65: Software Overview
Close all other software programs including background applications and task bar items. Place the KODAK DC290 Installer Software CD into your CD-ROM drive and follow the online instructions. If the installation does not automatically begin, click Start and click Run. In the Run dialog box, type: D:\setup (or use the letter for the drive you have the DC290 disc in) then click OK. -
Page 66: Macintosh System Requirements
Macintosh computer. They are: KODAK Digital Camera Software (Mounter) / for DC290—allows you to see the DC290 camera as a volume through a camera icon on the desktop. Mounter can be used by other applications or as a stand-alone application to access the contents of the memory card using the Macintosh Finder. -
Page 67: Software Overview
KODAK Digital Camera Software (Control Panel) / for DC290—lets you set the port and serial speed, and mount the DC290 camera as a volume on your desktop. KODAK Pictures Now Desktop Software—allows you to view and print pictures in multiple sizes. It provides template layouts to print your pictures on perforated and nonperforated KODAK Inkjet Paper. -
Page 68: Loading Kodak Software On Macintosh Computers
If prompted, restart your computer when the software installation is complete. Copying KODAK Plug-In Acquire files to a Plug-In Folder When you use KODAK Digital Camera (Plug-In Acquire) with an application for the first time, you must copy the file to an ADOBE Photoshop compliant picture editor. -
Page 69: Connecting Your Camera
CompactFlash card reader (CF card reader). CF card readers are available as an accessory from our Website at http://www.kodak.com/go/accessories. Once the camera is connected to a computer and any required software is installed, you are ready to transfer pictures from the camera to your computer. -
Page 70: Checking For Usb Support On Windows 98
Checking for USB Support on Windows 98 The Universal Serial Bus (USB) is a relatively new method for your camera to communicate with a personal computer. A USB connection is faster than an RS-232 serial connection. USB requires special computer hardware and software features, including a USB enabled motherboard, USB connections, and Windows 98. -
Page 71: Connecting Your Camera
When connecting the camera, it is a good idea to use the AC Adapter for KODAK DC200 Series Digital Cameras. If you do not have this AC adapter, it is available as an accessory from dealers of KODAK products or from our Website at http://www.kodak.com/go/accessories. -
Page 72: Starting The Kodak Software
Chapter 4. For detailed information on using the software, refer to the online help. Opening KODAK Software for Windows-Based Computers For information on each KODAK software and KODAK utilities, refer to the online help. KODAK Digital Camera (Mounter) Double-click the My Computer icon. -
Page 73: Opening Kodak Software For Macintosh Computers
The Main Window for Tools appears. KODAK Digital Camera (Control Panel) The DC290 camera icon must be on your desktop to access the contents of the camera memory card. If the icon is not on the desktop, choose APPLE -> Control Panels ->... -
Page 74: Folder And File Naming Conventions
Folder and File Naming Conventions When you are using KODAK-supplied host software and are connected to the camera or using a card reader, it is possible to create folders and files, including picture files on the memory card. All filenames must follow the DOS 8-character format. -
Page 75: Naming Pictures
P0000008.JPG, even if P0000007.JPG was deleted prior to taking P0000008.JPG. If you insert a different memory card into your DC290 camera, the next picture number is derived using the camera picture number and is not dependent on the picture number of any of the pictures currently on the memory card. -
Page 76: Locating Pictures On The Camera
Burst folders are found in the DC290 folder or in Album folders and are identified with the prefix BR. Burst folders are created by the camera and contain pictures previously taken in a burst series. -
Page 77: Tips And Troubleshooting
Blow gently on the surface to remove dust and dirt. Moisten the surface by breathing lightly on it. Wipe the surface gently with a soft, lint-free cloth or an untreated lens-cleaning tissue. Service agreements are available in some countries. Please contact a dealer of KODAK products for more information. -
Page 78: Connecting With Your Computer
Connecting With Your Computer If you are getting messages on your computer that state you are not connected, refer to the PDF documents installed with the software or the online help for troubleshooting information. If you are experiencing problems with a: Windows-based computer, refer to USB.PDF. -
Page 79: Tips For Printing
Resize the picture to a smaller size or print the picture on glossy paper to increase the quality of the print. To improve the quality of your prints, print your pictures on KODAK InkJet Paper. InkJet Paper is made to work with most inkjet printers to give you clearer,... -
Page 80: Troubleshooting
Troubleshooting If you are experiencing difficulties with your camera, check the following table for possible solutions. Additional technical information is available in the ReadMe file located in the KODAK DC290 folder. Problem The camera shuts off unexpectedly. The camera does not recognize your memory card. - Page 81 Problem Corrupted Image message is displayed on the Color LCD while in the Review mode. While in the Capture mode, the thumbnail appeared normal. Shutter button does not work. Camera does not turn on. Part of the picture is missing. Camera Problems Cause The memory card was...
- Page 82 Problem EX files cannot be accessed using the software. They can, however, be viewed on the camera. Picture is too dark. Picture is too light. Stored pictures are damaged. Camera Problems Cause A previous file with the same name was not fully processed.
- Page 83 Problem Pictures remaining number does not decrease. Using IBM Thinkpad 770E - USB, the camera does not appear in the Device Manager under the USB host controller. Picture is not clear. Camera Problems Cause The image resolution The camera is does not take up operating normally.
- Page 84 Problem Computer cannot communicate with the camera. Picture is not clear in Burst mode. Camera Problems Cause Camera power is off. The Mode dial is not set to Connect. Conflict with another device. Some Advanced Power Management utilities on laptops can turn off ports to save battery life.
- Page 85 Problem Memory card is Full. No Memory Card. Cannot read memory card. Camera did not establish connection. Camera needs service. The receiving camera does not have enough memory to receive the pictures. Unable to receive picture. Transfer of pictures was interrupted.
- Page 86 Problem Not enough memory LCD Messages Cause There is not enough Transfer pictures to memory on the card to your computer or store the selected insert a memory card time-lapse picture that has available sequence. memory. You can also change the Time-lapse sequence to one that requires less memory.
-
Page 87: Where To Get Help
Online Services Contact Kodak via: World Wide Web America Online CompuServe Faxed Information Kodak offers automated support by fax: U.S. and Canada Europe U.K. Place of purchase World Wide Web Technical support http://www.kodak.com... -
Page 88: Customer Support
Customer Support If you have questions concerning the operation of KODAK software or the camera, you may speak directly to a customer support representative. Have the camera connected to your computer, its serial number ready, and be at your computer when you call. Also have ready a description of the problem with the exact error message along with information about the type of computer, amount of RAM, and the software being used. - Page 89 Country Help Number Hong Kong 852-2564-9777 Hungary 44-0-131-458-6714 India 91-22-617-5823 Ireland 01-407-3054 Italy 02-696-334-52 Japan 81-3-5488-2390 Korea 82-2-708-5400 Latin America 1-305-267-4700 Lebanon 44-0-131-458-6714 Malaysia 60-3-757-2722 Mexico 52-5-449-4300 Middle East 44-0-131-458-6714 Netherlands 020-346-9372 New Zealand 0800-500-135 Norway 23-16-21-33 Panama 52-3-678-6200 Peru 51-1-224-8610 Philippines 63-2-810-0331...
-
Page 91: Warranty And Regulatory Information
If the equipment does not function properly during the warranty period due to defects in either materials or workmanship, Kodak will, at its option, either repair or replace the equipment without charge, subject to the conditions and limitations stated herein. -
Page 92: Limitations
PROOF OF PURCHASE. PLEASE RETURN THE WARRANTY REGISTRATION CARD WITHIN 30 DAYS OF PURCHASE. THIS WARRANTY BECOMES NULL AND VOID IF YOU FAIL TO PACK YOUR DC290 CAMERA IN A MANNER CONSISTENT WITH THE ORIGINAL PRODUCT PACKAGING AND DAMAGE OCCURS DURING PRODUCT SHIPMENT. -
Page 93: Application Support
If the original packaging has been discarded or is not available, packing will be at the owner's expense. Unless a specific Kodak warranty is communicated to the purchaser in writing by a Kodak company, no other warranty or liability exists beyond the information contained above, even though defect, damage or loss may be caused by negligence or other act. -
Page 94: Regulatory Information
Regulatory Information FCC Compliance and Advisory This device complies with Part 15 of the FCC Rules. Operation is subject to the following two conditions:1) this device may not cause harmful interference, and 2) this device must accept any interference received, including interference that may cause undesired operation. - Page 95 1Index AC adapter locatorUSB connection, locator 3 using 15 adapter AC, using 15 adding sound 51 sound in quickview 35 adjusting your monitor 72 advanced exposure, icon 24 exposure, settings 29 focus, icon 24 focus, setting 30 album icon 24 naming new 45 opening 49 placing pictures 44...
- Page 96 setting 20 capture preference, setting 31 card, see memory card choosing a script 34 cleaning camera 71 LCD screen 71 collapsing pictures 50 color balance 27 color printing tips 73 CompactFlash, see memory card compression 13 computer connecting problems 72 connecting the camera 63 connecting camera to computer 63...
- Page 97 14 installing batteries 11 software, Macintosh 62 software, PC 59 IrDA communication, indicator 6 transceiver, locator 2 KODAK software help 81 Macintosh computers 60 Windows-based computers 58 cleaning 71 messages, troubleshooting 74 status, overview 6 light sensor, locator 2...
- Page 98 monitor adjustment 72 Mounter software description 58 multi-spot auto focus 30 name camera 32 new album 45 new album naming 45 setting 26 on and off, camera 19 on-camera applications loading 48 selecting 48 using 47 opening albums 49 ordering prints 40 overlay setting 41 sound 35...
- Page 99 30 sleep mode 15 time-out preference 31 slide show setting preferences 41 softkey description 5 locator 3 software, KODAK help 81 Macintosh computers 60 software,KODAK Windows-based computers 58 sound adding 35 adding to pictures 51 deleting 35 overlay 35...
- Page 100 taking pictures 19 television, viewing pictures 55 text watermark 28 tiff file format 12 time-lapse picture type, indicator 7 play settings 42 playing 53 using the shutter button 21 tips for printing 73 tripod socket, locator 3 troubleshooting 74 TWAIN Acquire software 58 ultra resolution 25 uncompressed...
Need help?
Do you have a question about the DC290 and is the answer not in the manual?
Questions and answers