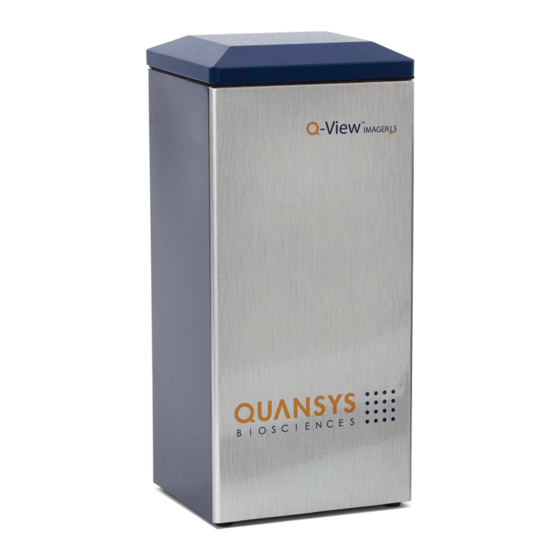
Summary of Contents for Quansys Q-View IMAGER LS
- Page 1 Operator’s Manual Version 2.03 For Research Use Only Not For Use in Diagnostic Procedures...
-
Page 2: Introduction
Q-View Imager LS. Notes on Safety The Q-View Imager LS has been designed and certified to meet EN61010-1 requirements, which are internationally accepted electrical safety standards. Certified products are safe to use when operated in accordance with the device instruction manual. -
Page 3: Notice Of Warranty
DOES WARRANT AND IS NOT RESPONSIBLE FOR DAMAGES CAUSED MISUSE, ABUSE, ACCIDENTS, VIRUSES, UNAUTHORIZED SERVICE PARTS, COMBINATION OF QUANSYS BIOSCIENCES BRANDED PRODUCTS WITH OTHER PRODUCTS. THIS LIMITED WARRANTY DOES COVER NON-QUANSYS BIOSCIENCES BRANDED PRODUCTS. ANY WARRANTY APPLICABLE NON-QUANSYS BIOSCIENCES BRANDED SOFTWARE OR PRODUCTS IS PROVIDED BY THE ORIGINAL MANUFACTURER. -
Page 4: Table Of Contents
Placement in the Laboratory Temperature and Humidity Ventilation and Dust Space Vibration Q-View Imager LS Setup Assembly Focusing the Q-View Imager LS Light Leak Check Acquire Dark Field Setup Completion Disassembly Moving the Q-View Imager LS For Research Use Only... - Page 5 Q-View Software Introduction Chapter 3: Operation Before you Begin Cleaning the Tray Surface Loading the Plate Imaging the Plate Using the Qualification Plate Troubleshooting Troubleshooting Guide: Appendix Q-View Imager LS Specifications Operating Specifications Plate Diagram Notes For Research Use Only...
-
Page 6: Chapter 1: Installation And Safety
Electricity Since the Q-View Imager LS has a 110V/220V power supply, exercise typical precautions to ensure shocks do not occur. Do not place liquids close to the Q-View Imager LS and do not cut cords that provide power or connect the device to the PC. -
Page 7: Space
The Q-View Imager LS weighs approximately 9.12 kg (20.12 lbs). To correctly setup the Q-View Imager LS the following steps should be followed: 1. Place the Q-View Imager LS in a clean work area. Ensure the location meets the requirements addressed in Placement in the Laboratory () 2. -
Page 8: Focusing The Q-View Imager Ls
To perform this test remove any plates from the Q-View Imager LS, ensure the lid is closed, and capture an image. The average pixel intensity of the image should be less than 500. If the pixel intensity... -
Page 9: Acquire Dark Field
Ensure there is no plate on the tray of the Q-View Imager LS and unplug all cords. The Q-View Imager LS weighs approximately 9.12 kg (20.12 lbs). In order to move or ship the Q-View Imager LS, there are several critical steps that should take place. For Research Use Only... -
Page 10: Chemical Safety
6. With a piece of tape, tape the lid down so it doesn’t open during transit 7. Insert the Q-View Imager LS into the provided plastic sleeve 8. Insert the glass/tray insert into the protective sleeve 9. Bundle and tie cables together 10. -
Page 11: Electronic Considerations
The power cord is a 3-wire grounding-type plug. This cord will only fit into a grounded outlet, which is a requirement for the Q-View Imager LS. Do not remove the grounding leg of the plug. Doing so will void all warranties on the Q-View Imager LS. -
Page 12: Routine Maintenance
Do not use scouring cleaners or abrasive pads as this can scratch the glass. Be careful not to spill any cleaning materials inside the Q-View Imager LS. Regularly inspect all cables for fraying or loose connections. -
Page 13: Chapter 2: System Overview
COMPUTER CONNECTION The Q-View Imager LS is connected to the PC via a USB cable. Do not unplug either end of the USB cable without closing Q-View Software on the PC. From within Q-View Software, the user can open Imager... -
Page 14: Chapter 3: Operation
The user sets the Q-Plex™ plate in the glass/tray insert with well A1 in the top left corner of the tray when facing the Q-View Imager LS. Make sure the plate rests flat on the glass on all edges of the plate. -
Page 15: Imaging The Plate
Imager. If the dropdown says “No Imagers Connected”, select Refresh. The name of the Q-View Imager LS will appear and connection can be made. At this point, the user may select the Exposure Time and Image Name. -
Page 16: Troubleshooting
TROUBLESHOOTING To resolve any issue with the Q-View Imager LS, please contact Quansys Biosciences calling 1-877-QUANSYS or send an email describing the issue to support@quansysbio.com. If outside the USA, please contact your Quansys distributor for your area. Have your serial number available with a detailed description of the issue. -
Page 17: Appendix
Appendix Q-VIEW IMAGER LS SPECIFICATIONS Resolution: 18 Megapixels Pixel Pitch: 4.11 microns Sensor Type: CMOS Sensor Size: 337.5mm Optics: EF-S 60mm f/2.8 Macro USM Lens Image Application: SBS plate format with Chemiluminescent blots (7.6 cm x 12.1 cm) Imaging Time:... - Page 18 For technical support, email: support@quansysbio.com Part Number 365 North 600 West, Logan, Utah 84321 Tel: 1-888-782-6797 | Fax: (435)750-6869 | www.quansysbio.com...


Need help?
Do you have a question about the Q-View IMAGER LS and is the answer not in the manual?
Questions and answers