Advertisement
Available languages
Available languages
Quick Links
OWNER'S MANUAL
Portable Tabletop OR
Side Fire Box™
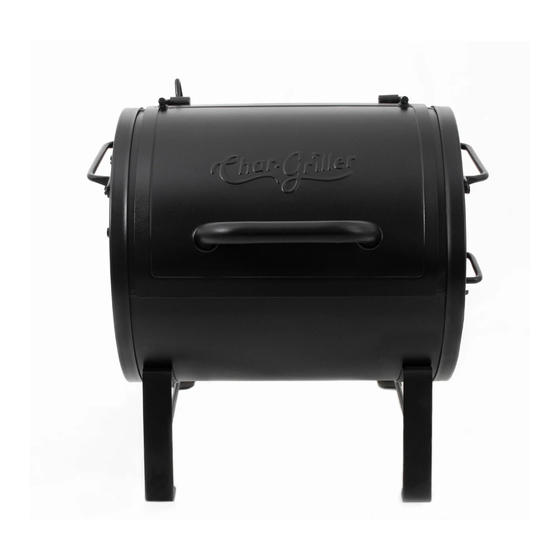
Model #72424
Keep your receipt with this manual for
Warranty.
CUSTOMER SERVICE
1-912-638-4724
Service@CharGriller.com
Contents of this manual are Trademarked and Copyrighted by Char-Griller | A&J Manufacturing.
Using the information contained in this manual without consent of Char-Griller and/or A&J
Manufacturing is strictly prohibited.
OM_72424_ED_ A.1
Advertisement

Subscribe to Our Youtube Channel
Related Manuals for Char-Griller 72424


Summary of Contents for Char-Griller 72424
- Page 1 Keep your receipt with this manual for Warranty. CUSTOMER SERVICE 1-912-638-4724 Service@CharGriller.com Contents of this manual are Trademarked and Copyrighted by Char-Griller | A&J Manufacturing. Using the information contained in this manual without consent of Char-Griller and/or A&J Manufacturing is strictly prohibited. OM_72424_ED_ A.1...
- Page 2 TABLE OF CONTENTS Safety Warnings & Warranty....... A-1 Assembly Instructions ........B-1 Table Top Grill ..........B-1 Side Fire Box ..........B-6 Product Usage ..........C-1 Recipes .............. D-1 Accessories ............E-1...
- Page 3 You have purchased a product that can be used as EITHER a Portable Table Top Charcoal Grill as a mounted side fire box on a Char-Griller barrel grill. Assembly instructions for use as a Portable Table Top Grill can be found on page B-1.
- Page 4 This Page Intentionally Left Blank...
- Page 5 IMPORTANT SAFETY WARNINGS READ ALL SAFETY WARNINGS AND INSTRUCTIONS CAREFULLY BEFORE ASSEMBLING AND OPERATING YOUR GRILL Read the following instructions carefully and be sure your appliance is properly assembled, installed, and maintained. Failure to follow these instructions may result in serious bodily injury and/or property damage.
- Page 6 Customer Service at 1-912-638-4724. Registration provides important protections: 1. In the extremely unlikely event of a product recall Char-Griller can easily contact you and rectify the issue. 2. If a warrantied part is broken or missing we can send you the needed parts promptly.
- Page 7 This grill has been made according to the highest of quality standards. If you have any questions that are not addressed in this manual or if you need parts please call our Customer Service Department at 1-912-638-4724 (USA) or email Char-Griller at: Service@CharGriller.com and have your serial number handy.
- Page 8 SURFACE RUST IS NOT CONSIDERED A MANUFACTURING OR MATERIALS DEFECT Char-Griller grills are made of steel and if exposed to the elements rust will occur naturally. Please refer to the section entitled, “Usage” to review how to care for your grill properly.
- Page 9 ASSEMBLY INSTRUCTIONS PORTABLE TABLE TOP GRILL PARTS LIST AND TOOLS REQUIRED (Tools Not Included) Pliers 7/16" nut driver Phillips Head Screwdriver 10 pcs 20 pcs Bezel 2 pcs. Wing Nuts 2 pcs. Parts List: 1 Cooking Chamber 2 Damper Circle 2 Cast Iron Grates 2 Metal Rod Handle 1 Front Handle...
- Page 10 Step 1 Attach LEGS to GRILL BODY with four (4) 1/2” HEX BOLTS and four (4) HEX NUTS, see below. Grill Body Hex Nuts Hex Bolts Legs Step 2 Attach HANDLE and BEZELS to SFB HOOD with two (2) 1/4” WING NUTS and two (2) LOCK WASHERS.
- Page 11 Step 3 Attach WIRE HANDLE to GRILL BODY with four (4) HEX BOLTS and four (4) HEX NUTS, see below. Hex Bolts Wire Handle Wire Handle Hex Bolts Hex Nuts Step 4 Attach DAMPER CIRLCE to GRILL BODY with one (1) 3/4” HEX BOLTS, one (1) FLAT WASHER, one (1) LOCK WASHER, and one (1) HEX NUT.
- Page 12 Step 5 Attach DAMPER CIRCLE to the ASH DRAWER with 3/4” HEX BOLT, FLAT WASHER, LOCK WASHER, and HEX NUT, see below. Damper Circle Hex Nut Lock Nut Ash Drawer Flat Washer Hex Bolt Step 6 Attach U HANDLE to ASH DRAWER with two (2) LOCK WASHERS and two (2) HEX NUTS. Lock Washers Hex Nuts Ash Drawer...
- Page 13 Step 8 Place FIRE GRATE onto ASH DRAWER then slide it into GRILL BODY. Grill Body Fire Grate Ash Drawer Step 9 Place COOKING GRATES onto the GRILL BODY. Grill Body Cooking Grates...
- Page 14 ASSEMBLY INSTRUCTIONS SIDE FIRE BOX PARTS LIST AND TOOLS REQUIRED (Tools Not Included) Pliers 7/16" nut driver Phillips Head Screwdriver Hammer 10 pcs 20 pcs Bezel 2 pcs. Wing Nuts 2 pcs. Parts List: 1 Cooking Chamber 2 Damper Circle 2 Cast Iron Grates 2 Metal Rod Handle 1 Front Handle...
- Page 15 Step 1 Remove the FILLER PLATES from the SFB and main GRILL BODY that you plan to install the SFB onto. Grill Body Filler Plates Step 2 Attach SFB to main GRILL BODY. With a helper align the SFB in place over the opening on the grill body then attach with six (6) 1/2”...
- Page 16 Step 3 Attach SPACER TUBES in between SFB and SIDE BRACE and secure with two (2) 2” HEX BOLTS and HEX NUTS. The HEX BOLTS should go through from the SFB side, see below. Align the SPACER TUBES with the corresponding holes on the leg brace and SFB. Insert the 2” HEX BOLT through the SFB then through the SPACER TUBE , and finally through the LEG BRACE.
- Page 17 Step 5 Attach HANDLE and BEZELS to SFB HOOD with two (2) 1/4” WING NUTS and two (2) LOCK WASHERS. Handle Lock Washers Wing Nuts Step 6 Attach DAMPER CIRCLE to the ASH DRAWER with 3/4” HEX BOLT, FLAT WASHER, LOCK WASHER, and HEX NUT, see below.
- Page 18 Step 8 Tighten ALL BOLTS and NUTS. Insert a 1/2” BOLT and tighten with a NUT for any open holes in GRILL BODY after assembly. Step 9 Place FIRE GRATE onto ASH DRAWER then slide it into SFB. Fire Grate Ash Drawer Step 10 Place COOKING GRATES onto SFB.
- Page 19 OPERATING INSTRUCTIONS Setting Up Set grill up on solid, flat surface with adequate wind shelter. Do not move grill while hot, and do not leave unattended during operation. This appliance is designed for use outdoors, away from any flammable materials. It is important that there are no overhead obstructions and that there is a minimum distance of 3 feet (90cm) from the side or rear of the appliance.
- Page 20 Lighting Instructions 1. To start a charcoal fire, stack 15 or so briquettes in a pyramid and saturate with lighter fluid. NOTE: Do not use gasoline, kerosene or alcohol for lighting charcoal. Use of any of these or similar products could cause an explosion possibly leading to severe bodily injury. 2.
- Page 21 Finishing Up When your are finished grilling you can shut down your grill by closing both dampers and allowing the fire to suffocate. Be patient. This make take an hour or more. Emptying the Ashes & Ash Pan: ** ONLY EMPTY ASHES WHILE GRILL IS NOT IS USE ** After the fire is completely extinguished you should wait several hours before emptying the ashes to ensure they are not still hot and a burn hazard.
- Page 22 This Page Intentionally Left Blank...
- Page 23 GRILLING RECIPES Know Your Cuts of Meat...
- Page 24 Direct Heat • Direct Heat is a high heat method used to cook foods that take less than 25 minutes to cook. Typically, this means foods that are relatively small or thin such as steaks, chops, boneless chicken breasts, fish fillets, hamburgers, etc. •...
- Page 25 • Grill for 20 minutes. Sear with lid open and fire grate in high (hot) position for 1 minute on each side before lowering grate and closing lid. • To SMOKE, place birds in center of GRID with fire in both ends of FIRE BOX. KABOBS: •...
- Page 26 SHRIMP (Peeled) & CRAYFISH: • Place on skewers. • Coat with melted butter and garlic salt. • Grill 4 minutes on each side or until pink. Cocktail sauce optional. BAKED POTATOES: • Rub with butter and wrap in foil and cook on grill with lid down for 50 minutes. •...
- Page 27 Pan not included. Disposable bread pan is recommended. SMOKE BY COOKING SLOWLY (See chart above). 1. Place water/drip pan on left side of fire grate. 2. Place hot coals on right side (damper end) of fire grate. The charcoal basket accessory helps confine coals to one side.
- Page 28 • Baste with ham glaze 3 or 4 times during last 30 minutes of cooking time. • Garnish with pineapple rings about 15 minutes before end of cooking time. SMOKED HOT DOGS STUFFED: • Slit hot dogs lengthwise, within 1/4 inch of each end. •...
- Page 29 • Add shrimp and/ or crayfish and smoke 45 minutes. SMOKED VEGETABLES: • Turnips, potatoes, carrots, okra, mushrooms, peeled onions, zucchini, squash, etc. • Put in pan and cover with water and cook for several hours while cooking the meat. Or place vegetables on grill and smoke for 50 minutes, either wrapped in foil or not.
- Page 30 mixture is very smooth. • Stir in 1/4 cup bottle gravy coloring (Kitchen Bouquet and Gravy Master) and 2 teaspoons Beau Monde seasoning (or substitute 1 teaspoon MSG and 1 teaspoon seasoned salt). • Allow meat to stand in marinade at room temperature for 2 hours or refrigerate up to 24 hours in a covered dish.
- Page 31 ACCESSORIES Warming Rack Increase Grill Area Keeps Food Warm Cover Custom Fit Weather Resistant Protects Grill Finish Cover Accommodates Side Shelf or Side Fire Box Charcoal Basket Confines Coals to One Rotisserie Side for Smoking Excellent for Effortless Grilling Indirect Cooking Universal Fit for Any Grill Quick Release Chimney Starter...
- Page 32 For pricing or to order accessories visit: www.CharGriller.com CALL: 912-638-4724 P.O. Box 30864 Sea Island, GA 31561 912-638-4724 www.CharGriller.com Service@CharGriller.com...
- Page 33 Lo contenido en este manual es Marca Registrada y Propiedad con Derechos de Autor de Char- Griller | A&J Manufacturing. Está terminantemente prohibido utilizar la información suministrada en este manual sin el consentimiento de Char-Griller y/o A&J Manufacturing OM_72424_SPA_ A.1...
- Page 34 TABLA DE CONTENIDO Advertencias De Seguridad......A-1 Instrucciones de Ensamblado......B-1 Instrucciones Operativas ......... C-1 Recetas Para La Parrilla ........D-1 Accesorios ............E-1...
- Page 35 ¡Felicitaciones por tu compra de este producto Char-Griller®! Has comprador un producto que puede ser utilizado COMO una Parrillera a Carbón Portable y de Mesa O como una Parrillera lateral montable a una parrillera tipo barril de Char-Griller. Las instrucciones de ensamblado para...
- Page 36 Esta Página Ha Sido Intencionalmente Ha Dejado En Blanco...
- Page 37 Departamento de Atención al Cliente al 1-912-638-4724 (EE.UU.), o envíenos un correo electrónico a: Service@Char-Griller.com; tenga el número de serial de su parrillera al alcance. Documente el Número de Serial y Modelo de su Parrillera AQUÍ: (El número de modelo y serial se encuentran en la parte trasera del cuerpo de la parrilera o en la...
- Page 38 ADVERTENCIAS DE SEGURIDAD LEA TODAS LAS INSTRUCCIONES Y ADVERTENCIAS DE SEGURIDAD CUIDADOSAMENTE ANTES DE ENSAMBLAR Y OPERAR SU PARRILLERA Lea todas las instrucciones cuidadosamente y asegúrese de que su parrillera esté ensamblada, instalada y reciba mantenimiento apropiadamente. El incumplimiento de estas instrucciones puede causar daños a la propiedad y/o lesiones severas.
- Page 39 ESTAS ADVERTENCIAS TAMBIÉN APLICAN PARA LA PARRILLERA LATERAL. REGISTRE SU PARRILLERA: Para aprovechar al máximo la garantía de Char-Griller, registre su parrillera a través de la página web www.CharGriller.com/Register o llamando a Servicio al Cliente al 1-912-638-4724. Registrarse le otorga protecciones importantes: 1.
- Page 40 El ÓXIDO SUPERFICIAL NO ES CONSIDERADO UN DEFECTO DE MANUFACTURA O DE MATERIAL Las parrilleras Char-Griller están hechas de acero y al ser expuestas a los elementos ambientales se producirá la oxi- dación naturalmente. Por favor, refi érase a la sección “Uso” para revisar como cómo cuidar su parrillera apropiadamente.
- Page 41 LISTA DE PIEZAS Y HERRAMIENTAS (Herramientas No incluidas Pinza llaves para tuercas de 7/16" pulg. Destornillador Phillips Martillo 20 pcs Bisel Tuerca de mariposa 2 pcs. 2 pcs. PIEZAS DESCRIPCIÓN: 1 BASERO LATERAL 2 CíRCULO DEL REGULADOR DE TRIO 1 CAJÓN DE LA BANDEJA 2 PARILLA PARA COCINAR 1 FUNDICION DE HIERRO LEVANTADOR 2 MANIJA LATERAL...
- Page 42 INSTRUCCIONES DE ARMADO Lea todos los avisos de seguridad e instrucciones De cuidado antes de armar u operar su parilla. Nota: Todas las tuercas de ir en el interior de la parrilla. Quite y desempaquete la parilla y todas sus partes del empaquetado. Paso 1 Conecte las piernas al cuerpo de parrilla con cuatro (4) 1/2”...
- Page 43 Paso 2 Sujete el MANIJA y los BISELS a la CUBIERTA DE LA PARILLA con dos (2) TUERCAS DE MARIPOSA de 1/4" y dos (2) ARANDELAS DE SEGURIDAD. Manija Delantera Cubierta de la parrilla Bisels Arandela de seguridad Tuerca de mariposa Paso 3 Conecte el alambre manejar al cuerpo de parrilla con cuatro (4) pernos de maleficio y cuatro (4) tuercas hexagonales, vea abajo.
- Page 44 Paso 4 Conecte el regulador circule al cuerpo de la parrilla con una (1) 3/4” pernos hexagonales, una (1) arandela plana, una (1) arandela y una (1) tuerca hexagonal. Arandela plana Arandela de seguridad Tuercas hexagonal Pernos hexagonal Círculo de amortiguador Arandela plana Paso 5...
- Page 45 Paso 6 Instale asideros en U a cenicero con dos (2) arandelas y dos (2) tuercas hexagonales. Arandela de seguridad Tuercas hexagonal Cenicero U Agarradores Paso 7 Apriete todos los pernos y tuercas. Inserte un perno de 1/2" y apriete con una tuerca para cualquier abiertos agujeros en el cuerpo de la parrilla después del montaje.
- Page 46 Paso 9 Coloque las rejillas de cocción en el cuerpo de la parrilla. Cuerpo de la parrilla las parrillas de cocción...
- Page 47 Página en blanco para las notas...
- Page 48 LISTA DE PIEZAS Y HERRAMIENTAS (Herramientas No incluidas Pinza llaves para tuercas de 7/16" pulg. Destornillador Phillips Martillo 20 pcs Bisel Tuerca de mariposa 2 pcs. 2 pcs. PIEZAS DESCRIPCIÓN: 1 BASERO LATERAL 2 CíRCULO DEL REGULADOR DE TRIO 1 CAJÓN DE LA BANDEJA 2 PARILLA PARA COCINAR 1 FUNDICION DE HIERRO LEVANTADOR 2 MANIJA LATERAL...
- Page 49 Paso 1 Retire las placas de relleno del SFB y cuerpo de la parrilla principal que va a instalar el SFB en. Cuerpo de la parrilla Placas de relleno Paso 2 Conecte SFB al cuerpo de la parrilla principal. Con un ayudante Alinee el SFB en su lugar sobre la abertura en el cuerpo de la parrilla, luego conecte con seis (6) pernos de 1/2"...
- Page 50 Paso 3 Fije los tubos distanciadores entre SFB y lado apoyos y asegure con dos (2) 2" pernos hexagonales y tuercas hexagonales. Los pernos hexagonal deben pasar a través de la parte SFB, véase abajo. Alinee los tubos dis- tanciadores con los agujeros correspondientes en el soporte de pierna y SFB. Inserte el 2" hexagonal Perno a través el SFB y mediante el tubo separador y finalmente a través de la abrazadera de la pierna.
- Page 51 Paso 5 Sujete el MANIJA y los BISELS a la CUBIERTA DE LA PARILLA con dos (2) TUERCAS DE MARIPOSA de 1/4" y dos (2) ARANDELAS DE SEGURIDAD. Manija Delantera Cubierta de la parrilla Bisels Arandela de seguridad Tuerca de mariposa Paso 6 Coloque círculo de amortiguador en el cenicero con 3/4"...
- Page 52 Paso 7 Instale asideros en U a cenicero con dos (2) arandelas y dos (2) tuercas hexagonales. Arandela de seguridad Tuercas hexagonales Cenicero U Agarradores Paso 8 Apriete todos los pernos y tuercas. Inserte un perno de 1/2" y apriete con una tuerca para cualquier abiertos agujeros en el cuerpo de la parrilla después del montaje.
- Page 53 Paso 10 Colocar las rejillas de cocción en SFB. Las parrillas de cocción B-13...
- Page 54 Esta Página Ha Sido Intencionalmente Ha Dejado En Blanco...
- Page 55 INSTRUCCIONES OPERATIVAS Instalación del Equipo Coloque la parrillera en una superficie plana y sólida, resguardada del viento. No mueva la parrillera mientras esté caliente y no la deje sin supervisión durante su operación. Este equipo está diseñado para ser utilizado al aire libre, lejos de cualquier material inflamable. Es importante que no existan obstrucciones superiores y que haya una distancia mínima de 3 pies (90 cm) desde la parte lateral o trasera del equipo.
- Page 56 Instrucciones de Encendido 6. Para comenzar un fuego a carbón, apile de 15-18 briquetas en forma de pirámide y sature con fluido de encendido. NOTA: No use gasolina, querosén o alcohol para encender el carbón. El uso de cualquiera de estos productos, o de similares, puede causar una explosión que posiblemente conlleve a graves lesiones.
- Page 57 Luego de que el fuego esté completamente apagado, deberá esperar varias horas para vaciar las cenizas, asegurando que ya no están calientes y no existe peligro de quemaduras. 1. Tumbe cualquier ceniza que no haya caído al recipiente de cenizas de la rejilla de combustible. (Si encuentra pedazos de carbón parcialmente quemados en la rejilla para combustible, puede guardarlos para la próxima vez.
- Page 58 Esta Página Ha Sido Intencionalmente Ha Dejado En Blanco...
- Page 59 RECETAS PARA COCINAR A LA PARRILLA Conozca sus Cortes de Carne COSTILLAS LOMO COSTILLA PARA ASAR, EXTREMO GRANDE SOLOMO CORTES DE RES BISTEC DE LOMITO COSTILLA PARA ASAR, EXTREMO PEQUEÑO PUNTA DE SOLOMO BISTEC DE LOMO FILETE DE COSTILLA, EXTREMO PEQUEÑO BISTEC DE SOLOMO LOMO ENTERO BISTEC DE COSTILLA...
- Page 60 Calor Directo • El Calor Directo es un método de alta temperatura utilizado para cocinar comidas que toman menos de 25 minutos de cocción. Normalmente significa que son comidas que tienen poco grosor como los bistecs, chuletas, pechugas de pollo deshuesadas, filetes de pescado, hamburguesas, etc.
- Page 61 minuto en cada lado antes de bajar la rejilla y cerrar la tapa. • Para AHUMAR, coloque las aves en el centro de la REJILLA con el fuego en los dos extremos de la PARRILLA LATERAL. BROCHETAS: • Alternar en las brochetas cualquier combinación de carnes, cebollas, tomates, pimentones verdes, champiñones, calabacines, una rodaja de maíz sancochado o piña.
- Page 62 CAMARONES (Pelados) y LANGOSTA: • Coloque en pinchos. • Cubra con mantequilla derretida y ajillo con sal. • Ase por 4 minutos en cada lado o hasta que estén rosados. La salsa Cóctel es opcional. PAPAS AL HORNO: • Frótelas con mantequilla y envuelva en papel de aluminio. Áselas en la parrilla con la tapa abajo por 50 minutos.
- Page 63 Bandeja no incluida. Se recomienda una bandeja para pan desechable. AHUMADO POR COCCIÓN LENTA (Ver el cuadro de arriba) 1. Coloque la bandeja de goteo/recolectora de agua en la parte izquierda de la rejilla de combustible. 2. Coloque carbón caliente en la parte derecha (extremo de la compuerta) de la rejilla de calefacción. El accesorio de la cesta para carbón ayuda a mantener los carbones en un solo lugar.
- Page 64 estén totalmente cocidos, deberían ser cocidos a una temperatura interna de 160°F (71°C). • Vierta glaseado de jamón 3 o 4 veces durante los últimos 30 minutos del tiempo de cocción. • Aderece con rodajas de piña 15 minutos antes de terminar el tiempo de cocción. PERROS CALIENTES AHUMADOS RELLENOS: •...
- Page 65 VEGETALES AHUMADOS: • Nabos, papas, zanahorias, quingombó, champiñones, cebollas peladas, calabacín, calabaza, etc. • Coloque en bandeja y cubra con agua y cocine por varias horas hasta que se la carne esté lista. O coloque vegetales en la parrilla y ahúme por 50 minutos, envuelto o no en papel de aluminio. PESCADO AHUMADO: •...
- Page 66 • Permita que la carne se marine a una temperatura ambiente por 2 horas o refrigere hasta 24 horas en un plato cubierto. • Espere que llegue a temperatura ambiente antes de cocinar. MARINADA PARA BROCHETAS: Mezcle 1 taza de salsa de soya ½...
- Page 67 ACCESORIOS Cubierta a la Medida Rejilla de Calentamiento Resistente al Clima Aumenta el Área de la Protege el Acabado La Cubierta Parrillera y Mantiene la se Adapta al Estante Lateral o la Comida Caliente Parrillera Lateral Cesta para Carbón Mantiene los Carbones a un Lado para Ahumar Cocción Indirecta Asador...
- Page 68 Para obtener información de precios o para ordenar accesorios, visite: www.CharGriller.com LLAME AL: 912-638-4724 P.O. Box 30864 Sea Island, GA 31561 912-638-4724 www.CharGriller.com Service@CharGriller.com...
Need help?
Do you have a question about the 72424 and is the answer not in the manual?
Questions and answers