
Subscribe to Our Youtube Channel
Related Manuals for Kia G6DB-3.3

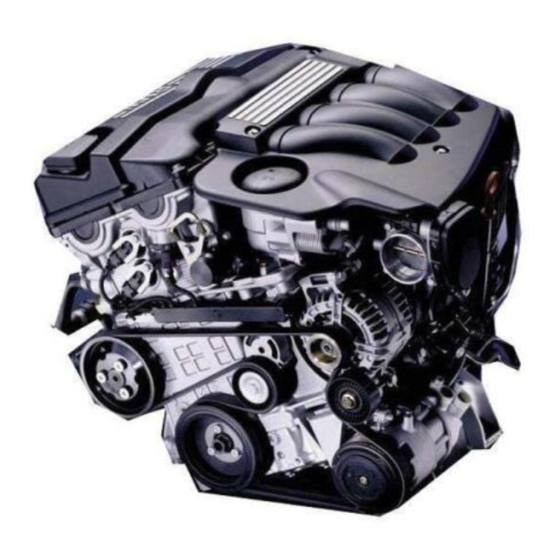
Summary of Contents for Kia G6DB-3.3
- Page 1 www.CarGarage.ir Engine Mechanical System GENERAL COOLING SYSTEM ENGINE AND TRANSAXLE ASSEMBLY LUBRICATION SYSTEM TIMING SYSTEM INTAKE AND EXHAUST SYSTEM TIMING CHAIN INTAKE MANIFOLD EXHAUST MANIFOLD EXHAUST PIPE CYLINDER HEAD ASSEMBLY ENGINE BLOCK www.CarGarage.ir...
- Page 2 www.CarGarage.ir EMA -2 ENGINE MECHANICAL SYSTEM GENERAL SPECIFICATION EE6CF939 Specifications Description Limit G6DB - 3.3 G6DA - 3.8 General Type V-type, DOHC Number of cylinders Bore 92mm (3.6220in) 96mm (3.7795in) Stroke 83.8mm (3.2992in) 87.0 mm(3.4252in) 3.778cc Total displacement 3,342cc (203.86cu.in) (230.55cu.in) Compression ratio 10.4...
- Page 3 www.CarGarage.ir GENERAL EMA -3 Specifications Description Limit G6DB - 3.3 G6DA - 3.8 0.02 ~ 0.18mm → End play (0.0008 ~ 0.0071in) Valve Valve length Intake 105.27mm(4.1445in) Exhaust 105.50mm (4.1535in) Stem outer diameter Intake 5.465 ~ 5.480mm (0.2151 ~ 0.2157in) Exhaust 5.458 ~ 5.470mm (0.2149 ~ 0.2153in) Face angle...
- Page 4 www.CarGarage.ir EMA -4 ENGINE MECHANICAL SYSTEM Specifications Description Limit G6DB - 3.3 G6DA - 3.8 Intake 0.10 ~ 0.30mm 0.17 ~ 0.23mm (0.0067 ~ 0.0090in) (0.0039 ~ 0.0118in) Exhaust 0.20 ~ 0.40mm 0.27 ~ 0.33mm (0.0106 ~ 0.0129in) (0.0078 ~ 0.0157in) Cylinder block 92.00 ~ 92.03mm 96.00 ~ 96.03mm...
- Page 5 www.CarGarage.ir GENERAL EMA -5 Specifications Description Limit G6DB - 3.3 G6DA - 3.8 Main bearing oil clearance 0.022 ~ 0.040mm (0.0008 ~ 0.0016in) End play 0.10 ~ 0.28mm (0.0039 ~ 0.0110in) Oil pump 450 ~ 550kPa Relief valve opening pressure (4.59 ~ 5.61kgf/cm²,65.28 ~ 79.79psi) Engine oil 4.5 ~ 5.5L(4.76 ~ 5.81U.S.qus, 3.96...
- Page 6 www.CarGarage.ir EMA -6 ENGINE MECHANICAL SYSTEM TIGHTENING TORQUE Item kgf.m lb.ft Quantity Crankshaft pulley bolt 284.2 ~ 303.8 29.0 ~ 31.0 209.76 ~ 224.22 Timing chain cover bolt B 18.62 ~ 21.56 1.9 ~ 2.2 13.74 ~ 15.91 Timing chain cover bolt C 9.80 ~ 11.76 1.0 ~ 1.2 7.23 ~ 8.68...
- Page 7 www.CarGarage.ir GENERAL EMA -7 Item kgf.m lb.ft Quantity Knock sensor bolt 15.68 ~ 23.52 1.6 ~ 2.4 11.57 ~ 17.36 Drive plate bolt 71.54 ~ 75.46 7.3 ~ 7.7 52.80 ~ 55.69 Oil filter cap 24.50 18.08 Oil drain bolt 34.30 ~ 44.10 3.5 ~ 4.5 25.31 ~ 32.55...
- Page 8 www.CarGarage.ir EMA -8 ENGINE MECHANICAL SYSTEM INSPECTION VALVE CLEARANCE INSPECTION AND ECE1FCC3 ADJUSTMENT COMPRESSION PRESSURE NOTE NOTE Inspect and adjust the valve clearance when the en- If there is lack of power, excessive oil consumption or gine is cold (Engine coolant temperature : 20 C) and poor fuel economy, measure the compression pres- cylinder head is installed on the cylinder block.
- Page 9 www.CarGarage.ir GENERAL EMA -9 After disconnecting the MAF sensor connector(A) and Remove the wiring over the surge tank. the breather hose(B), remove the air cleaner assem- bly(C). Disconnect the injection harness connector(A). Disconnect the camshaft position sensor(CMP) harness connector(B). Disconnect the ground line(C). Disconnect the ignition coil harness connec- tor(D).
- Page 10 www.CarGarage.ir EMA -10 ENGINE MECHANICAL SYSTEM Disconnect the fuel hose tube(A). 10. Loosen the cylinder head cover bolts and then remove the cover(A) and gasket. SBLM16015L SBLM16007L Remove heater hose(A) and disconnect the brake vaccume hose(B). 11. Set No.1 cylinder to TDC/compression. Turn the crankshaft pulley and align its groove with the timing mark "T"...
- Page 11 www.CarGarage.ir GENERAL EMA -11 Check that the mark(A) of the camshaft timing Valve clearance sprockets are in straight line on the cylinder head Specification surface as shown in the illustration. Engine coolant temperature : 20 C [68 F] If not, turn the crankshaft one revolution (360 ) Limit Intake : 0.17 ~ 0.23mm (0.0067 ~ 0.0090in.) Exhaust : 0.27 ~ 0.33mm (0.0106 ~ 0.0129in.)
- Page 12 www.CarGarage.ir EMA -12 ENGINE MECHANICAL SYSTEM Remove the camshaft assembly(A). Place a new tappet on the cylinder head. NOTE Appling engine oil at the selected tappet on the pe- riphery and top surface. Install the intake and exhaust camshaft. Install the bearing caps. m.
- Page 13 www.CarGarage.ir GENERAL EMA -13 TROUBLESHOOTING EB9DDED8 Symptom Suspect area Remedy Engine misfire with abnormal Worn crankshaft bearings. Replace the crankshaft and bearings internal lower engine noises. Loose or improperly installed as required. engine drive plate. Repair or replace the drive plate as required.
- Page 14 www.CarGarage.ir EMA -14 ENGINE MECHANICAL SYSTEM Remedy Symptom Suspect area Upper engine noise,regard- Low oil pressure. Repair or replace as required. less of engine speed. Broken valve spring. Replace the valve spring. Worn or dirty valve lifters. Replace the valve lifters. Stretched or broken timing chain and/or Replace the timing chain and sprockets.
- Page 15 www.CarGarage.ir GENERAL EMA -15 Remedy Symptom Suspect area Engine noise under load. Low oil pressure Repair or replace as required. Excessive connecting rod bearing Inspect the following components clearance . andrepair as required : • The connecting rod bearings. • The connecting rods. •...
- Page 16 www.CarGarage.ir EMA -16 ENGINE MECHANICAL SYSTEM SPECIAL SERVICE TOOLS E787872C Tool (Number and name) Illustration Crankshaft front oil seal installer Installation of the front oil seal (09231-3C100) KDRF233A Flywheel stopper Removal and installation of the flywheel (09231-3C300) and crankshaft pulley. KCRF030D Torque angle adapter Installation of bolts &...
- Page 17 www.CarGarage.ir GENERAL EMA -17 Tool (Number and name) Illustration Valve spring compressor Removal and installation of the intake & holder or exhaust valve (09222-3K000) A : 09222-3K000 (09222-3C300) B : 09222-3C300 (holder) ECRF003A Crankshaft rear oil seal installer Installation of the crankshaft rear oil seal (09231-3C200) A : 09231-3C200 (09231-H1100)
- Page 18 www.CarGarage.ir EMA -18 ENGINE MECHANICAL SYSTEM ENGINE AND TRANSAXLE Remove the under cover(A). ASSEMBLY REMOVAL E31DBAFC CAUTION • Use fender covers to avoid damaging painted surfaces. • To avoid damage, unplug the wiring connec- tors carefully while holding the connector portion.
- Page 19 www.CarGarage.ir ENGINE AND TRANSAXLE ASSEMBLY EMA -19 Disconnect the PCM connectors(A). SBLM16011L Disconnect the battery connector(A), the power SBLM16009L steering switch connector(B) and the knock sen- Remove the battery tray while recovering refrigerant. sor(RH) harness connector(C). Disconnect the high and low pressure pipes from the radiator or the compressor.(Refer to Air conditioning system in HA Group).
- Page 20 www.CarGarage.ir EMA -20 ENGINE MECHANICAL SYSTEM Disconnector water temperature sen- 16. Remove heater hose(A) and disconnect the brake sor(WTS) harness connector(A), the oil temper- vaccume hose(B). ature sensor(OTS) harness connector(B) and the purge control solenoid valve(PCSV) harness connector(C). SBLM16017L 17. Remove the exhaust and intake manifold covers.(Re- fer to Intake and exhaust system in this Group).
- Page 21 www.CarGarage.ir ENGINE AND TRANSAXLE ASSEMBLY EMA -21 INSTALLATION EAD5D6B1 Installation is in the reverse order of removal. Perform the following : • Adjust the shift cable. • Refill the engine with engine oil. • Refill the transaxle with fluid. • Refill the radiator with engine coolant. •...
- Page 22 www.CarGarage.ir EMA -22 ENGINE MECHANICAL SYSTEM TIMING SYSTEM TIMING CHAIN COMPONENTS EFFAFA9E 284.2 ~ 303.8 (29.0 ~ 31.0, 209.76 ~ 224.22) 7.84 ~ 9.80 (0.8 ~ 1.0, 5.78 ~ 7.23) 29.4 ~ 33.3 (3.0 ~ 3.4, 21.7 ~ 24.6) 9.8 ~ 11.76 (1.0 ~ 1.2, 7.23 ~ 8.68) 52.92 ~ 57.82 (5.4 ~ 5.9, 39.06 ~ 42.67)
- Page 23 www.CarGarage.ir TIMING SYSTEM EMA -23 19.60 ~ 24.50 (2.0 ~ 2.5, 14.17 ~ 18.08) 9.80 ~ 11.76 (1.0 ~ 1.2, 7.23 ~ 8.68) 18.62 ~ 21.56 (1.9 ~ 2.2, 13.74 ~ 15.91) 18.62 ~ 21.56 (1.9 ~ 2.2, 13.74 ~ 15.91) 9.80 ~ 11.76 (1.0 ~ 1.2, 7.23 ~ 8.68) 19.60 ~ 24.50...
- Page 24 www.CarGarage.ir EMA -24 ENGINE MECHANICAL SYSTEM REMOVAL Remove the alternator(A). EE688815 Engine removal is required for this procedure. Remove the drive belt(A). KDRF104A Remove drive belt idler(A). SBLM16101L Remove the power steering pump(A). KDRF105A Remove drive belt auto tensioner(A). KDRF102A Remove the air compressor(A).
- Page 25 www.CarGarage.ir TIMING SYSTEM EMA -25 DISASSEMBLY Remove water pump pulley(A). ECE9DBD5 Remove the engine cover. KDRF107A Remove intake manifold. SBLM16001L Remove the engine room resonator(A). SBLM16003L After disconnecting the MAF sensor connector(A) and the breather hose(B), remove the air cleaner assem- bly(C).
- Page 26 www.CarGarage.ir EMA -26 ENGINE MECHANICAL SYSTEM After disconnecting the other breather hose(A), the Purge Control Solenoid Valve(PCSV) hose(B), the Positive Crankcase Ventilation (PCV) hose(C) and the Electronic Throttle Control(ETC) cooling hoses(D), remove the surge tank assemlby(E). SBLM16006L Loosen the cylinder head cover bolts and then remove the cover(A) and gasket.
- Page 27 www.CarGarage.ir TIMING SYSTEM EMA -27 Check that the mark(A) of the camshaft timing Remove the crankshaft damper pulley(A). sprockets are in straight line on the cylinder head surface as shown in the illustration. If not, turn the crankshaft one revolution (360 ). KDRF109A 10.
- Page 28 www.CarGarage.ir EMA -28 ENGINE MECHANICAL SYSTEM 11. Install a set pin after compressing the timing chain 14. Remove oil pump chain cover(A). tensioner. KDRF185A KCRF105A 15. Remove oil pump chain tensioner assembly(A). 12. Remove RH cam-to-cam guide(A). KDRF119A KDRF116A 16. Remove oil pump chain guide(A). 13.
- Page 29 www.CarGarage.ir TIMING SYSTEM EMA -29 18. Remove RH timing chain guide(A). 21. Remove LH cam-to-cam guide(A). KDRF118A KDRF123A 19. Remove oil pump chain sprocket(A) and oil pump 22. Remove LH timing chain auto tensioner(A) and LH chain(B). timing chain tensioner arm(B). KDRF121A KDRF124A 20.
- Page 30 www.CarGarage.ir EMA -30 ENGINE MECHANICAL SYSTEM INSPECTION 25. Remove crankshaft sprocket(A)(LH camshaft drive). E33C7CDB SPROCKETS, CHAIN TENSIONER, CHAIN GUIDE, CHAIN TENSIONER ARM Check the camshaft sprocket and crankshaft sprocket for abnormal wear, cracks, or damage. Replace as necessary. Inspect the tensioner arm and chain guide for abnor- mal wear, cracks, or damage.
- Page 31 www.CarGarage.ir TIMING SYSTEM EMA -31 REASSEMBLY Install LH timing chain guide(A). E0BF1C9F The key(A) of crankshaft should be aligned with the Tightening torque timing mark(B) of timing chain cover. As a result of 19.60 ~ 24.50Nm(2.0 ~ 2.5kgf.m, 14.17 ~ 18.08lb-ft) this, the piston of No.1 cylinder is placed at the top dead center on compression stroke.
- Page 32 www.CarGarage.ir EMA -32 ENGINE MECHANICAL SYSTEM Install chain tensioner(A). Tightening torque 9.80 ~ 11.76Nm(1.0 ~ 1.2kgf.m, 7.23 ~ 8.68lb-ft) KDRF122A 10. Install oil pump chain(B) and oil pump sprocket(A). Tightening torque 18.62 ~ 21.56Nm(1.9 ~ 2.2kgf.m, 13.74 ~ 15.91lb-ft) KDRF124A Install LH cam-to-cam guide(A).
- Page 33 www.CarGarage.ir TIMING SYSTEM EMA -33 12. Install RH timing chain. To install the timing chain with no slack between each shaft (cam, crank), follow the below procedure. → Crankshaft sprocket(A) Intake camshaft sprocket(B) → Exhaust camshaft sprocket(C). The timing mark of each sprockets should be matched with timing mark (color link) of timing chain at installing timing chain.
- Page 34 www.CarGarage.ir EMA -34 ENGINE MECHANICAL SYSTEM 17. Install oil pump chain tensioner assembly(A). 21. Install timing chain cover. The sealant locations on chain cover and on counter parts (cylinder head, cylinder block, and Tightening torque 9.80 ~ 11.76Nm(1.0 ~ 1.2kgf.m, 7.23 ~ 8.68lb-ft) lower oil pan) must be free of engine oil and ETC.
- Page 35 www.CarGarage.ir TIMING SYSTEM EMA -35 Install the new gasket(A) to the timing chain The firing and/or blow out test should not be per- cover. formed within 30 minutes after the timing chain cover was assembled. 22. Using SST(09231-3C100), install timing chain cover oil seal.
- Page 36 www.CarGarage.ir EMA -36 ENGINE MECHANICAL SYSTEM CAUTION • Make clean the sealing face before assem- bling two parts. • Remove harmful foreign matters on the seal- ing face before applying sealant. • When applying sealant gasket, sealant must not be protruded into the inside of oil pan. •...
- Page 37 www.CarGarage.ir TIMING SYSTEM EMA -37 Install the cylinder head cover bolts as following method. Tightening torque 9.80 ~ 11.76Nm(1.0 ~ 1.2kgf.m, 7.23 ~ 8.68lb-ft) SBLM16201L CAUTION Do not reuse cylinder head cover gasket. Install ignition coil Connect ignition coil connector(A), condenser connector(B) and install wiring bracket(C).
- Page 38 www.CarGarage.ir EMA -38 ENGINE MECHANICAL SYSTEM INSTALLATION Install drive belt idler(A). E0ED79CB Install intake manifold. Tightening torque 52.92 ~ 57.82Nm(5.4 ~ 5.9kgf.m, 39.06 ~ 42.67lb-ft) Install water pump pulley(A). Tightening torque 7.84 ~ 9.80Nm(0.8 ~ 1.0kgf.m, 5.78 ~ 7.23lb-ft) KDRF105A Install alternator Install air compressor KDRF107A...
- Page 39 www.CarGarage.ir CYLINDER HEAD ASSEMBLY EMA -39 CYLINDER HEAD ASSEMBLY COMPONENTS EEECCDC0 18.62 ~ 23.52 39.2 (4.0, 28.93) + 120 + 90 (1.9 ~ 2.4, 13.74 ~ 17.36) TORQUE : N.m (kgf.m, lbf.ft) 1. RH cylinder head 4. LH cylinder head gasket 2.
- Page 40 www.CarGarage.ir EMA -40 ENGINE MECHANICAL SYSTEM 9.80 ~ 11.76 (1.0 ~ 1.2, 7.23 ~ 8.68) 64.68 ~ 76.44 (6.6 ~ 7.8, 47.74 ~ 56.4) 9.80 ~ 11.76 (1.0 ~ 1.2, 7.23 ~ 8.68) TORQUE : N.m (kgf.m, lbf.ft) 1. Camshaft bearing cap 6.
- Page 41 www.CarGarage.ir CYLINDER HEAD ASSEMBLY EMA -41 REMOVAL Remove camshaft assembly(A). EC0F8ABA CAUTION • Use fender covers to avoid damaging painted surfaces. • To avoid damaging the cylinder head, wait un- til the engine coolant temperature drops be- low normal temperature before removing it. •...
- Page 42 www.CarGarage.ir EMA -42 ENGINE MECHANICAL SYSTEM DISASSEMBLY Remove the spring retainer. EC0C0D1E Remove the valve spring. NOTE Identify MLA, valves and valve springs as they are Remove the valve. removed so that each item can be reinstalled in its original position. Using SST(09222-29000), remove the valve stem seal.
- Page 43 www.CarGarage.ir CYLINDER HEAD ASSEMBLY EMA -43 INSPECTION VALVE AND VALVE SPRING EA4BD93A CYLINDER HEAD Inspect valve stems and valve guides. Using a caliper gauge, measure the inside diam- Inspect for flatness. eter of the valve guide. Using a precision straight edge and feeler gauge, measure the surface the contacting the cylinder block Valve guide I.D.
- Page 44 www.CarGarage.ir EMA -44 ENGINE MECHANICAL SYSTEM Subtract the valve stem diameter measurement Inspect valve seats from the valve guide inside diameter measure- Check the valve seat for evidence of overheating and ment. improper contact with the valve face. If the valve seat is worn, replace cylinder head. Valve stem-to-guide clearance Before reconditioning the seat, check the valve guide for wear.
- Page 45 www.CarGarage.ir CYLINDER HEAD ASSEMBLY EMA -45 CAMSHAFT Inspect MLA. Inspect cam lobes. Using a micrometer, measure the MLA outside diam- Using a micrometer, measure the cam lobe height. eter. Cam height MLA O.D. [Standard value] Intake/Exhaust : 34.964 ~ 34.980mm(1.3765 Intake : ~ 1.3771in.) 46.3mm (1.8228in.)(3.3L)
- Page 46 www.CarGarage.ir EMA -46 ENGINE MECHANICAL SYSTEM Install the bearing caps. Inspect camshaft end play. Install the camshafts. CAUTION Using a dial indicator, measure the end play while Do not turn the camshaft. moving the camshaft back and forth. Remove the bearing caps. Camshaft end play Measure the plastigage at its widest point.
- Page 47 www.CarGarage.ir CYLINDER HEAD ASSEMBLY EMA -47 CVVT ASSEMBLY Under the condition of (3), turn the CVVT assem- bly to the advance angle side (the arrow marked Inspect CVVT assembly. direction in the illustration) with your hand. Depending on the air pressure, the CVVT assem- Check that the CVVT assembly will not turn.
- Page 48 www.CarGarage.ir EMA -48 ENGINE MECHANICAL SYSTEM REASSEMBLY Using the SST(09222 - 3K000, 09222-3C300), ED39E8BC compress the spring and install the retainer locks. After installing the valves, ensure that the retainer NOTE locks are correctly in place before releasing the Thoroughly clean all parts to be assembled. valve spring compressor.
- Page 49 www.CarGarage.ir CYLINDER HEAD ASSEMBLY EMA -49 INSTALLATION Install OCV(A). E63A6A04 Tightening torque NOTE 9.80 ~ 11.76Nm(1.0 ~ 1.2kgf.m, 7.23 ~ 8.68lb-ft) • Thoroughly clean all parts to be assembled. • Always use a new head and manifold gasket. • The cylinder head gasket is a metal gasket. Take care not to bend it.
- Page 50 www.CarGarage.ir EMA -50 ENGINE MECHANICAL SYSTEM NOTE Refer to below illustration to apply the sealant. 3 : 3.3L Bead width : 2.0~3.0 mm 8 : 3.8L Sealant locations : 1.0~1.5mm from block surface Recommended sealant :Liquid sealant TB1217H CYLINDER HEAD GASKET 2.0 ~ 3.0mm R : RH...
- Page 51 www.CarGarage.ir CYLINDER HEAD ASSEMBLY EMA -51 Install the CVVT and camshaft sprocket. NOTE Always use new cylinder head bolt. Tightening torque 64.68 ~ 76.44Nm(6.6 ~ 7.8 kgf.m, 47.74 ~ 56.4lb-ft) KDRF199B KCRF122A NOTE • Install camshaft-inlet to dowel pin of CVVT as- sembly .
- Page 52 www.CarGarage.ir EMA -52 ENGINE MECHANICAL SYSTEM INTAKE CAMSHAFT SBLM16209L KDRF226A Ø30mm(1.1811in.) Ø30mm(1.1811in.) 3.3L Ø27mm(1.0630in.) Ø30mm(1.1811in.) Ø27mm(1.0630in.) Ø27mm(1.0630in.) 3.3L Ø27mm(1.0630in.) Ø30mm(1.1811in.) Ø30mm(1.1811in.) Ø30mm(1.1811in.) 3.8L Ø30mm(1.1811in.) Ø27mm(1.0630in.) Ø27mm(1.0630in.) Ø27mm(1.0630in.) 3.8L Ø27mm(1.0630in.) Ø30mm(1.1811in.) Install camshaft bearing caps with the order below. EXHAUST CAMSHAFT Tightening torque 1st step : 5.9Nm(0.6kgf.m, 4.3lb-ft) 2nd step : 9.80 ~ 11.76Nm(1.0 ~ 1.2kgf.m,...
- Page 53 www.CarGarage.ir CYLINDER HEAD ASSEMBLY EMA -53 NOTE Be careful the right, left bank, intake, exhaust side before assembling. ECBF036A A : L(LH),R(RH) B : I(Intake),None(Exhaust) C : Journal number D : Front mark CAUTION Rotate the crankshaft not to contact the valves to the pistons by making the pistons below 10mm(0.3937in.) from the top of cylinder block.
- Page 54 www.CarGarage.ir EMA -54 ENGINE MECHANICAL SYSTEM ENGINE BLOCK COMPONENTS EF6DC04B 19.6 (2.0, 14.46) + 90 9.80 ~ 11.76 (1.0 ~ 1.2, 7.23 ~ 8.68) 9.80 ~ 11.76 (1.0 ~ 1.2, 7.23 ~ 8.68) TORQUE : N.m (kgf.m, lbf.ft) 1. Piston ring 6.
- Page 55 www.CarGarage.ir ENGINE BLOCK EMA -55 9.80 ~ 11.76 (1.0 ~ 1.2, 7.23 ~ 8.68) 71.54 ~ 75.46 (7.3 ~ 7.7, 52.80 ~ 55.69) 9.80 ~ 11.76 (1.0 ~ 1.2, 7.23 ~ 8.68) 29.40 ~ 31.36 (3.0 ~ 3.2, 21.70 ~ 23.14) 49.00 (5.0, 36.16) +90 19.60 (2.0, 14.46) +120 TORQUE : N.m (kgf.m, lbf.ft)
- Page 56 www.CarGarage.ir EMA -56 ENGINE MECHANICAL SYSTEM REMOVAL Remove alternator(A) from engine. E4DADBA3 CAUTION • Use fender covers to avoid damaging painted surfaces. • To avoid damage, unplug the wiring connec- tors carefully while holding the connector portion. NOTE • Mark all wiring and hoses to avoid misconnec- tion.
- Page 57 www.CarGarage.ir ENGINE BLOCK EMA -57 DISASSEMBLY Remove rear oil seal case(A). EBCBF7FE Remove drive plate. Remove knock sensor(A). KDRF208A KDRF205A Remove oil drain cover(A). Remove upper oil pan(A). KDRF209A KDRF206A Check the connecting rod end play. Remove baffle plate(A). Check the connecting rod oil clearance. Remove piston and connecting rod assemblies.
- Page 58 www.CarGarage.ir EMA -58 ENGINE MECHANICAL SYSTEM INSPECTION 10. Remove crankshaft main bearing cap and check oil EAA56C18 clearance. CONNECTING ROD AND CRANKSHAFT 11. Check the crankshaft end play. Check the connecting rod end play. 12. Lift the crankshaft(A) out of engine, being careful not Using a feeler gauge, measure the end play while to damage journals.
- Page 59 www.CarGarage.ir ENGINE BLOCK EMA -59 Measure the plastigage at its widest point. CONNECTING ROD MARK LOCATION Standard oil clearance 0.038 ~ 0.056mm(0.0015 ~ 0.0022in) EDQF196A DISCRIMINATION OF CONNECTING ROD CLASS MARK INSIDE DIAMETER KDRF212A 58.000 ~ 58.006mm If the plastigage measures too wide or too nar- (2.2834 ~ 2.2837in.) row, remove the upper half of the bearing, in- stall a new, complete bearing with the same color...
- Page 60 www.CarGarage.ir EMA -60 ENGINE MECHANICAL SYSTEM DISCRIMINATION OF CRANKSHAFT 11) Selection OUTSIDE DIAMETER CONNECTING ROD CLASS MARK OF PIN IDENTIFICATION MARK 54.966 ~ 54.972mm 0(a) 1(b) 2(c) 1 or A (2.1640 ~ 2.1642in.) 54.960 ~ 54.966mm CRANK- 1 or A (YEL- 2 or B (GREEN)
- Page 61 www.CarGarage.ir ENGINE BLOCK EMA -61 Remove the cap and bearing again, and measure Crankshaft bore mark location the widest part of the plastigage. Letters have been stamped on the block as a mark for the size of each of the 5 main journal Standard oil clearance bores.
- Page 62 www.CarGarage.ir EMA -62 ENGINE MECHANICAL SYSTEM DISCRIMINATION OF CRANKSHAFT SELECTION OUTSIDE DIAMETER CRANKSHAFT BORE CLASS MARK OF JOURNAL IDENTIFICATION MARK 68.954 ~ 68.960mm a(A) b(B) c(C) (2.7147 ~ 2.7150in.) 68.948 ~ 68.954mm 1 or A (YEL- CRANK- (GREEN) (BROWN) (2.7145 ~ 2.7147in.) LOW) SHAFT 68.942 ~ 68.948mm...
- Page 63 www.CarGarage.ir ENGINE BLOCK EMA -63 Inspect main journals and crank pins CONNECTING RODS Using a micrometer, measure the diameter of each When reinstalling, make sure that cylinder numbers main journal and crank pin. put on the connecting rod and cap at disassembly match.
- Page 64 www.CarGarage.ir EMA -64 ENGINE MECHANICAL SYSTEM CYLINDER BLOCK Remove gasket material. Using a gasket scraper, remove all the gasketmaterial from the top surface of the cylinder block. Clean cylinder block Using a soft brush and solvent, thoroughly clean the cylinder block. Inspect top surface of cylinder block for flatness.
- Page 65 www.CarGarage.ir ENGINE BLOCK EMA -65 Check the piston size code(A) and the front mark(B) PISTON AND RINGS on the piston top face. Clean piston Using a gasket scraper, remove the carbon from the piston top. Mark for total Using a groove cleaning tool or broken ring, clean displacement the piston ring grooves.
- Page 66 www.CarGarage.ir EMA -66 ENGINE MECHANICAL SYSTEM Inspect the piston ring side clearance. Inspect piston ring end gap. Using a feeler gauge, measure the clearance between To measure the piston ring end gap, insert a piston new piston ring and the wall of the ring groove. ring into the cylinder bore.
- Page 67 www.CarGarage.ir ENGINE BLOCK EMA -67 PISTON PINS Measure the diameter of the piston pin. Piston pin diameter 23.001 ~ 23.006mm(0.9055 ~ 0.9057in) ECKD001Z Measure the piston pin-to-piston clearance. Piston pin-to-piston clearance 0.010 ~ 0.020mm(0.0004 ~ 0.0008in) Check the difference between the piston pin diameter and the connecting rod small end diameter.
- Page 68 www.CarGarage.ir EMA -68 ENGINE MECHANICAL SYSTEM REASSEMBLY Install connecting rod bearings. E2B1FCB7 Align the bearing claw with the groove of the con- NOTE necting rod or connecting rod cap. • Thoroughly clean all parts to assembled. • Before installing the parts, apply fresh engine oil Install the bearings(A) in the connecting rod and to all sliding and rotating surfaces.
- Page 69 www.CarGarage.ir ENGINE BLOCK EMA -69 Install thrust bearings. NOTE Install the 2 thrust bearings(A) under the No.3 journal • Always use new main bearing cap bolt. position of the cylinder block with the oil grooves fac- • If any of the bearing cap bolts in broken or de- ing outward.
- Page 70 www.CarGarage.ir EMA -70 ENGINE MECHANICAL SYSTEM Stop after the ring compressor pops free, and 11. Check the connecting rod end play. check the connecting rod-to-check journal align- 12. Install oil drain cover. ment before pushing the piston into place. Apply engine oil to the bolt threads. Install the Tightening torque rod caps with bearings, and torque the bolts.
- Page 71 www.CarGarage.ir ENGINE BLOCK EMA -71 13. Install rear oil seal case. 14. Using SST(09231-3C200, 09231-H1100), install rear oil seal. Tightening torque 9.80 ~ 11.76Nm (1.0 ~ 1.2kgf.m, 7.23 ~ 8.67lb-ft) 09231-3C200 09231-H1100 KDRF237A 15. Install baffle plate. Install and uniformly tighten the baffle plate bolts, in several passes, in the sequence shown.
- Page 72 www.CarGarage.ir EMA -72 ENGINE MECHANICAL SYSTEM 16. Install upper oil pan. After assembly, wait at least 30 minutes before Using a gasket scraper, remove all the old pack- filling the engine with oil. ing material from the gasket surfaces. Before assebling the oil pan, the liquid sealant 17.
- Page 73 www.CarGarage.ir ENGINE BLOCK EMA -73 INSTALLATION EC9DBCE3 Install power steering pump. Install alternator. Install air compressor Install oil filter assembly. Install oil pump. Install cylinder head. Install water temperature control assembly. Install timing chain. Install intake manifold. 10. Install exhaust manifold. www.CarGarage.ir...
- Page 74 www.CarGarage.ir EMA -74 ENGINE MECHANICAL SYSTEM COOLING SYSTEM COMPONENTS E6DF76AB 19.6 ~ 23.52 (2.0 ~ 2.4, 14.5 ~ 17.36) 9.8 ~ 11.76 (1.0 ~ 1.2, 7.23 ~ 8.68) 21.56 ~ 26.5 (2.2 ~ 2.7, 15.91 ~ 19.5) 16.66 ~ 19.60 (1.7 ~ 2.0, 12.30 ~ 14.47) 7.84 ~ 9.80 (0.8 ~ 1.0, 5.78 ~ 7.23)
- Page 75 www.CarGarage.ir COOLING SYSTEM EMA -75 INSPECTION Start the engine and run coolant circulates. E60AA7F9 When the cooling fan operates and coolant circulates, ENGINE COOLANT REFILLING AND refill coolant through the radiator cap. BLEEDING Repeat 7 until the cooling fan 3 ~ 5times and bleed air sufficiently out of the cooling system.
- Page 76 www.CarGarage.ir EMA -76 ENGINE MECHANICAL SYSTEM CAP TESTING TESTING Remove the radiator cap, wet its seal with engine Wait until engine is cool, then carefully remove the coolant, then install it no pressure tester. radiator cap and fill the radiator with engine coolant, then install it on the pressure tester.
- Page 77 www.CarGarage.ir COOLING SYSTEM EMA -77 REMOVAL Remove the cooling fan shroud. EECA3D1E WATER PUMP Remove the water pump(A) and gasket. Drain the engine coolant. WARNING System is under high pressure when the engine is hot. To avoid danger of releasing scalding engine coolant, remove the cap only when the engine is cool.
- Page 78 www.CarGarage.ir EMA -78 ENGINE MECHANICAL SYSTEM RADIATOR Remove the under cover(A). Drain engine coolant. SBLM16016L Remove the radiator grille upper cover(A). SBLM16021L WARNING System is under high pressure when the engine is hot. To avoid danger of releasing scalding engine coolant, remove the cap only when the engine is cool.
- Page 79 www.CarGarage.ir COOLING SYSTEM EMA -79 WATER TEMPERATURE CONTROL ASSEMBLY Drain the engine coolant. Remove air cleaner assembly. Remove the automatic transaxle oil gauge. Remove the battery assembly(A). SBLM16024L Remove the radiator from the condensor by removing bolts.(Refer to Condensor in HA Group). Remove the cooling fan shroud(A) after disconnecting cooling fan harness connector(B) and loosening the mounting bolts(C).
- Page 80 www.CarGarage.ir EMA -80 ENGINE MECHANICAL SYSTEM Remove water temperature control assembly(A). SBLM16204L THERMOSTAT SBLM16116L Disconnect WTS connector. NOTE Removal of the thermostat would have an adverse Disconnect heater hose, water vent hose and water effect, causing a lowering of cooling efficiency. Do hose from water temperature control assembly.
- Page 81 www.CarGarage.ir COOLING SYSTEM EMA -81 INSPECTION THERMOSTAT EEE5DC80 WATER PUMP Immerse the thermostat in water and gradually heatthe water. Check each part for cracks, damage or wear, and re- place the coolant pump assembly if necessary. Check the bearing for damage, abnormal noise and sluggish rotation, and replace the coolant pump as- sembly if necessary.
- Page 82 www.CarGarage.ir EMA -82 ENGINE MECHANICAL SYSTEM INSTALLATION Install drive belt(A). EFD4FFC4 WATER PUMP Install the water pump(A) and a new gasket(1, 2) with 12 bolts. Tightening torque 21.56 ~ 23.52Nm (2.2 ~ 2.4kgf.m, 15.91 ~ 17.36lb-ft) 9.80 ~ 11.76Nm (1.0 ~ 1.2kgf.m, 7.23 ~ 8.68lb-ft) SBLM16101L Fill with engine coolant.
- Page 83 www.CarGarage.ir COOLING SYSTEM EMA -83 WATER TEMPERATURE CONTROL ASSEMBLY Connect WTS connector. Connect the RH/LH cooling pipes(A, B). NOTE Make clean the contact face before assembly. Install water temperature control assembly(A) and new gasket. Tightening torque 19.6 ~ 23.52Nm (2.0 ~ 2.4kgf.m, 14.5 ~ 17.36lb-ft) SBLM16115L SBLM16204L NOTE...
- Page 84 www.CarGarage.ir EMA -84 ENGINE MECHANICAL SYSTEM Install the automatic transaxle oil gauge. THERMOSTAT Install air cleaner assembly. Place thermostat in thermostat housing. Fill with engine coolant. Install the thermostat with the jiggle valve up- ward. 10. Start engine and check for leaks. Install a new thermostat(B).
- Page 85 www.CarGarage.ir COOLING SYSTEM EMA -85 RADIATOR Install the radiator assembly. Install the cooling fan shroud(A) by connecting cooling fan harness connector(B) and tightening the mounting bolts(C). SBLM16024L Install the radiator grille upper cover(A). SBLM16025L Install the radiator with the condensor by tightening bolts.(Refer to Condensor in HA Group).
- Page 86 www.CarGarage.ir EMA -86 ENGINE MECHANICAL SYSTEM Install the engnie cover(A). SBLM16001L Refill engine coolant. www.CarGarage.ir...
- Page 87 www.CarGarage.ir LUBRICATION SYSTEM EMA -87 LUBRICATION SYSTEM COMPONENTS E35BD1AA 9.80 ~ 11.76 (1.0 ~ 1.2, 7.23 ~ 8.68) 18.62 ~21.56 (1.9 ~ 2.2, 13.74 ~ 15.91) 19.60 ~ 23.52 (2.0 ~ 2.4, 14.47 ~ 17.36) 9.8 ~11.76 (1.0 ~ 1.2, 7.23 ~ 8.68) 9.8~11.76 (1.0 ~ 1.2, 7.23 ~ 8.68) TORQUE : N.m (kgf.m, lbf.ft) 1.
- Page 88 www.CarGarage.ir EMA -88 ENGINE MECHANICAL SYSTEM OIL AND FILTER Check the part number of the new oil filter is as E5D0D7D0 same as old one. Install new oil filter element(A) and two new CAUTION O-rings(B). • Prolonged and repeated contact with mineral oil will result in the removal of natural fats from the skin, leading to dryness, irritation and dermatitis.
- Page 89 www.CarGarage.ir LUBRICATION SYSTEM EMA -89 REMOVAL Remove oil pump chain sprocket(A). EEB453AF OIL PUMP Drain engine oil. Remove the front member.(Refer to Front suspension system in SS Group). Using SST(09215-3C000) remove lower oil pan(A). 09215 - 3C000 KDRF189A Remove oil pump(A). SBLM16019L CAUTION •...
- Page 90 www.CarGarage.ir EMA -90 ENGINE MECHANICAL SYSTEM INSPECTION OIL FILTER ASSEMBLY E9C606A4 Remove the engine assembly.(Refer to Engine and OIL PRESSURE SWITCH transaxle assembly in this Group). Check the continuity between the terminal and the Loosen the oil filter cap by turning it counterclockwise body with an ohmmeter.
- Page 91 www.CarGarage.ir LUBRICATION SYSTEM EMA -91 ENGINE OIL EAA26A7C NOTE Do not fill with engine oil above the "F" mark. Check engine oil quality. Check the oil for deterioration, entry of water, discol- SELECTION OF ENGINE OIL oring or thinning. If the quality is visibly poor, replace the oil. Recommended API classification : Above SJ or SL Recommended SAE viscosity grades : 5W-20 Check engine oil level.
- Page 92 www.CarGarage.ir EMA -92 ENGINE MECHANICAL SYSTEM INSTALLATION Install oil pump chain cover(A). EF2EDF0E OIL PUMP Tightening torque 9.80 ~ 11.76Nm (1.0 ~ 1.2kgf.m, 7.23 ~ 8.68lb-ft) Install oil pump(A). Tightening torque 19.60 ~ 23.52Nm (2.0 ~ 2.4kgf.m, 14.47 ~ 17.36lb-ft) NOTE Always use a new O-ring.
- Page 93 www.CarGarage.ir LUBRICATION SYSTEM EMA -93 OIL FILTER ASSEMBLY CAUTION Install oil filter body and new O-rings. • Make clean the sealing face before assem- bling two parts. Tightening torque • Remove harmful foreign matters on the seal- 9.80 ~ 11.76Nm (1.0 ~ 1.2kgf.m, 7.23 ~ 8.68lb-ft) ing face before applying sealant •...
- Page 94 www.CarGarage.ir EMA -94 ENGINE MECHANICAL SYSTEM INTAKE AND EXHAUST SYSTEM INTAKE MANIFOLD COMPONENTS EEBEB0E3 9.8 ~ 11.8 (1.0 ~ 1.2, 7.2 ~ 8.7) 18.6 ~ 23.5 (1.9 ~ 2.4, 13.7 ~ 17.4) 9.80 ~ 11.76 (1.0 ~ 1.2, 7.23 ~ 8.68) 26.5 ~ 31.4 (2.7 ~ 3.2, 19.5 ~ 23.1) 26.5 ~ 31.4...
- Page 95 www.CarGarage.ir INTAKE AND EXHAUST SYSTEM EMA -95 REPLACEMENT Disconnect the other breather hose(A), the Purge E6783A17 Control Solenoid Valve(PCSV) hose, the Positive Crankcase Ventilation (PCV) hose(C) and the Elec- Remove the engine cover. tronic Throttle Control(ETC) cooling hoses(D) and connector(E). SBLM16001L Remove the engine room resonator(A).
- Page 96 www.CarGarage.ir EMA -96 ENGINE MECHANICAL SYSTEM Disconnect the injector wiring(H) and ignition coil Remove heater hose(A) and disconnect the brake wiring(I). vaccume hose(B). SBLM16017L SBLM16006L Disconnect the surge tank stay. Remove the surge tank. 10. Disconnect the injector connectors. 11. Disconnect the water hose on intake manifold from the nipple on the chain cover.
- Page 97 www.CarGarage.ir INTAKE AND EXHAUST SYSTEM EMA -97 18. Connect the fuel hose tube(A). NOTE Be careful of the installation direction. a - h : 1st step order 1 ~ 8 : 2nd step order SBLM16015L 19. Connect the wiring over the surge tank. Connect the injection harness connector(A) Connect the camshaft position sensor(CMP) har- SBLM16207L...
- Page 98 www.CarGarage.ir EMA -98 ENGINE MECHANICAL SYSTEM 20. Connect the other breather hose(A), the Positive 22. Install the engine room resonator(A). Crankcase Ventilation (PCV) hose(C) and the Elec- tronic Throttle Control(ETC) cooling hoses(D), ETC connector(E). SBLM16003L Tightening torque 9.80 ~ 11.76Nm (1.0 ~ 1.2kgf.m, 7.23 ~ 8.68lb-ft) SBLM16208L 23.
- Page 99 www.CarGarage.ir INTAKE AND EXHAUST SYSTEM EMA -99 EXHAUST MANIFOLD COMPONENTS E1D30F79 1. Gasket 4. Self - locking flange nut 2. Exhaust manifold 5. Flange bolt 3. Heat protector SBLM16110L www.CarGarage.ir...
- Page 100 www.CarGarage.ir EMA -100 ENGINE MECHANICAL SYSTEM REPLACEMENT Remove the RH cooling pipe(A). E2C05B4E [RH SIDE OR BANK 1] Remove the engine cover(A). SBLM16111L Remove the RH exhaust manifold heat protector. SBLM16001L CAUTION Handle the heat protector with caution not to be After disconnecting the MAF sensor connector(A) and deformed.
- Page 101 www.CarGarage.ir INTAKE AND EXHAUST SYSTEM EMA -101 [LH SIDE OR BANK 2] Remove the automatic transaxle fluid oil level gauge. Remove the engine oil level gauge. Disconnect the oil pressure switch harness connector and the battery ground line. Remvoe the battery assembly(A). After removing the under cover, disconnect the ex- haust manifolds from the front muffler.
- Page 102 www.CarGarage.ir EMA -102 ENGINE MECHANICAL SYSTEM EXHAUST PIPE COMPONENTS EEE4783F 1. Self-locking nut 5. Catalytic converter 2. Hanger 6. Center muffler 3. Gasket 7. Main muffler 4. Front muffler 8. Tail pipe assembly SBLM16031L www.CarGarage.ir...
Need help?
Do you have a question about the G6DB-3.3 and is the answer not in the manual?
Questions and answers