Table of Contents
Advertisement
IMPORTANT SAFETY INFORMATION:
Read this manual first before attempting to install or use this electric fireplace. Always comply with the
warnings and safety instructions contained in this manual to prevent personal injury or property damage.
Service Manual
Models
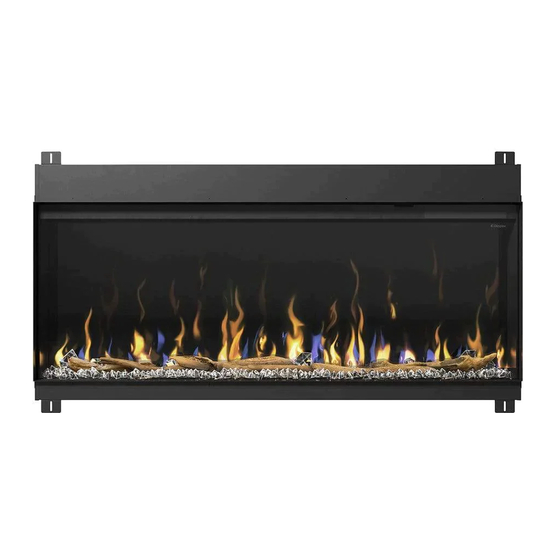
XLF5017-XD - 6911580000
XLF6017-XD - 6911590000
XLF7417-XD - 6911600000
XLF8817-XD - 6911610000
XLF10017-XD - 6911620000
7401140100R03
Advertisement
Table of Contents

Related Manuals for Dimplex XLF5017-XD


Summary of Contents for Dimplex XLF5017-XD
- Page 1 Service Manual Models XLF5017-XD - 6911580000 XLF6017-XD - 6911590000 XLF7417-XD - 6911600000 XLF8817-XD - 6911610000 XLF10017-XD - 6911620000 IMPORTANT SAFETY INFORMATION: Read this manual first before attempting to install or use this electric fireplace. Always comply with the warnings and safety instructions contained in this manual to prevent personal injury or property damage.
-
Page 2: Table Of Contents
XLF5017-XD Replacement Parts List ........ -
Page 3: Exploded Parts Diagrams
3002350200RP 3002350200RP XLF5017-XD Replacement Parts List 1. Remote Control ....X-3002310100RP 13. Mirrored Glass ....X-5903780100RP 2. -
Page 4: Xlf6017-Xd Replacement Parts List
11. Media LED Strip (2) ....X-3002350200RP 23. Side Panel (includes 1) ... X-1033820100RP (1)....X-3002350300RP www.dimplex.com... -
Page 5: Xlf7417-Xd Replacement Parts List
LED Configuration Flame 3002320200RP 3002320100RP 3002320300RP 3002320300RP Media 3002350300RP 3002350300RP 3002350300RP Overhead 3002350200RP 3002350200RP 3002350200RP XLF7417-XD Replacement Parts List 1. Remote Control ....X-3002310100RP 13. -
Page 6: Xlf8817-Xd Replacement Parts List
24. Hardware Kit ....X-9602620400RP 25. Side Panel (includes 1) ... X-1033820100RP www.dimplex.com... -
Page 7: Xlf10017-Xd Replacement Parts List
LED Configuration Flame 3002320300RP 3002320300RP 3002320300RP 3002320300RP 3002320200RP Media 3002350300RP 3002350300RP 3002350300RP 3002350300RP Overhead 3002350200RP 3002350200RP 3002350200RP 3002350200RP XLF10017-XD Replacement Parts List 1. Remote Control ....X-3002310100RP 14. -
Page 8: Wiring Diagrams
Wiring Diagrams XLF5017-XD Heating Element Cut-outs Flicker Motor Relay Board 5 Amp Power Supply Hidden Touch Controls Main Control Board Media Bed LEDs Overhead LEDs Flame LEDs XLF6017-XD Heating Element Cut-outs Flicker Motor Relay Board 5 Amp Power Supply Hidden Touch Controls... -
Page 9: Xlf7417-Xd
XLF7417-XD Heating Element Cut-outs Flicker Motor Relay Board 5 Amp Power Supply Hidden Touch Controls Main Control Board Overhead LEDs Media Bed LEDs Flame LEDs XLF8817-XD Heating Element Cut-outs Flicker Motor Adapter 3 Amp Power Supply Board Relay Board 5 Amp Power Supply Hidden Touch Controls Main Control Board Media Bed LEDs... -
Page 10: Replacement Part Procedures
5. Remove the mirrored glass brackets (Figure 3). 6. Tilt the mirrored glass and lift to remove it (Figure 4). Figure 1 Figure 2 Front Glass Bracket(s) - Quantity varies by model Figure 4 Figure 3 Mirrored Glass Bracket - Quantity varies by model www.dimplex.com... -
Page 11: Heater Assembly Replacement
Heater Assembly Replacement Tools Required: Phillips-Head Screwdriver Pliers 1. Follow the instructions for Preparing Firebox for Service on page 10. 2. Remove the 4 screws that secure the overhead LED assembly. Unplug the LED connection, and set the assembly aside (Figure 5). 3. -
Page 12: Main Control Board Replacement
5. Secure the new main control board using the previously removed screws. 6. Connect the wires on the new main control board in the correct locations. 7. Ensure wires are not too close to the mirrored glass. 8. Reassemble the firebox. Figure 6 Heater Disable Remove this jumper www.dimplex.com... -
Page 13: Power Supply Replacement
6. Replace any wire ties that have been cut. Ensure wires are not too close to the mirrored glass. 7. Reassemble the firebox. Figure 7 Models XLF5017-XD, XLF6017-XD, and XLF7417-XD Electronics Relay Board 5 Amp Power Supply Main Control Board... -
Page 14: Relay Board Replacement
5. Connect the wires on the new adapter board in the correct locations. 6. Ensure wires are not too close to the mirrored glass. 7. Reassemble the firebox. Figure 8 Models XLF8817-XD and XLF10017-XD Electronics Relay Board 5 Amp Power Supply 3 Amp Power Supply Main Control Board Adapter Board www.dimplex.com... -
Page 15: Hidden Touch Controls Replacement
Hidden Touch Controls Replacement Tools Required: Phillips-Head Screwdriver 1. Follow the instructions for Preparing Firebox for Service on page 10. 2. Remove the screws on either side of the hidden touch controls bracket (Figure 9). 3. Remove the 4 screws that secure the board to the bracket (Figure 10). 4. -
Page 16: Temperature Sensor (Ntc) Replacement
5. Feed the connector from the new NTC toward the main control board, and connect it into the correct location. 6. Secure the new NTC on the NTC bracket using the provided wire tie. 7. Secure the bracket using the 4 screws previously removed. 8. Reassemble the firebox. Figure 12 NTC Bracket www.dimplex.com... -
Page 17: Flicker Motor Replacement
Flicker Motor Replacement Tools Required: Phillips-Head Screwdriver 1. Follow the instructions for Preparing Firebox for Service on page 10. 2. Remove the 10 screws that secure the flame panel furthest to the right (Figure 13). 3. Remove the 9 screws that secure the flicker motor housing (Figure 14). 4. -
Page 18: Flame Led Replacement
7. Reinstall the flame panels in the order opposite of which they were removed, ensuring they remain in the correct order. 8. Reassemble the firebox. Figure 17 Figure 18 Flame Panels (quantity Flame LED Bracket will vary by model) Figure 19 Pinch rivets using pliers to release LED board www.dimplex.com... -
Page 19: Media Bed Led Replacement
Media Bed LED Replacement WARNING: If the firebox was operating prior to servicing, allow at least 10 minutes for the heating elements to cool off to avoid accidental burning of skin. WARNING: Disconnect power before attempting any maintenance to reduce the risk of electric shock or injury to persons. -
Page 20: Overhead Led Replacement
7. Secure the overhead LED bracket using the 4 screws previously removed. 8. Reassemble the firebox. Figure 21 Overhead LED Bracket Figure 22 Pinch rivets using pliers to release LED board www.dimplex.com... -
Page 21: Troubleshooting
Troubleshooting Problem Display Cause Solution Circuit breaker trips or fuse Install unit on a dedicated minimum Improper circuit current rating blows when unit is turned on 15 amp circuit. Ensure unit is wired correctly No incoming power Check main disconnect panel Ensure wall switch is on (if applicable) Turn power off (from breaker or Front glass was installed after unit... -
Page 22: App
Err 24 Main control board not detected Defective Main control board. Defective Display board. Err 25 Display board not detected Defective Main control board. For troubleshooting information related to the Flame Connect app, please visit www.dimplex.com/fcapp DATE ECO-000201 13-APR-21 ECO-000208 28-MAY-21 1-888-346-7539 | www.dimplex.com...
Need help?
Do you have a question about the XLF5017-XD and is the answer not in the manual?
Questions and answers