
Subscribe to Our Youtube Channel
Related Manuals for Veratron OceanLink


Summary of Contents for Veratron OceanLink
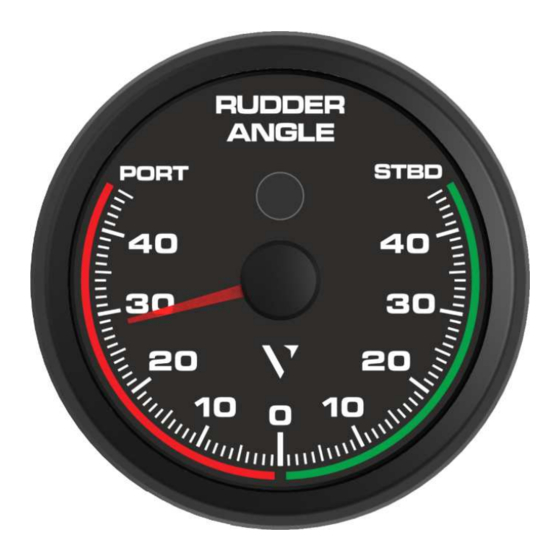
- Page 1 PROFESSIONAL RUDDER ANGLE INDICATOR OPERATING INSTRUCTIONS rev. AB B000856...
- Page 2 LANGUAGE PAGE ENGLISH DEUTSCH ITALIANO FRANÇAIS B000856...
- Page 3 PROFESSIONAL RUDDER ANGLE INDICATOR OPERATING INSTRUCTIONS rev. AB B000856...
-
Page 4: Table Of Contents
CONTENT CONTENT Content ................2 Introduction ............... 3 Packaging Content ..............3 Safety Information ............4 Safety during Installation ............4 Safety after Installation .............5 Electrical Connection ...............5 Mechanical Installation ........... 6 Before the Assembly ..............6 Installation with Spinlock ............7 Flush Mounting ................ -
Page 5: Introduction
INTRODUCTION INTRODUCTION PACKAGING CONTENT 1x Rudder Angle 1x Wire Harness A2C1507870001 Indicator gauge B00067401 1x Mounting 1x Safety Instructions B000100 Spinlock A2C1376090001 B000856... -
Page 6: Safety Information
• Use our product only as intended. Use of the • Modifications or manipulations to veratron product for reasons other than its intended use products can affect safety. Consequently, you may lead to personal injury, property damage may not modify or manipulate the product! •... -
Page 7: Safety After Installation
SAFETY INFORMATION • When working underneath the vehicle, secure conventional test lamps can cause damage to control units or other electronic systems. it according to the specifications from the • The electrical indicator outputs and cables vehicle manufacturer. • Drill small ports; enlarge and complete them, if connected to them must be protected from direct contact and damage. -
Page 8: Mechanical Installation
MECHANICAL INSTALLATION MECHANICAL INSTALLATION BEFORE THE ASSEMBLY Before beginning, turn off the ignition and remove the ignition key. If necessary, remove the main circuit switch 2. Disconnect the negative terminal on the battery. Make sure the battery cannot unintentionally restart. 3. -
Page 9: Installation With Spinlock
MECHANICAL INSTALLATION INSTALLATION WITH SPINLOCK Create a circular hole in the panel considering Adjust the spinlock ad shown in picture [C] the device dimensions. [A] according to the panel thickness Remove the spinlock and insert the device Carefully screw in the spinlock by hand at from the front. -
Page 10: Flush Mounting
MECHANICAL INSTALLATION FLUSH MOUNTING Create a circular hole in the panel considering 4. Insert the instrument into the drill hole from the device dimensions. [A] the back. [C] 2. Remove the spinlock. 5. Adjust the instrument so that the gauge is level and fasten it to the stud bolts on the rear 3. -
Page 11: Electrical Installation
ELECTRICAL INSTALLATION ELECTRICAL INSTALLATION PINOUT Pin No. Wire color Description KL. 30 – Battery Power 12 / 24 V Black KL. 31 – Ground White Signal GND Green 5 V output (Sensor feed) Blue NMEA 0183 OUT + Blue / White NMEA 0183 OUT - Device rear view Yellow... -
Page 12: Connections Diagrams
ELECTRICAL INSTALLATION CONNECTIONS DIAGRAMS Connections diagram for resistive rudder angle sensor and second gauge connected via NMEA 0183 Connections diagram for 0 – 5 V rudder angle sensor and second gauge connected via NMEA 0183 B000856... -
Page 13: Configuration
CONFIGURATION CONFIGURATION DEFAULT SENSOR CALIBRATION 0 – 5 V Sensor Rudder Position Resistive Sensor Rudder Position 40° PORT 3 Ω 40° PORT 2.5 V Center 90 Ω Center 40° STBD 180 Ω 40° STBD CALIBRATION ADJUSTMENT In order to adjust the default calibration of the sensor, a simple three-steps procedure is implemented. - Page 14 CONFIGURATION Keep pushing the infrared pushbutton (IR) to 6. Move the rudder to the center. [C] start the calibration process. [A] 7. Keep “pushing” the IR button to store the 2. The illumination now blinks every 1 sec and CENTER reading. [A] the pointer indicates 20°...
-
Page 15: Technical Data
TECHNICAL DATA TECHNICAL DATA DATASHEET 12 V / 24 V Nominal Voltage 8 – 32 V Operating Voltage Max. 100 mA Current consumption IP X7 Protection class Red LED Illumination Black with graphics Dial Red illuminated, translucent Pointer backlighting, black cap Plastic double lens anti-reflection Lens Plastic (flame-retardant) acc. -
Page 16: Accessories
Part Number Pigtail cable with MX 150 connector A2C15078700 Spinlock Nut A2C1376090001 Flush Mount kit N05-800-792 Rudder Angle Sensor – Single Station A2C1102950001 Rudder Angle Sensor – Dual Station A2C1102960001 Please visit http://www.veratron.com for the complete list of accessories. B000856... - Page 17 Any distribution, translation or reproduction, partial or total, of the document is strictly prohibited unless with prior authorization in writing from veratron AG, except for the following actions: • Printing the document in its original format, totally or partially.
- Page 18 PROFESSIONELLER RUDERLAGENANZEIGER BEDIENUNGSANLEITUNG rev. AB B000856...
- Page 19 INHALT INHALT Inhalt ....................2 Einführung..................3 VerpackungsInhalt ................. 3 Sicherheitshinweise ..Fehler! Textmarke nicht definiert. Sicherheit bei der InstallationFehler! Textmarke nicht definiert. Sicherheit nach der InstallationFehler! Textmarke nicht definiert. Elektrischer C anschlussFehler! Textmarke nicht definiert. Mechanische InstallationFehler! Textmarke nicht definiert. Vor dem ZusammenbauFehler! Textmarke nicht definiert.
-
Page 20: Einführung
EINFÜHRUNG EINFÜHRUNG VERPACKUNGSINHALT 1x Professioneller 1x Kabelbaum Ruderlagenanzeiger A2C1507870001 B00067401 1x Spinlock- 1x Sicherheitshinweise Befestigungsmutter B000100 A2C1376090001 B000856... -
Page 21: Sicherheitshinweise
SICHERHEITSHINWEISE SICHERHEITSHINWEISE WARNUNG • Nicht rauchen! Kein offenes Feuer oder Wärmequellen! • Das Produkt wurde unter Beachtung der • Beachten Sie eventuelle Veränderungen am grundlegenden Sicherheitsanforderungen der Fahrzeug, die beim Einbau zu berücksichtigen EG-Richtlinien und dem anerkannten Stand sind! • Für den Einbau sind Grundkenntnisse der der Technik entwickelt, gefertigt und geprüft. - Page 22 SICHERHEITSHINWEISE Systemen verursachen. Bitte beachten Sie, Sicherheitshinweise der dass beim Abklemmen der Batterie alle Handwerkzeughersteller beachten. • Bei notwendigen Arbeiten ohne flüchtigen elektronischen Speicher ihre eingegebenen Werte verlieren und neu Spannungsunterbrechung darf nur mit programmiert werden müssen. isoliertem Werkzeug gearbeitet werden. •...
- Page 23 SICHERHEITSHINWEISE ein, dass keine Litzen beschädigt oder Beschädigungen anderer elektronischer abgetrennt werden. Systeme verursachen. Deshalb müssen alle • Verlöten Sie neu zu schaffende Verbindungen der Spannungsversorgung mit verschweissbaren Stossverbindern versehen Kabelverbindungen nur im Weichlötverfahren und ausreichend isoliert sein. oder verwenden Sie handelsübliche •...
- Page 24 MECHANISCHE INSTALLATION MECHANISCHE INSTALLATION WARNUNG Vor Beginn der Arbeiten ist der Minuspol der Batterie abzuklemmen, da sonst Kurzschlussgefahr besteht. Wenn das Fahrzeug über Zusatzbatterien verfügt, müssen ggf. auch die Minuspole dieser Batterien abgeklemmt werden! Kurzschlüsse können Kabelbrände, Batterieexplosionen und Beschädigungen von anderen elektronischen Systemen verursachen. Bitte beachten Sie, dass beim Abklemmen der Batterie alle flüchtigen elektronischen Speicher ihre eingegebenen Werte verlieren und neu programmiert werden müssen.
-
Page 25: Einbau Mit Spinlock
MECHANISCHE INSTALLATION EINBAU MIT SPINLOCK Erstellen Sie ein rundes Loch in der Platte Stellen Sie die in Abbildung [C] gezeigte unter Berücksichtigung der Spinlock-Anzeige entsprechend der Geräteabmessungen. [A] Plattendicke ein. Entfernen Sie den Spinlock und setzen Sie Schrauben Sie den Spinlock vorsichtig das Gerät von vorne ein. -
Page 26: Bündige Montage
MECHANISCHE INSTALLATION BÜNDIGE MONTAGE Erstellen Sie ein rundes Loch in der Platte 4. Führen Sie das Instrument von hinten in das unter Berücksichtigung der Bohrloch ein. [C] Geräteabmessungen. [A] 5. Richten Sie das Gerät so aus, dass es 2. Entfernen Sie den Spinlock. waagerecht steht, und befestigen Sie es mit dem Zubehör des Zusammenbausatzes an 3. -
Page 27: Elektrische Installation
ELEKTRISCHE INSTALLATION ELEKTRISCHE INSTALLATION PINBELEGUNG Farbe des Pin Nr. Beschreibung Kabels KL. 30 - Batterie Plus 12 / 24 V Schwarz KL. 31 - Masse Weiss Signal Masse Grün 5V Ausgang (Sensorversorgung) Blau NMEA 0183 OUT + Blau/Weiss NMEA 0183 OUT - Rückseite des Geräts Gelb KL. -
Page 28: Verbindungsschemas
ELEKTRISCHE INSTALLATION VERBINDUNGSSCHEMAS Anschlussplan für widerstandsabhängigen Ruderlagen-Sensor und zweites Gerät über NMEA 0183 angeschlossen Anschlussplan für Ruderlagen-Sensor 0 - 5 V und zweites Gerät über NMEA 0183 angeschlossen B000856... -
Page 29: Konfiguration
KONFIGURATION KONFIGURATION STANDARD-SENSORKALIBRIERUNG Widerstandsabhängiger 0 - 5 V Sensor Ruderstellung Ruderstellung Sensor 3 Ω 40° Backbord 40° Backbord 90 Ω 2.5 V Mitte Mitte 180 Ω 40° Steuerbord 40° Steuerbord KALIBRIERUNG ANPASSEN Um die Standardkalibrierung des Sensors anzupassen, wird ein einfaches drei-Schritte-Verfahren angewendet. - Page 30 KONFIGURATION Halten Sie die Infrarot-Taste (IR) gedrückt, 6. Bewegen Sie das Ruder in die Mitte. [C] um den Kalibrierungsvorgang zu starten. [A] 7. Halten Sie die IR-Taste gedrückt, um den 2. Die Beleuchtung blinkt nun im Sekundentakt Mittelstellungs-Wert zu speichern. [A] und der Zeiger zeigt 20°...
-
Page 31: Technische Daten
TECHNISCHE DATEN TECHNISCHE DATEN DATENBLATT Nennspannung 12 V / 24 V Betriebsspannung 8 - 32 V Stromverbrauch Max. 100 mA Schutzklasse IP X7 Beleuchtung Rote LED Ziffernblatt Schwarz mit Grafiken Rot beleuchtet, durchscheinende Zeiger Hintergrundbeleuchtung, schwarze Kappe Frontglas Kunststoff-Doppellinse, entspiegelt Kunststoff (flammhemmend) nach Gehäuse UL94... -
Page 32: Zubehör
ZUBEHÖR ZUBEHÖR Zubehör Teilenummer Pigtail-Kabel mit MX 150-Stecker A2C15078700 Spinlock-Mutter A2C1376090001 Kit für bündige Montage N05-800-792 Ruderlagen-Sensor – Single Station A2C1102950001 Ruderlagen-Sensor – Dual Station A2C1102960001 Eine vollständige Liste des Zubehörs finden Sie unter http://www.veratron.com. B000856... - Page 33 - Kopieren von Inhalten ohne Änderungen und unter Angabe der Veratron AG als Urheberin. Veratron AG behält sich das Recht vor, ohne Vorankündigung Änderungen oder Verbesserungen an der entsprechenden Dokumentation vorzunehmen. Anfragen zur Autorisierung, zu zusätzlichen Kopien dieses Handbuchs oder zu technischen Informationen über dieses...
- Page 34 INDICATORE ANGOLO DI BARRA PROFESSIONALE ISTRUZIONI PER L’USO rev. AA B000856...
-
Page 35: Indice
INDICE INDICE Indice ..................... 2 Introduzione ................3 Contenuto della confezione .............. 3 Indicazioni per la sicurezza ............4 Sicurezza durante il montaggio ............4 Sicurezza dopo il montaggio.............. 5 Collegamento elettrico ................ 5 Installazione ................. 7 Prima del montaggio ................7 Installazione tramite spinlock ............ -
Page 36: Introduzione
INTRODUZIONE INTRODUZIONE CONTENUTO DELLA CONFEZIONE 1x Indicatore Angolo 1x Cablaggio con di barra Molex MX150 B00067401 A2C1507870001 1x Spinlock 1x Istruzioni di A2C1376090001 sicurezza B000100 B000856... -
Page 37: Indicazioni Per La Sicurezza
• Modifiche o manipolazioni del prodotto per cui è previsto. Le conseguenze di un utilizzo improprio del prodotto possono veratron possono compromettere la sicurezza. causare lesioni a persone e danni a cose o Non sono pertanto ammesse manovre di all’ambiente. Prima del montaggio accertarsi modifica o manipolazione. -
Page 38: Sicurezza Dopo Il Montaggio
INDICAZIONI PER LA SICUREZZA eventualmente anche il polo negativo di tutte sega da traforo, una sega a coda o con una lima le batterie. I corto circuiti possono bruciare i e rifinirli. Sbavare i bordi. Attenersi cavi, far esplodere le batterie e causare danni assolutamente alle indicazioni di sicurezza del ad altri sistemi elettronici. - Page 39 INDICAZIONI PER LA SICUREZZA • Unire i nuovi collegamenti praticati tra i cavi e danni di altri sistemi elettronici, perciò tutti i collegamenti dell’alimentazione di tensione solo con saldature dolci o utilizzare il vanno dotati di giunti di testa saldabili e collegamento a pressione comunemente in devono essere sufficientemente isolati.
-
Page 40: Installazione
INSTALLAZIONE INSTALLAZIONE AVVERTENZA Prima di iniziare a lavorare staccare il morsetto del polo negativo della batteria per evitare il rischio di corto circuito. Se il veicolo è dotato di batterie supplementari occorre staccare eventualmente anche il polo negativo di tutte le batterie. I corto circuiti possono bruciare i cavi, far esplodere le batterie e causare danni ad altri sistemi elettronici. -
Page 41: Installazione Tramite Spinlock
INSTALLAZIONE INSTALLAZIONE TRAMITE SPINLOCK 1. Creare un foro circolare di 85 mm nel pannello 3. Orientare lo spinlock come mostrato in figura considerando l’ingombro del dispositivo. [A] [C] in base allo spessore del pannello 2. Rimuovere lo spinlock ed inserire frontalmente 4. -
Page 42: Montaggio A Filo Pannello
INSTALLAZIONE MONTAGGIO A FILO PANNELLO 1. Creare un foro circolare di 83 mm nel pannello 4. Inserire il dispositivo dal retro del pannello considerando l’ingombro del dispositivo. [A] utilizzando il foro appena creato. [C] 2. Rimuovere lo spinlock. 5. Fissare il dispositivo utilizzando gli accessori del kit di montaggio (non incluso). -
Page 43: Connessione Del Dispositivo
CONNESIONE DEL DISPOSITIVO CONNESSIONE DEL DISPOSITIVO PIEDINATURA Colore del Descrizione filo KL. 30 – Positivo batteria 12/24 Rosso Nero KL. 31 – Massa Bianco Massa segnale Uscita 5 V (Alimentazione Verde sensore) NMEA 0183 OUT + Blu / Bianco NMEA 0183 OUT - Retro del dispositivo Giallo KL. -
Page 44: Schema Di Collegamento
CONNESSIONE DEL DISPOSITIVO SCHEMA DI COLLEGAMENTO Schema di collegamento con sensore angolo di barra resistivo e secondo indicatore connesso via NMEA 0183 Schema di collegamento con sensore angolo di barra 0 – 5 V e secondo indicatore connesso via NMEA 0183 B000856... -
Page 45: Configurazione
CONFIGURAZIONE CONFIGURAZIONE TARATURA DI DEFAULT DEI SENSORI Posizione del Posizione del Sensore 0 – 5 V Sensore resistivo timone timone 40° babordo (PORT) 3 Ω 40° babordo (PORT) 2.5 V Centrale 90 Ω Centrale 40° tribordo (STBD) 180 Ω 40° tribordo (STBD) REGOLAZIONE DELLA CALIBRAZIONE Per regolare la calibratura di default del sensore collegato, è... - Page 46 CONFIGURAZIONE Tenere premuto il bottone ad infrarossi (IR) per iniziare la procedura di calibrazione. [A] Tenere premuto il bottone ad infrarossi per memorizzare la lettura del sensore. [A] Il dispositivo a questo punto lampeggia ogni secondo e la lancetta indica 20° a babordo Il dispositivo a questo punto lampeggia tre (PORT).
-
Page 47: Dati Tecnici
DATI TECNICI DATI TECNICI DATASHEET 12 V / 24 V Tensione di alimentazione nominale 8 – 32 V Tensione di esercizio Max. 100 mA Consumo di corrente IP 6K7 Grado di protezione IP Rossa a LED Illuminazione Nero con grafiche Quandrante Illuminata rossa, retroilluminazione Lancetta... -
Page 48: Accessori
Cablaggio con connettore Molex MX 150 A2C15078700 Spinlock A2C1376090001 Kit montaggio a filo pannello N05-800-792 Sensore angolo di barra – Singola Stazione A2C1102950001 Sensore angolo di barra – Doppia Stazione A2C1102960001 Visita http://www.veratron.com per la lista completa degli accessori disponibili. B000856... - Page 49 - Stampare il documento nel suo formato originale, totalmente o parzialmente. - Copiare i contenuti senza alcuna modifica e indicare Veratron AG come proprietario del copyright. Veratron AG si riserva il diritto di apportare modifiche o miglioramenti alla relativa documentazione senza preavviso.
- Page 50 INDICATEUR D’ANGLE DE BARRE PROFESSIONEL MODE D’EMPLOI rev. AB B000856...
- Page 51 CONTENU CONTENU Contenu ..................2 Introduction ................. 3 Contenu de l'emballage ............... 3 Consignes de sécurité ..............4 Pendant le montage, veiller aux faits suivants ......4 A observer après le montage ............. 5 Raccordement électrique ..............5 Installation ................... 7 Avant le montage ..................7 Montage avec spinlock.................
-
Page 52: Introduction
INTRODUCTION INTRODUCTION CONTENU DE L'EMBALLAGE 1x Indicateur d’angle 1x Faisceau de câbles de barre A2C1507870001 B00067401 1x Spinlock à rainure 1x Consignes de 85 mm sécurité A2C1376090001 B000100 B000856... -
Page 53: Consignes De Sécurité
• N’utilisez notre produit que de manière • Le fait de modifier ou de manipuler le produit conventionnelle. Une utilisation non conforme Veratron peut avoir des conséquences sur la à l’usage prévu de ce produit peut causer des sécurité. C’est pourquoi il ne doit pas être dommages corporels, matériels ou... -
Page 54: A Observer Après Le Montage
CONSIGNES DE SÉCURITÉ Les courts-circuits peuvent causer des d’une fraise conique, d’une scie à guichet, incendies de câbles, des explosions de d’une scie sauteuse ou d’une lime puis installez. batteries et endommager d’autres systèmes Ebarbez les arêtes. Respecter impérativement électroniques. Sachez que toute coupure de la les consignes de sécurité... - Page 55 CONSIGNES DE SÉCURITÉ • Veillez à ce que les câbles ne soient soumis à • Des courts-circuits au niveau du réseau de aucune force de traction, de pression ou de bord peuvent entraîner des incendies de cisaillement. câbles, des explosions de batteries et •...
-
Page 56: Installation
INSTALLATION INSTALLATION AVERTISSEMENT Avant de commencer à travailler, débrancher le pôle négatif de la batterie, pour éviter tout risque de court-circuit. Si le véhicule est équipé de batteries supplémentaires, il y a lieu, le cas échéant, de débrancher également le pôle négatif de ces batteries. Les courts-circuits peuvent mettre le feu aux câbles ou provoquer l’explosion des batteries et peuvent endommager les systèmes électroniques. -
Page 57: Montage Avec Spinlock
INSTALLATION MONTAGE AVEC SPINLOCK 1. Percer un trou circulaire, en tenant compte des 3. Orienter le spinlock comme cela est indiqué à la dimensions d’encombrement du dispositif. [A] figure [C] selon l'épaisseur du panneau. 2. Enlever le spinlock et introduire le dispositif par 4. -
Page 58: Montage Affleurant
INSTALLATION MONTAGE AFFLEURANT 1. Percer un trou circulaire, en tenant compte des 4. Emboîter l’appareil par derrière dans le vide de dimensions d’encombrement du dispositif. [A] forure. [C] 2. Enlever le spinlock. 5. Orienter l’appareil en veillant à ce que l’affichage soit vertical et le fixer au moyen de 3. -
Page 59: Connexion De L'appareil
CONNEXION DE L‘APPAREIL CONNEXION DE L’APPAREIL BROCHAGE Broche Couleur Description Rouge Borne 30 – Batterie 12 / 24 V Noir Borne 31 – Masse Blanc Signal de masse 5 V sortie (alimentation du Vert capteur) Bleu NMEA 0183 OUT + Bleu / Blanc NMEA 0183 OUT - Vue arrière de l'appareil... - Page 60 CONNEXION DE L’APPAREIL SCHÉMA DES CONNEXIONS Schéma des connexions pour capteur d'angle de barre résistif et deuxième appareil connecté via NMEA 0183 Schéma de raccordement pour capteur d'angle de barre 0-5 V et deuxième appareil connecté via NMEA 0183 B000856...
-
Page 61: Configuration
CONFIGURATION CONFIGURATION CALIBRAGE DU CAPTEUR PAR DÉFAUT Position Position Capteur 0 – 5 V Capteur résistif du gouvernail du gouvernail 40° PORT 3 Ω 40° PORT 2.5 V Centre 90 Ω Centre 40° STBD 180 Ω 40° STBD RÉGLAGE DE L'ÉTALONNAGE Afin d'ajuster l'étalonnage par défaut du capteur, une procédure simple en trois étapes est mise en œuvre. - Page 62 CONFIGURATION Continuer à appuyer sur le bouton-poussoir Déplacer le gouvernail vers le centre. [C] infrarouge (IR) pour démarrer le processus d'étalonnage. [A] Continuer à appuyer sur le bouton IR pour L'éclairage clignote maintenant toutes les 1 enregistrer la lecture du CENTRE. [A] seconde et le pointeur indique 20 °...
-
Page 63: Données Techniques
DONNÉES TECHNIQUES DONNÉES TECHNIQUES FICHE TECHNIQUE Tension Nominale 12 V / 24 V 8 – 32 V - Protection contre Tension de fonctionnement lʼinversion de polarité Consommation de courant Max. 100 mA Classe de protection IP 6K7 Éclairage LED rouge Cadran Noir avec graphiques Rétroéclairage translucide... -
Page 64: Accessoires
Câble Pigtail avec connecteur MX 150 A2C15078700 Spinlock à rainure A2C1376090001 Kit de montage affleurant N05-800-792 Capteur dʼangle de barre – Poste simple A2C1102950001 Capteur dʼangle de barre – Poste double (passerelle A2C1102960001 haute) Veuillez visiter http://www.veratron.com pour la liste complète des accessoires. B000856... - Page 65 9464 Rüthi, Switzerland veratron.com Toute distribution, traduction ou reproduction, partielle ou totale, du document est strictement interdite, sauf autorisation préalable et écrite de veratron AG, à l'exception des actions suivantes : - Imprimer le document dans son format original, totalement ou partiellement.
Need help?
Do you have a question about the OceanLink and is the answer not in the manual?
Questions and answers