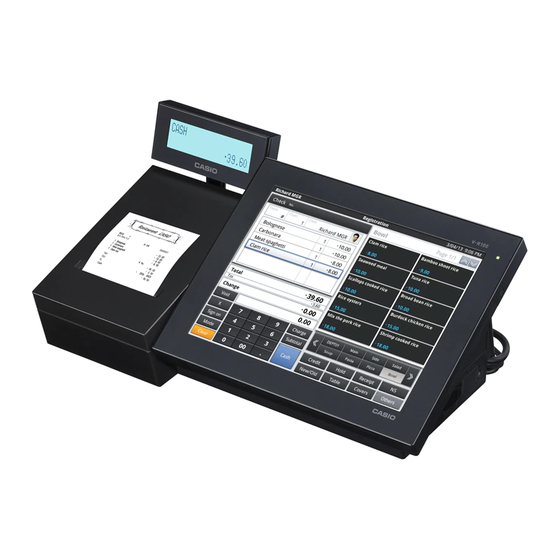
Casio V-R100 User Manual
Standard style
Hide thumbs
Also See for V-R100:
- Service manual (56 pages) ,
- Setup manual (15 pages) ,
- Programming and reference manual (155 pages)
Table of Contents
Advertisement
Quick Links
Advertisement
Table of Contents

Subscribe to Our Youtube Channel
Related Manuals for Casio V-R100


Summary of Contents for Casio V-R100
- Page 1 User’s Manual V-R100 Standard Style...
-
Page 2: Table Of Contents
Contents Safety Precautions . . . . . . . . . . . . . . . . . . . . . . . . . . . . . . . . . . . . . . . . . . . . . . . . . . . . . . . . . . . . . . 4 Precautions for Use . - Page 3 Work Operations . . . . . . . . . . . . . . . . . . . . . . . . . . . . . . . . . . . . . . . . . . . . . . . . . . . . . . . . . . . . . . . 24 Server Sign On (Specifying Server) .
-
Page 4: Safety Precautions
● If something, such as foreign matter or water, should get inside, unplug the power cord from the outlet and contact the dealer or distributor from whom you purchased the product or your Casio service center. If you use the device as is, it may result in fire or electrical shock . - Page 5 Caution Installation Location ● Do not position the device in an unstable place, such as on an unsteady table or on an incline . If it falls, it may cause an injury . ● Do not locate it in places with high humidity or that is dusty. Doing so may cause a fire and/or electrical shock .
- Page 6 Responsible within the European Union:CASIO EUROPE GmbH CASIO-Platz 1, 22848 Norderstedt, Germany Please keep all information for future reference . The declaration of conformity may be consulted at http://world .casio .com/ Laite on liitettävä suojamaadoituskostkettimilla vaurstettuun pistorasiaan Apparatet må tilkoples jordet stikkontakt Apparaten skall anslutas till jordat nätuttag.
-
Page 7: Precautions For Use
Precautions for Use Read the following items thoroughly and use the device accordingly . Casio bears no responsibility whatsoever for damage or malfunctions that occur due to handling the device contrary to the following instructions . Also, please note that the cost of any repairs will be charged even if still under warranty for free repairs . -
Page 8: Take Advance Notice Of The Following
Casio . ● Casio has taken all possible care in producing this manual so it is error-free, however, if you should notice an unclear point, mistake or omission, please do contact us and let us know . -
Page 9: Names Of Parts And What They Do
Names of Parts and What They Do Names of Parts Overview Side Back 1 Printer cover Keep the front cover closed while in use . 14 Connector cover Ports for communication etc ., are located inside this cover . Also, POP ads can be 2 Automatic cutter Automatically cuts receipts when issued . -
Page 10: Adjusting The Angle Of The Main Display
Adjusting the Angle of the Main Display The angle for the main display can be adjusted so it is easy for the operator to view it . Operate the tilt switch when the power switch is ON . Steps 1 . Holding the tilt switch on the DOWN side lowers the angle of the main display . -
Page 11: Installing Original Advertisements (Pop Ads)
Installing Original Advertisements (POP Ads) The menu of the shop, special bargain items and customer notices can be displayed on the back of the connector cover . Steps 1 . Put your finger on the bottom of the transparent cover at the back of connector cover, and pull it up towards you to remove the transpar- ent cover . -
Page 12: Loading Printer Paper
Loading Printer Paper Steps 1 . Remove the printer cover. Put your finger on the paper holder and lift it up, then open the arm to the position where it stops naturally . 2 . Hold the end of roll of paper so it comes out from below, and load it in the paper compartment . -
Page 13: Changing Printer Paper
Changing Printer Paper When only about one meter of printer paper is remaining, a red line will appear . Change to a new roll of paper at your earliest convenience . Steps 1 . Remove the printer cover. Put your finger on the paper holder and lift it up, then open the arm to the position where it stops naturally . -
Page 14: When Unmounting An Sd Card
When Unmounting an SD Card If you do not go through the unmounting process, the data on the SD card may be damaged . Steps 1 . Select <System>/<Android Settings> from the <Top Menu>. (See figure below). Alternatively, select <Android Settings> . 2 . -
Page 15: Loading A Usb Device
USB Hub Ferrite Core When using a USB hub*, be sure to attach the ferrite core that came with the V-R100 to the cable for the USB hub . If the ferrite core is not installed, it may cause a malfunction . -
Page 16: Specifications
Specifications Model V-R100 Main display Type 10 .4 SVGA color TFT LCD Resolution 800 × 600 Color * Max . 16 .77 million colors Backlight White LED Other Power tilt function (15° to 75°) Touch panel Method 4-wire resistive film Size 10 .4 inch... - Page 17 User’s Manual Operation Sales Management Standard Style...
-
Page 18: Overview Of Sales Management
Overview of Sales Management Sales Management Functions Sales Management is an application for managing store sales . The main functions of Sales Management are introduced here . Registering Sales This function registers customer orders and creates a bill . Orders from customers can be registered quickly and easily by using the touch screen menu and/or barcode scanner . -
Page 19: Basic Operations
Basic Operations Operations with the Sales Management application can be performed on the touch screen . Following is an explanation of the basic operations using the Sales Management application . Key Operation The screens of the Sales Management application have keys in various shapes and their functions are indicated by text, icons and images . -
Page 20: Scrolling The Window
Scrolling the Window Scroll the screen if you cannot see everything at one time because there is too much data . Scroll display (Ex . ) Using the scroll (Ex . ) : Swipe scrolling There are six lines of data in the display area of Sliding your finger up/down on the screen scrolls this screen . -
Page 21: Tab Page Operation
Table Operation Enter numbers in the list in tables . Table display (Ex . ) To display a hidden area of the table, either touch the key below the table or touch the table to scroll . Move to the top of the table Move down one screen Move up one screen Touch the number of bills you wish to change . -
Page 22: Names Of Main Keys And Their Functions
Names of Main Keys and Their Functions This section explains the names and functions of the main keys . Names of Main Keys and Their Functions Covers key Use to specify the number of Ten-key guests . . . Use to enter quantities, unit prices, Hold key ID numbers, etc . -
Page 23: Others Key Functions
Others Key Functions Press the <Others> key to call up other transaction keys . ST %- Key Use to give a discount on an entire sales check . ST - Key Use to reduce an entire sales check . ST %+ Key Use to increase the percentage on Check key an entire sales check . -
Page 24: Work Operations
Work Operations Sales Management manages the sales in one-day units, from Open to Sales Reset . Following is a description of the main operations for business from opening to Z Report (resetting sales) . Server Sign On (Specifying Server) The functions of Sales Management begin with the signing on of the servers who are working . Servers sign on either by entering their ID, or selecting their server key directly from a list . -
Page 25: Signing-Off Server (Canceling Server)
Signing-off Server (Canceling Server) To sign off, enter <0> and then touch the <Sign on> key . Switching Modes The screen for registering sales is normally the one displayed . To perform various tasks, such as opening for business, correcting transactions, X Report (inspecting) or Z Report (resetting sales) or to make various settings, touch the <Mode>... -
Page 26: Preparing Change (Registering Change)
Preparing Change (Registering Change) After opening for business, prepare the change used for payments . Touch the <Loan> key on the <Register> tab of the <Top Menu> to prepare change . Once the key is pressed, the drawer opens and the <Loan> screen opens . Register the number of each denomination of currency/coin in order on the <Loan>... -
Page 27: Main> Menu Display For Registering Items
<Main> Menu Display for Registering Items Touching an item displayed on the menu screen registers it . Registering items (Ex . ) : Selecting <Roast beef> Once an item is registered, it appears on the <Check> screen . Display of a registered item (Ex . ) : <Roast beef> To register an item that is not on the menu screen, touch one of the switch menu keys at the bottom of the screen . -
Page 28: Check Payment
Check Payment After all items have been registered, go through the check payment process . Operating the payment screen (Ex . ) First of all, touch the <Subtotal> key to get a total sales amount and to open the screen to display for the customer . -
Page 29: Registering Sales (Registering Customer Orders)
Registering Sales (Registering Customer Orders) To register sales, touch the Transactions like customer orders or discounts are <Registration> key on the <Register> registered in order on the <Registration> screen . The main tab of the <Top Menu> to open the functions, from registering sales to making the bill are <Register>... -
Page 30: Handling Returned Items
Handling Returned Items This is the process for handling returned items in situations such as when a mistake is noticed, or after a sale has been recorded and an item is returned . Touch the <Refund> key on the <Register> tab of the <Top Menu>... - Page 31 Desposit (Ex . ) : Fill the drawer with eighty quarters ($20) for making change . Tap the <RC> column under Touch 2000/<OK> Touch <Enter> <Received on Account> twice Withdrawal (Ex.): Move five 100 notes to the safe. Tap the <PD> column under Touch 50000/<OK>...
-
Page 32: Checking The Electronic Journal
Registering Discounts from Total Amounts For amount or percentage discounts from a total amount, check the total amount with the <Subtotal> key and then touch the <Others> key to call up other transaction keys . There are transaction keys for discounting by percentage <ST %-> or amount <ST ->, so enter the percentage or amount to discount and then touch the appropriate transaction key . -
Page 33: Check And Reset Operation
Check and Reset Operation This allows you to confirm the results (such as total) of item registration, or issue X (inspection) or Z (reset) report when you put together the sales of the day or for a certain period of time . Flash Sales Report (Quickly check sales status) Flash sales reports print out the sales amount, number of customers, and balance . -
Page 34: Declaration Operation
Declaration Operation Balance Declaration (Report the Amount of Cash in the Drawer) After the close of business, count the amount in the drawer and declare the balance . Touch the <Declaration> key on the <Z> tab of the <Top Menu> to declare the balance . Once a declaration is made, the drawer opens and the <Declaration>... - Page 35 Outputting a periodic report (specified period) Select a period After specifying the period, the steps are the same as for the Z report . Report example...
- Page 36 MA1209-A V-R100*STD-E...
Need help?
Do you have a question about the V-R100 and is the answer not in the manual?
Questions and answers