Advertisement
Quick Links
Advertisement

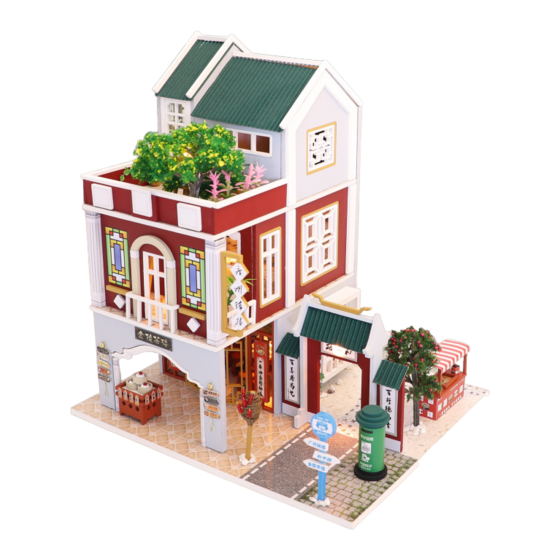
Summary of Contents for Hongda USA M2021
- Page 1 M2021 Instruction manual...
- Page 2 Testing on LED function Tips for assembling Be sure to test the LED lights before making the lighting, 1.Picures shown on the package may be slightly different from the actual product. note that the LED white wire to the negative, gray wire 2.All the materials are taken in the operation step, put the remaining materials back into to the positive reference to the following figure the original pocket until the installation is completed.(Avoid material loss during installation)
- Page 3 Details of minature Thumbnail of material list (reference only) Name Material package A package of A16 all printed paper is concentrated on A16 paper Printing paper accessories ( 7 sheets of A4 single side Small dining car E bag + H bag + printing paper Page 3 Table &...
- Page 4 E02(2 pieces) E03(2 pieces) A16-30 A16-31 (5 pieces) (5 pieces) (5 pieces) A16-49 A16-31 A16-30 Paste E05 in the middle of E04 Paster in the middle of E04 St eaming cage Cut A16-49 to A16-64 printing paper and paste it on G06 Just use A16-49 here,please keep the remaining printing...
- Page 5 teapot steaming cage (had ready made) refer to the above steps and make 4 sets A16-65 A16-65 (2 pieces) A16-65 roll A16-65 into a drum shape all wooden blocks on A15 need to be A15-07 A15-08 (4 pieces) A15-08 A15-04 A15-03 A15-05 A15-06...
-
Page 6: Floor Plan
A16-42 A16-42 A16-42 refer to the above steps and A16-42 A16-42 make 2 pieces A15-09 A15-10 floor plan (2 pieces) (2 pieces) A16-32 A16-33 A16-34 (2 pieces) A16-34 A15-10 A16-33 A15-09 teapot (had ready made) A15-10 A16-32 A15-10 A15-09 crop off the area below the red line A16-36 (2 pieces)... - Page 7 F18(3 pieces) A16-07 1.3cm A16-05 A16-06 A16-07 use A16-07 to paste the circled part A16-07 A16-55 A16-55 of F17 red circle A16-08 A16-09 A16-10 A16-10 A16-06 A16-05 A16-08 A16-09 flip to the other side and paste A16-05 sugar-coated haws 90cm wrap around F19 with 2 pieces split G13 in two the last lap is gently wrapped...
- Page 8 ( bed sheet ) 1.6cm ( bed sheet ) 1.6cm 7.4cm ( bed sheet ) 5.8cm flip G01 back to the front and G02 (mattress) fold to the middle flip G01 to the back and fold back1.6cm fold back 1.6cm A16-67 1.6cm tidy up...
- Page 9 A16-74 A16-70 A16-74 potted potted plants2 plants3 fold in half along the middle 2.5cm A16-74 and paste 0.2cm 0.2cm A16-73 0.2cm 0.2cm potted plants4 2.5cm A16-72 0.2cm A16-71 1.6cm flower pot (template paper) 0.2cm potted potted plants5 plants6 0.2cm according to the previous steps, paste the flower pot(template paper) 2.5cm complete the potted plants5...
- Page 10 A15-06(2 pieces) A15-06 A16-17 C11 (4 pieces) roman column1 A16-24 A16-24 refer to the above steps wrap B12 with A16-24 and make 2 sets B12 (2 pieces) A16-17 roman column2 refer to the above steps wrap with A16-17 and make 2 sets floor plan (2 pieces)...
- Page 11 B04(2 pieces) (2 pieces) A16-54 A16-52 A16-53 A16-54 A16-52 A16-45 memorial arch 2 A16-45 A16-45 memorial arch 1 A16-46 A16-46 A16-46 A16-53 ( 1 light) pay attention to the A19 Please cut out A19 according to template paper before making docking docking diagram...
- Page 12 A16-16 table table chair chair counter potted plants 1 stairs of first floor counter A16-04 A16-03 A16-02 window of first floor flip to the back and stick the light wire A16-64 hanging hanging board 1 board 2 light 1 A16-18 roman column 1 roman...
- Page 13 0.38cm A16-19 A16-23 roman column 2 roman column 2 potted plants 1 2.75cm 2.75cm flip to the back and stick A16-25 the light wire 5.3cm A16-12 13cm light 1 1.7cm A16-28 light 1 A16-27 1.5cm refer to the above steps to pass the A05 lightwire through make 2 pieces the small hole of A02...
- Page 14 potted potted plants 2 plants 3 potted plants 4 easel refer to the above steps to potted make 2 pieces plants 6 pay attention for the direction potted plants 7 pay attention for the direction stick J01 into G17 A16-29 pass the G17 light wire through the small hole of A02 A19 roof 2...
- Page 15 memorial arch potted plants 5 stick the light wire as shown stick the light wire as shown A16-75 sugar-coated haws Postbox beef offal car How to assemble the battery holder Statement: the lamp wires cannot be inserted into the output socket. –...
-
Page 16: Dust Cover
Installation of dust cover dust cover (Upgrade version accessories need to be purchased separat ely) Ripped one side of kraft paper, leaving one side of kraft paper rat io:1:10 ratio:1:10 ratio:1:10 K04 plexiglass K05 plexiglass K06 plexiglass Take out the plexiglass and tear off the (t ransparent ) (transparent ) (transparent )


Need help?
Do you have a question about the M2021 and is the answer not in the manual?
Questions and answers