
Related Manuals for Hongda USA PC902


Summary of Contents for Hongda USA PC902
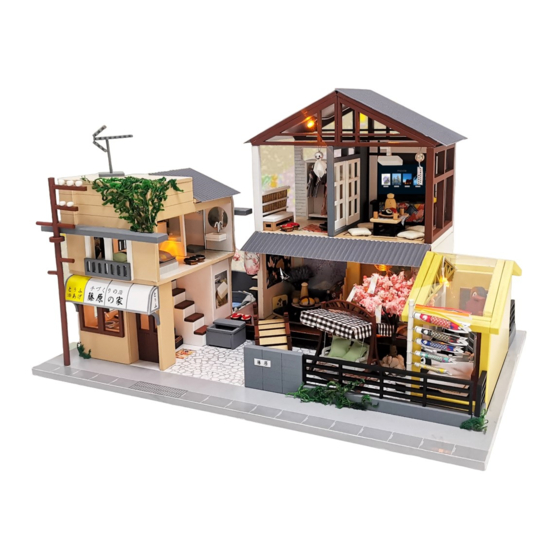
- Page 1 DIY mini house kits - DIY mini house kits - Initial D Initial D PC902 Instruction manual PC902 Instruction manual...
- Page 2 Testing on LED function Tips for assembling Be sure to test the LED lights before making the lighting, 1.Picures shown on the package may be slightly different from the actual product. note that the LED white wire to the negative, gray wire 2.All the materials are taken in the operation step, put the remaining materials back into to the positive reference to the following figure the original pocket until the installation is completed.(Avoid material loss during installation)
- Page 3 details of minature kit Thumbnail of material list( reference only) screen D bag Name Material package Bag A-A24(All printing and template papers are Printing paper washing table D bag+M bag+P bag shown on A24 paper, total 3pieces of A3 and 1piece of A4 ) shower D bag+P bag+Q bag...
- Page 4 A24-55 A24-55 A24-50-1 A24-50-2 A24-50-3 A24-50-4 A24-50-4 A24-50-6 A24-50-2 A24-50-6 A24-50-5 A24-50-3 A24-50-1 A24-50-5 A25-49 A25-49 (make 4 pieces)
- Page 5 Cut out the material M09 and M10 according to the template paper before making. M10(rope belt)4pieces G11 G11 G11 G11 M09(rope belt) G11 G11 G11 G11 (rope belt)4pieces G12:0.7cm (16pieces) (make 4pieces) G11(4pieces) (rope belt) G12(8pieces) 4pieces A24-57 G15 G15 A24-57 A24-35-1 A24-35-2...
- Page 6 A24-40 A24-40 A24-39 (As shown in the figure, two of the boxes (make 2pieces) need to be stuffed with A24-39.) A24-40 (5pieces) N02(5pieces) A24-19 A24-19 A24-20 A24-20 Cut out the material M01,M08,M12 and M15 according to the template paper before making. (cushion) (cushion) (cushion)
- Page 7 M01(cushion) M03(back chair cushion)2pieces M08(back chair cushion)2pieces M15(back chair cushion)2pieces A24-31 M01(cushion)4pieces M08(cushion)4pieces M15(cushion)4pieces (make 2pieces) (make 2pieces) Cut out the material M16 according to A24-54 the template paper before making. A24-58 M16( wash basin A24-46 A24-58 A24-46 0.5cm M16(wash basin) 0.8cm P04:1.3cm A24-54...
- Page 8 Cut out the material M01,M02,M03,M08 and M15 according to the template paper before making. A24-33 A24-24 M01(bed cushion 2) (bed (quilt 2) cushion2) A24-56 (bed pillow) M15(bed A24-59 cushion 2) A24-43 A24-24 A24-56 A24-33 A24-43 M01(bed cushion 2) M15(bed cushion 2) M03(quilt 2) A24-59 0.7cm...
- Page 9 Cut out the material M01,M08,M10,M11,M12,M13,M15 and M18 according to the template paper before making. nori roll nori roll (cushion) (sashimi) (cushion) (rice)2pieces (cushion) (cushion) (cushion) A24-22 (sushi filling) (cushion) 2pieces N07 N07 (sushi filling) (cushion) (cushion) 2pieces (cushion) (cushion) (cushion) (cushion) (sushi filling) 2pieces...
- Page 10 ( right slice (collar) of bathrobe) back slice of bathrobe) ( left slice of bathrobe) P05:0.4cm(2pieces) P05:2.6cm(3pieces) 0.2cm 0.2cm (folding towel) 0.5cm 0.2cm M10(collar) left slice of bathrobe) M06 ( right slice of bathrobe) (need three) back slice of bathrobe) A24-45 (6pieces) P02:25cm(2pieces)
- Page 11 Cut out the material M15 and M16 according to the M16(mirror) template paper before making. 0.5cm M15(mirror) M16(mirror) 0.8cm P04:1.3cm M15(mirror) 0.5cm (sunshade) A24-42 N17(4pieces) P04:5cm A24-42 A23(sunshade) 0.1cm 0.2cm 0.2cm (need 2pieces) A24-07-2 A24-07-3 A24-07-1 A24-07-1 0.2cm 0.2cm A24-07-2 A24-07-3 Cut out the material M08 according to the template paper before making.
- Page 12 A24-27-2 (towel) A24-27-1 Cut out the material A23 according to the template paper before making. A23(bridge) A23(bridge) E09 E10 (need 4pieces) Music machine core manual guide A24-01 (If you have purchased the music machine core, please fix it firstly) Music machine R01 Music R02 Screw core handle...
- Page 13 A24-16 A24-08 A24-47 interior stairs tofu box cabinet A24-44 A24-08 A24-15 2.8cm round lamp...
- Page 14 A24-02 A24-13 Washing Table 2.9cm A24-34-2 A24-34-1 A24-04 A24-34-1 A24-34-2 A24-61 A24-05 shower screen...
- Page 15 A24-18 A24-03 A24-03 (need 2pieces) A24-17 Single bed Clogs 0.3cm 0.6cm A23(big roof 2) A23(big roof 1) 0.6cm antenna signboard...
- Page 16 Cut out the material M15 according to the template before making. A24-09 A24-53 A24-06 cherry blossom M15(projector) tree hot spring A24-29 A24-11 A24-21 A24-29 A24-12 A24-29 tatami bed indoor tree A24-37 round table umbrella screen...
- Page 17 A24-10 1.4cm 3.7cm outdoor stair round sunshade unbrella lamp light Cut out the material M14 according to the template before making. M14(railing) wardrobe long chair clogs clogs A24-23 M14(railing) TV cabinet tatami table for four Cut out the material A23 according to the template paper before making. A23(big 2) (need 2pieces) 3.5cm...
- Page 18 Cut out the material A23 according to the template paper before making. A23(big 1) 3.7cm 0.6cm 0.6cm 0.3cm wind 3.7cm doll bell 0.6cm A24-14 A24-26 wall deco ladder shelf clock tire rack wall deco elevator fire hydrant...
- Page 19 Cut out the material A22 according to the template paper before making. (need 2pieces) car repair shed 摇椅 car repair shed cherry rocking blossom crap A24-52 chair tree flags clogs bridge According to the template paper center line, use a knife to scratch a mark, gently fold it. How to assembl e the battery hol d er Statement: the lamp wires cannot be inserted into the output socket.
- Page 20 Installation of dust proof cover (For updated version, the parts need to be purchased separately) Scale 1:7 Scale 1:7 Scale 1:7 2.Paste Q04,Q05 and Q06 together to Q06 Transparent cover 1. Tear off kraft paper of Q04 Transparent cover Q05 Transparent cover 19.7*19.5*0.15cm(2pieces) 30*20*0.15cm(1piece) 30*19.5*0.15cm(2pieces)
Need help?
Do you have a question about the PC902 and is the answer not in the manual?
Questions and answers