
Subscribe to Our Youtube Channel
Related Manuals for Kanguru Defender KDH3B


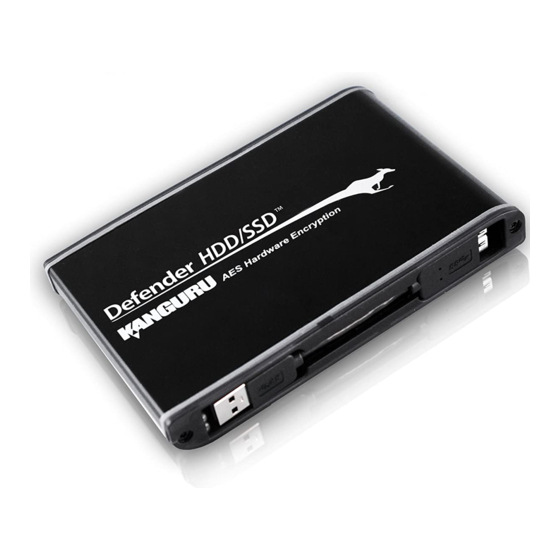
Summary of Contents for Kanguru Defender KDH3B
-
Page 1: User Manual
Kanguru Defender HDD / SSD User Manual Model no: KDH3B, KDH3B-SSD Copyright 2013, All Rights Reserved... -
Page 2: Notices And Information
Microsoft Inc. All other brands or product names are trademarks of their respective companies or organizations. Kanguru Solutions will not be held responsible for any illegal use of this product nor any losses incurred while using this product. The user is solely responsible for the copyright laws, and is fully responsible for any illegal actions taken. -
Page 3: Table Of Contents
Updating Your Defender HDD .................29 4.1 Updating standard edition drives ................29 4.2 Updating KRMC enterprise edition drives ............29 4.3 Verifying the download checksum................30 Safely removing Your Kanguru Defender .............31 5.1 Unmounting Your Defender .................31 5.2 Safely Removing from Windows .................32 Warranty information ....................33 tech Support ......................33... -
Page 4: Introduction
Introduction / Package Contents / System Requirements 1. introduction The Kanguru Defender is a hardware encrypted, tamper proof drive. The Defender contains two partitions: a read-only, CD-ROM partition and a secure, encrypted partition. The CD-ROM partition contains the login application that will allow you to access the secured partition.The secure partition is where you store your data. -
Page 5: Features
(KRMC). KRMC is a web-based application that gives administrators a complete USB management system. KRMC is available in two different options: Customer hosted enterprise version or a Kanguru hosted Cloud version. Please contact Kanguru Solutions if you have any questions about which option would be the best fit for your organization. -
Page 6: Technical Specifications
8.5 - 11ms Weight 10.3 oz Kanguru Defender SSD Capacities 128GB, 256GB Write Cycles 10,000 write cycles / block Mean Time Between Failure 1,000,000 hours Access Time 0.4ms Weight 9.6 oz Kanguru Solutions defines a gigabyte (GB) as 1,000,000,000 bytes. -
Page 7: General Operation
General Operation / Parts and Functions 2. General operation This chapter contains information on how to use your Kanguru Defender. Please read these sections carefully. 2.1 Parts and functions Activity Indicator LED Power Indicator LED USB A USB Cable USB Micro-B... -
Page 8: Hardware Setup
3. Connect the Micro B side of the USB cable to the Defender’s USB port. Connect the A side of the USB cable to your computer. The LED indicators on the side of the drive will light up. You are now ready to begin using your Kanguru Defender drive. ↓... -
Page 9: Kanguru Defender Manager
Kanguru Defender Manager / Running KDM 3. Kanguru Defender Manager Kanguru Defender Manager (referred to throughout this manual as “KDM”) is the client program preloaded on the Defender’s CD-ROM partition. The user needs to login to KDM in order to access the secure, encrypted partition. - Page 10 Running KDM attention Windows 7 Users Windows 7 users may not see the removable disk partition until you have logged into KDM. This is normal. If you are running Windows 7 and for any reason need to see the removable disk before you log into KDM, you will need to configure Windows in the following manner: Note: This is user preference only.
-
Page 11: The Setup Wizard
The Setup Wizard / Selecting a Setup Language 3.2 the Setup Wizard When you start KDM for the first time you will be greeted by the Setup Wizard. Follow the Setup Wizard instructions to create a security password for your Defender’s secure, encrypted partition. caution! Once the Setup Wizard has started, you should not disconnect your Defender without either first completing the Setup Wizard or closing the Setup Wizard by clicking on the X button. -
Page 12: Resetting The Device Through The Setup Wizard
Resetting the Device through the Setup Wizard 3.2.2 resetting the Device through the Setup Wizard If you experience any problems while completing the Setup Wizard, you may have to perform a device reset before you can complete the setup process. To perform a device reset while in the Setup Wizard: 1. -
Page 13: Activating On-Board Antivirus Protection
3.2.3 activating on-board antivirus Protection Note: This section does not apply to Enterprise Edition users. Antivirus for Enterprise Edition is activated through Kanguru Remote Management Console (KRMC). Enterprise Edition users, please contact your administrator. KDM will automatically check if your device has a valid antivirus license key. -
Page 14: Setting A Password
Setting a Password 3.2.4 Setting a Password From the Set Password screen: 1. Enter your password in the Password data field. You can enter your password using KDM’s Virtual Keyboard by clicking the VK button. For more information on using the Virtual Keyboard see section 3.4 Using the Virtual Keyboard to Enter Your Password on page 19. -
Page 15: Krmc Cloud
Note: This section does not apply to Enterprise Edition users. Kanguru Defender drives can be remotely managed using the Kanguru Remote Management Console (KRMC). KRMC Cloud is hosted on Kanguru’s server and can be enabled on any non-Enterprise Defender drive. -
Page 16: Contact Info
Contact Info 3.2.6 contact info Note: This section does not apply to Enterprise Edition users. Your contact info will be saved to the drive. If you are managing your drive using KRMC Cloud, the information entered here will be automatically be imported to the KRMC Cloud server when you register your drive. -
Page 17: Unlocking The Security Partition
Once KDM has started, you should never disconnect your device without first closing the KDM application by clicking the KDM task bar icon and selecting Unmount Kanguru Defender as described in section 5.1 Unmounting Your Defender on page 31. -
Page 18: Resetting From The Login Screen
Resetting from the Login Screen 3.3.1 resetting from the Login Screen In the event you have forgotten your password, you can use the ‘Reset to Factory Default’ function to reset your password. This function will restore the device to the factory settings, erasing all saved passwords and data residing on the device’s secure partition. -
Page 19: Using The Virtual Keyboard To Enter Your Password
Using the Virtual Keyboard to Enter Your Password 3.4 Using the Virtual Keyboard to enter Your Password The virtual keyboard feature can be accessed anytime you are required to enter your password in order to prevent key logging applications from recording your key strokes and potentially stealing your password. To use the virtual keyboard to enter your password: 1. -
Page 20: Encrypting Files And Folders
Encrypting Files and Folders 3.5 encrypting files and folders A key feature of the Defender is drag & drop encryption; allowing you to simply drag files directly onto the drive. The Defender automatically encrypts these files as they are transferred to the secure partition, ensuring that your data stays safe and private. -
Page 21: On-Board Antivirus
On-board Antivirus 3.6 on-board antivirus You must register your device with Kanguru Solutions in order to take advantage of the Defender’s on- board antivirus features (see section 3.2.3 Activating On-board Antivirus Protection on page 13). Once your on-board antivirus has been activated, real-time virus scanning is automatically enabled whenever you log into your device. -
Page 22: Device Scan
Device Scan 3.6.1 Device Scan The antivirus console allows you to scan your Defender for known viruses and malware. To scan your Defender: 1. Click on the Scan Device tab at the top of the antivirus console. 2. Click on the Start Scan button to begin scanning your Defender. 3. -
Page 23: Path Scan
Path Scan 3.6.2 Path Scan The antivirus console allows you to scan any path on your computer for known viruses and malware. Note: The Scan Path feature can be disabled on Enterprise Edition drives, please contact your administrator for more information. To scan a path on your computer: 1. -
Page 24: File Scan
File Scan 3.6.3 file Scan The antivirus console allows you to scan any file on your computer for known viruses and malware. Note: The Scan file feature can be disabled on Enterprise Edition drives, please contact your administrator for more information. To scan a file: 1. -
Page 25: Changing Your Password
Changing Your Password 3.7 changing Your Password You can change your security password through the Security Settings. To change your password: located in the task bar and then select Security Settings… from the 1. Click on the KDM icon popup menu. 2. -
Page 26: Krmc Cloud Settings
KRMC Cloud Settings 3.8 KrMc cloud Settings Note: This section does not apply to Enterprise Edition users. You can enable or disable KRMC Cloud functionality through the Security Settings. To change your device’s KRMC functionality: 1. Click on the KDM icon located in the task bar and then select Security Settings…... -
Page 27: Changing Languages
Changing Languages 3.9 changing Languages KDM supports several languages. The language is set to English by default. To change the language: 1. Right -click on the KDM icon located in the task bar and then hover your cursor over the Language option in the popup menu. -
Page 28: Online Documentation
Online Documentation / About KDM 3.10 online Documentation You can download digital copies of the Kanguru Defender’s documentation from the internet. To download your Defender’s documentation, right-click on the KDM icon located in the task bar. • Click on Quick Start Guide to download a digital copy of the Defender’s Quick Start Guide. -
Page 29: Updating Your Defender Hdd
Standard edition Defender HDD users can also manually search and download available client updaters from the Kanguru Support site. Defender HDD client updaters can be found under the ‘USB Client Software Updates’ forum in the ‘Software Downloads and Updaters’ section (support.kanguru.com). -
Page 30: Verifying The Download Checksum
The SHA256 Checksum tool will generate a 64-character checksum which can be verified against the checksum list published by Kanguru Solutions. This ensures that the updater file was downloaded correctly and wasn’t altered. The SHA256 Checksum tool and a list of valid checksum values can be found on Kanguru’s Support site: https://kanguru.zendesk.com/entries/21747773-sha256-checksum-utility To view and verify your download’s checksum:... -
Page 31: Safely Removing Your Kanguru Defender
The KDM icon in the task bar will disappear and the Defender’s secure partition will no longer be accessible. caution! Do not disconnect the Kanguru Defender without first properly unmounting your device as detailed in this section and then safely removing the device from your computer. Doing so may result in... -
Page 32: Safely Removing From Windows
Safely Removing From Windows 5.2 Safely removing from Windows caution! Be sure that the secure partition has been unmounted before attempting to remove the Defender drive. See section 5.1 Unmounting Your Defender on page 31. Please use the Windows ‘Safely Remove Hardware’ function before disconnecting your Defender drive. To safely remove the Defender: 1. -
Page 33: Warranty Information
Warranty Information / Tech Support 6. Warranty information This product carries a 1-year warranty from the date of purchase. Kanguru Solutions is not responsible for any damages incurred in the shipping process. Any claims for loss or damage must be made to the carrier directly. -
Page 34: Appendix A - Proxy Support
Proxy Support appendix a - Proxy Support If your computer uses a proxy server to access the internet, the correct proxy information will need to be configured in KDM. If the KDM client application cannot connect to the internet you will see the following error message: If the computer that the Defender is connected to uses a proxy server to access the internet, click on the Yes button. -
Page 35: Appendix B - Windows Xp Settings
Windows XP Settings appendix B - Windows XP Settings In order to use the Defender HDD/SSD with Windows XP, a few modifications to the system settings have to be made by a user with Administrator privileges. if the Defender HDD/SSD cannot enumerate when you log in as a Windows XP restricted user: 1. - Page 36 Windows XP Settings if you are unable to format the hard drive when logged in as a Windows XP restricted user 1. Log into Windows XP as a user with Administrator privileges. 2. Click on the Windows Start menu → run 3.
- Page 37 Windows XP Settings if you are unable to reset the Defender HDD to factory defaults through Windows XP: 1. Login into KDM to mount the Defender HDD secure partition. 2. Open the Computer Management Console by clicking on the Windows Start menu → control Panel →...
- Page 38 Kanguru Solutions 1360 Main Street Millis, MA 02054 www.kanguru.com 03.08.13 v1.0.2 © 2013 Kanguru Solutions Legal terms and conditions available at www.kanguru.com. Please review and agree before use. Thank you.
Need help?
Do you have a question about the Defender KDH3B and is the answer not in the manual?
Questions and answers