Table of Contents
Advertisement
Quick Links
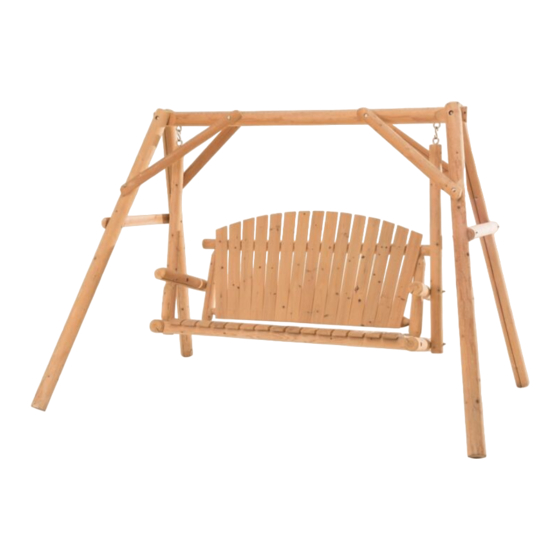
Assembly Instructions
D-DNC487PWD
WARNING:
Repeated assembly can weaken the locking ability of the screw/bolt/nut. Periodically
check all bolted connections on your product to make sure they are tight and secure. Keep
these instructions for future reference.
Some parts may contain sharp edges. Wear protective gloves as necessary.
DO NOT stand on the swing seat.
Set it up on the level ground.
Attention: There are pre-crack slots on the back side of the log, this is not inferior,
the slot is pre-drilled and intended produced, this is to allow the wood to naturally
shrink and expand.
Advertisement
Table of Contents

Subscribe to Our Youtube Channel
Related Manuals for Sunjoy D-DNC487PWD


Summary of Contents for Sunjoy D-DNC487PWD
- Page 1 Assembly Instructions D-DNC487PWD WARNING: Repeated assembly can weaken the locking ability of the screw/bolt/nut. Periodically check all bolted connections on your product to make sure they are tight and secure. Keep these instructions for future reference. Some parts may contain sharp edges. Wear protective gloves as necessary.
- Page 2 Qty. Part Description Beam Bracket Connection Boom Back Seat Armrest Stick M10*170 Bolt M10*120 Bolt M10*150 Bolt M10*300 Bolt M4*45 Screw M10*130 Bolt M10*120 Swinging Ring Hook M10 Nut M10 Washer Step 1: Attach Leg (B) to Beam (A) with Bolt AA, Nut JJ and 2 pieces Washer KK.
- Page 3 Step 2: Attach Leg (B) to Connection (D) and Bracket (C) with Bolt BB, Nut JJ and 2 pieces Washer KK, attach Bracket (C) to Beam (A) with Bolt AA, Nut JJ and 2 pieces Washer KK. Then fasten all the bolts now. Step 3: Insert Back (F) into the hole of Seat (G), attach Stick (I) to Seat (G) and Armrest (H) with Bolt DD and Washer KK, attach Armrest (H) to Back (F) with Bolt FF, Nut JJ and 2 pieces Washer KK.
- Page 4 Step 4: Attach Back (F) to Seat (G) with Screw EE, attach Boom (E) to Armrest (H) and Seat (G) with Bolt CC, Nut JJ and 2 pieces Washer KK. Step 5: Attach Swinging Ring HH to Beam (A) with Washer KK, 2 pieces Nut JJ, hang the Hook II on Swinging Ring (HH), then hang the ring on Boom (E) to Hook II.
- Page 5 Limited Warranty: This limited warranty is extended to the original purchaser and applies to defects in materials and workmanship of your item provided the item is maintained with care and used only for personal, residential purposes. The item is warranted to be free from defects in material or workmanship for a period of six (6) months.
Need help?
Do you have a question about the D-DNC487PWD and is the answer not in the manual?
Questions and answers