
Subscribe to Our Youtube Channel
Related Manuals for Forever Redwood ELI'S REDWOOD POTTING BENCH


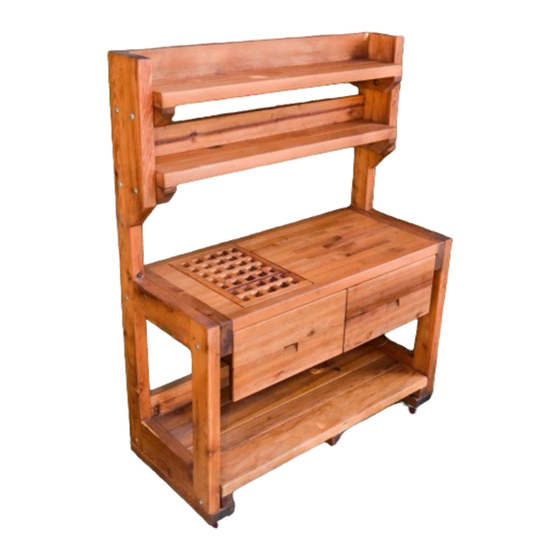
Summary of Contents for Forever Redwood ELI'S REDWOOD POTTING BENCH
- Page 1 866.332.2403 (TOLL FREE) (707) 640.29.05 (Option 4) Direct Line for the Design Department; 7am – 7pm Pacific Time, Monday-Saturday ASSEMBLY INSTRUCTIONS FOR THE ELI’S REDWOOD POTTING BENCH P| 0 ELI’S REDWOOD POTTING BENCH www.ForeverRedwood.com...
- Page 2 NOTE: Assembly is best done by two people. To assemble your product, you need a Hammer, a Ratch or a wrench and if required a Drill. Required Tools (Are not included in your hardware packing). PROCESS TO INSTALL THE HARDWARE PROVIDED. To install the bolts.
- Page 3 To install the lag bolts. Place the washers in their lag bolts. After that, insert the lag bolts into the holes and carefully tighten it using a ratchet with the necessary socket. Use the washers only for the Wood Pieces. To install the deck screws.
-
Page 4: Hardware List
CONTENT OF BOXES Qty. Description Drawing Legs Floor Parquet shelves Drawer Shelves Note: Part numbers in the Content of Boxes Table are for reference only. These do not match to the numbers marked on the parts sent. HARDWARE LIST Qty. Description Drawing 3/8”... - Page 5 DESCRIPTION Legs Floor Parquet shelves Drawer Shelves P| 4 ELI’S REDWOOD POTTING BENCH www.ForeverRedwood.com...
- Page 6 Note: Part numbers in the Drawing are for reference only. These do not match to the numbers marked on the parts sent. P| 5 ELI’S REDWOOD POTTING BENCH www.ForeverRedwood.com...
- Page 7 Step 1: Attach the legs (2) to the floor with 3/8” x 4 ½” bolts (BL1) with washer and nuts. Check the marked numbers on each floor and place as drawings shown. Step 2: Attach the Parquet shelve (2) to the legs (1), use 3/8” x 4 ½” bolts (BL1) with washer and nuts. Check the marked numbers on each parquet shelve and place as drawings shown.
- Page 8 Step 3: Attach the shelves (5) to the legs (1) with 3/8” x 4 ½” bolts (BL1) with washer and nuts. Check the marked numbers on each shelve and place as drawings shown. Step 4: Finally, put the drawer (5) in place. P| 7 ELI’S REDWOOD POTTING BENCH www.ForeverRedwood.com...
- Page 9 This completes the bench assembly. Hope you enjoy your set for many decades. If you ever have a problem or a question, don't hesitate to call us (866 332 2403) or email us. We are here to support you. P| 8 ELI’S REDWOOD POTTING BENCH www.ForeverRedwood.com...
Need help?
Do you have a question about the ELI'S REDWOOD POTTING BENCH and is the answer not in the manual?
Questions and answers