Table of Contents
Advertisement
Advertisement
Table of Contents
Troubleshooting

Related Manuals for Jet JWP-15DX


Summary of Contents for Jet JWP-15DX
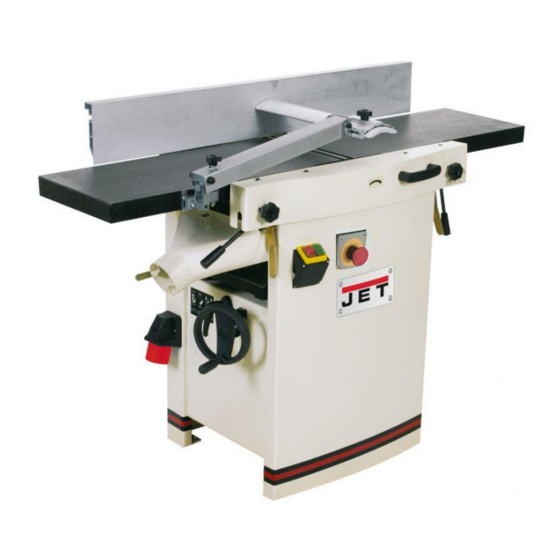
- Page 1 This Manual is Bookmarked Operating Instructions and Parts Manual 15-inch Thickness Planer Model JWP-15DX WMH TOOL GROUP 2420 Vantage Drive Elgin, Illinois 60124 Part No. M-708538 Ph.: 800-274-6848 Revision A1 8/06 www.wmhtoolgroup.com Copyright © WMH Tool Group...
-
Page 2: Warranty And Service
WMH Tool Group is consistently adding new products to the line. For complete, up-to-date product information, check with your local WMH Tool Group distributor, or visit jettools.com. WARRANTY JET products carry a limited warranty which varies in duration based upon the product (MW = Metalworking, WW = Woodworking). WHAT IS COVERED? This warranty covers any defects in workmanship or materials subject to the exceptions stated below. -
Page 3: Table Of Contents
Table of Contents Table of Contents ...3 Warning...4 Introduction...6 Specifications ...6 Unpacking ...7 Contents of the Shipping Container ...7 Assembly...8 Handwheel ...8 Control Box ...8 Extension Tables...9 Dust Hood ...9 Grounding Instructions...9 Extension Cords...10 Adjustments...11 Belt Tension ...11 Pulley Alignment ...11 Table Rollers...12 Cutterhead ...12 Installing and Replacing Knives ...12... -
Page 4: Warning
Warning 1. Read and understand the entire owners manual before attempting assembly or operation. 2. Read and understand the warnings posted on the machine and in this manual. Failure to comply with all of these warnings may cause serious injury. 3. - Page 5 blahblahblah 21. Make your workshop child proof with padlocks, master switches or by removing starter keys. 22. Give your work undivided attention. Looking around, carrying on a conversation and “horse-play” are careless acts that can result in serious injury. 23. Maintain a balanced stance at all times so that you do not fall or lean against the knives or other moving parts.
-
Page 6: Introduction
This manual is provided by WMH Tool Group covering the safe operation and maintenance procedures for a JET Model JWP-15DX Planer. This manual contains instructions on installation, safety precautions, general operating procedures, maintenance instructions and parts breakdown. This machine has been designed and constructed to provide years of trouble free operation if used in accordance with instructions set forth in this manual. -
Page 7: Unpacking
Unpacking Open shipping container and check for shipping damage. Report any damage immediately to your distributor and shipping agent. Do not discard any shipping material until the Planer is assembled and running properly. Compare the contents of your container with the following parts list to make sure all parts are intact. -
Page 8: Assembly
Assembly Tools required for assembly: Forklift or hoist with slings Open-end wrenches (provided) Hex wrenches (provided) 16mm open-end wrench Remove the screws holding the planer to the pallet and use a forklift or hoist to lift the planer off the pallet. Forks and straps should always be placed under the four lifting handles when lifting this machine (Figure 3). -
Page 9: Extension Tables
Extension Tables 1. Mount an extension table to the edge of the main table with three M8 x 25 hex cap screws and washers (Figure 7) using a 12mm wrench. Do not fully tighten yet. 2. The extension table must be leveled with the main table. -
Page 10: Extension Cords
This machine’s power cord must be fitted with an appropriate UL/CSA listed 230 Volt plug (similar to the one shown in Figure 9), or it can be “hard- wired” directly to a control panel. If hard-wired, make sure a disconnect is available for the operator. -
Page 11: Adjustments
Adjustments Disconnect machine from power source before making adjustments (except feed rate). Belt Tension Inspect the tension of the belts frequently during the first few times you use the planer. Belts often stretch during this trial period. If they require tightening, proceed as follows: 1. -
Page 12: Table Rollers
Table Rollers Your planer is supplied with two table rollers (Figure 14) which turn as the stock is fed into the machine, thus reducing friction. It is not possible to give exact dimensions on the proper height setting of the table rollers because each type of wood behaves differently. -
Page 13: Inspect Work Table Parallel To Cutterhead
Care must be exercised in setting knives into the cutterhead. Replace all three knives at the same time. Proceed as follows: 1. Disconnect machine from power source. 2. Remove the gib screws and the gib (Figure 17) using a T-handle hex wrench. 3. -
Page 14: Adjusting Work Table Parallel To Cutterhead (Major Adjustment)
3. Push down or pull up the cutterhead assembly in the desired direction. Hold the assembly in position and retighten the cap screws. 4. Re-check the table-to-cutterhead parallelism again as described in the previous section, then repeat steps 1 through 3 until the deviation is less than 0.004”. -
Page 15: Infeed And Outfeed Roller Spring Tension
Infeed and Outfeed Roller Spring Tension The infeed roller (B, Figure 21) and outfeed roller (E, Figure 21) are those parts of your planer that feed the stock while it is being planed. The infeed and outfeed rollers are under spring tension and this tension must be sufficient to feed the stock uniformly through the planer without slipping but should not be so tight that it... -
Page 16: Outfeed Roller Height
Outfeed Roller Height 1. Disconnect machine from power source. 2. Make sure the knives are set properly as previously explained Adjustment." 3. Place the gauge block (F, Figure 25) on the table directly beneath the cutterhead (D, Figure 25). 4. Using a 0.02" (0.5mm) feeler gauge (G, Figure 25) placed on top of the gauge block, raise the work table until the knife just touches the feeler gauge when the knife is... -
Page 17: Chip Deflector
Chip Deflector The chip deflector (C, Figure 27) keeps wood chips from falling into the outfeed roller. The deflector should be set approximately 1/16" to 1/8” from the tip of the knives. Make sure the deflector is oriented so the bevel on its front edge matches the shape of the cutterhead. -
Page 18: Depth Of Cut
Depth of Cut The cutting depth scale (Figure 31) is a combination inch/metric scale, with a cutting range from 0 to 6" (152.4mm). The distance of upward or downward movement is controlled by the handwheel. Before moving the table up or down, loosen the locking handles (Figure 31). - Page 19 The item numbers on this chart are referenced to the surrounding Figures on pages 18 and 19. No. Position Interval Drive Chain Inspect and lubricate monthly Gear Box When operated more than 2,500 hours Return Rollers Inspect frequently Worm Gear Inspect and lubricate monthly Lead Screw Inspect and lubricate monthly...
-
Page 20: Troubleshooting: Performance Problems
Troubleshooting: Performance Problems Trouble Probable Cause Table rollers not set properly. Inadequate support of long boards. Snipe. (NOTE: Snipe can be Uneven feed roller pressure front to minimized until back. negligible, but not eliminated.) Dull knives. Lumber not butted properly. High moisture content in wood. -
Page 21: Troubleshooting: Mechanical And Electrical Problems
Troubleshooting: Mechanical and Electrical Problems Trouble Probable Cause Knives are worn. Uneven depth of cut side to side. Cutterhead not level with bed. Board thickness does not match depth of Depth of cut scale incorrect. cut scale. Inadequate tension. Chain is jumping. Sprockets misaligned. -
Page 22: Replacement Parts
Trouble Probable Cause Machine will not start/restart or repeatedly trips circuit breaker or blows fuses. (continued) Motor starter failure. Motor failure. Miswiring of the machine. On/off switch failure. Replacement Parts Replacement parts are listed on the following pages. To order parts or reach our service department, call 1-800-274-6848 between 7:30 a.m. -
Page 23: Head Assembly
Head Assembly... -
Page 24: Parts List: Head Assembly
Parts List: Head Assembly Index No. Part No. 1...JWP15H-001... Head Casting..1 2...TS-1525021 ... Set Screw... M10x12 ... 8 ...JWP15DX-CA ... Cutter Head Assembly (Index #3 thru #7)..1 3...JWP15DX-003 ... Cutter Head ..1 4...JWP15DX-004 ... Pin..6 5...708817... - Page 25 60 ...JWP15H-060... Handle..1 61 ...JWP15H-061... Cover..1 62 ...JWP15H-062... Spring Pin..2 63 ...PF-C22 ... Plate..2 64 ...TS-1482021 ... Hex Cap Screw... M6x12 ... 8 65 ...TS-1504091 ... Socket Head Cap Screw... M8x45 ... 1 66 ...JWP15H-067...
-
Page 26: Base Assembly
Base Assembly... -
Page 27: Parts List: Base Assembly
Parts List: Base Assembly Index No. Part No. 1...JWP15H-201... Base ..1 2..TS-1525021 ... Set Screw... M10x12 ... 8 3...JWP15H-203... Column..3 4...JWP15H-204... Column..1 5...JWP15H-205... Lead Screw ..3 6...JWP15H-206... Lead Screw ..1 7...JWP15H-207... -
Page 28: Table Assembly
Table Assembly... -
Page 29: Parts List: Table Assembly
Parts List: Table Assembly Index No. Part No. Description Size 1...JWP15H-101... Middle Table..1 2...JWP15H-102... Roller..2 3..BB-608Z... Ball Bearing ... 608Z ... 4 4...JWP15H-104... Eccentric Shaft ..4 5...TS-1523041 ... Set Screw... M6x12 ... 4 6...JWP15H-106... -
Page 30: Gear Box Assembly
Gear Box Assembly... -
Page 31: Parts List: Gear Box Assembly
Parts List: Gear Box Assembly Index No. Part No. Description Size 1...JWP15H-301... Gear Box ..1 2...OS-28408 ... Oil Seal..1 3...BB-6204Z... Ball Bearing ... 6204Z ... 1 4...JWP15H-304... Gear ... 16T... 1 5...TS-1503031 ... Socket Head Cap Screw... M6x12 ... 1 7...BB-6201 ... -
Page 32: Stand And Motor Assembly
Stand and Motor Assembly... -
Page 33: Parts List: Stand And Motor Assembly
15 ...JWP15H-418... Power Cable ..1 16 ...PAG-M02 ... Motor Cable..1 17 ...PG-M02 ... Jet Plaque ..1 18 ...TS-2245081 ... Flat Head Screw ... M5x8 ... 2 19 ...TS-2286201 ... Flat Head Screw ... M6x20 ... 4 20 ...PJH-S02 ... -
Page 34: Electrical Connections
Electrical Connections... - Page 36 WMH Tool Group 2420 Vantage Drive Elgin, Illinois 60124 Phone: 800-274-6848 www.wmhtoolgroup.com...
Need help?
Do you have a question about the JWP-15DX and is the answer not in the manual?
Questions and answers