Advertisement
Quick Links
O
RIGINAL INSTRUCTION MANUAL
D
,
EAR CUSTOMER
Thank you for choosing our product. Please read this manual carefully before assembling or using
the product, to avoid damage caused by improper use. If the product is passed on to third parties,
this manual should be passed on along with the product. If you have any questions, please don't
hesitate to contact us.
1
Advertisement

Related Manuals for Serta USAN1022780-1


Summary of Contents for Serta USAN1022780-1
- Page 1 RIGINAL INSTRUCTION MANUAL EAR CUSTOMER Thank you for choosing our product. Please read this manual carefully before assembling or using the product, to avoid damage caused by improper use. If the product is passed on to third parties, this manual should be passed on along with the product. If you have any questions, please don’t hesitate to contact us.
- Page 2 ABLES OF ONTENTS 1.Wireless Remote Instruction---------------------------------4 2.Parts List---------------------------------------------------------7 3.Assemble the Frame-------------------------------------------10 ARNING...
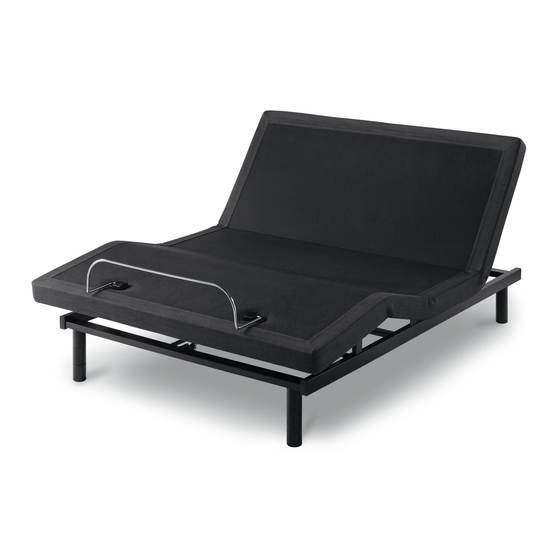
- Page 3 Specifications Actuator rating: 24V,3A (Max) Max.weight limit: 800 LBS Dorsal angle: 0-70° Leg angle: 0-45°...
- Page 4 Wireless Remote Instruction a.Brief introduction of remote control(W) panel function and install the battery Function analysis of six key wireless key S1 key: head up S2 key: head down S3 key: leg up S4 key: leg down S5 key: both up S6 key: both down The S1-S6 keys are inching type, release to stop...
- Page 5 slide down the Install the battery slide up the back cover back cover Please install the battery(S) as shown, pay attention to the battery polarity. if you can't slide off the back covers smoothly , use hammer or other heavy stuff to knock the edge slowly.
- Page 6 b. Build connection then 1. Press the 2 button on remote control at same time: head up, foot down. 2. Keep press the botton on reomote control and press the code match key on motor. 3. When you hear "didi" sound, the match get succeed. Now you can use remote control to lift and lower the bed.
- Page 7 ARTS LIST 1× 1× 1× RONT IGHT RONT 1× C 2× D 4× IGHT ROSS ED FOOT WITH LONG SCREW 2× F 2× 1× ED FOOT WITH SHORT SCREW 1× 1× 2× IGHT OTOR RIVING EVER...
- Page 8 1× 1× M 1× OARD OARD OARD 1× 1× P 1× OUNDATION OARD OARD OARD 1× 1× U 1× ETAINER OARD ATTERY 1× 1× 1× NSTRUCTION ANUAL EMOTE ONTROL loth OVER 4× 18× 2× M10*30 M8*35 M8*55...
- Page 9 6× 2× 1× LASTIC ASKET PANNER 1× 1× 4× PEN END WRENCH PANNER INGER OVERS Y 10 4× M 8*40...
- Page 10 Assemble the Frame Please check that you have all the parts listed before you do not continue assembly, please contact us immediately. NOTE: Please do not tighten all the hardware completely until the entire assembly is completed!
- Page 11 Build Frame Base and Mount 6 Legs Round hole facing up( Part C) The left and right brackets(A1,A2&B1,B2) are placed upside down and placed symmetrically;...
- Page 12 Build lift bars The head of two driving(J) levers are aligned. The left and right bars(F,G,H) are connected with the driving lever, lever(J), please align the arrows as indicated.
- Page 13 Connect Foot Lift bars on Frame Base Foot Head Plastic gasket Assemble the circled part , Assemble the square part, pls check circle 1; pls check square 2.
- Page 14 Connect Head Lift Bars on Frame Base Foot Head Assemble the circled part , pls check circle 1;...
- Page 15 Mount motor Put the motor slots 1. Slide off the motor(I) on the driving lever tube back covers. Enfold the driving lever into the motor Slide up Foot to close Head 2.Insert the motor into the driving lever, please ay attention to the direction of the motor, check the mark head and foot.
- Page 16 Mount bed boards Head Foot Turn the bed frame over ,then place the 7 bed boards in the direction of the arrows and screw them with M8*35(Y2) screws.
- Page 17 Assemble the Frame Before put on cloth cover, push S5 button till the bed elevate to the highest degree. Spread out the cover and insert the board into Starting at the end of the bed, cover the the edge of the right side cover. left corner first. 3.
- Page 18 Pay attention to the front and back direction of the cloth cover; There are two holes behind the cover. cloth Raise the head to put on the cloth cover, put down the head after all the corner are wrapped.
- Page 19 Push the retainerbar Place remote control At the end of the bed,push the retainerbar into the plastic slider Dry clean Steam ironing Do not twist dry Do not wash...
Need help?
Do you have a question about the USAN1022780-1 and is the answer not in the manual?
Questions and answers