Table of Contents
Advertisement
Quick Links
π
H-2058
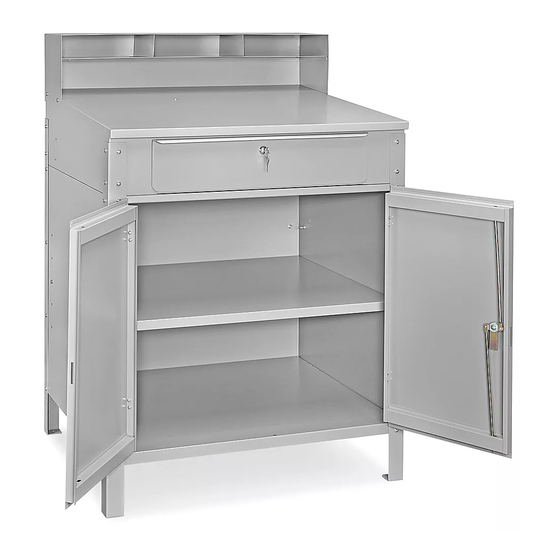
cabinet
sHop desk
TOOls NEEDED
Phillips Screwdriver
10 mm Wrench
8 mm Wrench
7 mm Wrench
Small Bolt x 4
Small Nut x 4
Medium Bolt x 8
Medium Nut x 8
Large Bolt x 61
Large Nut x 59
Left Door x 1
Right Door x 1
Top Shelf x 1
PAGE 1 OF 5
1-800-295-5510
uline.com
Small Washer x 4
Medium Washer x 8
Drawer Track x 2
Desk Top x 1
Bottom Shelf x 1
Drawer x 1
Front Leg x 2
PARTs
Small Lock Washer x 4
Medium Lock Washer x 8
Middle Shelf x 1
Drawer Lock x 1
Door Handle With Lock x 1
Front Channel x 1
Back Panel x 1
Side Panel x 2
Back Leg x 2
Lock Bar x 1
0714 IH-2058
Advertisement
Table of Contents

Related Manuals for U-Line H-2058


Summary of Contents for U-Line H-2058
- Page 1 π H-2058 1-800-295-5510 uline.com cabinet sHop desk TOOls NEEDED Phillips Screwdriver 10 mm Wrench 8 mm Wrench 7 mm Wrench PARTs Small Bolt x 4 Small Nut x 4 Small Washer x 4 Small Lock Washer x 4 Drawer Lock x 1...
- Page 2 AssEmbly LEG ASSEMBLy Place desk top on a smooth, non-marring surface with top side facing down. 2. Attach front legs using 4 large bolts and 4 large nuts on each leg. (See Figure 1) Attach back legs using 4 large bolts and 4 large nuts on each leg. NOTE: Door hinges must face inward when attaching front legs.
- Page 3 AssEmbly CONTiNuED 3. Insert drawer tracks into inside of desk top, aligning front and back bolt holes. Drawer slides must face inward. Use 4 large bolts and 4 large nuts to assemble each drawer track to the desk top. (See Figure 4) NOTE: lip should face the bottom of desk Figure 4 CABINET ASSEMBLy...
- Page 4 AssEmbly CONTiNuED 5. Install bottom shelf with 9 large nuts and 9 large bolts. Lip must face towards front of desk. (See Figure 7) 6. Set desk top assembly upright and recheck all bolts and nuts for tightness. Figure 7 Flip door hinges inward.
- Page 5 AssEmbly CONTiNuED TOP SHELF ASSEMBLy Set desk top assembly upright and recheck all bolts and nuts for tightness. 2. Place top shelf on desk top and assemble with 6 large bolts and 6 large nuts. (See Figure 10) 3. Insert drawer into desk top. Figure 10 LOCK ASSEMBLy Disassemble drawer lock and reassemble lock on...
Need help?
Do you have a question about the H-2058 and is the answer not in the manual?
Questions and answers