Advertisement
Available languages
Available languages
Quick Links
H-2171, H-2172, H-2173, H-2174
H-2298, H-2299, H-5927, H-5928
H-5929, H-5930
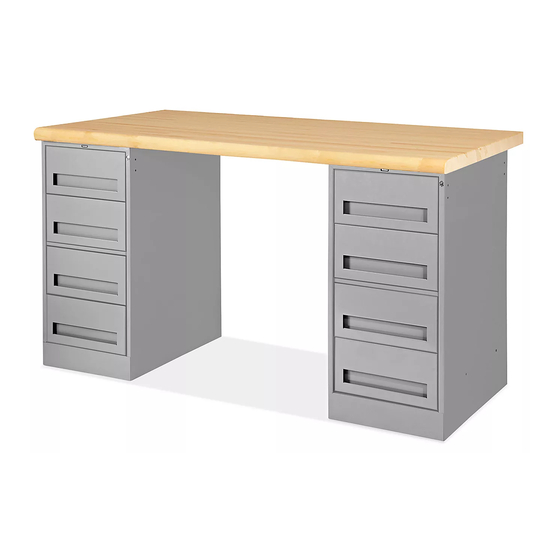
PEDESTAL WORKBENCHES
TOOLS NEEDED
Electric Drill
Phillips Head
(Optional)
Screwdriver
FOR WOOD OR LAMINATE TOPS – See pages 1-4.
FOR STEEL TOPS – See pages 4-6.
#14 x 3/4" Hex Head Slotted
Wood Screw x 16 ( x 20 for 96" Top)
2 PEDESTAL ASSEMBLY
NOTE: For pedestal workbench featuring
1 pedestal and 1 leg assembly, see page 3.
TABLETOP PRE-ASSEMBLY
1.
Place tabletop on a smooth, non-marring surface
with top side facing down.
2. Partially insert eight #14 x 3/4" hex head slotted
wood screws into pre-drilled holes in top, leaving
approximately 1/8" between top and screw heads.
Use holes located 6½" from the front and back
edges, 13½" apart. (See Figure 1)
Figure 1
PAGE 1 OF 18
1-800-295-5510
uline.com
Flathead
7/16" Wrench
Screwdriver
HARDWARE
1/4"-20 x 5/8" Bolt x 22
(Steel Top)
WOOD OR LAMINATE TOP ASSEMBLY
Pour le français, consulter les pages 13-18.
Nut x 4
( x 10 for Steel Top)
MOUNTING WOOD OR LAMINATE TOP TO PEDESTALS
1.
Remove top two drawers or open cabinet doors.
(See Figure 2)
2. Place cabinets squarely 30" apart for 60" tops,
42" apart for 72" tops, or 66" apart for 96" tops.
3. Set top assembly on cabinets, placing screw heads
in keyhole slots, and slide forward. (See Figure 2)
Figure 2
4. Position top so that ends of top are flush with cabinet
sides and tighten all screws.
5. Replace drawers or close cabinet doors.
NOTE: For 96" wood or laminate top workbench
assembly, continue to page 2.
Para Español, vea páginas 7-12.
Lock Washer x 4
( x 10 for Steel Top)
1120 IH-2171
Advertisement

Related Manuals for U-Line H-2171


Summary of Contents for U-Line H-2171
- Page 1 Para Español, vea páginas 7-12. Pour le français, consulter les pages 13-18. H-2171, H-2172, H-2173, H-2174 H-2298, H-2299, H-5927, H-5928 1-800-295-5510 H-5929, H-5930 uline.com PEDESTAL WORKBENCHES TOOLS NEEDED Electric Drill Phillips Head Flathead 7/16" Wrench (Optional) Screwdriver Screwdriver FOR WOOD OR LAMINATE TOPS – See pages 1-4.
- Page 2 WOOD OR LAMINATE TOP ASSEMBLY CONTINUED 2 PEDESTAL, 1 LEG ASSEMBLY MOUNTING WOOD OR LAMINATE TOP TO LEG 1. Adjust pedestal leveling feet to allow installation of leg. NOTE: Only for 96" top. 2. Slide leg underneath the center of the tabletop and LEG ASSEMBLY line up with pre-drilled holes.
- Page 3 WOOD OR LAMINATE TOP ASSEMBLY CONTINUED 1 PEDESTAL, 1 LEG ASSEMBLY MOUNTING WOOD OR LAMINATE TOP TO LEG Place tabletop on a smooth, non-marring surface LEG ASSEMBLY with top side facing down. Insert adjustable feet into leg and slide into place. 2.
-
Page 4: Pedestal Assembly
WOOD OR LAMINATE TOP ASSEMBLY CONTINUED MOUNTING TOP WITH LEG TO PEDESTAL 3. Position top so that ends of top are flush with cabinet sides and tighten all screws. Replace drawers or Remove top two drawers or open cabinet door. close cabinet door. - Page 5 STEEL TOP ASSEMBLY CONTINUED 3. Set top assembly on cabinets, placing bolt heads in 2. Align bracket to outside of each leg and secure keyhole slots, then slide forward. (See Figure 16) using two bolts, two lock washers and two nuts per bracket.
- Page 6 STEEL TOP ASSEMBLY CONTINUED MOUNTING STEEL TOP AND LEG TO PEDESTAL 3. Secure leg to top by inserting four bolts into threaded inserts along the end of the tabletop. Remove top two drawers or open cabinet doors. 4. Tighten all bolts. 2.
-
Page 7: Herramientas Necesarias
H-2171, H-2172, H-2173, H-2174 H-2298, H-2299, H-5927, H-5928 800-295-5510 H-5929, H-5930 uline.mx MESAS DE TRABAJO CON PEDESTALES HERRAMIENTAS NECESARIAS Taladro Eléctrico Desarmador Desarmador Llave de 7/16" (Opcional) de Cruz Plano PARA CUBIERTAS DE MADERA O LAMINADAS – Vea las páginas 7-10. - Page 8 CONTINUACIÓN DE ENSAMBLE DE CUBIERTA DE MADERA O LAMINADA ENSAMBLE DE 2 PEDESTALES Y ENSAMBLE DE CUBIERTA DE MADERA O LAMINADA A LOS POSTES 1 SET DE POSTES 1. Ajuste las patas de nivelación del pedestal para NOTA: Solo para cubiertas de 2.4 m (96"). permitir la colocación de los postes.
- Page 9 CONTINUACIÓN DE ENSAMBLE DE CUBIERTA DE MADERA O LAMINADA ENSAMBLE DE 1 PEDESTAL Y 1 SET DE POSTES ENSAMBLE DE CUBIERTA DE MADERA O LAMINADA A LOS POSTES ENSAMBLE DE LOS POSTES 1. Coloque la cubierta de la mesa con la parte Inserte las patas ajustables en los postes y superior hacia abajo sobre una superficie lisa y que deslícelas hasta colocarlos en su lugar.
- Page 10 CONTINUACIÓN DE ENSAMBLE DE CUBIERTA DE MADERA O LAMINADA ENSAMBLE DE CUBIERTA Y 3. Coloque la cubierta de forma que los extremos de ella estén al ras con los lados del gabinete y UN SET DE POSTES AL PEDESTAL apriete todos los tornillos. Vuelva a colocar el cajón 1.
- Page 11 CONTINUACIÓN DE ENSAMBLE DE CUBIERTA DE ACERO 3. Coloque el ensamble de la parte superior sobre los 2. Alinee el soporte con el exterior de cada uno de las gabinetes, insertando las cabezas de los pernos en los postes y fíjelo usando dos pernos, dos rondanas de las ranuras tipo bocallave y luego deslícelo hacia seguridad y dos tuercas por soporte.
- Page 12 CONTINUACIÓN DE ENSAMBLE DE CUBIERTA DE ACERO 3. Asegure la pata a la parte superior insertando ENSAMBLE DE CUBIERTA DE ACERO Y cuatro pernos dentro de los insertos ranurados a lo POSTES AL PEDESTAL largo del extremo de la cubierta para mesa. 1.
-
Page 13: Outils Requis
H-2171, H-2172, H-2173, H-2174 H-2298, H-2299, H-5927, H-5928 1-800-295-5510 H-5929, H-5930 uline.ca ÉTABLIS À CAISSONS OUTILS REQUIS Perceuse électrique Tournevis Tournevis Clé de 7/16 po (Optionnel) cruciforme à tête plate POUR SURFACE EN BOIS OU STRATIFIÉE – Voir pages 13 à 16. -
Page 14: Montage Du Pied
FIXATION À UNE SURFACE EN BOIS OU STRATIFIÉE SUITE MONTAGE AVEC 2 CAISSONS ET 1 PIED FIXATION D'UNE SURFACE EN BOIS OU STRATIFIÉE AU PIED REMARQUE : Seulement pour les surfaces de 1. Ajustez les pattes de nivellement du socle afin table de 2,4 m (96 po). - Page 15 FIXATION À UNE SURFACE EN BOIS OU STRATIFIÉE SUITE MONTAGE AVEC 1 CAISSON ET 1 PIED FIXATION D'UNE SURFACE EN BOIS OU STRATIFIÉE AU PIED MONTAGE DU PIED Placez la surface de table sur une surface lisse, non Insérez la patte réglable dans le pied et faites-la marquante, le côté...
- Page 16 FIXATION À UNE SURFACE EN BOIS OU STRATIFIÉE SUITE FIXATION DE LA SURFACE DE TABLE 3. Positionnez la surface de table de façon à ce que les extrémités de la surface soient au ras des côtés ET DU PIED AU CAISSON de la base de l'établi, puis serrez toutes les vis.
- Page 17 MONTAGE D'UNE SURFACE DE TABLE EN ACIER SUITE 3. Placez la surface de table sur les bases de l'établi en 2. Alignez le support à l'extérieur de chaque pied et insérant les têtes de boulons dans les trous de serrure fixez-le à...
- Page 18 MONTAGE D'UNE SURFACE DE TABLE EN ACIER SUITE FIXATION DE LA SURFACE DE TABLE 3. Insérez quatre boulons dans les sections filetées se trouvant le long de la surface de table afin de fixer EN ACIER ET DU PIED AU CAISSON le pied à...
Need help?
Do you have a question about the H-2171 and is the answer not in the manual?
Questions and answers